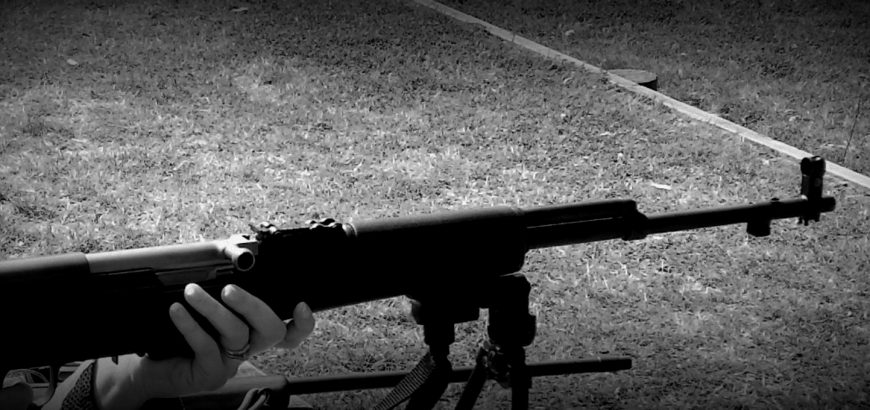
SKS on bipod at the range.

SKS front sight tool

The SKS is an immensely popular rifle in New Zealand. Whether it’s for budget-conscious hunting or recoil-reduced plinking, there are plenty of reasons to have one or two of these fun-makers in your gun safe. However, if you’ve picked up your favourite communist rifle and found that the grouping is out, you’re going to need to invest in a front sight tool – something I’ve recently done. Here are my do’s and don’t of this process.

This is what you should do when buying a front sight tool
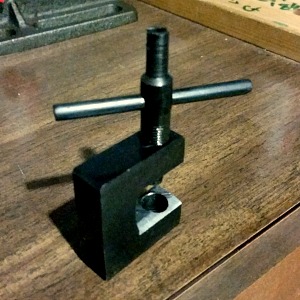
SKS front sight tool
As you can see I have filed down the inside edge of the tool to fit around the hooded front sight.

You should definitely shop around. How much are they at the gun store – 50 bucks? Forget that. Go to Quartermaster Supplies and pick one up for $20. Most tack-on accessories for milsurp rifles can be found there for cheap. I paid $28, including all tax and couriered to my work. Sure beats paying almost twice as much at some of the big-name stores, and wasting time and petrol too.

You will probably need to file down one edge of the tool. I think these would fit an AK-style rifle without it (don’t have one on hand to check), but you’ll definitely need to shave off one of the inside edges of the U-shaped device, so that it can accommodate the round post-protector ring. This took me all of 5 minutes with a file, and a quick sand to debur. Just one edge is fine – you can flip it around to adjust the other way.

Sighting in should be done with the FORS principle in mind. That is Front Opposite, Rear Same. If you move the front sight to the left, the point of impact shifts to the right. If you raise the post, the POI will move down. If that just doesn’t make sense, check out the video below. This guy explains it fairly well – and it’ll save me repeating myself.

This is what you should not do when buying a front sight tool for the SKS

Do not try and drift the sight across with a hammer and punch. I have – naively – tried this, and not only is it frustrating, but you’ll soon end up with scuffs all over your bluing and you probably won’t move it much in the end. Spend the $28 – it’s worth it.

Don’t adjust your front sight while the gun is loaded. Seriously. Load one round at a time when sighting in if you have to, but don’t put your hand near the dangerous end of the rifle, and your body or face over the action when it’s loaded. Doesn’t that just sound like a recipe for disaster? The best safety is an empty chamber.

Don’t try and sight it in alone, unless you want a long and frustrating day at the range. Get someone on a spotting scope telling you where you’re impacting – it’s easier, and it’s always nice to have company.

You shouldn’t assume one shot is enough to determine where the rifle is shooting. I prefer to shoot a group of two or three before adjusting iron sights on a rifle like this at 100 or 200 yards. If it was a scoped target rifle on a bipod, with a more accurate round, then yes, one shot would be enough to figure out where to move your POA.

And lastly, don’t sight in with your plinking ammo and expect it to be spot-on with your good stuff. Sight in with the ammo you need to be most accurate with. The difference isn’t much, but the SKS can sometimes need all the help it can get when it comes to extracting every last bit of accuracy out of it. At least most bullets are of a similar weight and diameter when it comes to the SKS, so there won’t be a great deal of difference.

Crown of 303 barrel.

Cleaning tips for centrefire rifles

Everybody has their personal references when it comes to cleaning their rifles. From the guys who wipe down with an oily rag to those that give their gun a thorough birthday every time it sees fresh air, everyone got the “perfect” cleaning method.

I’ll be honest. The way I clean my guns may not suit you, or it could be just what you like. So why bother going through the whole process? There are plenty of books, product manuals and nooks of the internet that will give you all the info you need to clean a weapon. And they’ll likely all be different. If you’re starting out in shooting, read a few of these, hop on the online forums and figure out your own path.

So, instead of running you through cleaning from start to finish (which you have your own ideas on), I’ll go over a few quick tips which you may not have encountered.

3 quick tips for cleaning your rifle faster

1. Roll-your-own

It’s annoying isn’t it? You run a patch through your bore and it comes out filthy, but only a tiny bit of it. So you end up going through a bunchy of patches (and time) trying to get as much gunk out of your rifle as possible.

Well, instead of threading your patch through, you can either use circular patches to make a swab (not my favourite – too much effort), or roll your patch around a Parker Hale style jag. Instead of having only the front tip of your cloth/jag picking up dirt, you create a cylinder that exposes the sides of the jag to the barrel. This way you use almost the entire patch, instead of about a quarter of it.

Here’s a great blog post on brush/jag types and different solvents. If you’re starting out and figuring your way around cleaning a rifle, it’s a good place to start from.

2. Go both ways

A lot of people will tell you to never run a brush both ways through the barrel. Why? Because they don’t want to damage the crisp edge of the crown – the very last surface contact a projectile has with your rifle’s barrel. While there is some merit to this thinking, the effects of a brass/bronze brush, or even a nylon brush, on hammer forged steel should be minimal.

I’m not as gung-ho about this as some people who will vigorously scrub with the brush completely exiting the bore, but I will happily pull my brush backwards and forwards through the barrel, without pushing the entire brush through. It just makes me feel better. I give the whole barrel a thorough going over and push the brush out at the end and remove the brush before pulling the rod back through.

And no, never clean from the muzzle end. There are too many reasons why you shouldn’t and none why you should. Aside from protecting the crown, you don’t want to push all the junk back into your action and magazine.

However, your solvent should be doing most of the work when it comes to cleaning, so you should only really be brushing if you are dealing with a heavily fouled barrel.

3. Leave it wet

Yup, that solvent should do most of the job. So why not leave it working? Once you’ve got your barrel to an acceptable level, I like to run another wet patch through.

For a rifle I shoot fairly regularly, I will run a patch of Hoppe No. 9 through and let the solvent work away. Before shooting I’ll put a dry patch through and be surprised (every time) at how much carbon and copper had been too stuck in there to come out the first time.

If I’m cleaning a rifle that will likely go back in the safe for a few months, the last patch I’ll run through will be soaked in lubricating oil. Not because I’m trying to lube anything up, but because it has a high viscosity and likes to cling to the inside of the barrel, instead of running out like regular oil. This will be a protective layer that will inhibit any rust formation. A rifle that is being stored in the safe for that long usually gets a wipe down all over the metal and wood with an oily rag, to keep everything from getting that thin layer of red that likes to pop up in safes in Auckland’s muggy climate.

Hope that’s clear as mud! Leave your own cleaning tips in the comments below.