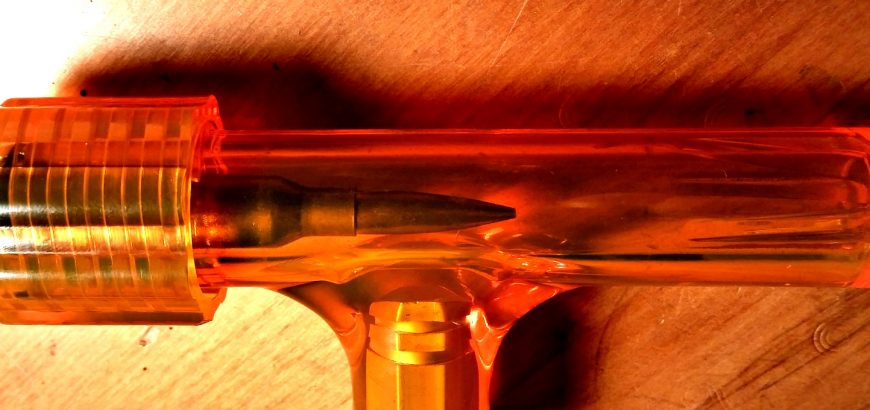
Lyman bullet puller with 6.5x55 round in large collet.

Product review: Lyman Magnum Inertia Bullet Puller

It’s an unfortunate fact of life for reloaders – at some point, you’ll need to pull bullets and start again. For me,this happened recently when I made a mistake with my mechanical scale while reloading for 6.5×55. I was tossing up between a press mounted bullet pulling die and a ‘hammer type’ inertia puller, when my mind was made up for me.

As often happens when you’re at your local gun store, you see something that you’ve been meaning to get for ages. For me, it was a bullet puller (as well as some dies, a cleaning rod, solvent, shell holders and more, but hey…). My initial leaning towards an inertia bullet puller was (typically) the cost saving. Most hammers are able to handle a huge variety of calibres, while a bullet-pulling die requires a collet for each calibre you’re pulling.

When I saw the Lyman Magnum Inertia Bullet Puller under the glass counter, the decision was made. Most of the impact-type pullers I’d seen did not cater for larger rounds like .416 Rigby or .338 Lapua Magnum, or even Winchester WSMs or Remington Ultra Mags. According to the packaging – the Lyman does! While I didn’t need to pull a big game magnum round any time soon, I liked the idea that I could if I really wanted to.

Putting it to the test
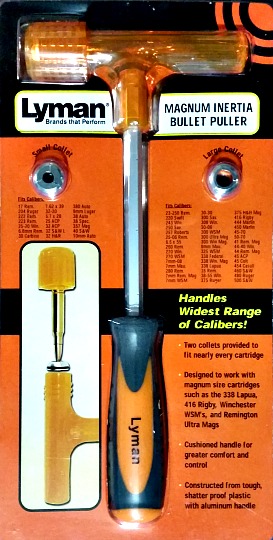
The Lyman Magnum Inertia Bullet Puller has all the instructions you need on the packaging.

Well, how did it work? Simply and easily. I did make a simple mistake, which I’d be remiss not to share. I didn’t want to mark the plastic of my brand-new-hammer-looking-thing, so I started rapping it on a piece of timber. No dice. Then on a laminate bench. Damn… That bench top now has a massive bulge in it from being hammered into oblivion with no bullet-pulling success.

Resigned to the fact that I had made a dud purchase, I gave it a few quick raps on the concrete floor, and lo-and-behold – success!

The long and short of it

Using the Lyman bullet puller is extremely easy. It covers just about every calibre you can think of and is a cinch to use. You simply select one of the two collets, depending on the calibre you are dealing with. You slip the loaded round into the collet so the rounded edge is facing the primer end. It will sit nicely in the extractor groove.

The next step is to put the loaded round in the body of the hammer, while the collet keeps it suspended. Screw in the retaining cap and give it a few good whacks on some concrete or something to separate your ammunition into powder, projectile and primed case. I found the end cap could come a bit loose, which may require tightening after a couple blows – not a big deal really.

The instructions are on the packaging, including the size of collet you want for various calibres, so the whole process really is super easy.

I don’t like pouring powder back into the container once it’s been loaded for a while. No particular reason, I just don’t. I prefer to know the powder I’m using is 100% what it’s supposed to be when I’m loading fresh rounds. So, for that reason, powder from pulled rounds gets put straight into the hopper and used for plinking ammo. Or, if I have another jar of powder that is almost empty, I’ll put it in there and use fresh powder from a new bottle for my target loads.

Pulled SMK bullet and PPU brass.
My freshly pulled SMK ready for reloading.

The bullet itself is obviously reusable. The primed brass is too – unless, you are taking your round apart because of an issue with the primer. Now, do not try and decap an unfired primer. I shouldn’t need to explain this, but it’s basically crushing the primer from the anvil end – which will make it go bang. Not fun for your decapping pin. Not fun for you. The best way to get a primer out so you can reuse the brass is to fire the round in your rifle. You can simply load the primed case into your gun and pull the trigger (outdoors, with the muzzle pointed a safe direction – i.e. the same way you would treat it if it were a normal round). Now you can decap.

What you shouldn’t do with an inertia bullet puller
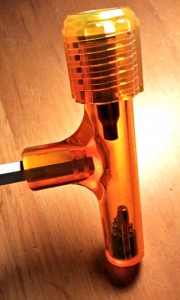
Pulled bullet with powder and case.
A pulled bullet resting in powder.

Lyman recommends on the packaging to not use the product without safety glasses. There’s not much danger in it, but you can guarantee that if anything is ever going to go wrong, it will be the one time you’re not wearing protective gear. So, as with your regular reloading (because you’re working with explosive components), chuck on some safety glasses.

You should never try and pull bullets from rimfire ammunition. It will go bang. You will regret it.

You shouldn’t expect perfect bullets if you’re using projectiles with plastic tips. Kerry from thebloke.co.nz tells how his Nosler Ballistic Tips were damaged when using this exact same puller. Bear in mind, when a bullet is moving at supersonic speeds, there is a cushion of air in front of the projectile, which means slight deformities aren’t the end of the world. This is why hollow points aren’t less accurate than FMJs. They are often more accurate because of the weight distribution.
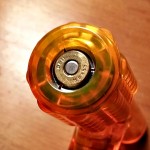
The collet sits in the extractor groove, holding the round in place.

That’s the theory behind Sierra Matchkings anyway, and it seems to be working well so far. So, while I wound’t mind if my lead- or plastic-tipped rounds got a bit of a crumple in them, I wouldn’t use them for target loads. Repeatability leads to accuracy. I would use rounds like this for hunting at normal ranges or general plinking or practice – they’ll still do their job and expand on game.

If you are concerned about the condition of the your match rounds or long-distance projectiles, a press-mounted bullet puller might be what you’re after. However, I have used the Lyman puller for SMKs, and it’s worked out just fine, with no damage to the projectile tip that I can see.
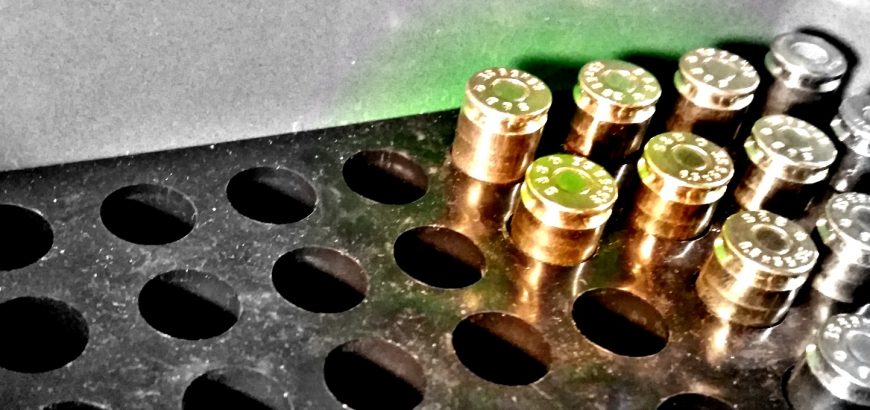
Reloaded rounds in MTM 50 rounds ammo container.

The importance of a good reloading bench

Reloading is a great way to extend your enjoyment of shooting in New Zealand. In fact, for many it becomes a hobby in its own right. There are only a few items you need to start reloading, but there are many added extras that can enhance accuracy, ease of reloading, confidence and even the appearance of your completed rounds.

It may not even cross your mind, but a solid reloading bench is one of the most essential tools for your first foray to into producing your own ammunition.

Solid

First off – is your bench of solid construction? When reloading, you are reshaping the brass – especially with full length sizing dies, as opposed to neck-sizing dies. This can require a fair bit of force, and if your table is flimsy, it may bend a bit before you fully cam over and get the full effect of your sizing die. This can mean the shoulder won’t be bumped back quite enough, or the base of the round (before the extractor groove) will be slightly too large. This isn’t the end of the world, but it can make it hard to chamber your rounds, and can introduce inconsistency into your reloaded rounds. Inconsistency is the enemy of accuracy.

Level

Is your bench level? A solid chunk of wood supported on cinder blocks may be fine in terms of taking the pressure exerted in sizing a round, but if it’s not level, your powder scale could be off.

This is less of a problem with electronic scales, but as I covered in a previous article, it can affect mechanical scales such as the Lee Safety Powder Scale.

Height, light and storage

This is more about comfort and ease of operation than anything else, but it’s not hard to realise that good conditions lead to a quality product. If you’re sitting in the same spot for hours on end, you’re much more likely to produce something of value if your back isn’t aching and you can actually see what you’re doing.

Storage is a must, and investing in a storage solution like a bin rack is not a bad idea. Keeping your brass separated by number of firings is easier this way. You can also organise your products by calibre or even the specific rifle they’re for. Lockable storage is a good idea for powder and other dangerous components. Don’t forget to store powder, primers and completed rounds separately and in their appropriate and labelled containers.

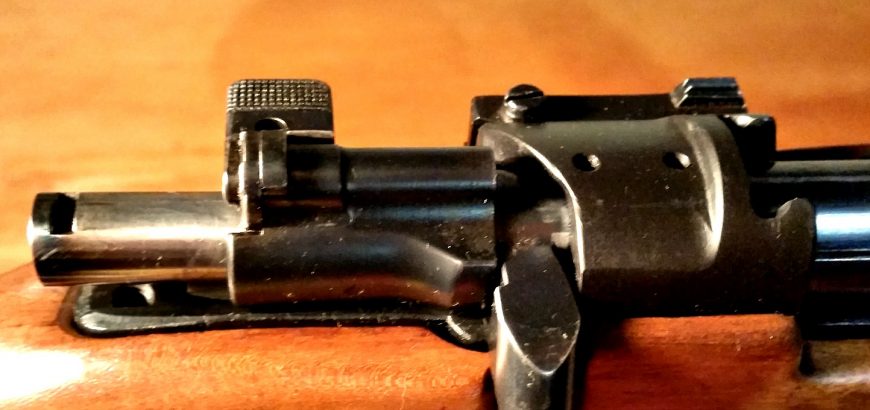
Modified M38 bolt.

Mauser bolt modification

Spend any time exploring gun forums and corners of the internet dedicated to military surplus firearms, and you’ll quickly encounter the opinion that Mauser’s bolt design is the standard by which all other bolt actions should be judged, and that most subsequent “improvements” were purely cost-saving modifications.

As a big fan of the small-ring Mauser variants, especially in the super-accurate Swede, it was only a matter of time before I started pulling apart my Husqvarna M38 to see what I could improve. Most Mauser bolt mods are bent handles to allow for scope clearance – something which has been covered ad nauseam all over the place.

So, instead of going over the same ground about oxy-acetylene torches, vices and hammers to get your military Mauser into sporting condition, I’m instead going to look how to reduce lock time by shaving some material off the cocking piece and firing pin. As always, remember that modifying your firearm is dangerous/irreversible/stupid, etc.

What is lock time?

Lock time is the minuscule period of time between when you pull the trigger and when the firing pin crushes the primer to set off the powder inside the cartridge. In other words, how long it takes the firing pin to travel to the primer from the time it is released by the pull of the trigger and the disengagement of the sear. The term lock time comes from the age of muskets – flint locks and wheel locks – the time it it took for the lock to work.

Essentially, the longer the lock time, the more likely it is that the shooter’s natural movements will move the rifle off target. The other period of time that is quite significant is how long it takes the bullet to leave the barrel, as again, the shooter can move slightly during this time.

So, naturally, it’s in a shooter’s best interests to have as short a lock time as possible. Modern bolt actions are incredibly quick compared to old military surplus rifles, and the chief ways in which lock time can be decreased are through eliminating excess material which causes resistance, friction or drag, and making modifications to the main spring, or replacing it and/or the firing pin. There are a few “speed lock” products out there, which are kits aimed to help you reduce the length of travel of the striker, and usually the trigger pull as well. Often, they will also convert your cock-on-closing Mauser to a cock-on-opening action.

Personally, I quite like the cock-on-closing action on older rifles, as it allows you to “feel” more of the chambering and extraction process – a real plus for reloaders.

Removing material

This is something you can’t afford to do wrong, especially if you’re working on a rifle with hard-to-replace parts. Fortunately for me, I had recently bought a replacement bolt due to a different issue and had some good parts on the old bolt to work with.

If you’ve spent any time on Mauser-related forums, you’ll have come across Dutchman, or Dutch. A very knowledgeable gentleman with his own website dedicated to everything Mauser. I came across one of his posts, in which he showed the modifications that were made to cocking pieces and firing pins in order to produce the bolts for the super-accurate CG63s and CG80s. With this as inspiration, I set off on my own bolt-modification adventure.

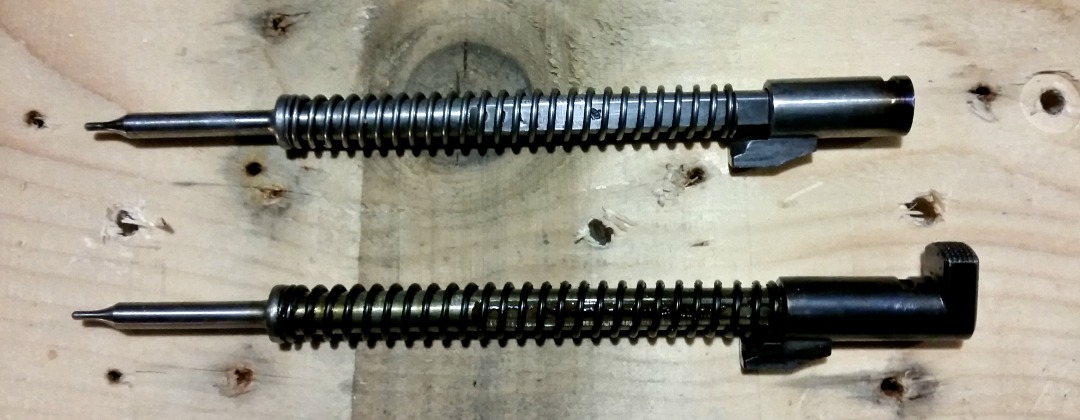
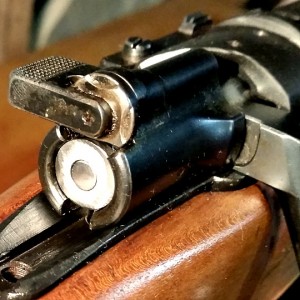
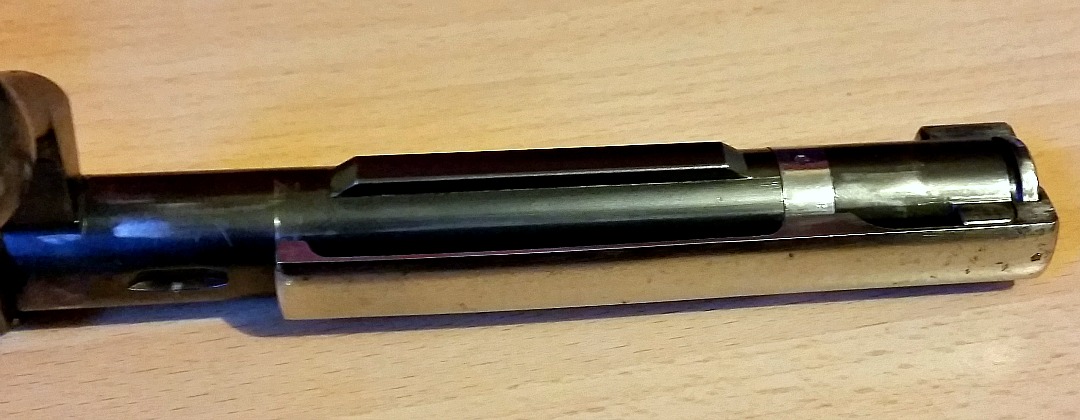
I removed the thumb piece on the back of the cocking piece to reduce weight and drag, and made the firing pin short enough to match. As you can see in the picture below, the previous owner of this rifle cut down the main spring to decrease cocking effort on the rifle, but this can lead to unreliable firing and pierced primers, so I’ll be swapping that spring for the one on the blued bolt I recently bought.

Modified Mauser firing pin.

As you can see in Dutchman’s post, there is more material that can be removed in order to reduce friction, as he shows some rifles with scalloped bolt sleeves. Whether I attempt this or not is still yet to be seen, I’d like to see the difference this makes first before going any further. The sear engagement on the cocking piece can also be altered according to his pics, but it looks like a welder would be needed to reinforce the sear engagement section. There’s also the fact that you’ll need to case harden this section again, as a cut-up sear piece will quickly wear away, creating a dangerous firearm.

I’ve opted to leave this bit for now, as I’m planning on replacing the factory trigger with a Timney trigger in the near future. I want to see what it’s like with the new bang button, before I go and make any permanent changes.

It’s all about the looks

The flush fit of the cut firing pin is much more attractive than the thumb piece.

Well, not all about the looks, but it does play some part. I’ve got to admit, the cut down cocking piece looks a lot more modern and svelte than its military-style counterpart. I’ll take this opportunity to remind you that this rifle was not in collectors condition when I got it from the previous owner, so it is purely a project – no one is cutting up a pristine M38 here!

Another thing I wanted to do was break up the solid black of my rifle. The “new” bolt I bought had been blued and combined with the matte black paint job I did on the action and barrel, it was starting to look pretty boring. For a bit of contrast I took the un-blued extractor and extractor collar from the original bolt and added it to my new hybrid monster. The end result is a little bit of flair, with no real practical relevance. Be warned though, that while the extractor is easy enough to remove, the collar does not spring back into shape nicely for you to put teh extractor back on. You’ll need to hold it shut while sliding the extractor over – which isn’t easy without the armourer’s tools. I used a pair of circlip pliers, which while tricky to do, managed the job in the end.

The blued bolt body creates a contrast for the polished extractor and extractor collar.
Choosing a calibre for a secondary AR-15 upper?

Best upper for AR-15

So you’ve bought your first AR-15 and you’re super excited by the fact that you can swap in just about any upper you want to create a whole new weapon. But which is the best upper to choose? While the .223 is a great round, it’s not the be-all and end-all of rifle shooting (nothing is), so what about about a different calibre?

Here’s my take on what you can achieve my swapping out the upper on your AR-style rifle.

How about a .22LR Upper?

Well, not the worst idea actually. If you want a cheap way to practice with your AR or to introduce younger shooters to the sport, using 22LR ammo is a great and inexpensive way to do it. However, there are some conversions that use your 5.56 barrel – don’t do it. It can work, but it won’t be a satisfactory way to shoot either caliber, and it requires more work.

Rather, spend the money on a full upper and magazine, like this one from gunsupplies.co.nz, which will work with any milspec receiver. Although, to be honest, for not much more you could buy an entire .22LR AR-type rifle.

7.62×39 anyone?

Okay, let’s be honest, I’m a big fan of the humble 7.62×39 Soviet cartridge. It’s cheap and dirty and does the job. But, would I put it through an AR upper? Not really to be honest. While the AR platform is great. there’s not much reason to get it to shoot cheap Russian ammo.

If you want a cheap way to shoot this calibre, you can get a Chinese SKS for a third of the price of a 7.62×39 upper, and again, you have a whole new rifle to enjoy. You also won’t feel nearly as bad using it as a knock-around bush gun.

AR-15 in .300 BLK

If you want 7.62×39 ballistics in an AR-15, .300 BLK might be the way to go. Developed for spec-op military applications, this round is AR-friendly. It feeds from a standard STANAG magazine with no modifications, and without reducing the capacity, so at least you can use your current AR mags.

If you’re looking for something novel and interesting to shoot, which is designed for the platform and actually useful, the .300 AAC Blackout could be the answer. It is more expensive to shoot than any of the other rounds, and would probably necessitate reloading to make it a viable addition to your safe.

Which AR-15 upper should I choose?

Well, my personal preference would be to have one completely milspec rifle for service rifle competitions, a 20 inch barreled set up for 3-Gun, and perhaps a .300 BLK upper to enjoy shooting something a bit different.

But hey, that’s just me! What would you choose as your ideal black gun set up?

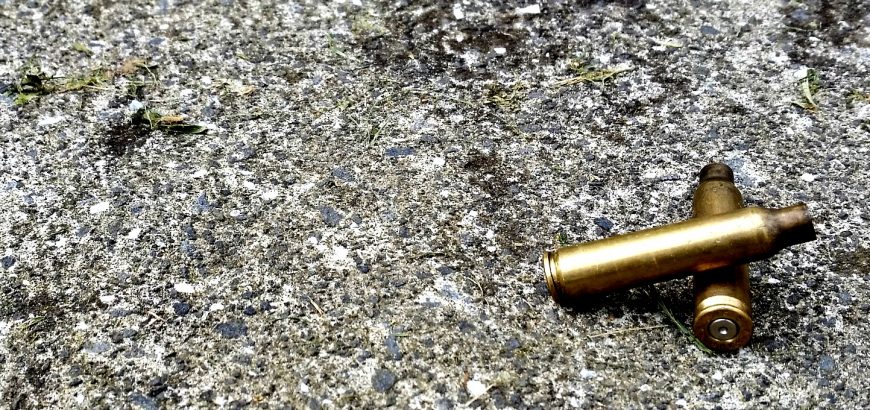
Ejected .223 brass

Starting out in 3-gun competition: Affordable AR-15 options

One of my goals over the next couple years is to get into 3-gun competition. I say the next couple years because this will necessitate qualifying for and buying a pistol, with all the hefty club fees and added security that goes with that. Not to mention it’s a lengthy process.

On top of that I will, at some stage, need to get an E-Cat licence, as it’s hard to be competitive in these games with a 7-round magazine. This is starting to get expensive. And then there’s the shotgun which, when all is considered, is the least of my concerns.

So, before I’m elbow-deep in debt and fired casings, I’ll probably want to get an A-Cat AR-15 which I can practice with in the meantime. While I’d love a $3000 AR-15 variant chambered in .223 Webley, I’ll settle for a more run-of-the-mill offering for now. Fortunately, getting into black rifles isn’t nearly as expensive as it used to be, even just a few short years ago.

Here are my top picks for affordable AR-15s to help get you into your desired shooting sport. Remember, if you’re going to do service rifle shooting, you may need to modify these to comply with your club’s rules.

NEA-15 Carbine

You can spend a couple hundred more to get these in a fuller-length version, but the point of this blog post is to find the most cheap and cheerful AR variants out there.

The NEA-15 is a Canadian export which is on the cheaper side of things when it comes to North American firearms. As with any AR, they are highly accessorisbale, and have many interchangable parts which will help you customise your new rifle.

You can pick these up for $1799 from NZAR15.com, and they come in a variety of configurations. At the time of writing they have chamberings of 5.56 mm and 300BLK available, colour options of Flat Dark Earth (FDE) or black, and barrel lengths of 12.5 or 14.5 inches.

The barrel twist is 1:7 – perfect for those long, heavy bullets that dominate sport competitions. However, the extremely short barrel will make practising at longer ranges a bit more difficult. Most serious 3Gun competitors use 18 – 20 inch barrels. Bear in mind that some shots can be up to 500 yards in a 3Gun match.

S&W M&P-15 Sport

Smith & Wesson has some great offerings in their M&P (Military and Police) range. The Sport variant is an AR-type rifle that compromises on some features and gives more in other areas. The S&W M&P-15 Sport is a well-balanced offering.

The 16-inch barrel is a pretty good all-rounder, as is the 1 in 9 inch twist rate. The large trigger guard is great for those with larger hands and/or gloves in winter. It comes with adjustable sights already fitted as well, which is a bit of a saving – unless you’re going for magnified optics anyway. On the downside, the foregrip doesn’t have the wealth of rails found on the NEA-15 or most other modern AR-variants. And the forward assist. There isn’t one.

How many times have you seen an AR user engage the forward assist to re-chamber a round? Never? Me neither. And realistically, if you did have a reclacitrant round that wouldn’t chamber in the middle of a match or fast-paced shooting situation, you’d simply rack the bolt and chamber a fresh round. I personally don’t like it, because that means there’s a live round on the deck – but it’s not exactly dangerous. I’ve shot with many ex-military types who advise to simply rack the bolt in a high-pressure or high-speed scenario, regardless of whether you have a forward assist or not. Get the offender out of there and chamber a fresh round is the most common response.

Some ups, some downs, but the most attractive thing about this AR is it’s price point. You can pick one up from gunsnz.com for a mere $1595.

Chinese AR-15 copies

There are an abundance of AR clones out there, and just about everyone is making them. There are a couple Chinese-made versions floating around, including the Ranger offerings. realistically, these are probably made using the same tooling as many other more “up-market” brands. Most manufacturers purchase their parts from each other anyway, and simply assemble to varying specifications. Why pay an extra grand for a fancy rollmark?

I haven’t fired a Chinese AR yet, but have handled one and found the finish to be as good as any other budget-minded AR-15 clone. The Chinese weapons that I have owned have all had varying levels of fit and finish, but were pretty damn accurate with a little coaxing. My cheapest rifle regularly outscores guns that are 4 or 5 times the price, even 10 times the price I paid for mine. But then again, I did spend the better part of 6 months getting it that way.

A great bonus with the Chinese guns is that they are most likely pretty close to milspec – ideal for service rifle competitors. Other than that, I would personally opt for one of the other rifles mentioned here, especially seeing that they are a little cheaper in general than what is being asked for Norinco or Ranger weapons at the moment.

The most important thing is fit, finish and feel when you personally inspect and handle the rifle. It also helps if it’s milspec or pretty close, so that you can change uppers and lowers later down the line.

Should I Loctite my scope bases?

If you’re putting together a rifle for the first time, or you’ve just bought a package deal that was loosely thrown together, you may not be aware of the intricacies involved in proper scope mounting. One of the questions often debated in forums all over the internet is whether or not to apply Loctite to scope base screws, and if so, which colour to use?

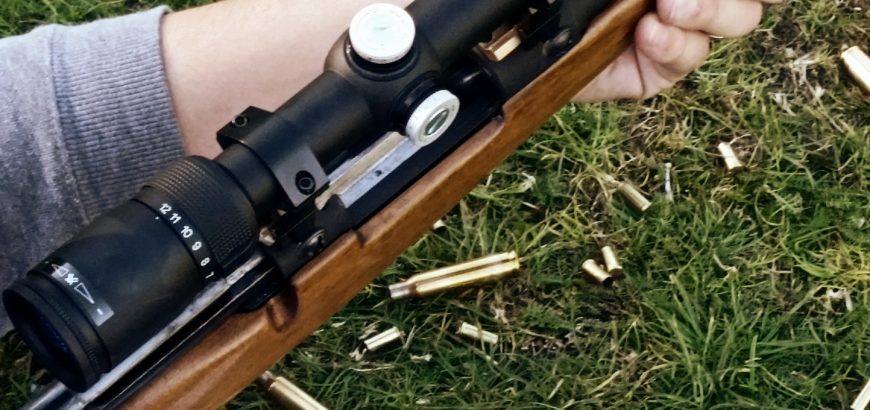
Well, I made the rookie mistake of driving three and a half hours to do some target shooting after reassembling a rifle I had coated with a nice new finish. I completely forget to Loctite to the scope bases. I sent a few factory rounds down range to foul the barrel, and got a group size under 2 inches at 100 yards. Sounds about right.

I then painstakingly went through shooting 3-shot groups with my reloaded ammo (I was working up a new load), and watched in absolute horror as my groups opened up to 3 or 4 inches. Thinking I may have overheated the barrel, I gave the old shooting iron a rest and threw some lead downrange with a few other toys while it cooled off.

Taking up the prone position again I looked forward to drilling some really expensive Sierra Matchkings into ragged little holes 100 yards away. No such luck. I was shooting groups that opened up to 7 inches. What the…? I could not figure out how I had screwed up this batch of reloads so badly. Until I adjusted the scope settings for a friend of mine to shoot at 50 yards. Wait – was that a bit of wiggle in the scope mounting? Indeed it was. I had managed to get about $50 worth of ammo down range with no particular success before I realised that my loads were fine – the scope bases had come loose.

Don’t make my mistake

Frustratingly, after driving home for three and a half hours I noticed the blue bottle of Loctite sitting on my gun bench, like a big fat “I told you so” from the universe.

In short, don’t make my mistake – Loctite your scope base screws. I took a perfectly good 1-inch shooter and turned it into a minute-of-dinner-plate loser by forgetting this simple step. And I’m sure my scope didn’t appreciate flopping around like that either.

Make sure your threads are completely clear of debris or grease when you do this. And while some people say red Loctite is okay to use, I prefer to use blue – I find it is much easier to remove. While you may not take your scope bases off regularly, if you want to upgrade or change to a 35 MOA rail, or whatever, you’ll wish you had used the blue variant.