Auckland NZDA Prize Shoot

The annual NZDA Auckland branch Prize Shoot is a great day out for Auckland shooters of all abilities. Falling in September each year, the weather can be a bit hit and miss, but aside from that, it’s a perfectly pleasant day on the range with your favourite rifle and some mates.

This year – the 46th Prize Shoot – I shot for my second time and my wife completed her first centrefire competition. We both did fairly well, but she truly excelled. I’ll claim that it’s because I sighted the rifle in through my shooting (we shared a rifle). However, all credit to her, as she outshot some great shooters.

The field

That’s another thing that makes the day enjoyable – there are shooters of all abilities. I placed well ahead of some very experienced shooters, but was beaten by someone shooting for their first time ever. And vice versa. It really is a great field of competitors, where everyone can benchmark their performance against others.
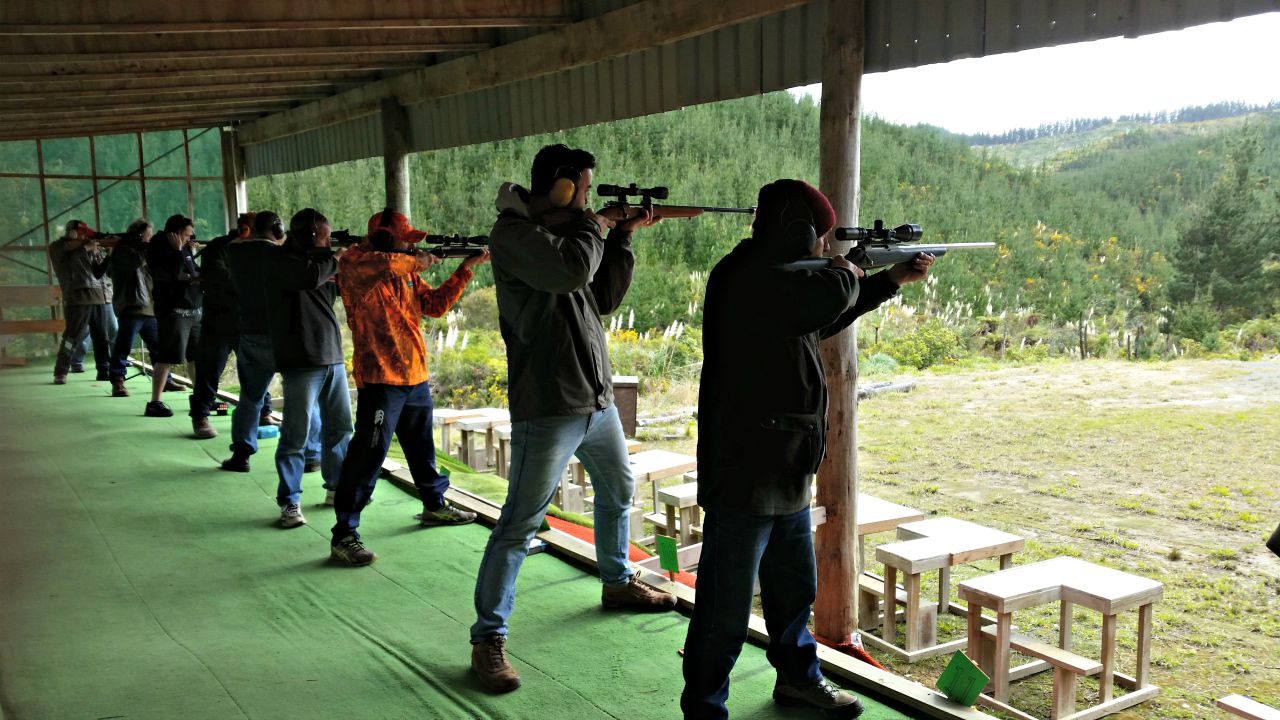
NZDA 100 metre standing shoot
100 metres is more than enough from the standing position.

At the top of Division A were the usual suspects, including Paul Carmine. My wife, Kassie, took out Division B – which got her called up second in the order of prize recipients, allowing her to choose a really nice Hunting and Fishing backpack for her prize.

This year there were four ladies and two junior shooters. In total, there were just under 40 shooters, making up two details. Last year there were around 60 shooters (despite the inclement weather), and apparently previous years have had a similar turnout. Perhaps timing a competition to coincide with Bathurst wasn’t the best move…

The format

The format of the shoot is very simple and easy to follow. Once the safety instructions and competition rules had been read out, the first detail (Squad A) went to the mound for sighting in and the prone target shoot.
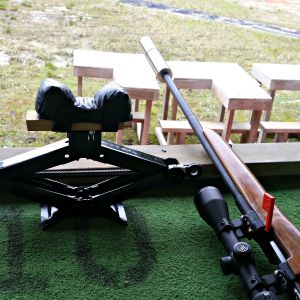
Rest and bipods are allowed for sighting in, however, you want tomake sure you're sighted in before competition day if possible.
Rest and bipods are allowed for sighting in, however, you want to make sure you’re sighted in before competition day if possible.

Sighting in is done on a target on the right hand side of the frame, and five minutes are allowed for unlimited sighters.  The range for the competition is 100 metres. I got 13 rounds off in this time, trying to get my rifle on point. The lesson here being to always sight your rifle in before competition day if you’ve done some work on it. After 13 rounds, there was a decent amount of mirage created by the heat of the barrel and my new MAE suppressor. However, by taking my time this didn’t affect my prone shoot.

You can use a rest or bipod to sight in, however the rest of the competition is shot without any aids (aside from a shooting mat and a kneeling roll).This means no slings, jackets or gloves.

The prone shoot is 5 shots in 7 minutes – plenty of time. After this is finished and the rifles are cleared and removed from the mound, scorers go forward to retrieve targets. Squad B is next, but in the meantime, people stand around chatting and enjoying the all-day sausage sizzle.

After Squad B, the same process is followed and Squad A goes up for 5 rounds in the kneeling position, also in 7 minutes. Rinse and repeat for Squad B. The last shoot of the day is 5 rounds standing, again in 7 minutes. This is what separates the men from the boys. Some of those scoring in the 40’s in the prone event struggle to scrape 20 together in the standing position.

In between these, there is a 5 round rapid shoot on the 25 metre range, to be completed in 40 seconds. Again, making sure you know your hold under/over and your parallax settings before competition day is invaluable. If you’re sharing a rifle with your partner or buddy, you will be accommodated with an extra rapid at the end – although you’ll probably have time in between while targets are retrieved and people yack on about how they pulled that one shot. Targets are also given out once scored, so there is plenty to talk about during the day.

The rifles

Generally speaking, the rifles are hunting rifles in hunting calibres. There are some rifles that would look more at home in an F-Class shoot, and some that would be quite comfortable in the lineup for a military service rifle shoot. The most exotic calibre of the day was probably .310 Cadet, with one .22 Hornet and a 6BR making an appearance.

As far as I could see, the only semi-auto was a Norinco M305 (the Chinese version of the M14), whereas last year a couple AR-15’s placed very highly in the field. At the 2014 Prize Shoot I did take an SKS – what a mistake. The iron sights had not been sighted in and after I took the muzzle brake off, the scope’s zero was so off that I wasn’t on the paper. It was an exercise in frustration, and using the iron sights and a whole lot of compensation, I managed to get some scoring shots in the kneeling and standing events.

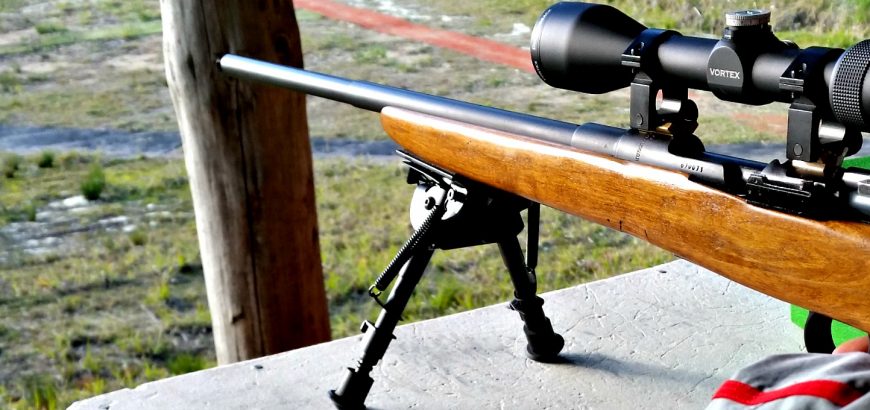
This year I went armed with my 1943 Husqvarna M38, chambered in 6.5×55. This rifle was sporterised when I got it, and has since been modified even more. Over the last ten or so months it has a new matte black coating applied, the bolt has been replaced and the cocking piece cut down to reduce lock time. I’ve also installed a Vortex Diamondback BDC 4-12 x 40, and a new adjustable BOLD Trigger, which was kindly supplied by Boyds. Completing the setup was a brand new MAE suppressor, which thoroughly impressed my shooting buddies as well as those that heard it perform.

I also have a new Boyds Gunstock waiting to be fitted to this rifle, but I didn’t want to rush the bedding and finishing before this shoot. It should be ready before the 300m Swiss Club shoot in November. And I’ve learnt my lesson – sight in beforehand!

The load I was shooting was as follows:

Projectile: SMK HPBT 142 gr
Powder: ADI AR2208 34.7 gr
Brass: PPU (twice fired)
Primer: Federal Gold Medal Large Rifle Match

Aside from my wife and I, there was one other person shooting 6.5×55. The most common calibre by far was  .223 Remington, with 14 shooters using this round. There was one .243 and three .270s, with eight .308 rifles as well. The winning rifle was a .222. There were also four other rifles in this calibre on the day, two placing very low in the field and the other two coming in near the top.

The MAE suppressor cut down felt recoil and the loud crack of the rifle, making it a pleasure to handle.

The prizes

The prizes for the shoot are kindly donated by several sponsors, including major Auckland gun stores, as well as private individuals and club members. Also on offer was a one-year membership to the club, as well as a couple magazine subscriptions.

There were some great prizes to be had, including four of these Leupold knives.

Dotted along the prize table were all sorts of cool items for the garage, range, shed, field or bush. Ranging from knives and a machete to ammunition, books, cleaning products, car accessories and even a leather-working voucher.

Everyone walked away happy, having picked a prize that was probably worth more than the $25 they paid to enter the competition. With free sausages all day, and a lot of shooting to do, it adds up to a very worthwhile day.

With the prizes on display all day, everyone eyes up what they want, and probably spend a fair bit of time vacillating between equally awesome prizes. Last year the knives were first to go, however this year they stuck around for a bit. There were a fair few on offer, and myself and two other members of HSSRC managed to score three out of the four limited edition Leupold hunting knives. The first place junior made a bee-line for the machete, which was clearly something he’d been eyeing up all day.

Whether you only break out the centrefire rifles a few times a year or you regularly enjoy taking your hunting rig out, the NZDA Annual Prize Shoot is a rewarding experience in more ways than one, and is something I’d definitely recommend.

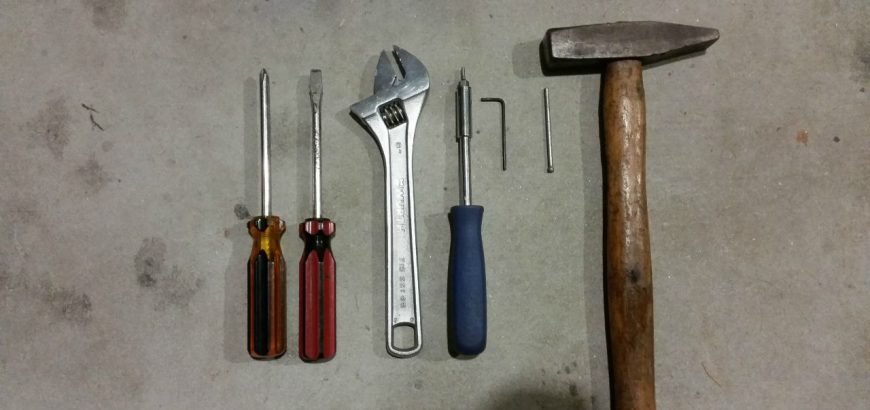
The tools needed for this job are pretty simple and should all be in your tool box already.

Installing an aftermarket triger

Modern rifles with their out-of-the-box accuracy guarantees usually come with adjustable triggers, but if yours didn’t, help is on the way. Whether it’s an old military surplus rifle that you’re modifying or a modern hunter that needs a little bit of work, installing a new trigger is easy and worthwhile.

A stiff trigger pull can be the difference between a bullseye and the 9 ring, or the difference between a clean kill and a long walk through the bush chasing a wounded animal. If you want to see the difference a good trigger can make, one of the best examples you could have would be to try a 10/22 with a match trigger, and then shoot one with the standard trigger. After shooting with a lightened trigger for so long, I thought the safety was on when I tried to pull the standard trigger.

The tools you’ll need

There’s not much to this job really. Most stock triggers are removed by driving out the pin that holds the unit in place. This pin also acts as the fulcrum for the trigger set and reset. To drive this out, you’ll need a hammer and punch – or a filed down nail if you don’t have a punch to hand.

Depending on the trigger unit, you may need a small spanner or wrench to adjust lock nuts, and probably some allen keys or screwdrivers to adjust pull and sear engagement. Depending on your rifle, you’ll probably need a large flat head screwdriver to undo your action screws.

The tools needed for this job are pretty simple and should all be in your tool box already.

The trigger of choice

Of course all of this is moot if you don’t have a trigger to install. There are a few options out there, depending on your breed of rifle. Ruger 10/22s, AR15s and Rem 700s have a multitude of aftermarket bang switches, however if you’re improving an older rifle you may have to do some digging to find the trigger you need.


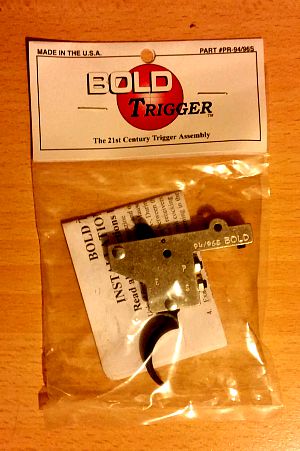
Nice new trigger thanks to Boyds Gunstocks.

My most recent trigger install is a BOLD Trigger from Boyds for my Husqvarna M38. As I’ve mentioned before, I don’t like using a safety – an empty rifle is the best type of safety – so I went for the version without the side safety. However, if you do like to use your safety in addition to safe gun handling practices, the side safety is much more convenient than the toggle on the back of the bolt on the old Swedes.

The 94/96 trigger fits the M38 perfectly. Boyds also stocks triggers for the 98-family Mausers, as well as a Mosin Nagant trigger. Other hardware obtainable from the gun stock manufacturer include trigger guards and floor metal, as well as sling swivel studs and action screws.

Extra inletting

Depending on your trigger, action and stock, there could be some extra in letting to do. Thankfully with the Boyds stock this rifle is destined for, there is ample space for the trigger. However, before I get round to bedding and finishing that stock, I’ll be taking out a bit of material from the current stock to allow the larger trigger unit to fit.

For this job you may want to use a mill. However, hand tools or a dremel will do just fine.

The easy part

The easy part is the install itself. For most triggers, all you’ll need to do is punch out the retaining pin, put the new trigger in the old one’s place, and insert the pin again. That’s almost all there is to it.

With the BOLD Trigger, there’s a grub screw forward of the pin which, when tightened, keeps the unit in place. The mechanism is quite different from the original trigger, so you won’t need the old spring or any of that. If there is any issue with fit (as there can be with the many variations of these beloved milsurp rifles), the instructions that come with your trigger should tell you where you need to add or remove material.

Adjusting the pull and sear engagement

This is where your new trigger comes into its own. It will have its usual factory setting – 3 pounds for the single-stage BOLD Triggers – and an adjustable range. The range on my new trigger is 2-4 pounds, and the sear engagement can be altered too.

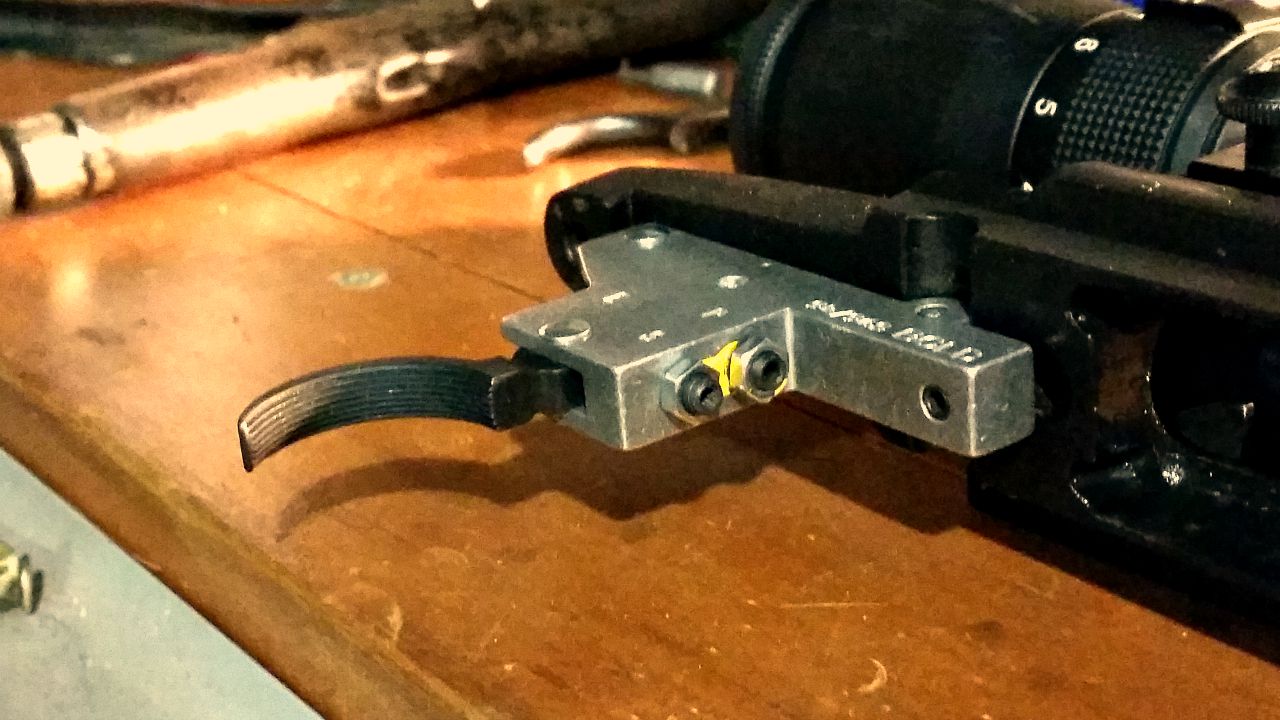
On my model, this is done by loosening the locking nuts and adjusting the grub screws with an allen key. In the photo below, you can see I’ve started on this in the photo below, as the factory seal yellow paint has been broken.

The yellow factory seal on the adjustment screws is broken.

I’ve adjusted my trigger to the lightest it will go. This rifle will be a range-only queen, so the heavier pull you’d want on a hunting rifle is not necessary. When adjusting sear engagement, work the bolt rapidly to make sure it won’t fire on closing – too little sear engagement and you could end up with an unsafe rifle.

Once the trigger pull is where you want it – I shouldn’t have to say this, but obviously you’re testing this on an empty chamber or dummy round – it’s time to tighten up the locking nuts. Your particular trigger may have different instructions or mechanisms, so make sure you follow the included install directions.

Of course, the number one concern when modifying a rifle is safety when operating, as well as during the install process. If you’re unsure of how to properly install or set your trigger, your local gunsmith should be able to help you out for a very reasonable fee, as the the work involved is not onerous.

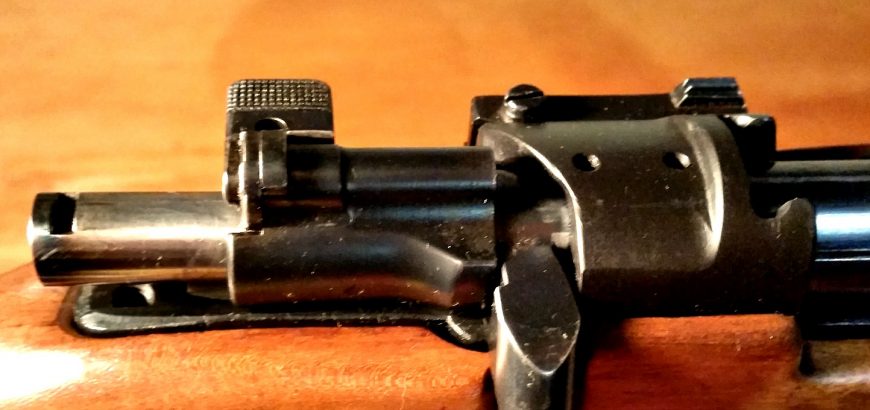
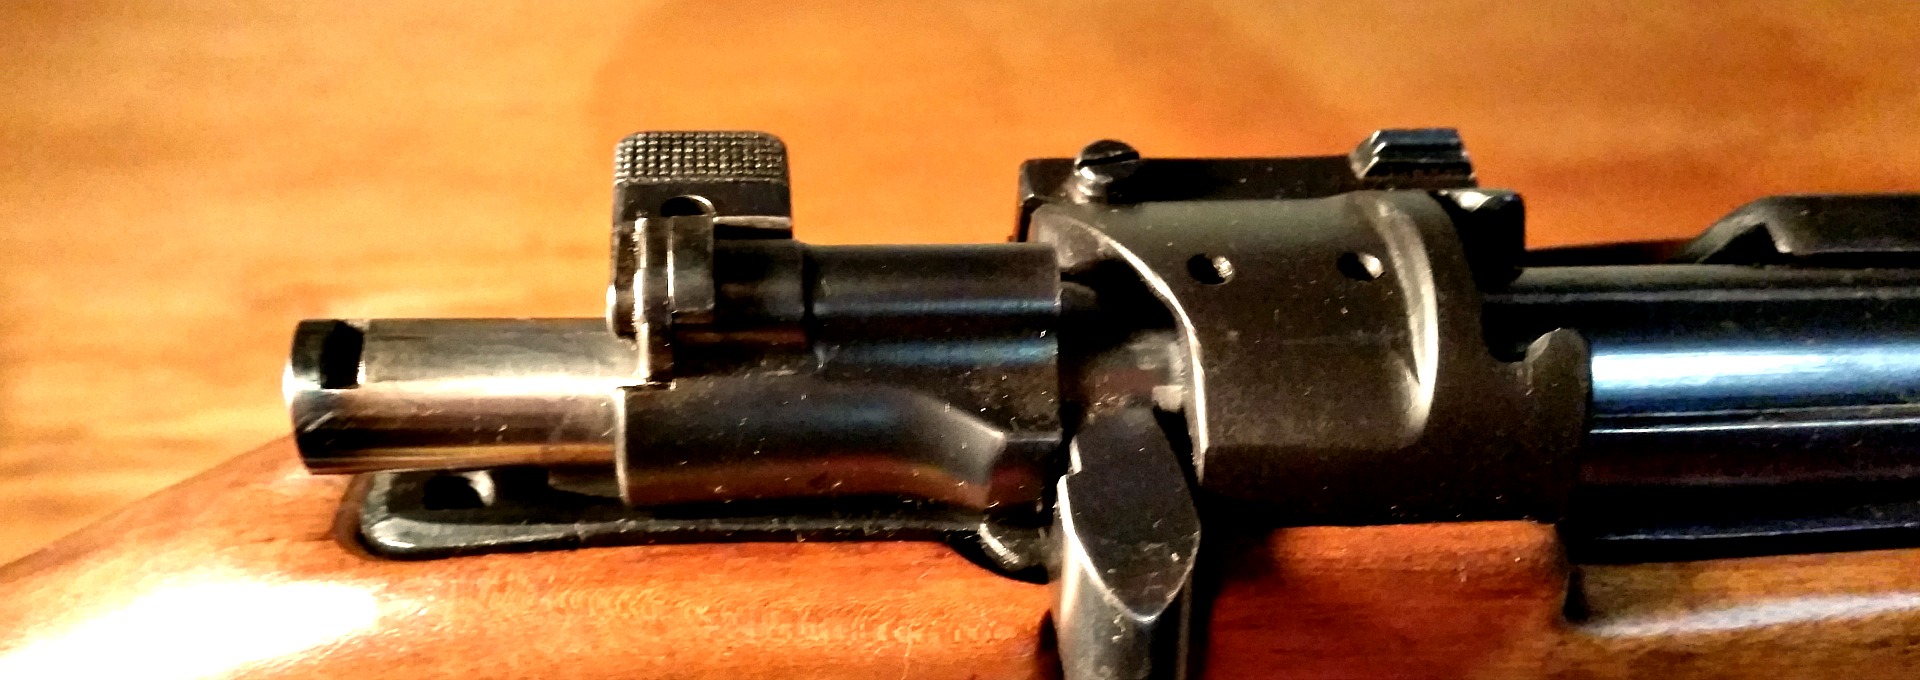
Modified M38 bolt.

Why I will never use my safety

If you’ve gone through the effort of getting your firearms licence, you’ll have come across seven neat rules that should dictate the way you handle guns for the rest of your life. These are the foundation of the arms code and are as follows:

Rule 1: Treat every firearm as loaded
Rule 2: Always point firearms in a safe direction
Rule 3: Load a firearm only when ready to fire
Rule 4: Identify your target beyond all doubt
Rule 5: Check your firing zone
Rule 6: Store firearms and ammunition safely
Rule 7: Avoid alcohol and drugs when handling firearms

You’ll notice, not one of these is “apply the mechanical safety on your firearm”. Why is this? Mechanical objects fail due to wear and tear, extreme conditions and pure bad luck. If you’ve read the instruction manual that comes with your new rifle or shotgun (highly recommended activity), you’ll notice that while new and improved safeties are always created for weapons and mentioned in these manuals, they usually discourage you from relying solely on these little switches.

How does a safety work?

There are two ways that most safeties work. The first is that they block the trigger from being pulled back, or even disconnect the trigger mechanism. The other is that they block the striker or hammer from moving forward and contacting the firing pin. There are many, many other types of safeties, and they can be in different places on your firearm, but they all have one thing in common – they are small bits of material upon which a large responsibility hangs.

That is why you never rely solely on a safety. Now – this my preference – I prefer not to use the safety at all. Some ranges will require your safety to be applied, and that’s fine. But, I personally don’t want to build up a reliance on a little switch.

What do I do instead?

When on the range and not using the rifle, I have it pointed in a safe direction with the action open, magazine out (or empty) and a breech flag in the chamber. This indicates to everyone that firearm is unloaded and safe.

When carrying a firearm to or on the range, same applies. Magazine out or empty (if fixed), and safety flag in or thumb in the chamber – muzzle pointed in a safe direction.

When firing on the range – well, you’re firing. What good is a safety when you want it to go bang?

When carrying a rifle in the field… This is where it gets a bit tricky. I leave my ammunition in my pocket, as well as my bolt if it’s a bolt action, until I’m near where I want to be shooting. When I am in the area in which I want to shoot, I fit the bolt (or close the action on a semi), and load the ammunition.

At this point, I do not chamber a round. I close the bolt on an empty chamber by pushing the top round down with my thumb or inserting the magazine on a closed bolt. When you’re ready to line up your shot, rack the bolt and get ready to squeeze the trigger.

If your quarry eludes you – drop the magazine out and remove the chambered round. Double check to see there’s nothing in there and close the bolt on an empty chamber before inserting your magazine again. Or, push the top round down on your bolt action.

This is just my personal procedure – you may have different feelings on the matter, or experience to the contrary. Leave a comment below with your tips on firearm safety.

Check out the arms code here.

Shooting a sporterised Husky M38 at Deerstalkers Auckland range.

Get started shooting: How to get an A Category licence

While you might go to the range or shoot a .22 on someone’s private land – under immediate supervision – to get your first taste of shooting, if you’re serious about owning or shooting firearms, the next step is getting your A Category licence. Here’s a quick guide on the process, what to expect and what an A Cat licence entitles you to do.

What firearms can I own with an A Cat licence?

There are no restrictions on the amount of A Cat firearms you can own. They’re not registered against your name, and you can go buy one from the store straight away, assuming you have your licence and all the associated safety measures in place.

Firearms that are considered A Cat compliant are basically rifles or shotguns that are manually loaded. This means pump actions, lever actions, bolt actions, etc. You can have any features you want on these guns, as long as the overall length is more than 762 mm (30 inches). Anything shorter than that is considered a pistol, and will require a B-endorsement on your licence – which is a whole other story.

This means you can shorten your barrel, or have it in a bullpup configuration, whatever. There is no real minimum barrel length, as long as the overall length is over 762 mm. Which makes sense, as the issue with handguns is conceal-ability.

You can also own a semi-automatic sporting rifle or shotgun, but there are restrictions on these to make sure they don’t fall in to the MSSA (Military Style Semi-Automatic) category, which is governed by an E-endorsement on your licence.

In order to keep your semi-automatic firearm in A-Cat compliant condition, you’ll need to make sure:

  • The magazine holds 7 rounds or less of centrefire or 15 rounds or less of rimfire ammo
  • The mag also can’t “appear” to hold more than the above
  • The butt isn’t collapsible, telescoping or folding
  • There is no bayonet lug present
  • There is no flash suppressor
  • It doesn’t have a free-standing “military style” pistol grip

The pistol grip is the latest addition to the MSSA restrictions, and has been met with a cold-shoulder from the shooting community. Essentially it made a whole lot of unregulated A-Cat firearms illegal and meant people had to modify their rifles or dispose of them. New rifles or shotguns are now usually provided with thumbhole or Dragunov-style stocks.

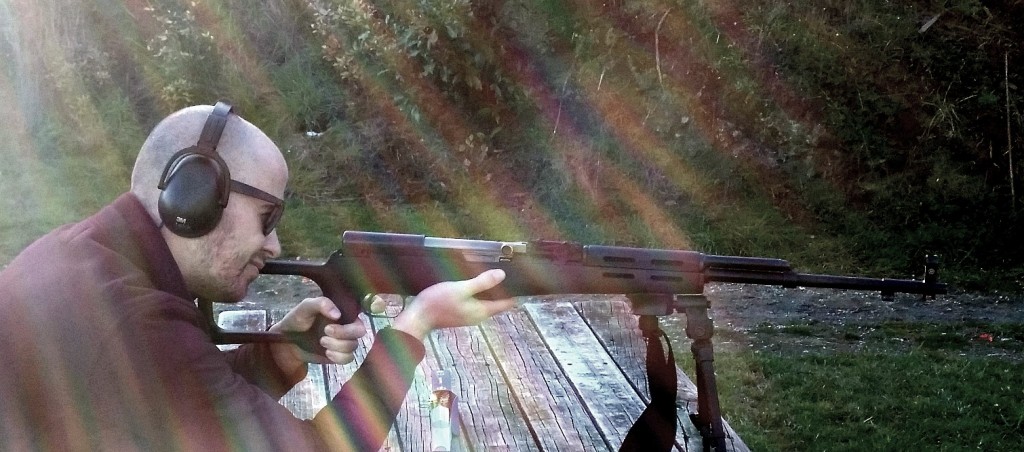
SKS with Dragunov stock
The SKS my friend Nick is shooting here would be illegal with a free-floating pistol grip instead of the Dragunov-style stock

What do I need to do get my firearms licence?

Well, there’s the obvious stuff first. For those with criminal records or histories of domestic or other violence, a licence to hold a potentially lethal weapon isn’t exactly on the cards. The police firearms officer will do a background check on you, and they’ll also ask to interview two referees. If you’re married or otherwise attached, one of those referees will have to be your spouse, while the other must be a non-related person you’ve known for a couple years or more. Those referees are basically to attest to the fact that you’re a fit and proper person to own a firearms.

However, before you’ve even done this step, you’ll have to sit a test that shows you have a solid understanding of how to safely store and use hunting or sporting weapons. Start your study by asking your local police station for a copy of the Arms Code or get it online. Once you have a thorough understanding of what is involved in the responsible and safe ownership and operation of firearms, you can apply to sit the test.

The test will be held at your local police station, and is facilitated by volunteers who have a wealth of practical firearms experience. They’ll take you through the main points of gun safety, including how to carry a gun in the field and ensuring the firearm is made safe before and after use. There’s a short video and practical demonstrations of how to hold, load and unload a rifle or shotgun.

After all this there is a multi-choice test, for which you have to get almost all of the answers right in order to pass. If you don’t get it right the first time, you’ll have to study up some more and attend another information evening before you can sit the test again.

Once you have your proof of having passed the test, you can go to the local post shop and pay for your licence. The cost is $126.50. You’ll need to get proof of payment along with passport photos to the police. At this point you’ll arrange for your safety check to be done at home. Talk to the police or your local arms officer about what the safety standards are.

For an A Category licence, a good standard is to have a lockable safe with separate ammo compartment (bolts and ammo must be stored separately so as to make the firearm inoperable). These can be picked up for a few hundred bucks on Trademe or other websites, and are usually supplied with expanding bolts and pre-drilled holes so you can secure the safe to either a concrete floor, or the walls and floor if you’re securing to wood (say, inside a closet). The firearms officer will check to see if the safe is actually securely fastened – it’s no good if a potential thief could just lift it up and take the entire safe away, guns and all.

Once you’ve sat your test, paid for your licence and supplied photos, had your referees interviewed and safety checked, it’s just a matter of time before your licence arrives in the post. It could take a few weeks or more, depending on how busy they are – so don’t freak out! Also remember that your licence is valid for ten years and will have to be renewed before it expires if you’re to keep your firearms. Which reminds me…

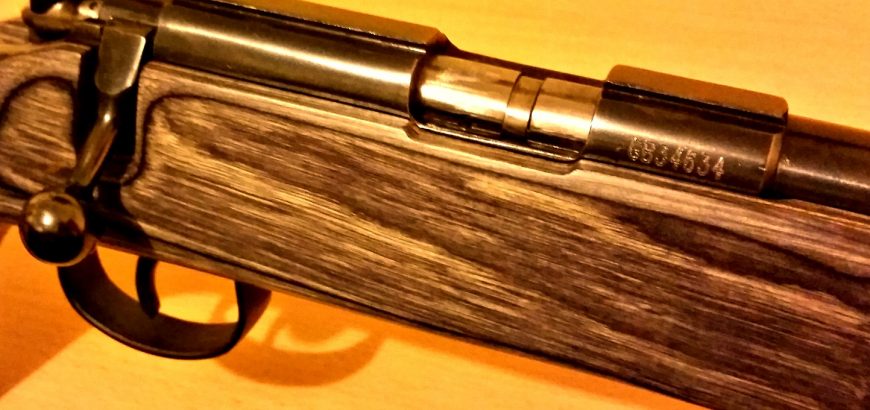
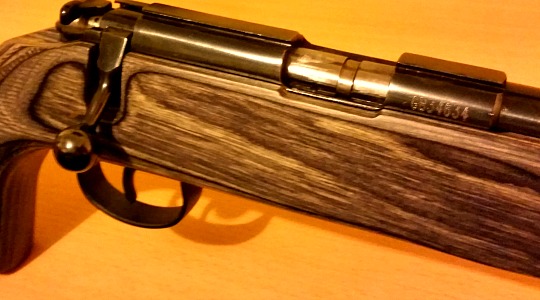
JW-15 in Boyds laminate stock.

Custom rifles vs Factory rifles – who wins?

Let me preface this by saying… How long is a piece of string? If you’re looking for the definitive guide on the all-time showdown between factory and custom rifles, you’ve got a long wait ahead of you. There’s no way to say one is categorically better than the other, but depending on your needs, one will suit you more than another. Here’s a quick run down on the two options.

Custom vs “Custom”

Well, maybe there are three options. There are rifles that are custom built by fantastic gunsmiths, or even several different people (i.e. barrel manufacturer, suppressor builder, stock maker, etc), and they can run into the tens-of-thousands of dollars. Chances are you’re not comparing a $35,000 rifle built on a Surgeon action to a Weatherby. So, realistically, these types of custom rifles fall outside of the scope of this discussion.

There are even the customised Remington 700s, Sakos and others you can buy direct from a gun store, which have been assembled with a host of accessories and a non-factory stock, etc, which offer “custom” rifles at lower costs and with a lot less effort. This a kind of middle-ground which, again, falls outside of the debate of custom vs factory.

Factory rifles

There are a host of incredibly good choices out there when it comes to factory target or hunting rifles. And the fact of the matter is, with modern production techniques and better quality control standards, many of these rifles are incredibly accurate out of the box.

Sako guarantees the Tikka T3 line to produce an MOA 3-shot group out of the box, and they boldly make the same claim with their T3 varmint and tac and 5-shot group. That’s pretty impressive. However, that doesn’t mean your new Tikka T3 Lite in stainless/synthetic will do that with any ammo you feed it. Bear in mind, Sako tests rifles with ammunition they produce themselves.

So, you may need to find just the right brand of ammunition, or even reload your own to get that level of accuracy.

The great thing about factory rifles is that if you look after them and keep track of how many rounds you put through them, you’ll generally get a pretty good resale value if you decide to switch calibres or clean out the safe down the line. Selling firearms is just foreign to me – I want more, not less – so I couldn’t really relate personally. However, for some, it’s a major benefit.

Another aspect of factory rifles, and this is one that I can understand, is that you have warranties and guarantees form manufacturers and retailers. If something goes wrong with a stock-standard rifle, you’re usually okay. Again, this comes down to incredibly efficient modern materials and processes – a lot of manufacturers are so confident, they will give you a lifetime warranty, even with their base models.

Custom rifles

A lot of firearm owners like to try and get more for less. They’ll buy a rusty old milsurp and try restore it, or even convert a P14 action from .303 to a .338 Lapua long-distance shooter. It’s this undeniable urge to make something better and more accurate – but cheap.

Many people try, and many people fail. The old adage “cheap, accurate, reliable – pick two” still stands true. However, not all is lost. Many backyard tinkerers find that they learn more about gunsmithing, rifle maintenance and internal or external ballistics by working on their own firearms than if they bought an out-of-the-box MOA-shooter. It gives you a more holistic view and respect for firearms, and generally makes you a better shooter. The more you know about how your rifle works, the better you can work with it.

Modified Mauser bolt action.
This modified Mauser bolt action was a lot more work, but is a joy to shoot.

What I have found with my own projects, from JW-15s to Swedish Mausers, is you’ll probably spend enough money in the end to have bought a tack-driving factory rifle. So why would you do it?

  1. The initial outlay is low. Three or four hundred for an M38 in 6.5×55 which might need a lot of work to be great, but at least in the meantime, it’s still good.
  2. It’s a project. If you yearn to create your own sub-MOA rifle and constantly look up the latest Boyds’ rifle stocks or DPT muzzle devices, then this probably for you.
  3. It’s unique. Hey, it’s the gun you built, not the one Howa, Marlin or Remington made. There’s a certain amount of pride in this, and you can make it look and feel the way you want.
  4. Individual needs. Hey, if you need a bush gun – cut down a .303. If you want an odd-looking F-Class gun, try your hand at “improving” an old Mauser. The best part is never feeling bad about cutting into the steel – coz it only cost $250.

Who wins?

Well, if you want a reliable, dependable and accurate rifle to take hunting or to the range, you could go and get yourself a Tikka T3 Lite in stainless/synthetic for less than $1200. Chances are your home-improved P14 or Model 1896 is going to end up costing you more with a new/improved stock, bedding, barrel and chambering, suppressor, bases drilled and tapped, etc, etc.

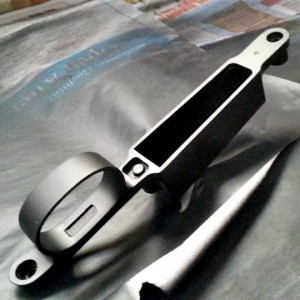
floor metal
Floor metal from 1943 looking fresh and ready to go.

However, if you want something unique that you can enjoy working on for months – or even years – pick up a donor action to work with. Even an older (pre-1964) M70 or Remmy 700 is fun to use. And the best part is if you buy a complete milsurp, you can probably enjoy shooting it “as is” to start with for very little outlay.

I’ve heard many Tikka T3 owners say their rifle is “boringly accurate”. And that is high praise for any manufacturer. So, at the end of the day, if you want to drill tiny holes into paper or leave gaping exit wounds in deer at 400 yards – get the factory rifle. If you want to feel like you earned your way to shooting sub-MOA or making long-distance kills, a project might be on the cards.

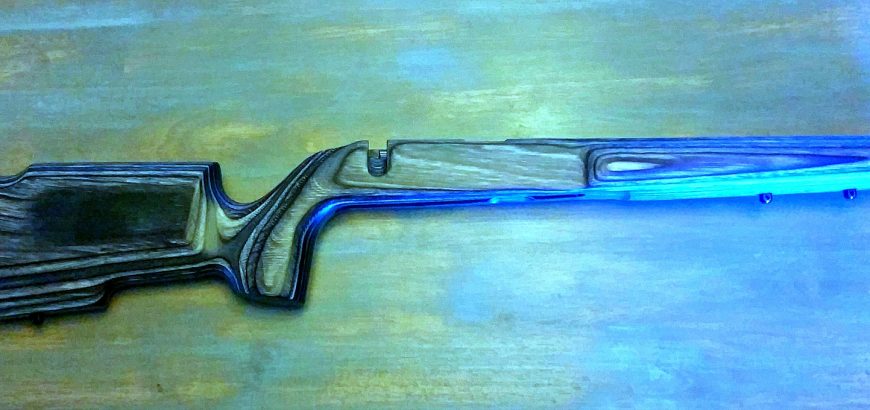
Pro Varmint for JW-15 stock in Pepper Laminate.

Product review: Boyds Pro Varmint gun stock for JW-15

Boyds gun stocks have long been a way for shooters to improve their favourite rifles. Whether it’s replacing a boring factory stock, modifying a sporterised milsurp rifle or finding a better fit for your shooting, there’s usually an option from Boyds that will fit the bill. For one of my rimfire project rifles it was a combination of improving the fit to my body, as well as increasing the aesthetic appeal.

When I first started working on JW-15s Boyds didn’t have anything available for them. Neither did anyone else. This is what got me into building my own stocks, which I’ve done a couple of. However, since then the good guys at Boyds have increased their range (as they always seem to be doing) and the JW-15 now has 5 different designs available.

Some of the designs are the same ones that much more expensive rimfire rifles come in, such as Savage’s Mark II BSEV and BTVS. Of course, the amount of money you could spend customising a JW-15 is probably about the same cost as buying a much better rifle – but where’s the fun in that?

While the Barracuda and SS Evolution are popular rimfire gun stocks that you can see on most ranges, strapped to a Ruger 10-22, the design I like most for the relatively long barrel on my JW-15 is the Pro Varmint, which seems to be the same stock the Savage Mark II TR sports. However, the black textured paint isn’t my cup of tea, so I opted to pay an extra US$15 to go for the Pepper Laminate instead. Visually, the stock is outstanding and I love the look.

Features of the Pro Varmint stock

Standard features include a sling stud under the base of the butt and two studs towards the front of the fore-end, one of these obviously for mounting attachments such as a bipod.

The stock is much heavier and more solid than the synthetic (i.e. plastic) stock the JW-15S comes in and makes it feel less like a toy and more like a real rifle. It’s also better suited to the average New Zealander’s length of pull.

The inletting is good and is done to Boyds’ house action. Obviously there is variation in rifles, probably more so in Norinco’s case, so yours may require some extra finishing. I found I had to relieve a couple millimetres of material where the recoil lug sits, which was not a big deal at all.

Boyds Pro Varmint stock for JW-15, showing inletting.
Precise inletting and a deep barrel channel on the Pro Varmint.

The barrel channel is extra deep, decreasing weight and ensuring a free floating barrel. You may need to do some fine sanding to make sure your barrel is free-floating, but mine was fine. The fore end also has a nice swell, so it fits perfectly in your hand.

There are also plenty of optional extras, including different finishes, varying lengths-of-pull, custom recoil pads and even laser engraving or chequering.

Downsides to the Pro Varmint stock

There aren’t many, but there are some. Because of the variations in rifle manufacture, you could find slight fitting and finishing is needed in order to get a solid fit for your action. Keep in mind that Norinco weapons have been banned from the states for a long time, so the action they have is probably very old. However, as I mentioned above, there was not much needed to get mine fitted snugly.

What I will probably do (and what I would recommend to anyone going for high accuracy) is bedding the rifle with Terminal Ballistics bedding compound or something similar. I’ve bedded two actions with Nathan Foster’s compund, and loved the result.

When shipping to NZ, Boyds has an order limit of US$100 (before postage). This is because of legal complications with US Customs. Unfortunately, it limits your ability to go for optional extras as some stocks are $99 already. The Pro Varmint was $75, and I changed to the Pepper Laminate for $15. Options like the adjustable comb height ($60) are just out of your reach with the $100 limit.

I can’t remember the cost of postage, but it’s still worthwhile when you consider how much Boyds stocks cost to buy over here. What you could do is buy it when you’re on a trip to the States or ask family/friends over there to buy it for you and send it over. Don’t try NZ Post’s YouShop, as they won’t ship rifle parts. You’ll end up paying for return postage to the supplier. Also, they charge by volumetric weight, which can end up costing a lot more than you expect.

I did have one minor issue with my rifle stock, and that was a tiny chip near the tang. It’s not a deal-breaker, and certainly not worth the effort/cost involved in sending it back for a replacement.

The final verdict

I’m extremely happy with my Boyds stock. As I mentioned before, I’m getting another one soon for a different rifle, so that should say a lot. Although there are minor detractors, these can be addressed fairly easily.

I would definitely recommend finding an alternative method of postage so that you can get all of the great features that your heart desires, and I would also advise that you bed your new stock.


The JW-15 sits snugly in the Pro Varmint.