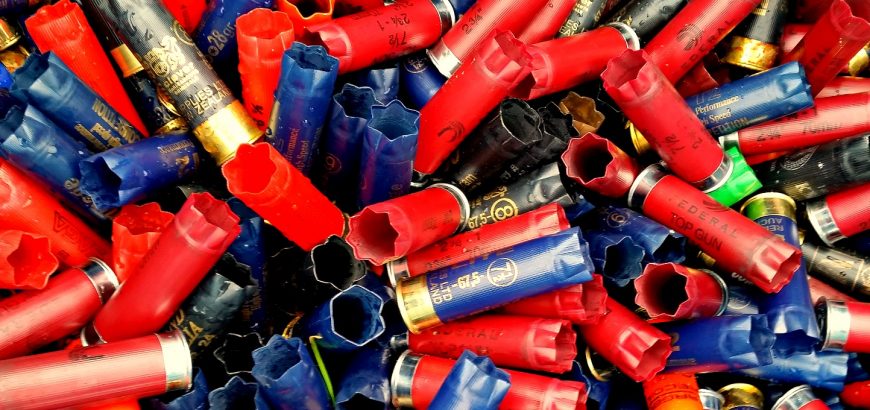
Spent shotgun shells at Waitemata Clay Target Club.

Where to shoot in NZ: Waitemata Clay Target Club

As somebody who spends a fair bit of time behind a scoped rifle, let me say, aiming “without looking at the gun” is a real challenge. As my wife and I set up to try our hand at down the line (DTL) trap shooting, Andy – our supervisor/guide/instructor through this process – informed us that the way to successfully shoot clays moving at 45 kph is to not aim the gun. Yup, don’t aim he said, or you’ll stop moving in line with the target.

The Waitemata Clay Target Club

Firstly, let me put this out there, as far as gun clubs in New Zealand go, this is a sleek organisation. They have a nice website, excellent facilities and a club room that would make you think of a golf course, rather than a shooting club.

There are a few different positions to shoot from, a patterning board and even an Olympic trap facility. What’s the difference with the Olympic version of the sport? More than triple the speed – 140 kph, and a greater variety of directions the clay pigeon could shoot off into.

The impressive Olympic throwers of the Waitemata Clay Target Club.

Back to the club. It’s about 25 or 30 minutes from the centre of Auckland, and took me around three-quarters of an hour from East Auckland. It’s conveniently close to the Hallertau Brewery, if you wanna grab a bite and a beer (after you shoot). If you’re familiar with the NZDA Auckland branch, it’s just round the corner from there.

There’s ample parking and you don’t need to trek through bush or anything. It’s a very accessible club all round.
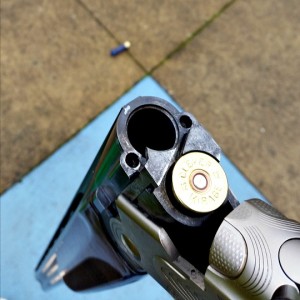
The Beretta under and over shotguns were a treat to shoot.

Shooting DTL Trap

As I mentioned before, shotgun shooting apparently just doesn’t come naturally to me. Although, I’ve got to admit, it sure was fun. The five positions you shoot from all have a mic that picks up your command to “pull”, releasing a clay. Aiming at the top of the trap house or just above, you try and move your head (and the shotgun which is welded to your cheek) along with the clay as it appears – not aiming, but simply following the target. Pull the trigger when you’re ready, and that’s all she wrote.

The mic can be set off by the loud ‘clack’ of pump or semi-auto shotgun, or people nattering away about how their last shot went. Because there are a limited number of clays available to shoot, this can be a bit frustrating if some are wasted by chatter and loud actions.

There are five different shooting positions with a shooter on each. After a shooter takes their shot, they break open their gun (or open the action on semis or pumps), and the next person loads, ready to call for their clay. Usually after five rounds, the shooters rotate to the next position, although we didn’t go through all the rotations on our first go.
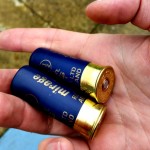
The Clever Mirage trap loads were light and easy on the shoulder.

The guns provided to us were very nice looking Beretta under and overs, and they shot like a dream. There were no malfunctions of any kind, and they were smooth and easy to operate. The Clever Mirage trap loads were light and didn’t leave us feeling bruised and battered at the end of the day.

The overall cost was not too much, considering all that is provided. For $52.50 each we got range fees, gun hire, a box of ammo each (25 rounds), 25 clay targets and some ear plugs (we forgot our hearing protection at home – although even with ear plugs, it was absolutely fine). Considering it’s a good afternoon’s entertainment, it’s well worth it – especially if you haven’t tried it before. And, speaking to Andy, it’s apparently much cheaper to shoot once you become a member. However, there is the high cost of trap or skeet shotguns to consider. Although, for the beginner, a cheap semi-auto will get you going.

For those that are interested in a casual shoot, check out the Waitemata Clay Target Club range calendar and call ahead if the weather is foul. The club rooms are easy to find and there’s a nice big sign on the road – you’ll find it easy enough.

At the end of the day, if you’re into your shotguns – this is something you should definitely try. For those that haven’t ventured into other shooting sports, it’s worth giving it a go. You never know, like my wife you may have a natural ability for reactive shooting.
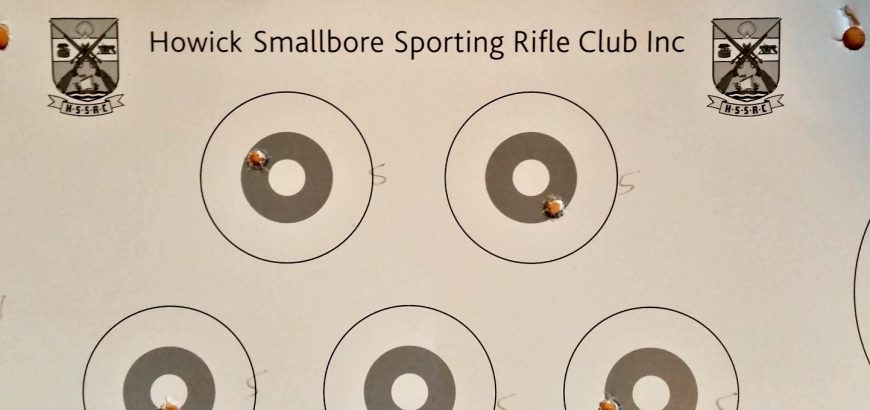
Regular target at HSSRC

Where to shoot in NZ: HSSRC

If you’re new to shooting – perhaps you’ve never seen a rifle up close – learning more about the sport can be daunting. The best way to go about it is to find a local club where you can develop your knowledge and trial different equipment before buying your own. You can also get a feel for different shooting disciplines and even competition, to see what most piques your interest.

A great place to get started is the shooting range in Howick. If you’re in East Auckland it’s a convenient place to shoot, and it’s fully indoors which is great in winter. There are quite  a few different clubs operating out of this range, including a couple sporting smallbore clubs, a target shooting club, air rifles and a pistol shooting club as well.

My favourite organisation at this range (and I’ve tried almost all of the options on offer), is the Howick Smallbore Sporting Rifle Club (HSSRC). It’s an extremely friendly environment and has a wealth of experienced shooters willing to lend a hand. The range is great and the club equipment is very good – the shooting fees are cheap too. You can hire a rifle, pay your range fee and pay for your ammo for less than a movie ticket – not a bad way to spend a Friday evening. You’ll also be fully supervised (if you’re unlicensed) throughout the shoot with full instruction – easy as!

Moving on in the club, you can participate as a range officer or assistant range officer, or help new shooters as well. You can also participate in the inter-club tournament and the club fun shoots and end-of-year prize shoot. There are plenty of opportunities to get involved, which you’ll find out as you go along. You’ll also find most shooters here engage in a couple different disciplines, and can not only help you with your shooting technique, but can also point you towards other clubs and competitions you might enjoy.

If you’re looking for a good place to learn, or you’re new to the area and already a competent shooter, this could be the place for you.

The club shoots on Friday evenings from around 7 pm onwards, and has plenty of gear available. You can also purchase ammo at very reasonable rates. Once you become a member (which doesn’t cost much at all), your weekly shoots and ammo will be even cheaper. If you’d like more info, leave a question in the comments below, or head on over to the HSSRC facebook page.


Should I Loctite my scope bases?

If you’re putting together a rifle for the first time, or you’ve just bought a package deal that was loosely thrown together, you may not be aware of the intricacies involved in proper scope mounting. One of the questions often debated in forums all over the internet is whether or not to apply Loctite to scope base screws, and if so, which colour to use?

Well, I made the rookie mistake of driving three and a half hours to do some target shooting after reassembling a rifle I had coated with a nice new finish. I completely forget to Loctite to the scope bases. I sent a few factory rounds down range to foul the barrel, and got a group size under 2 inches at 100 yards. Sounds about right.

I then painstakingly went through shooting 3-shot groups with my reloaded ammo (I was working up a new load), and watched in absolute horror as my groups opened up to 3 or 4 inches. Thinking I may have overheated the barrel, I gave the old shooting iron a rest and threw some lead downrange with a few other toys while it cooled off.

Taking up the prone position again I looked forward to drilling some really expensive Sierra Matchkings into ragged little holes 100 yards away. No such luck. I was shooting groups that opened up to 7 inches. What the…? I could not figure out how I had screwed up this batch of reloads so badly. Until I adjusted the scope settings for a friend of mine to shoot at 50 yards. Wait – was that a bit of wiggle in the scope mounting? Indeed it was. I had managed to get about $50 worth of ammo down range with no particular success before I realised that my loads were fine – the scope bases had come loose.

Don’t make my mistake

Frustratingly, after driving home for three and a half hours I noticed the blue bottle of Loctite sitting on my gun bench, like a big fat “I told you so” from the universe.

In short, don’t make my mistake – Loctite your scope base screws. I took a perfectly good 1-inch shooter and turned it into a minute-of-dinner-plate loser by forgetting this simple step. And I’m sure my scope didn’t appreciate flopping around like that either.

Make sure your threads are completely clear of debris or grease when you do this. And while some people say red Loctite is okay to use, I prefer to use blue – I find it is much easier to remove. While you may not take your scope bases off regularly, if you want to upgrade or change to a 35 MOA rail, or whatever, you’ll wish you had used the blue variant.

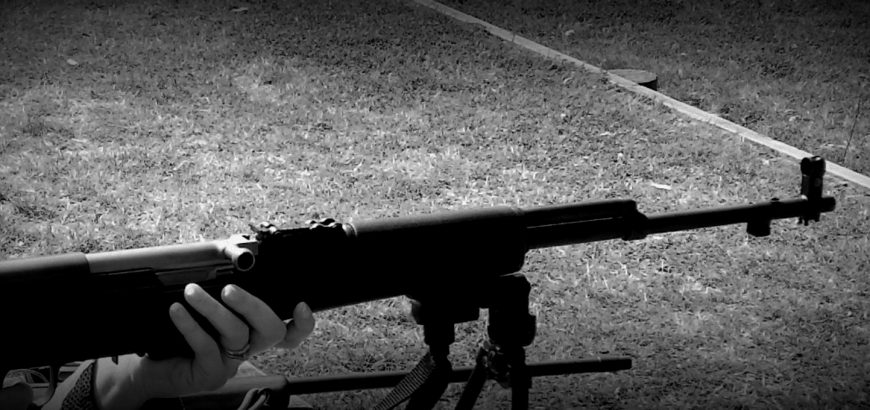
SKS on bipod at the range.

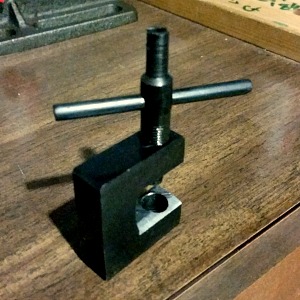
SKS front sight tool

The SKS is an immensely popular rifle in New Zealand. Whether it’s for budget-conscious hunting or recoil-reduced plinking, there are plenty of reasons to have one or two of these fun-makers in your gun safe. However, if you’ve picked up your favourite communist rifle and found that the grouping is out, you’re going to need to invest in a front sight tool – something I’ve recently done. Here are my do’s and don’t of this process.

This is what you should do when buying a front sight tool

SKS front sight tool
As you can see I have filed down the inside edge of the tool to fit around the hooded front sight.

You should definitely shop around. How much are they at the gun store – 50 bucks? Forget that. Go to Quartermaster Supplies and pick one up for $20. Most tack-on accessories for milsurp rifles can be found there for cheap. I paid $28, including all tax and couriered to my work. Sure beats paying almost twice as much at some of the big-name stores, and wasting time and petrol too.

You will probably need to file down one edge of the tool. I think these would fit an AK-style rifle without it (don’t have one on hand to check), but you’ll definitely need to shave off one of the inside edges of the U-shaped device, so that it can accommodate the round post-protector ring. This took me all of 5 minutes with a file, and a quick sand to debur. Just one edge is fine – you can flip it around to adjust the other way.

Sighting in should be done with the FORS principle in mind. That is Front Opposite, Rear Same. If you move the front sight to the left, the point of impact shifts to the right. If you raise the post, the POI will move down. If that just doesn’t make sense, check out the video below. This guy explains it fairly well – and it’ll save me repeating myself.

This is what you should not do when buying a front sight tool for the SKS

Do not try and drift the sight across with a hammer and punch. I have – naively – tried this, and not only is it frustrating, but you’ll soon end up with scuffs all over your bluing and you probably won’t move it much in the end. Spend the $28 – it’s worth it.

Don’t adjust your front sight while the gun is loaded. Seriously. Load one round at a time when sighting in if you have to, but don’t put your hand near the dangerous end of the rifle, and your body or face over the action when it’s loaded. Doesn’t that just sound like a recipe for disaster? The best safety is an empty chamber.

Don’t try and sight it in alone, unless you want a long and frustrating day at the range. Get someone on a spotting scope telling you where you’re impacting – it’s easier, and it’s always nice to have company.

You shouldn’t assume one shot is enough to determine where the rifle is shooting. I prefer to shoot a group of two or three before adjusting iron sights on a rifle like this at 100 or 200 yards. If it was a scoped target rifle on a bipod, with a more accurate round, then yes, one shot would be enough to figure out where to move your POA.

And lastly, don’t sight in with your plinking ammo and expect it to be spot-on with your good stuff. Sight in with the ammo you need to be most accurate with. The difference isn’t much, but the SKS can sometimes need all the help it can get when it comes to extracting every last bit of accuracy out of it. At least most bullets are of a similar weight and diameter when it comes to the SKS, so there won’t be a great deal of difference.

Three shot group on smallbore target

What are you shooting? Where to get targets for the range

If you’re heading down to the range to do a bit of practice or to shoot some really tight groups, you’re going to need something to aim at. Most ranges will have posts that you can staple targets to, but the targets themselves – where do you get them?

This can depend on what kind of shooting you want to do.

Low-magnification shooting

When shooting milsurp rifles without optics or with low-magnification scopes, it can be annoying heading downrange all the time to check where you’re landing. A good solution to this is the Shoot-N-C target from Birchwood Casey.

It’s a black target which comes in various sizes, and reveals a high-viz yellow impact mark when you strike it with a bullet. Easily visible at 50 yards, and pretty visible at 100 yards. At the longer ranges, you can get a pretty good idea of your shot placement through your scope, without needing a spotting scope.

Precision shooting

When it comes to having the exact target for the shooting that I want to do, having custom targets is great. I like using this website to create my own targets in PDF form, and then print them off in A3 size for the range.

They’re also great for air rifle targets at home, or whatever the case may be. You can do all sorts of customisation to get the ideal size of bull, number of rings etc. I like setting mine up as a 1 inch bull with 1 inch rings – this makes it easy to estimate MOA at a glance, before I get the calipers out.

No time to waste

If you’re after a target and don’t care what it is, or don’t have time to make your own, you can print off free targets from many corners of the web.

A lot of scope, ammo and rifle manufacturers will have printable targets on their websites. Otherwise, search for “print your own rifle targets” and you’re bound to come across some easy-to-use websites with stacks to choose from.

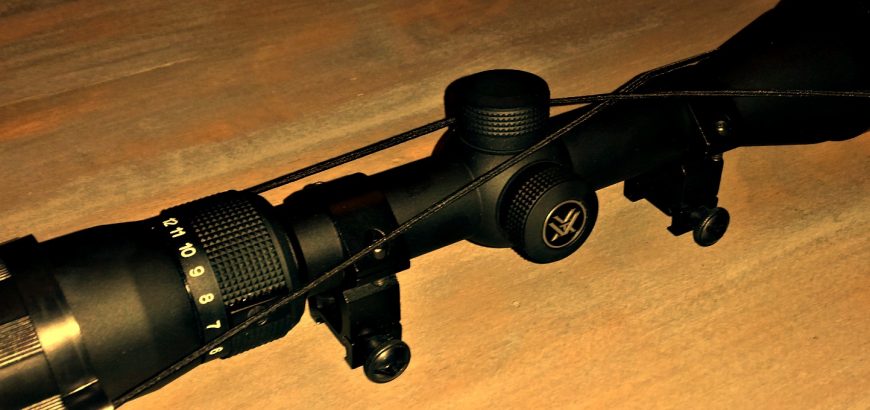
Vortex Diamondback scope

Product review: Vortex Diamondback 4-12 x 40 BDC

Firstly, buying this scope was a mistake. But it’s a mistake I’m very glad I made. I intended to buy the adjustable objective version of the Vortex Diamondback 4-12 x 40 BDC, but ended up with the fixed-parallax type. I couldn’t return to the store and swap it, because I had just left the country where I purchased it.

With the AO version, my idea was to use it at its maximum zoom at a 25 yard range on a rimfire target rifle. However, without that AO bell, the scope just won’t focus at 25 yards at any magnification greater than 8 x or 9 x. So, I reluctantly told my wife we’d need to take this brand new scope off her rimfire rifle and put it on my 6.5 x 55 that was in need of some glass. This is the point where I’m glad this happened.

The technical specs

The parallax setting on this scope is 100 yards – perfect for getting sighted in at the range, and more than adequate for the average hunting shot in the New Zealand bush. The adjustments go out  60 MOA in elevation and windage. With my 6.5 x 55 it was pretty much bang-on at 100 yards, maybe a total of 7 clicks left and a few up or down, I can’t remember. If you’re aiming to shoot long distance (600 – 1000 yards) you’re probably going to want to mount this on a 20 MOA rail.

The Bullet Drop Compensation (BDC) points are graduated in MOA, and so is your turret adjustment. How many times have you bought a mildot scope and found out later it has MOA turrets? So, this is nice to know right off the bat.

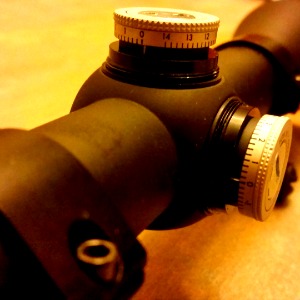
Vortex Diamondback scope with caps off.
The turret markings are easy to see from behind the gun.

The turrets are capped and resettable. This is nice, as now that I have my zero I can use the windage or elevation adjustments to my heart’s content without worrying about getting my 100 yard zero perfect again. The caps are nice and low and are easy to grip. Be careful when resetting the zero that you don’t damage the turrets, as I found them to be very tight and had to hold them in place with vice grips while I used a screwdriver to loosen the turret. Any extra pressure while doing this and you could have tool marks on your nice new scope. I covered the surface of my grips with masking tape to prevent teeth marks.

You have a total of 5 points of vertical aim, including the crosshairs and the top of the post. You also have 3 hash marks either side of the crosshairs horizontally, as well as the post edges. How to use the BDC? Check out this video from Vortex.


Quality and ease-of-use

The scope has the usual things that manufacturers claim, such as fog-proof, shock-proof and weather-proof everything. Except, this scope really does. I have mounted two scopes on this rifle – the other I won’t name. The unnamed piece-of-junk was used on one range trip for about 3 hours. Yes, there was wind, rain and sun. When I took it off to mount the Diamondback I noticed that the unnamed scope’s exterior coating was peeling off. After one trip!

Subjected to the same conditions, the Vortex scope still looks brand new. That’s probably why they provide an unlimited, unconditional warranty. Which, to be honest, is half the reason I bought it – that shows confidence!

The clarity was exceptional, and the lense coating wasn’t just for show. I had plenty of light, no glare and just a great shooting experience. The scope also features a fast focus adjustable eye-piece with a decent amount of range on it. This was perfect for when different shooters wanted to try it out. Also, the markings on the turret are easy to see without changing your shooting position much – which is not something I can say for every scope in my safe.

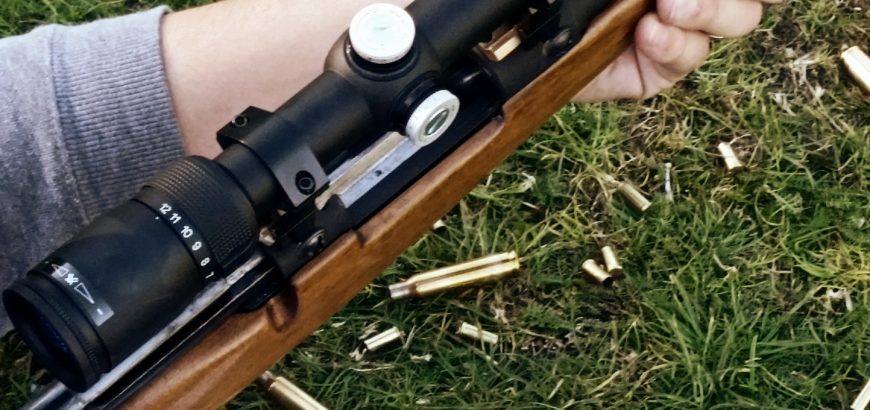
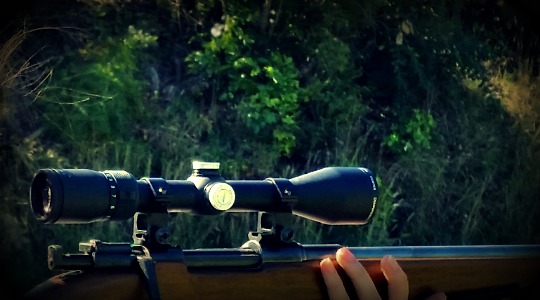
Vortex Diamondback scope on M38 Husky.
Adjustments on the range are done with ease.

Quality of manufacture is something that really shows when you shoot at an outdoor range. It’s also something that greatly determines how long a scope will last and whether you’ll enjoy shooting with it or not. In my humble opinion, the Vortex range is excellent. They are also reasonably priced. In the USA (where I bought mine) they were very affordable. In NZ, they are probably middle of the road. Either way, still worth it for the high-quality optic you’ll be getting. I would definitely purchase another scope from their range.

You also get some handy extras with your scope. There are the standard removable lense caps and a *really nice* cleaning cloth. I would suggest making use of Vortex’s incredibly intricate Long Range Ballistics Calculator. Not only will you be able to figure out your elevation and windage hold, but you’ll probably convince yourself to buy some new rifle while you check out all the ballistics tables you can produce for just about every calibre known to man.

You know the old addage of spend as much on your glass as you do on your rifle? Well, this is one scope that breaks that rule. I would happily mount Vortex optics on rifles that would generally be seen toting the latest Swarovski or Leupold glass.