Mossberg 100 ATR 7mm-08 Review

The Mossberg 100 ATR gets its initials from the phrase ‘All Terrain Rifle’. To be honest, if that’s what you’re after, this fits the bill. An inexpensive rifle that is rough and ready, but with a couple features that do stand out, the ATR is not a glamorous 1000-yard shooter, but a simple hunting tool.

Affordability is…

I do a fair bit of reading and research when it comes to shooting, and I remember one thought that really stood out when reading on barrel metallurgy. While steel prices have increased noticeably over the last decade, rifle prices have remained relatively static. So, if the cost of raw material is increasing, how are prices not rising accordingly?

This can be partly answered with advances in manufacturing techniques and the use of polymers and synthetics in place of wood and other expensive materials. However, it can’t be ignored that even some of the most expensive rifles show a bit more roughness around the edges compared to their 80’s or 90’s ancestors.

Opening up the Mossberg box for the first time was a mixture of anticipation and nerves - how good would this rifle be?
Opening up the Mossberg box for the first time was a mixture of anticipation and nerves – how good would this rifle be?

Mass production has resulted in cheaper rifles, while some advances in tooling, assembly and technique have resulted in relatively consistent levels of accuracy.

The Mossberg ATR is the ultimate expression of these cost-saving measures. It has the features you want, and some extras that you’ll enjoy – but it does feel cheap.

On the plus side

Undeniably, the most positive thing about this rifle is its price point. It’s affordable enough for the beginner hunter to make their way into the sport, and even cheap enough for the seasoned shooter to justify buying one just to try a different calibre out.

The ATR has been around for a fair few years, and has been supplanted in the States by the Patriot series of rifles – which seems to be a step up from the old ATR. However, with quite a bit of stock floating around New Zealand, there are still plenty of brand new rifles and packages floating around. You can expect to get a rifle for around $600 – $700, and packages including mounting system, rings, a scope and possibly a couple extras for between $700 and $900. A few good examples are here, here and here.

Features abound
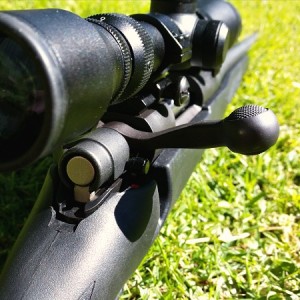
The half cock and side safety are features which will excite some.

Working in its favour, the Mossberg has a few features that you would expect to see on a more expensive firearm. Some that immediately spring to mind are the easily adjustable trigger, half cock on the bolt, side safety, a slick feeding action and fluting on the barrel.

  • LBA – Lightning Bolt Action – trigger system. The trigger on the ATR is fully adjustable, down to a mere 2 pounds. I found the 3 pound trigger pull from the factory to be light enough, especially for a hunting rifle, and even let one round off a bit too soon, as I expected more resistance from such a stock-standard rifle. Similar in appearance to the Savage Accutrigger, the LBA has a a thin piece of steel that nestles into the centre of the trigger. It’s pretty light and wiggly, but behind that is a rock solid single-stage trigger. The effect is similar to a two-stage trigger as the blade locks up the sear until fully depressed.
  • The half cock feature is something that a lot of hunters like. it allows you to be chambered and ready to go, with a simple push down on the bolt when you sight your prey. I personally prefer a bolt closed on an empty chamber, but the half cock is undeniably popular. The side-safety is easily reachable and operable, without shifting from your shooting position. You can easily manipulate it with the thumb of your shooting hand, but again, this isn’t something that is make-or-break for me.
  • The action is smooth as butter. In fact, probably one of the smoothest bolt actions in my safe. With two locking lugs and only a negligible bit of wobble when it travels, the bolt is well balanced. It’s a push-feed (as are most modern rifles), and picks up its rounds easily enough. I would buy this rifle all over again simply because it is so easy to work and feed.
  • The fluting on the barrel is a nice touch, and makes the rifle appear a bit more classy than its price tag would indicate. Aside from that, I can’t see much use for it. The weight saving couldn’t be too much, given it’s only have the barrel. And to be honest, this rifle could use a tiny bit more weight to absorb some recoil. However, it does make you feel less cheap when you’re at the range sighting in next to a Howa or a Remmy 700.
  • Already equipped with Weaver-style bases, the rifle is ready to mount your favourite scope too. It seems the bases are loctited too, as after over 50 rounds, these didn’t work loose. It’s also worth pointing out that the drop on the stock is pretty near perfect, lining you up nicely with a low-mounted scope.

It’s not all candy floss and daisies

It would be great to say we’ve found the cheapest, bestest rifle in the world. But you know how it goes. Cheap, accurate, reliable – choose two.

There are some aspects to the rifle that don’t float my boat, but at the incredibly low price, these are things I can generally handle. This rifle will end up being a good short-range (100 – 300 yards) shooter, for taking out goats, pigs or deer that present themselves nicely. It won’t be my go-to rifle, nor will it be my trusty long-range shooter.

Here are some of the detractors, which limit the rifle’s appeal in my opinion. Some of these are down to cheaper manufacturing, and can be expected.

  • It’s noisy. The ATR has a flimsy plastic stock that is hollow. If you knock the butt of the rifle, it lets out a hollow clunk. When you close the bolt you can hear it riding over the plastic follower and the bolt handle lets out another hollow-sounding tone when closed against the side of the stock.
  • The floor metal is… plastic. If you go for the walnut stock, you’ll get proper floor metal. However, the synthetic version comes with plastic moulded sling mounts, trigger guard and blind-magazine floor plate, I say floor plate, but it is completely sealed and inaccessible from the bottom of the rifle. This will all limit your ability to swap out the stock at a later date (without buying floor metal), and may interfere with some mounted accessories, such as bipods.
  • The recoil is dramatic. The 7mm-08 is not known to be a heavy recoiling round, however, with no mass to absorb the backward motion of the action, most of that recoil is going straight into your shoulder. Even with the inch-thick recoil pad equipped, there was noticeable kick. I did have a light grip on the fore of the rifle on the first shot I took, and after copping a scope to the face, I quickly tightened up my grip to arrest the rearward motion of the firearm. The walnut stocked version will probably deal with this recoil more appropriately.
  • The look of it. To be honest, it’s not that bad, and as mentioned above, the fluted barrel helps in the looks department. However, the obnoxious Mossberg branding on the bolt looks like lipstick on a pig. Without it, it would look like a good, basic rifle. Rather than a tarted-up cheapy.
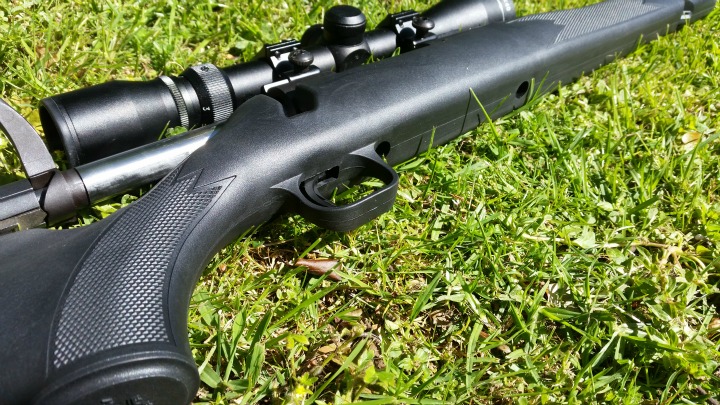
The Mossberg's floor metal - or lack thereof.
The Mossberg’s floor metal – or lack thereof.

Accuracy and the deal-breaker

I decided to test this basic hunting rifle with basic hunting loads. A week ago I took a drive down to Waiuku Pistol Club and spent some time on the 100 yard range testing out the following cartridges:

  • Winchester 140 gr Super-X Power Point
  • Remington 140 gr Express Core-Lokt
  • Highland AX 140 gr SPBT
  • Hornady 139 gr American Whitetail

I have read a few other reviews on this rifle, and note that one reviewer achieved sub-minute groups with some expensive ammo, while another was happy enough with his 2+ MOA groups.
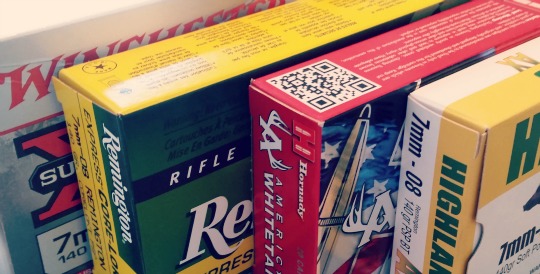
A good sampling of 7mm-08 hunting ammo was used for breaking in and sighting in.

This is the realm my rifle was printing in. The average group size across all four brands (3-shot groups) was 2.53 MOA. Surprisingly, the budget brand Highland AX achieved the best groups, just over 2 MOA, while Winchester (favoured by many 7mm-08 shooters) achieved just under 3 MOA.

At the end of the day, a 2 or 3 MOA rifle at this price is about what you would expect, and is still delivering consistent kill shots out to 300 yards (if you’re using a load closer to the 2 MOA range).

And I could forgive many aspects of this rifle’s construction if it ended there. The very tilty magazine follower, the hollow stock, the spartan looks and short length-of-pull.

All of this could be forgiven, if the barrel fouled a little during break in.

Barrel with no fouling

I know breaking in a rifle barrel is an oft-debated topic, but here it is, I do practice barrel break-in, especially for cheaper rifles, which stand to gain the most from a bit of polishing in the bore to relieve some rough machining. The process I use has nothing to do with achieving X amount of shots, cleaning in between each Y amount of shots. Rather, I take a similar approach to what Nathan Foster describes here. Visually inspecting for copper fouling, and masking sure you are getting a nice, slow build up, which will help maintain accuracy over a decent amount of shots, before fouling becomes excessive.

Two things that can indicate poor barrel manufacturing are excessive fouling after each shot, or no fouling at all. The latter is what I experienced with the ATR. After putting through 51 rounds, not a single trace of copper was seen. Plenty of powder residue, but no hint of the lands hugging the bullet enough to produce some slight copper swaging.

What does this mean? The bore is slightly over-sized. So slight, almost imperceptible. But it makes a massive difference. This barrel will never achieve a sweet spot after a few fouling rounds. The first clean shot will always be the best, and it will only go downhill from there until it is cleaned. Not only this, but the wear on the lands will mean that it has a greatly reduced barrel life, maybe 5 – 20% of what you would expect from your average barrel.

I’m certainly not saying that every ATR is like this. I am saying that this one is. While yours may be great, mine is a shocker. It will be good enough for casual goat hunts, where you might be using between 2 and 10 rounds in a trip. It will probably be good enough for at least a dozen or so trips like this. However, after this, the gun will rapidly start to lose accuracy and usefulness. Not having an action worth re-barrelling, in a few years, this particular rifle will not be worth much at all. However, given the price I paid for it, I feel like I will have achieved sufficient use out of this firearm in that time to justify the expense (and then some).

It’s also been a treat to be able to buy a cheap rifle simply to try out the 7mm-08 calibre. A more thorough review of the ammo used will be coming up soon.

Final thoughts?

If you want a cheap shooter in a new calibre, something to throw on the quad to take around the farm, or an inexpensive bush gun that can take some knocks, the All Terrain Rifle lives up to its name. If you’re under any allusions as to buying cheap and shooting 1/3 MOA groups all day, think again. You may luck out and get a great barrel, you may not.

At the end of the day, the rifle is worth every cent you pay for it, and a little bit more.
 

Rifle stock bedding and finishing: Part 1

Properly bedding and finishing your rifle will not only help it look a million bucks, but will seriously enhance your accuracy as well. In this blog series I’ll be looking at bedding and finishing my Boyds Prairie Hunter stock for my Swedish Mauser.

The stock

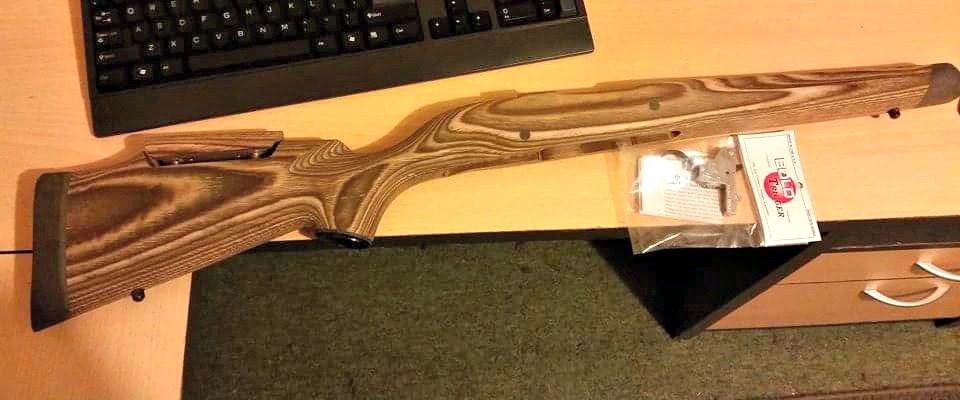
The stock I’ve chosen for my small ring Husqvarna chambered in 6.5×55 is a laminate from Boyds Gunstocks, in their Prairie Hunter shape with a nutmeg finish. The stock has more weight than my current one, absorbing some more recoil, but also balancing well against the almost half a kilo of suppressor on the other end. It also has a more appropriate length of pull, and a nice recoil pad that not only reduces kick, but also gives me that little bit of extra length.

This stock has been provided with a few nice extras, including an adjustable comb and synthetic pistol grip and forend caps.

The Boyds stock and BOLD Trigger made a nice car package to come home to.
The Boyds stock and BOLD Trigger made a nice care package to come home to.

For some stocks, Boyds only provides their products unfinished, which is the case here. This is because some rifles come in so many variations of configuration, that they will necessarily require some fitting by the user. In this case it’s differences in bolt handle that make it a must for users to complete their own stock. Many older Mausers still have their straight bolt handles, but increasingly if you come across an old Swede, the bolt handle will be bent back, or you could even have an M38 bolt – or similar – which comes turned down from the factory.

After finishing this, and any other inletting adjustments needed, you can then apply your choice of protective coating. While Boyds recommends a polyurethane, I really like the hand-rubbed oil look, so that’s what I’ll be trying with this project. My Pro Varmint stock from Boyds does have the polyurethane finish from the factory, and I must admit, it looks good and is very hard-wearing. But hey, since I’m doing this bit myself, I may as well try something different.

The bedding compound

There are various bedding compounds and systems on the market, and you have some serious research and decision-making to do. Some newer factory rifles will come with an aluminium bedding block, while others are pillar-bedded.

Rifles that are bedded after the fact can be done in several ways, depending on your capability, tools, budget (if your smith is doing it), desired application and the needs of your rifle’s action.

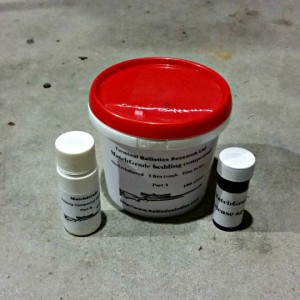
Terminal Ballistics Matchgrade Bedding Compound - release agent, component A and component B.
Terminal Ballistics Matchgrade Bedding Compound – release agent, component A and component B.

Generally people choose between pillar or glass bedding, or both. Then there’s also a full, front or front-and-rear glass bedding job. Pillar bedding uses metal pillars, such as aluminium or stainless steel, to eliminate the risk of compression or crush when tightening the king screws.

The pillars are tubes that are epoxied in the action screw holes, for the screws to go through. This way, when the wood expands and contracts, or is put under pressure between the floor metal and action, the screws can always be done up to the same point, as the metal is pretty much impervious to these stresses.

Glass bedding is the process of using a compound, that is pretty much an epoxy in most cases, that is reinforced in a fibreglass-like way. The compound I prefer is Nathan Foster’s Matchgrade Bedding Compound, which is steel reinforced, and easy to apply.

Check back in for Part 2, where I’ll go over the first steps of the stock prep and bedding process.

Voere 22LR Bolt Action

No bolt, no mag – what to do?

It’s not unusual for an older rifle to make its way through the family tree and lose its bolt or mag along the way – especially .22s which can be used and abused. The other way no mag/bolt guns fall into our hands is through Trademe auctions, usually run by gun stores that have used older rifles for parts, and no longer need the barrelled action and/or stock. So, is it worthwhile trying to restore these firearms to their former glory?

What’s the value?

If it’s a family heirloom, it could have enough sentimental value for you to undertake the project regardless of cost. However, if you’re eyeing up an auction, it’s probably because you want to get a rifle together on the cheap. Depending on your scenario, it may or may not be worth the time, money and effort to restore the firearm.

A word to the wise – thoroughly research your intended purchase before assuming you can find the parts to complete the project. As an example, I wanted to put together a cheap shotgun and bought an SKB semi action and stock, missing the forewood and barrel. I had seen some barrels online, and figured it would be easy enough to put this thing back together.

However, I found out (like an hour after the auction), that the SKB factory had been shut down, and that the barrels that I had found in the States were not ideal. There are some available locally – for over $900. There goes the idea of a cheap shotgun. So I paid $29.50 for something that probably won’t ever be used for anything, except perhaps testing out gun blue or stock reconditioning products.

What’s the cost?

Sometimes you can source the parts, but you have to be inventive to keep the cost down. The thing is, if it was cheap to do, the gun store would have bought the parts and sold a complete rifle for more – so you know it’s not going to be a walk in the park.

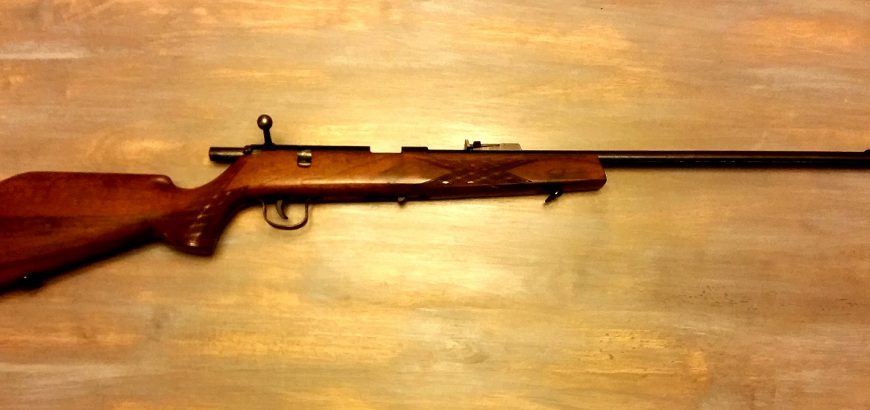
A good example of getting creative is a rifle I got from my father-in-law. It’s a .22LR bolt-action from sometime around the ’70s or ’80s. It was sold by a trading house by the name of Wischo Kg Erlangen in Germany originally, essentially assembled from parts provided by various European manufacturers. The rifle is basically a Voere.

The rifle came into my possession for the princely sum of a nice bottle of wine. It had a decent looking barrel and a crisp two-stage trigger. However, it was missing the rear sight, magazine and bolt. By keeping my eyes open, I managed to spot a Voere parts auction on Trademe.

The auction was for an action and bolt, with about 8 inches of barrel attached. See below video of me firing this weird thing, after fitting it to the stock from the rifle I had acquired.

Included in the “barrelled” action was the rear sight – a stroke of luck. Also in the auction I got a 6mm garden gun without bolt, which is just a wallhanger in my office. Oh well. I’m never even going to try solve that mystery.

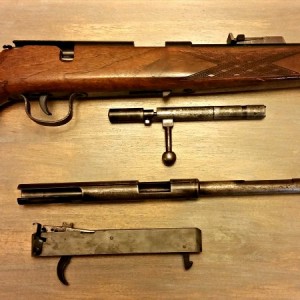
The Wischo rifle sporting the Voere sight, pictured next to the Voere bolt, action/barrel and trigger group.

The issue then became whether the parts I bought on an (educated) whim for $40 would fit my rifle – as technically they were not from the same gun. Well, it turned out I was right with my assumption that the trading house rifle was a Voere in disguise, however the bolt wouldn’t close nicely and the rear sight was obviously different, as it had a larger dovetailed base.

A machinist/engineer friend of mine helped me take a small piece of metal off the action around the bolt, which got it cocking smoothly, and extended the dovetail to take the sight off the parts gun. This cost me a box of Heineken.

All that’s left to buy is a magazine, which I can get from here, or here, for between $100 and $150. So, all up, for the cost of a bottle of wine, a box of beer, $40 for parts and around $150 for a mag, I’ll have a nice wee shooter with a bit of character and a story worth telling. By throwing in some of my own time and effort, I can reblue the rifle and varnish the stock, and it will end up being a really good looking little gun too.

So, again, it can be worth it – but you’ve got have the time, and sometimes know the right people, to make it worthwhile restoring a non-functioning rifle.

4 gun myths that need to stop

Action movies are great. You get to relax and get pumped up at the same time. However, there are certain things that Hollywood, news media and general ignorance get people thinking about guns that just aren’t true. Here are four myths that need to stop, right now.

1. A silencer makes your gun sound like a mouse fart

There are very few “silent” firearms. Those that have been created to be virtually undetectable from about 30 feet (10 metres) away, were mostly clandestine firearms developed in war time, such as the De Lisle carbine and the Welrod pistol.

However, almost every other firearm in existence is still pretty loud with a suppressor on. The aim of a silencer, suppressor or moderator, is to reduce the decibel level and take out the loud “crack” of the round being fired. This helps in several ways.

  • It protects your hearing – especially for hunters.
  • It makes it harder to pinpoint the origin of the sound – keeps the animals confused for a couple seconds longer
  • It keeps the volume down at the public range or when on private land near to neighbours

The suppressor also makes it easier to shoot more accurately, as it reduces the recoil felt by the operator of the firearm, as well as the muzzle climb. This means shooters have less of a tendency to flinch or close their eyes, and can take follow up shots more quickly if an animal has not been taken cleanly.

While incredibly quiet compared to what is was before, this rifle is still loud enough to not be confused with a grandma spitting
While incredibly quiet compared to what is was before it had a silencer, this rifle is still loud enough to not be confused with a grandma spitting

2. Cars are often blown up with bullets

This is one of the great contradictions in movies and video games… Shoot a car enough times and it’s apparently going to blow up. While it’s possible, it’s not very likely. Fuel lines and tanks are very hard to puncture, and are right in the guts of the car. Even if you do manage to spring a leak, you have to continue shooting in that vicinity to try and get sparks from your rounds’ impact to set the fuel alight.

Tied in with this fallacy is the idea that cars provide great cover. No they don’t. Most hunting cartridges could penetrate through a car door or roof and still do a great deal of damage – never mind the shrapnel created in the process. Twenty millimetre rounds from a jet, 7.62×51 armour piercing rounds from a gunship or .50 cal rounds from a ma deuce will rip you and your car to shreds.

3. Guns click and clack whenever you point them at someone

This is one of the most aggravating things to see in a movie – and few are exempt from this awful foul up. Every time a character handles a weapon in any way, it makes a lot clicking, mechanical noises. As if it’s doing something. If I hold a gun, it makes no sound. If I lift it up and point it at something it still makes no sound. If I swing it around in circles and dance around with it – it still makes no sound.

A firearm will make a noise in these situations:

  • It is being loaded or unloaded
  • It is being calibrated or sighted in some way
  • A gunsmith is busy taking it apart
  • Your pulling the trigger and making it go boom
  • A safety or selector is being applied
  • A hammer or slide is being pulled back
  • You drop it on the floor
  • You hit someone/something with it

Other than that, they’re pretty darn quite. If you leave them alone in a safe for a million years, they still won’t make any noise.

4. Guns need to be racked/cocked every few seconds

Directors seem to think that working the slide on a shotgun is punctuation for a tense sentence. For those that don’t know, every time you rack a pump action shotgun, it ejects the round that is chambered – whether it has been fired or not. This means that every time the hero says something cool and makes that “kachook” sound for effect, he’s ejecting a perfectly good round. If he keeps doing that, he’ll have nothing left in his magazine by the time he’s done talking.

Keep racking that bolt and you'll have an empty magazine soon enough.
Keep racking that bolt and you’ll have an empty magazine soon enough.

The same applies to the slide on a pistol, or the charging handle on a semi-automatic rifle. When the SWAT team makes all those clicky sounds as they’re leaving HQ, then again during the pep-talk in the truck, again when they get out of the vehicle, and again when they confront the bad guy, they’re ejecting a bunch of perfectly good rounds (if this were real life). At three rounds per SWAT member in this example, and a team of 10 people, that’s a whole magazine of ammo wasted every call out. Terrible economics.

I could go on, but that’ll just have to be food for another article. What bugs you about firearms in popular media?

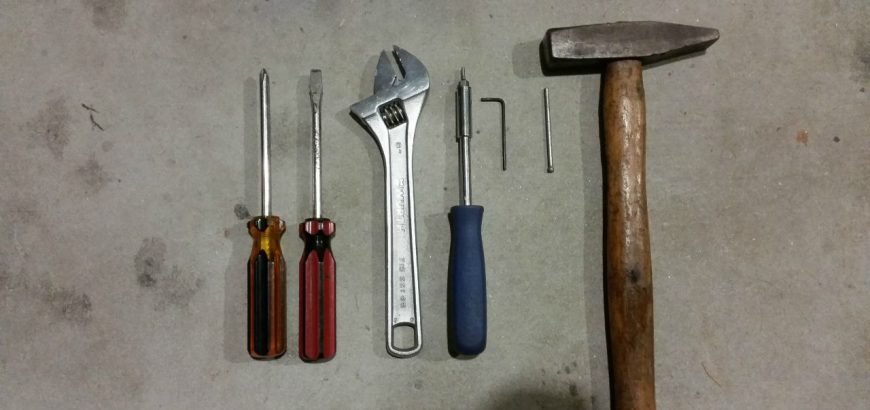
The tools needed for this job are pretty simple and should all be in your tool box already.

Installing an aftermarket triger

Modern rifles with their out-of-the-box accuracy guarantees usually come with adjustable triggers, but if yours didn’t, help is on the way. Whether it’s an old military surplus rifle that you’re modifying or a modern hunter that needs a little bit of work, installing a new trigger is easy and worthwhile.

A stiff trigger pull can be the difference between a bullseye and the 9 ring, or the difference between a clean kill and a long walk through the bush chasing a wounded animal. If you want to see the difference a good trigger can make, one of the best examples you could have would be to try a 10/22 with a match trigger, and then shoot one with the standard trigger. After shooting with a lightened trigger for so long, I thought the safety was on when I tried to pull the standard trigger.

The tools you’ll need

There’s not much to this job really. Most stock triggers are removed by driving out the pin that holds the unit in place. This pin also acts as the fulcrum for the trigger set and reset. To drive this out, you’ll need a hammer and punch – or a filed down nail if you don’t have a punch to hand.

Depending on the trigger unit, you may need a small spanner or wrench to adjust lock nuts, and probably some allen keys or screwdrivers to adjust pull and sear engagement. Depending on your rifle, you’ll probably need a large flat head screwdriver to undo your action screws.

The tools needed for this job are pretty simple and should all be in your tool box already.

The trigger of choice

Of course all of this is moot if you don’t have a trigger to install. There are a few options out there, depending on your breed of rifle. Ruger 10/22s, AR15s and Rem 700s have a multitude of aftermarket bang switches, however if you’re improving an older rifle you may have to do some digging to find the trigger you need.


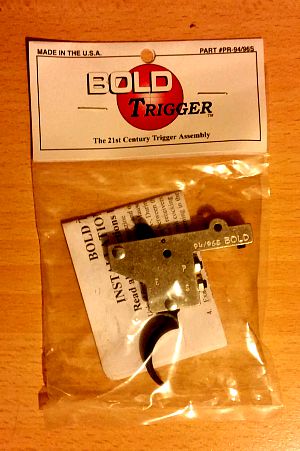
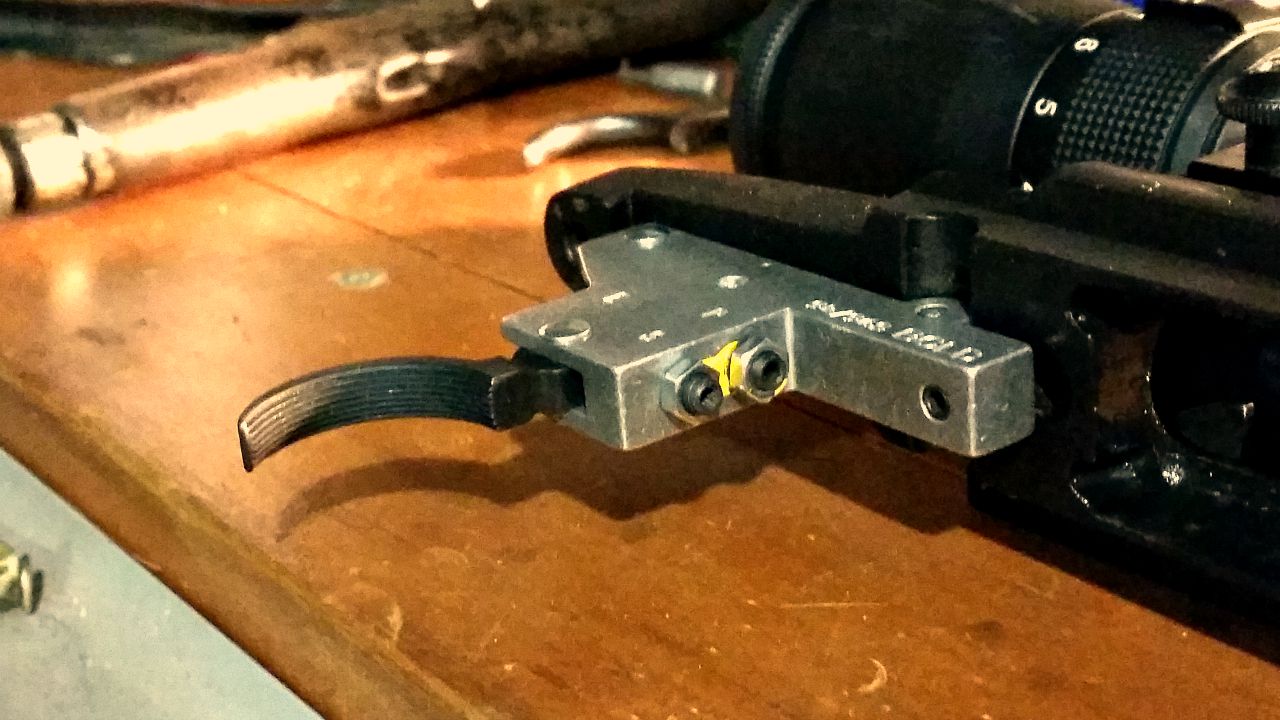
Nice new trigger thanks to Boyds Gunstocks.

My most recent trigger install is a BOLD Trigger from Boyds for my Husqvarna M38. As I’ve mentioned before, I don’t like using a safety – an empty rifle is the best type of safety – so I went for the version without the side safety. However, if you do like to use your safety in addition to safe gun handling practices, the side safety is much more convenient than the toggle on the back of the bolt on the old Swedes.

The 94/96 trigger fits the M38 perfectly. Boyds also stocks triggers for the 98-family Mausers, as well as a Mosin Nagant trigger. Other hardware obtainable from the gun stock manufacturer include trigger guards and floor metal, as well as sling swivel studs and action screws.

Extra inletting

Depending on your trigger, action and stock, there could be some extra in letting to do. Thankfully with the Boyds stock this rifle is destined for, there is ample space for the trigger. However, before I get round to bedding and finishing that stock, I’ll be taking out a bit of material from the current stock to allow the larger trigger unit to fit.

For this job you may want to use a mill. However, hand tools or a dremel will do just fine.

The easy part

The easy part is the install itself. For most triggers, all you’ll need to do is punch out the retaining pin, put the new trigger in the old one’s place, and insert the pin again. That’s almost all there is to it.

With the BOLD Trigger, there’s a grub screw forward of the pin which, when tightened, keeps the unit in place. The mechanism is quite different from the original trigger, so you won’t need the old spring or any of that. If there is any issue with fit (as there can be with the many variations of these beloved milsurp rifles), the instructions that come with your trigger should tell you where you need to add or remove material.

Adjusting the pull and sear engagement

This is where your new trigger comes into its own. It will have its usual factory setting – 3 pounds for the single-stage BOLD Triggers – and an adjustable range. The range on my new trigger is 2-4 pounds, and the sear engagement can be altered too.

On my model, this is done by loosening the locking nuts and adjusting the grub screws with an allen key. In the photo below, you can see I’ve started on this in the photo below, as the factory seal yellow paint has been broken.

The yellow factory seal on the adjustment screws is broken.

I’ve adjusted my trigger to the lightest it will go. This rifle will be a range-only queen, so the heavier pull you’d want on a hunting rifle is not necessary. When adjusting sear engagement, work the bolt rapidly to make sure it won’t fire on closing – too little sear engagement and you could end up with an unsafe rifle.

Once the trigger pull is where you want it – I shouldn’t have to say this, but obviously you’re testing this on an empty chamber or dummy round – it’s time to tighten up the locking nuts. Your particular trigger may have different instructions or mechanisms, so make sure you follow the included install directions.

Of course, the number one concern when modifying a rifle is safety when operating, as well as during the install process. If you’re unsure of how to properly install or set your trigger, your local gunsmith should be able to help you out for a very reasonable fee, as the the work involved is not onerous.

Service rifle shoot at Waiuku

I’ve never had good luck with a shoot at Waiuku. I’ve been to the range twice before and both times been hit torrential rain and gales, making shooting uncomfortable, if not impossible. Well, third time was the charm as I attended the Waiuku service rifle shoot this Saturday past.

Firstly, let me say that Waiuku has great facilities that enable a wide range of shooters to enjoy themselves. It’s also one of those rare clubs where pistol, rifle and shotgun are all welcome. However, I’ll leave a review of the range for another post. For clarity’s sake, this isn’t the same Waiuku range were ASRA does their winter shooting (The Farm).

On to the shoot itself. Well, it’s a 45 round shoot which I was hoping to do with my .303, until I realised that morning that I only had 20 rounds in the safe. With an abundance of 7.62×39, it turned out that the trusty SKS would get a work out this morning.

Service rifle shoot

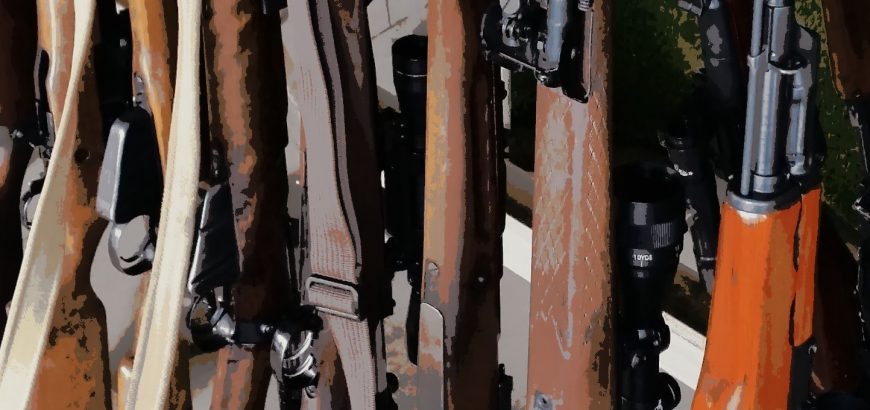
If you’re into your military surplus rifles, going along to a service rifle shoot should definitely be top of your list of things to do. With everything from WWI Lee Enfields, through to Mausers and AK47s and AR15s, every major armed conflict in recent history was represented.

The shoot was run in two details and as previously mentioned, was 45 rounds. This consisted of a Trinity and Action M match and a 10 round sniper shoot.

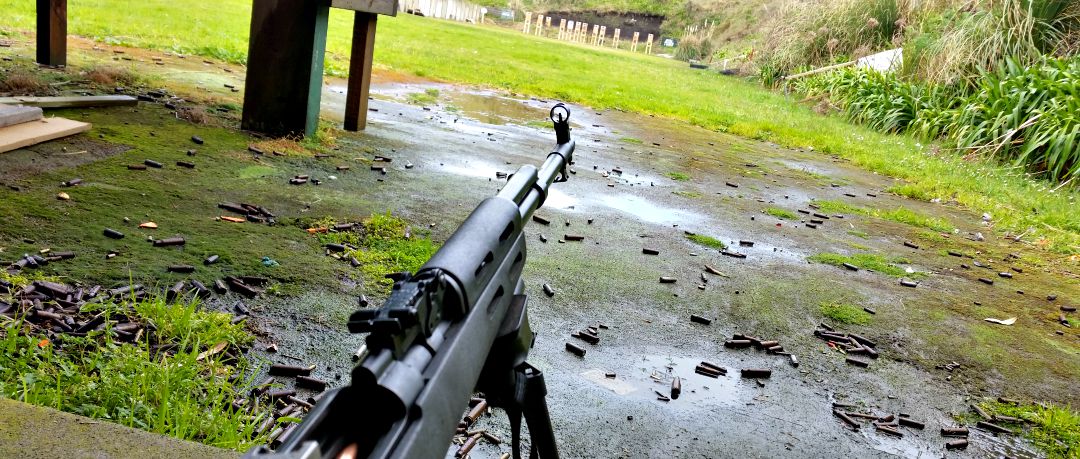
The Soviet weaponry and rusted casings are reminiscent of the Nicholas Cage movie Lord of War.

The trinity shoot is 5 rounds each in the standing, kneeling and prone positions. With no sighters or spotting scopes, you’ve got to know you’re rifle well. The SKS performed well, but was shooting low – which was more me than the rifle, as my wife was shooting too high with the same gun. One thing I may consider doing in the near future is replacing the front sight post with a skinnier one that doesn’t blot out the entire target. Those rifles that were scoped were limited to a magnification of 4x.

After those fifteen rounds, targets were checked, which is when a few of us actually got to see where our rounds were going. For myself, another shooter with an unsighted SKS and another with a new suppressor on his AR, the results were less than stellar.

The next ten rounds allowed us to compensate where we needed to, but the faster pace and movement involved in the Action M shoot means you can’t spend too much time trying to compensate, especially with open sights at 100 metres.

An Action M is usually shot in 60 seconds (at least it was when I last shot one at the Auckland Service Rifle Assn), and consists of 2 rounds prone, 2 rounds standing, one kneeling – reload another 5 round mag or clip – one kneeling, 2 standing and 2 prone. It’s 75 seconds for bolt actions, which is okay if you have a removable box magazine or stripper clips. However, when I shot this last with a Swedish Mauser and no stripper clips, it was certainly challenging. The rules for different types of matches are made by the NZ Service Rifle Association.

In light of the range of rifles and abilities present on the day, and the generally non-competitive nature of the shoot, no strict timing was done, although everyone went as quickly as they could.

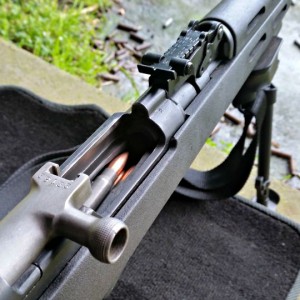
SKS on bipod
The sniper shoot allowed for rests or bi-pods. Handy hint; your car’s floor carpeting can be used if you forget your shooting mat.

The last ten rounds was a sniper shoot which allowed shooting aids, such as rests, bi-pods and spotting scopes – this is where many people were able to turn the tables – despite the smaller targets. Having someone spotting for you is also very helpful when you’re on iron sights.

Although I didn’t place highly, I did enjoy the day and seeing all the old relics shooting (and their rifles too). About a third of the shooters were from HSSRC, so there were some friendly faces, and a few us enjoyed shooting some silhouettes with the rimfires on range 2 afterwards. All-in-all, for $20 and the cost of ammo, a good day was had all round.

Finishing the day off with some silhouettes at 25, 50, 75 and 100 metres was good fun.