The process of annealing brass has interested me from very early on in my reloading journey. There seemed to be some mystique around it, and only the most hardcore of reloaders really did it. I must confess that I was clearly never hardcore enough and am only now, many years on, beginning to anneal myself. For this reason I thought it would be a good opportunity for me to write an article right from the start of my annealing journey so that those who are interested can learn with me as I go.
Why anneal brass?
To start with, for those who have no idea what I’m talking about, in layman’s terms brass is a soft metal, each time we work a brass case (that may be sizing it, expansion as it is fired, or contraction as it cools and is ejected) the brass becomes more and more “work hardened”. Without trying to oversimplify it too much annealing is the process of heating the brass case neck to a very specific temperature in order to “soften it” back to its natural state.
There are a few benefits of this, firstly it means we can try and achieve a more consistent neck tension, by ensuring we have a consistent start point between reloads. This in turn affects pressures and ultimately potentially affects accuracy. It also extends the life of the case due to the fact that as cases become more and more work hardened they eventually become brittle and split.
It is important to note here that we only want to anneal the case neck and shoulder, we do not want to be softening the case body or base – doing so could be dangerous.
How is brass annealed?
There are a couple of main ways brass is annealed by reloaders, One of the most common ways is by using a temperature sensitive product which is painted on the inside of the case neck, the case neck is the rotated through a flame (most commonly a gas blowtorch) or cases are partially submerged in a water bath leaving the necks exposed and blowtorched, until the temperature sensitive paint shows the case has reached optimum temperature. There are a few different methods and machines available that follow this basic process which for many reloaders works OK, or at least they believe it to. But there are a number of variables with this process to consider. Firstly ambient temperature and gas levels will both affect the temperature of the flame. Distance from the flame, angle of flame, time spent in the flame, case calibre, brass thickness, brass type and brand will all have an impact. This many variables, combined with having to use an open flame blowtorch in the house are really what prevented me from getting into annealing sooner.
Then a couple of years ago I came across a product “Annealing Made Perfect”, which I didn’t realise at the time was made in New Zealand. What the guys at AMP were doing seemed to be quite different to the above process and while I wasn’t an early adopter I started keeping more and more of an eye on the reviews and coverage of the guys at “AMP” while I continued to expand my knowledge of annealing and reloading in general.
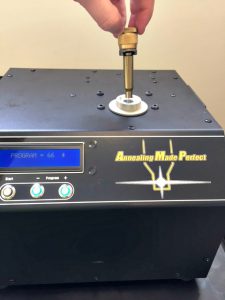
The process that the AMP machine uses differs in that it uses a magnetic field to pass the brass through in order to create heat, because this magnetic field is electronically controlled it gives the potential for far greater temperature and time control as well as greater consistency and repeatability than the common method of using a gas flame. This method has allowed the guys at AMP to test many combinations of calibre, brass type, brand, thickness, etc., to create an extensive database and various programs within their machine for each type of brass. You are not reliant on using temperature sensitive paint and adjusting everything to get it just right, you now have the ability of selecting the right program and pushing the start button.
Another really great service that the guys at AMP offer, and, in fact, recommend, is you send them samples of your own brass and they will test it in their laboratory to identify its unique properties and they will let you know the perfect settings. This service is completely free, and is intended to get you, the customer, the best achievable result. This type of service to me really signals the values of the company and their intent to work with the reloading community rather than just selling them a product.
They have also included a USB port on the side of the machine, and computer link cable in an effort to future proof the machine, in the event of any updates AMP will provide these to be downloaded onto the machine, ensuring your unit is not going to be redundant in a year’s time.
Getting started with the AMP machine
I have recently been lucky enough to get my grubby little hands on an AMP machine to do some testing with, while as said above I haven’t had any experience with the blowtorch methods of annealing and therefore can’t compare the two, I am able to compare annealed vs un-annealed loads.
The first thing I noticed when I opened the box was the thought that has gone into it all, the machine was very well packed, as were the accessories. The user manual was incredibly simple, even for those of us who never read user manuals (Lots of step by step pictures). Realistically, it is so simple that it could even be compressed into one page.
Setting up the machine took all of 2 minutes, literally to take it out of the box, screw in the little rubber feet, plug in the power cord, and you’re ready to start annealing.
A quick check on the Annealing Made Perfect website settings section, selecting my calibre and brass brand from the dropdown list, and I was told what pilot number, and setting number to use.
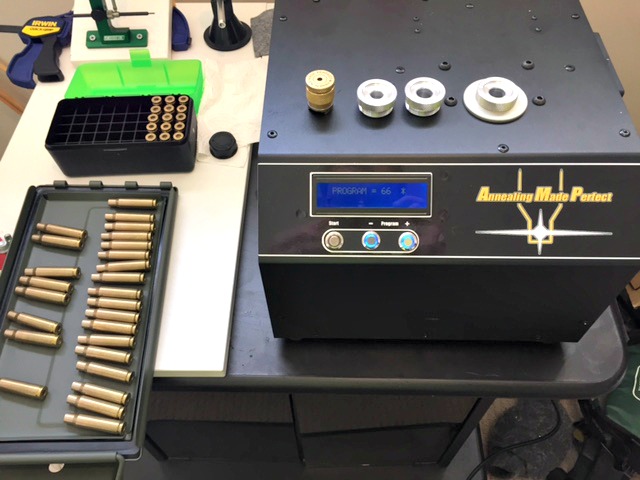
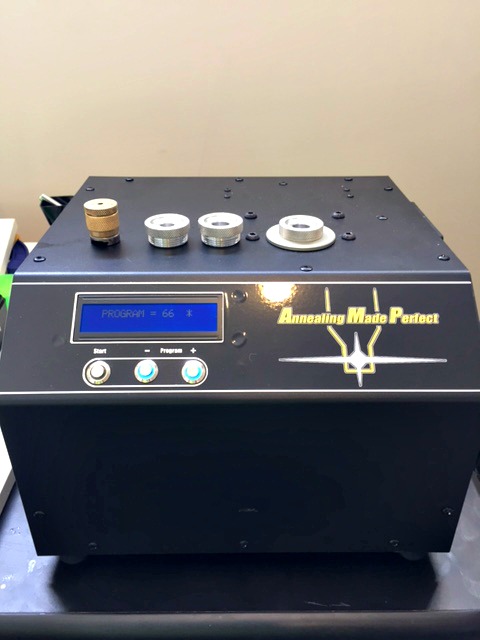
The Pilots are semi calibre specific (many calibres may use the same pilot i.e .243/7mm-o8/308 use the same pilot, but it will depend on what calibres you load as to what pilots you will need), and they simply screw into the top of the machine to hold the brass at the optimum height.
The machine has 3 buttons on the front, a “+” button, a “–“ button and a “start” button. Simply press the “+” or “-“ button until the LCD screen shows the correct setting for your brass, place a case into your shell holder (the shell holder is used to handle the hot brass), drop the brass into the hole on the top of the machine and press the start button.
The start button will glow red for a short time (depending on brass and setting this time will vary, but likely to be around 3-4 seconds), and you’re done, pull the brass out using the shell holder being careful not to burn yourself on the extremely hot case and drop it into a metal tray or container.
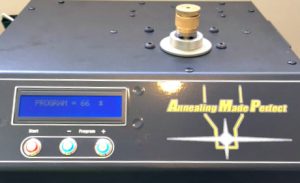
It really couldn’t be more simple and the part I like the most about this machine is it repeatability. With other methods I have seen, people tend to set up their machines for a single calibre. They were often reluctant to change, as doing so would mean a lot of setup to try and recreate the same results next time. It also meant people would do big batch runs of brass as the setup involved and lack of repeatability meant that small runs became an annoyance. With the AMP machine you could literally anneal one piece of brass, then a week later anneal another and the results would be the same. This seemed like a definite benefit to me as it allows me to anneal between each reload, and not have to save large number of brass up each time to get very consistent results.
Are there any downsides?
I will highlight that the two potential issues that some people may find with this machine-
The first is that it anneals one piece of brass at a time, and unlike some other systems which use an automated hopper type setup you have to manually insert and remove each piece of brass. Personally this isn’t a problem for me as I am annealing my brass after each shoot, so I am only doing 30ish pieces at a time. This is taking me less than 10 minutes in front of the TV to do and personally the benefits of this system over others outweigh this slight negative. But for those people who want to stockpile their brass and anneal it in a large batch AMP are currently working on a robotic system and case feeder to insert the brass and remove it, so you can set it and do something else, The system is not currently available, but there are videos on their Facebook page showing progress so far and I can’t imagine it will be too long until we see these out for delivery. The new robotic unit will fit existing AMP Machines.
The other thing I have seen people comment on is the “Thermal Cut Out”. Again for my application I don’t see any real problem here but I know that it comes up a little from time to time, so I thought I should address it. The machine is naturally going to get hot – its purpose is to produce heat after all! AMP have done a great job of addressing this and the machine is built with a number of internal fans (these fans are very quiet and for the most part do the job, with the outside of the machine remaining cool to the touch).
AMP have also built into the software a thermal cut out which monitors the internal temperature of the machine and if it reaches high levels it will place the unit into a cooldown mode where it will essentially stop annealing brass and run the fans until the temperature is reduced. Depending on the program / cartridge you are running AMP indicate this may be between 50-200 cases. The most I have put through nonstop in one hit was around a hundred 6.5 Creedmoor cases running program 53 and I did not reach this cut out, in fact the unit still felt very cool to the touch and the air being blown from the fans also felt cool. Once again I now anneal my brass after each shoot, so after my initial annealing of my existing brass stockpiles I won’t be doing any overly large batch runs so this isn’t a problem for me at all, in fact its quite comforting to know that the machine has this protection feature built in.
Testing the annealed cases
Now I guess you are all wondering, does it work? Well again I’m not a scientist by any means, so I urge you to do your own research in general, but I will say that I recently did a test comparing both annealed (through the AMP machine) and un-annealed loads in a newly broken in 308 build. The loads were essentially the same however there were TWO variables that potentially both impacted the test.
- One set of loads was Annealed and one was Not Annealed.
- The set that was Annealed were the 10 cases I had with most uniform neck wall thickness, and the set that was not annealed was the next most uniform 10 cases.
Both sets were selected from brass which had around 10 firings through them and were the 20 most uniform (neck wall thickness) cases of 150 measured.
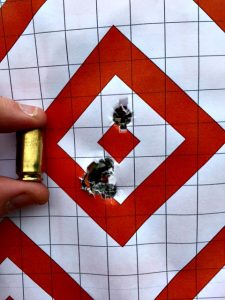
Measuring both sets of loads through a Magnetospeed Chronograph, the Standard Deviation of the 10 loads which were Not Annealed was 16.4. The Standard Deviation of the Annealed set was 9.4. The groupings of both sets at 100m was very good (one ragged hole, excluding a cold bore shot with each set) and I could not in fairness distinguish between sets, except for a single flyer on the Not Annealed set which while I don’t believe it was the result of shooter error, I can’t rule that out.
How important the Standard Deviation reduction is depends on you and what you are doing with the load. Both sets (Annealed an Non Annealed) would have happily taken down game out a long way, but for ringing steel or punching paper or shooting out at distance the reduction in SD (and ultimately grouping size/vertical dispersion) could well be worth it.
Overall, this is a great piece of kit. I plan to continue to update this article as I go and the machine is tested with as many calibres, brands and environments as I can. In the meantime, in New Zealand machines can be purchased from Serious Shooters in Auckland, and international purchasers can see their local stockists on the AMP website.
[Editor’s note: If you enjoyed reading this article from Chris (or any of his others), you may like to follow Chris on Facebook]
