Shooting a sporterised Husky M38 at Deerstalkers Auckland range.

Get started shooting: How to get an A Category licence

While you might go to the range or shoot a .22 on someone’s private land – under immediate supervision – to get your first taste of shooting, if you’re serious about owning or shooting firearms, the next step is getting your A Category licence. Here’s a quick guide on the process, what to expect and what an A Cat licence entitles you to do.

What firearms can I own with an A Cat licence?

There are no restrictions on the amount of A Cat firearms you can own. They’re not registered against your name, and you can go buy one from the store straight away, assuming you have your licence and all the associated safety measures in place.

Firearms that are considered A Cat compliant are basically rifles or shotguns that are manually loaded. This means pump actions, lever actions, bolt actions, etc. You can have any features you want on these guns, as long as the overall length is more than 762 mm (30 inches). Anything shorter than that is considered a pistol, and will require a B-endorsement on your licence – which is a whole other story.

This means you can shorten your barrel, or have it in a bullpup configuration, whatever. There is no real minimum barrel length, as long as the overall length is over 762 mm. Which makes sense, as the issue with handguns is conceal-ability.

You can also own a semi-automatic sporting rifle or shotgun, but there are restrictions on these to make sure they don’t fall in to the MSSA (Military Style Semi-Automatic) category, which is governed by an E-endorsement on your licence.

In order to keep your semi-automatic firearm in A-Cat compliant condition, you’ll need to make sure:

  • The magazine holds 7 rounds or less of centrefire or 15 rounds or less of rimfire ammo
  • The mag also can’t “appear” to hold more than the above
  • The butt isn’t collapsible, telescoping or folding
  • There is no bayonet lug present
  • There is no flash suppressor
  • It doesn’t have a free-standing “military style” pistol grip

The pistol grip is the latest addition to the MSSA restrictions, and has been met with a cold-shoulder from the shooting community. Essentially it made a whole lot of unregulated A-Cat firearms illegal and meant people had to modify their rifles or dispose of them. New rifles or shotguns are now usually provided with thumbhole or Dragunov-style stocks.
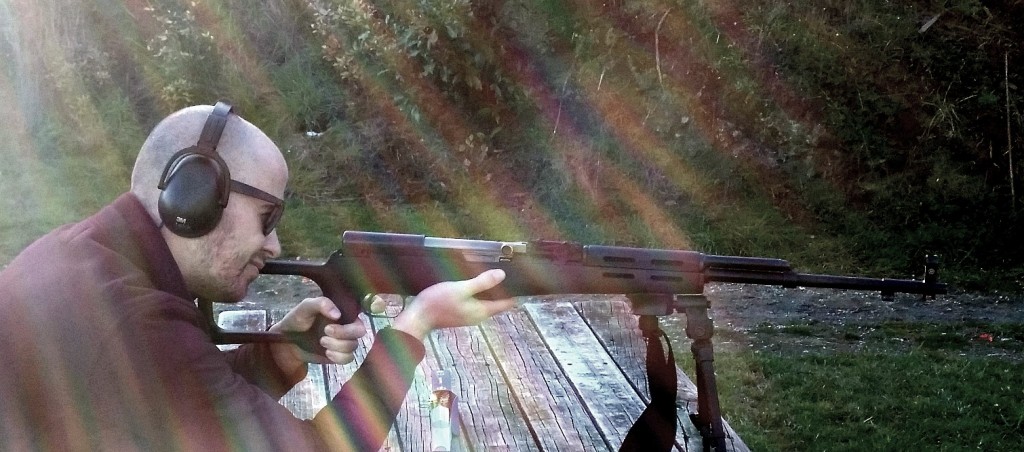
SKS with Dragunov stock
The SKS my friend Nick is shooting here would be illegal with a free-floating pistol grip instead of the Dragunov-style stock

What do I need to do get my firearms licence?

Well, there’s the obvious stuff first. For those with criminal records or histories of domestic or other violence, a licence to hold a potentially lethal weapon isn’t exactly on the cards. The police firearms officer will do a background check on you, and they’ll also ask to interview two referees. If you’re married or otherwise attached, one of those referees will have to be your spouse, while the other must be a non-related person you’ve known for a couple years or more. Those referees are basically to attest to the fact that you’re a fit and proper person to own a firearms.

However, before you’ve even done this step, you’ll have to sit a test that shows you have a solid understanding of how to safely store and use hunting or sporting weapons. Start your study by asking your local police station for a copy of the Arms Code or get it online. Once you have a thorough understanding of what is involved in the responsible and safe ownership and operation of firearms, you can apply to sit the test.

The test will be held at your local police station, and is facilitated by volunteers who have a wealth of practical firearms experience. They’ll take you through the main points of gun safety, including how to carry a gun in the field and ensuring the firearm is made safe before and after use. There’s a short video and practical demonstrations of how to hold, load and unload a rifle or shotgun.

After all this there is a multi-choice test, for which you have to get almost all of the answers right in order to pass. If you don’t get it right the first time, you’ll have to study up some more and attend another information evening before you can sit the test again.

Once you have your proof of having passed the test, you can go to the local post shop and pay for your licence. The cost is $126.50. You’ll need to get proof of payment along with passport photos to the police. At this point you’ll arrange for your safety check to be done at home. Talk to the police or your local arms officer about what the safety standards are.

For an A Category licence, a good standard is to have a lockable safe with separate ammo compartment (bolts and ammo must be stored separately so as to make the firearm inoperable). These can be picked up for a few hundred bucks on Trademe or other websites, and are usually supplied with expanding bolts and pre-drilled holes so you can secure the safe to either a concrete floor, or the walls and floor if you’re securing to wood (say, inside a closet). The firearms officer will check to see if the safe is actually securely fastened – it’s no good if a potential thief could just lift it up and take the entire safe away, guns and all.

Once you’ve sat your test, paid for your licence and supplied photos, had your referees interviewed and safety checked, it’s just a matter of time before your licence arrives in the post. It could take a few weeks or more, depending on how busy they are – so don’t freak out! Also remember that your licence is valid for ten years and will have to be renewed before it expires if you’re to keep your firearms. Which reminds me…
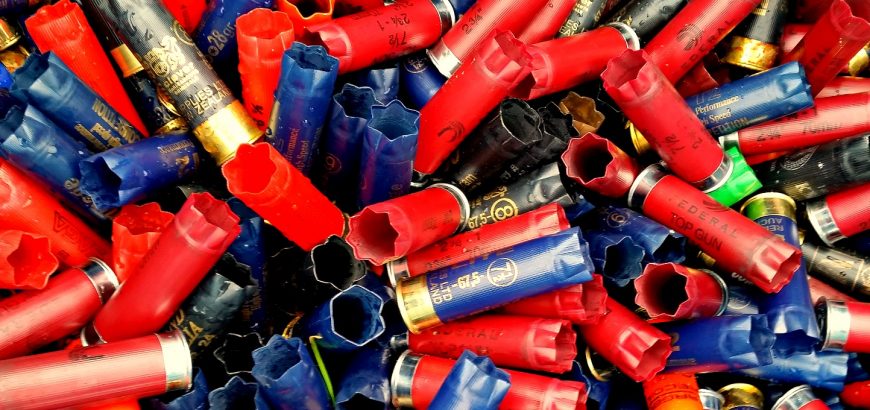
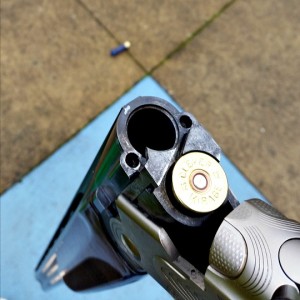
Spent shotgun shells at Waitemata Clay Target Club.

Where to shoot in NZ: Waitemata Clay Target Club

As somebody who spends a fair bit of time behind a scoped rifle, let me say, aiming “without looking at the gun” is a real challenge. As my wife and I set up to try our hand at down the line (DTL) trap shooting, Andy – our supervisor/guide/instructor through this process – informed us that the way to successfully shoot clays moving at 45 kph is to not aim the gun. Yup, don’t aim he said, or you’ll stop moving in line with the target.

The Waitemata Clay Target Club

Firstly, let me put this out there, as far as gun clubs in New Zealand go, this is a sleek organisation. They have a nice website, excellent facilities and a club room that would make you think of a golf course, rather than a shooting club.

There are a few different positions to shoot from, a patterning board and even an Olympic trap facility. What’s the difference with the Olympic version of the sport? More than triple the speed – 140 kph, and a greater variety of directions the clay pigeon could shoot off into.

The impressive Olympic throwers of the Waitemata Clay Target Club.

Back to the club. It’s about 25 or 30 minutes from the centre of Auckland, and took me around three-quarters of an hour from East Auckland. It’s conveniently close to the Hallertau Brewery, if you wanna grab a bite and a beer (after you shoot). If you’re familiar with the NZDA Auckland branch, it’s just round the corner from there.

There’s ample parking and you don’t need to trek through bush or anything. It’s a very accessible club all round.

The Beretta under and over shotguns were a treat to shoot.

Shooting DTL Trap

As I mentioned before, shotgun shooting apparently just doesn’t come naturally to me. Although, I’ve got to admit, it sure was fun. The five positions you shoot from all have a mic that picks up your command to “pull”, releasing a clay. Aiming at the top of the trap house or just above, you try and move your head (and the shotgun which is welded to your cheek) along with the clay as it appears – not aiming, but simply following the target. Pull the trigger when you’re ready, and that’s all she wrote.

The mic can be set off by the loud ‘clack’ of pump or semi-auto shotgun, or people nattering away about how their last shot went. Because there are a limited number of clays available to shoot, this can be a bit frustrating if some are wasted by chatter and loud actions.

There are five different shooting positions with a shooter on each. After a shooter takes their shot, they break open their gun (or open the action on semis or pumps), and the next person loads, ready to call for their clay. Usually after five rounds, the shooters rotate to the next position, although we didn’t go through all the rotations on our first go.

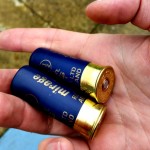
The Clever Mirage trap loads were light and easy on the shoulder.

The guns provided to us were very nice looking Beretta under and overs, and they shot like a dream. There were no malfunctions of any kind, and they were smooth and easy to operate. The Clever Mirage trap loads were light and didn’t leave us feeling bruised and battered at the end of the day.

The overall cost was not too much, considering all that is provided. For $52.50 each we got range fees, gun hire, a box of ammo each (25 rounds), 25 clay targets and some ear plugs (we forgot our hearing protection at home – although even with ear plugs, it was absolutely fine). Considering it’s a good afternoon’s entertainment, it’s well worth it – especially if you haven’t tried it before. And, speaking to Andy, it’s apparently much cheaper to shoot once you become a member. However, there is the high cost of trap or skeet shotguns to consider. Although, for the beginner, a cheap semi-auto will get you going.

For those that are interested in a casual shoot, check out the Waitemata Clay Target Club range calendar and call ahead if the weather is foul. The club rooms are easy to find and there’s a nice big sign on the road – you’ll find it easy enough.

At the end of the day, if you’re into your shotguns – this is something you should definitely try. For those that haven’t ventured into other shooting sports, it’s worth giving it a go. You never know, like my wife you may have a natural ability for reactive shooting.

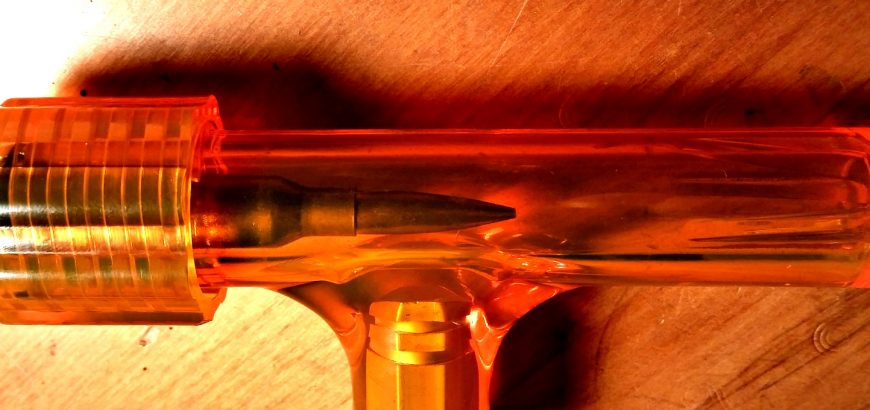
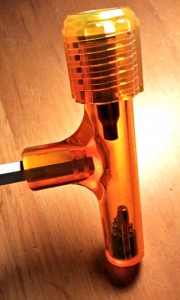
Lyman bullet puller with 6.5x55 round in large collet.

Product review: Lyman Magnum Inertia Bullet Puller

It’s an unfortunate fact of life for reloaders – at some point, you’ll need to pull bullets and start again. For me,this happened recently when I made a mistake with my mechanical scale while reloading for 6.5×55. I was tossing up between a press mounted bullet pulling die and a ‘hammer type’ inertia puller, when my mind was made up for me.

As often happens when you’re at your local gun store, you see something that you’ve been meaning to get for ages. For me, it was a bullet puller (as well as some dies, a cleaning rod, solvent, shell holders and more, but hey…). My initial leaning towards an inertia bullet puller was (typically) the cost saving. Most hammers are able to handle a huge variety of calibres, while a bullet-pulling die requires a collet for each calibre you’re pulling.

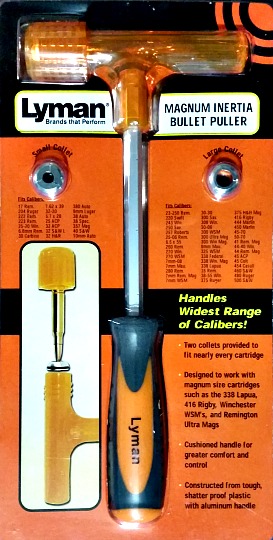
When I saw the Lyman Magnum Inertia Bullet Puller under the glass counter, the decision was made. Most of the impact-type pullers I’d seen did not cater for larger rounds like .416 Rigby or .338 Lapua Magnum, or even Winchester WSMs or Remington Ultra Mags. According to the packaging – the Lyman does! While I didn’t need to pull a big game magnum round any time soon, I liked the idea that I could if I really wanted to.

Putting it to the test

The Lyman Magnum Inertia Bullet Puller has all the instructions you need on the packaging.

Well, how did it work? Simply and easily. I did make a simple mistake, which I’d be remiss not to share. I didn’t want to mark the plastic of my brand-new-hammer-looking-thing, so I started rapping it on a piece of timber. No dice. Then on a laminate bench. Damn… That bench top now has a massive bulge in it from being hammered into oblivion with no bullet-pulling success.

Resigned to the fact that I had made a dud purchase, I gave it a few quick raps on the concrete floor, and lo-and-behold – success!

The long and short of it

Using the Lyman bullet puller is extremely easy. It covers just about every calibre you can think of and is a cinch to use. You simply select one of the two collets, depending on the calibre you are dealing with. You slip the loaded round into the collet so the rounded edge is facing the primer end. It will sit nicely in the extractor groove.

The next step is to put the loaded round in the body of the hammer, while the collet keeps it suspended. Screw in the retaining cap and give it a few good whacks on some concrete or something to separate your ammunition into powder, projectile and primed case. I found the end cap could come a bit loose, which may require tightening after a couple blows – not a big deal really.

The instructions are on the packaging, including the size of collet you want for various calibres, so the whole process really is super easy.

I don’t like pouring powder back into the container once it’s been loaded for a while. No particular reason, I just don’t. I prefer to know the powder I’m using is 100% what it’s supposed to be when I’m loading fresh rounds. So, for that reason, powder from pulled rounds gets put straight into the hopper and used for plinking ammo. Or, if I have another jar of powder that is almost empty, I’ll put it in there and use fresh powder from a new bottle for my target loads.

Pulled SMK bullet and PPU brass.
My freshly pulled SMK ready for reloading.

The bullet itself is obviously reusable. The primed brass is too – unless, you are taking your round apart because of an issue with the primer. Now, do not try and decap an unfired primer. I shouldn’t need to explain this, but it’s basically crushing the primer from the anvil end – which will make it go bang. Not fun for your decapping pin. Not fun for you. The best way to get a primer out so you can reuse the brass is to fire the round in your rifle. You can simply load the primed case into your gun and pull the trigger (outdoors, with the muzzle pointed a safe direction – i.e. the same way you would treat it if it were a normal round). Now you can decap.

What you shouldn’t do with an inertia bullet puller

Pulled bullet with powder and case.
A pulled bullet resting in powder.

Lyman recommends on the packaging to not use the product without safety glasses. There’s not much danger in it, but you can guarantee that if anything is ever going to go wrong, it will be the one time you’re not wearing protective gear. So, as with your regular reloading (because you’re working with explosive components), chuck on some safety glasses.

You should never try and pull bullets from rimfire ammunition. It will go bang. You will regret it.

You shouldn’t expect perfect bullets if you’re using projectiles with plastic tips. Kerry from thebloke.co.nz tells how his Nosler Ballistic Tips were damaged when using this exact same puller. Bear in mind, when a bullet is moving at supersonic speeds, there is a cushion of air in front of the projectile, which means slight deformities aren’t the end of the world. This is why hollow points aren’t less accurate than FMJs. They are often more accurate because of the weight distribution.

The collet sits in the extractor groove, holding the round in place.

That’s the theory behind Sierra Matchkings anyway, and it seems to be working well so far. So, while I wound’t mind if my lead- or plastic-tipped rounds got a bit of a crumple in them, I wouldn’t use them for target loads. Repeatability leads to accuracy. I would use rounds like this for hunting at normal ranges or general plinking or practice – they’ll still do their job and expand on game.

If you are concerned about the condition of the your match rounds or long-distance projectiles, a press-mounted bullet puller might be what you’re after. However, I have used the Lyman puller for SMKs, and it’s worked out just fine, with no damage to the projectile tip that I can see.

Reloaded rounds in MTM 50 rounds ammo container.

The importance of a good reloading bench

Reloading is a great way to extend your enjoyment of shooting in New Zealand. In fact, for many it becomes a hobby in its own right. There are only a few items you need to start reloading, but there are many added extras that can enhance accuracy, ease of reloading, confidence and even the appearance of your completed rounds.

It may not even cross your mind, but a solid reloading bench is one of the most essential tools for your first foray to into producing your own ammunition.

Solid

First off – is your bench of solid construction? When reloading, you are reshaping the brass – especially with full length sizing dies, as opposed to neck-sizing dies. This can require a fair bit of force, and if your table is flimsy, it may bend a bit before you fully cam over and get the full effect of your sizing die. This can mean the shoulder won’t be bumped back quite enough, or the base of the round (before the extractor groove) will be slightly too large. This isn’t the end of the world, but it can make it hard to chamber your rounds, and can introduce inconsistency into your reloaded rounds. Inconsistency is the enemy of accuracy.

Level

Is your bench level? A solid chunk of wood supported on cinder blocks may be fine in terms of taking the pressure exerted in sizing a round, but if it’s not level, your powder scale could be off.

This is less of a problem with electronic scales, but as I covered in a previous article, it can affect mechanical scales such as the Lee Safety Powder Scale.

Height, light and storage

This is more about comfort and ease of operation than anything else, but it’s not hard to realise that good conditions lead to a quality product. If you’re sitting in the same spot for hours on end, you’re much more likely to produce something of value if your back isn’t aching and you can actually see what you’re doing.

Storage is a must, and investing in a storage solution like a bin rack is not a bad idea. Keeping your brass separated by number of firings is easier this way. You can also organise your products by calibre or even the specific rifle they’re for. Lockable storage is a good idea for powder and other dangerous components. Don’t forget to store powder, primers and completed rounds separately and in their appropriate and labelled containers.

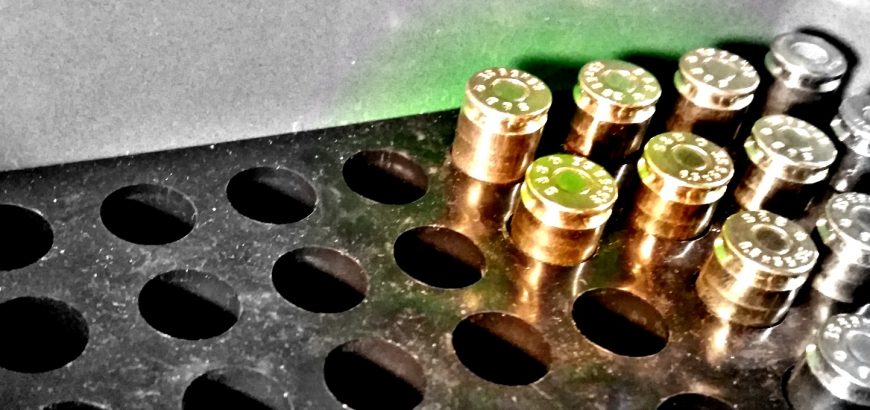
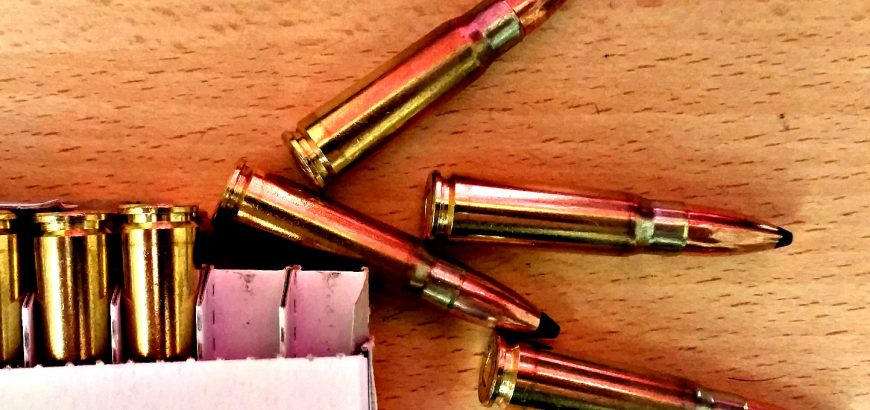
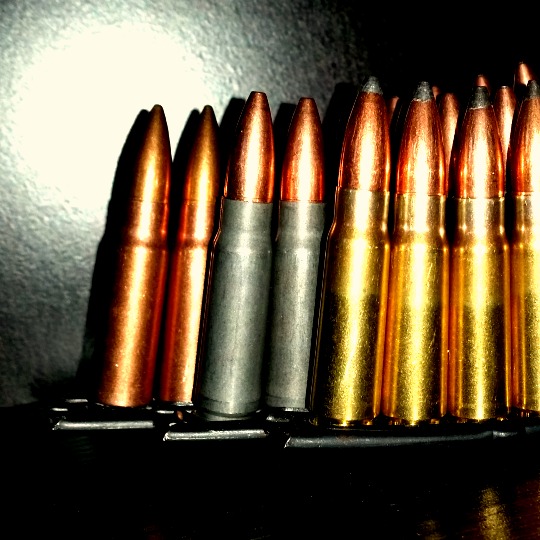
Brand new 7.62x39 PPU ammunition

Reloading for SKS or AK – is it worth it?

The SKS is one of very few semi-automatic centrefire rifles that allow for cheap and cheerful shooting in New Zealand. The rifles themselves are amongst the cheapest autoloaders around and the steel-cased ammo is a bargain compared to other centrefire rounds, as detailed in a previous post on the venerable 7.62×39.

However, what about reloading for the SKS or an AK? is it worth it? Every armchair shooter in the world will want to quickly chime in on why it’s simply not worthwhile reloading ammo for these rugged rifles. Here’s my take on it.

You will lose some brass

There is no question about it. With almost any semi-auto rifle, you should be prepared to lose a few casings. Even bolt action rifles in military service rifle matches will sacrifice some brass here or there for the sake of speed. But the SKS really loves throwing brass away. The video below perfectly illustrates what I mean.

However, even with the brass being flung in every possible direction known to man, you will still get a healthy return if you have patience (and the grass isn’t too long). The majority of your shells will land between 1 and 3 O’Clock, within a few metres of your shooting position – but not all of them. On my last trip to the range I shot some brass-cased PPU with some friends, and we recovered 55 out of 60 ejected cases. That’s over 90 per cent of your brass coming back to you – not bad.

The other option is to have a brass deflector or catcher attached, but these render your rear sights useless. Therefore, this only really becomes possible with a scoped SKS, which, as we all know, is not the most worthwhile pursuit in the world.

You will damage some brass

Again, this is a given. Autoloaders are hard on brass and the SKS is no exception. There are extractor marks from rough ejection, and if you’re shooting over a concrete floor, under a roof or near any kind of structure, chances are your brass will hit it and could possibly get dented.

At the end of the day, a small level of attrition is to be expected – it’s the cost of doing business with the SKS or an AK.

It is not a super-accurate rifle

Look, handloading is not going to turn your 1 – 3 MOA SKS into a 1/2 MOA super rifle. It just won’t. Usually handloads can be made to be incredibly accurate, and this works because you develop ammunition that is suited to your rifle’s chamber. The SKS is an intermediate-cartridge fed battle-rifle with very loose tolerances, which aid its reliability. Remember, cheap, reliable, accurate – you only get to choose two.

If you’re reloading the 7.62×39 for a CZ bolt action or a  modern semi-auto, then you’re talking about a whole different ball game.

The economy isn’t quite there

The price of 7.62×39 ammo means it’s not really worthwhile buying brass-cased stuff, plus your other components and dies. It will end up costing about the same in the long run, and your accuracy won’t be much better.

Generally speaking you can pick up steel-cased ammo at one of the major gun stores for around $16 or $17 per 20 rounds. If you buy in bulk, you can save a lot more too. Realistically, if you’re cost conscious and like doing a lot of shooting, buying in bulk would be a better solution than reloading. Plus, who doesn’t like opening the safe and seeing a wall of ammunition?

M43 ammo on stripper clips
What to feed a hungry SKS?

But I’d still do it

However, I’d still do it. And the reason is, because I enjoy shooting and I enjoy reloading. Brass cased ammo costs $8 more per packet (if you know where to shop – $15 if you don’t). When thinking about the cost of the brass, I account for the fact that I get the value of one factory pack of ammunition regardless. In other words, the brass is costing me $8 per 20, even though the pack of ammo costs $25, because I shot $17 worth of factory stuff. I say $17 worth of shooting, because that’s what a box of Tula SPs would set you back.

So, I can expect to retain about 18 cases, and I might get 5 or so reloads out of them. Throw in the cost of primers and powder (which I use for other loads anyway), and projectiles. Now, this lot I’m going to reload with Hornady’s Z-Max. In 7.62×39 the Z-Max is a SST projectile, with a different coloured tip according to Nathan Foster – whose research I would definitely rely on.

Why the Z-Max? Firstly, let’s be honest, a green-tipped bullet kind of looks cool. But also, as Nathan’s research suggests, the SST or Z-Max round is probably one of the better choices of bullet for what the SKS is designed to do – wound effectively within a limited range. I could save a few cents per round by going for a soft point projectile from another manufacturer, but I’m keen to give the Hornady bullets a whirl.

As for the cost of the dies – well, hopefully that gets absorbed over time. If not – I’ll just have to shoot some more until they’ve paid for themselves.

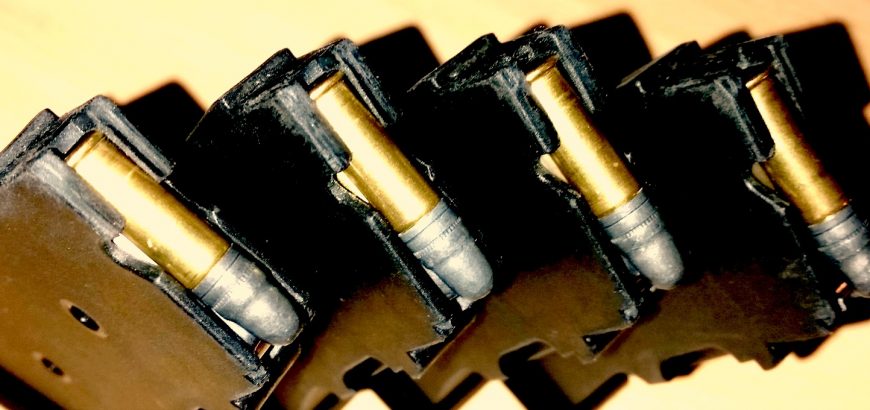
Four loaded CZ 452 magazines.

Disassembly of CZ 452 Magazines

Any smallbore range across New Zealand will have a few CZ 452 magazines floating around. Whether they’re attached to a Brno Model 2 or Norinco JW-15, these magazines hold up to thousands and thousands of rounds being put through them. Occasionally – you might even think about cleaning them.

How often to clean your CZ 452 magazine

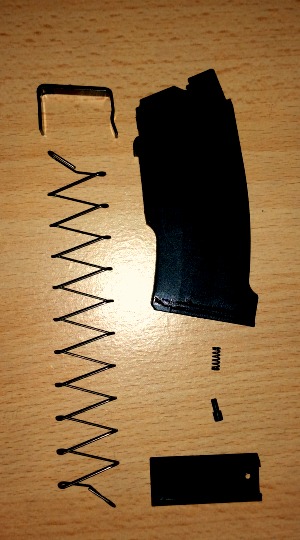
Disassembled CZ 452 Magazine
The spring-loaded button needs to be handled with care.

Simply put, not that often. There’s lots of discussion around how often you should clean a rimfire rifle. Some like to clean after every trip to the range, but I personally prefer not to clean that often.

I find that that once a rimfire barrel has been fouled it shoots more consistently. That’s my experience anyway. Cleaning every trip undoes this fouling and means wasting ammo before every shoot getting it fouled again. So, when do I clean? When accuracy drops off, or when feeding becomes slightly tougher. Usually, the latter strikes first.

I take the same approach to my magazines. I clean when feeding becomes an issue. I usually use multiple magazines and consequently they don’t get fouled that quickly. If I haven’t had any issues by the time I give my rifle a birthday, then they get a clean too. Might as well.

Disassembly and reassembly of the magazine

Pulling apart the CZ 452 magazine is very easy. They’re well made and there are no sharp parts or difficult processes involved.

At the base of the magazine there is a small dimple. Inside here is a spring loaded button. Press is down with a pen, nail or punch and slowly slide the base off the magazine. I say slowly because if you’re not careful, the spring will shoot that little steel button out. Good luck finding that again.

To get the spring and button out, cover them with your thumb while you slide the magazine floor off, and slowly release them into your hand. Next, pull the main magazine spring and the follower out. Take note of which way the follower is facing – it needs to go back the same way.

Cleaning is simply a matter of wiping everything down. You can dowse the spring and follower in Hoppes No. 9 if you like. A quick squirt of gun oil once everything is clean and dry isn’t the worst idea either.

Assembly is pretty easy, it’s the exact opposite. Again, be careful you don’t lose the spring or steel button.

Any questions? Post a comment.

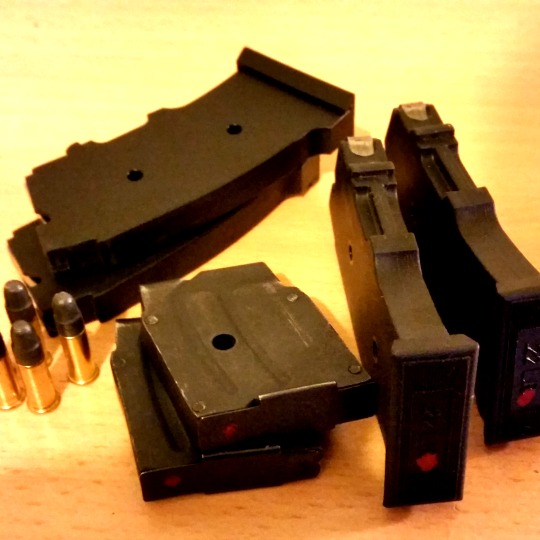
CZ 452 and Norinco JW-15 magazines with 22LR rounds.
Because CZ and Norinco mags are quite common, I marked mine with my wife’s red nail polish to make them easily identifiable.