Product review: MAE 6-30 ST Suppressor

Before the NZDA Prize Shoot earlier this month, I was lucky enough to get my hands on a brand new suppressor from MAE. I didn’t get a chance to shoot with it before the day, so I must admit I was a bit nervous – but it was well worth it in the end.

MAE

MAE are a New Zealand suppressor manufacturer, based out of East Tamaki in Auckland. These guys are not only part of what keeps New Zealand’s shooting community ticking, but they are able to actively engage with their customers to discover new needs and develop better products. Some of the models and cutaways that I saw at the shop were incredibly impressive – include a suppressor that tightens itself on the thread as you fire.

Suppressors in New Zealand

Unlike the USA, suppressors can be had without any legal hoopla or extra taxes. They are seen as practical accessories that improve the shooting experience, control noise on the range or farm, and make it easier to destroy pests or hunt game.
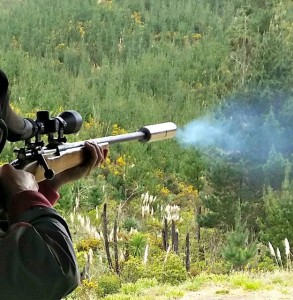
Suppressors help to reduce felt recoil, as well as decibel levels.

There are many – many – types of suppressors on the market, include muzzle forward (muzzle cans), over-barrel (reflex) or full-barrel (integrated). There are many produced here, and as much come in from overseas. Price-wise, you can expect to pay anything between $300 and well over $1000 for a centrefire suppressor. A decent rimfire silencer can go for as little as $55 on Trademe, and up to a couple hundred bucks if you want better performance. Again, the more you spend, the more you get. I have seen some impressive .22LR setups with full-barrel or over-barrel suppressors.

6-30 ST Muzzle Can

The 6-30 ST suppressor is the cheapest (brand new) centrefire suppressor I have seen in New Zealand recently. Don’t let this fool you though – it’s damn good.

presentation17

The positives

  • It does what it says. This suppressor greatly reduces felt recoil and muzzle climb. It was infinitely easier to shoot with this suppressor fitted, especially with a light (and short) stock. For modern hunting rigs in large calibres and light stocks, one of these should be on your radar.
  • It’s a solid unit. Literally. It doesn’t come apart for cleaning and is joined at the muzzle end with some very neat TIG welding. This means there are no bits to lose or break.
  • Long life expectancy. With a 5000 round minimum service life according to MAE, you can expect this suppressor to last as long as the barrel on your rifle. For the price, it’s definitely worth it.
  • Solid stainless. The 304 stainless means it’s heavy as hell, and you certainly notice the balance shift. However, the heavy material absorbs more sound and makes for a more solid unit. The 304 will also be less prone to corrosion than other materials. For a range rig, this is ideal. For a hunting rig, you may want something that reflexes over the barrel to spread the weight a bit better. MAE offers a 5 year warranty, so you know they’re built like a brick sh…
  • The price. At $250 for the stainless finish or $290 for the matte black, it’s the cheapest you’ll find on the market (at least as far as I can see).
  • The versatility. If you have multiple rifles with the same thread but in different calibres, this silencer is for you. Good for anything between 6mm and right up to the 300 magnums, you can have one suppressor for your rifle, your partners, and the three she doesn’t know about.
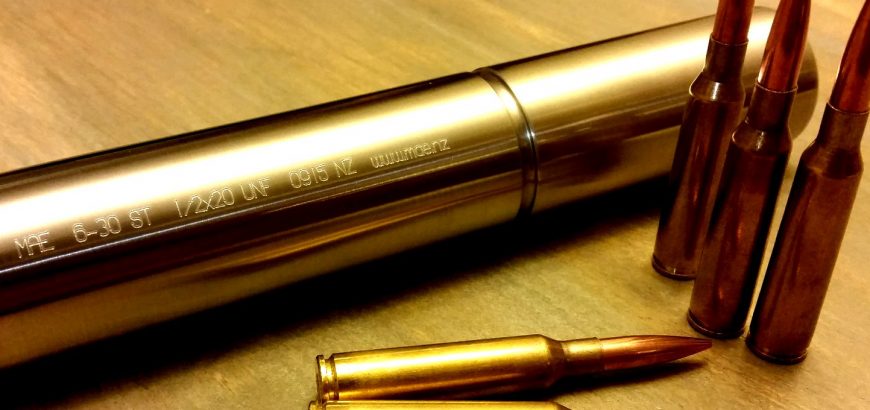
The suppressor is built for anything between 6mm and .300 RUM. The 6.5x55 above shows how much room there is left over.
The suppressor is built for anything between 6mm and .300 RUM. The 6.5×55 above shows how much room there is left over.

The negatives

  • Weight. Although I like the weight of this unit, at almost half a kilo, it could be off-putting for those after a bush-ready rig. If you want a long-range shooter or a tactical sniper set-up, then this won’t deter you at all.
  • The price. Some people just don’t feel like they’re getting a good product unless they have to have their wallet surgically removed through their nose. In my opinion, this suppressor does what much more expensive ones do (without skipping a beat), at a much lower price. If this bothers you, I imagine your gun safe is full of some pretty expensive stuff. If you do want to spend more money, I’m sure MAE will have something to fit the bill.
  • Um…… I can’t think of anything else to be honest.

Range shooting

I must admit, I had a pretty poor shoot at the NZDA, but that was me, not the rifle. However, the one thing I did get out of the day was an immense satisfaction with my new suppressor, as well as the BOLD Trigger from Boyds Gunstocks.
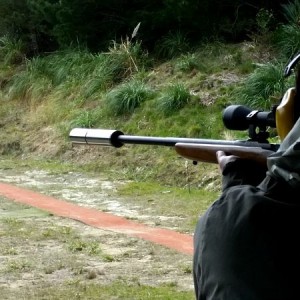
The brushed stainless finish stands out and looks great. Although, for hunters a matte black would be better.

I chose to leave my suppressor as brushed stainless. Not only did it keep the cost down, but it looks cool with my rifle and the other polished metal bits on it (the Mauser-style extractor and the cocking piece). Having had a look at the paint MAE use (Gun Kote 2410F), I knew I had a pretty good match at home if I wanted to paint it myself later. In fact, it would then perfectly match my barrel which I did with the same paint.

The 6.5×55 is a pretty mild-recoiling round, however, in the short, light-weight stock mine is in, it has quite a kick. Not enough to make it uncomfortable to shoot, but after 50 rounds, you’d definitely feel it. The first thing I noticed was an immense reduction in recoil. Not only does this get rid of the instinctual flinch you might develop over time, but it means you are right on target for your next shot. Previously I would find myself pointing two targets over to the left after each shot.

Shooting amongst a bunch of bare-barrel .308s and .223s all day, I could certainly notice (and appreciate) the significant reduction in noise from my old Swede. Ross, whom I shoot with regularly at the Howick Smallbore club, remarked several times throughout the day that he was incredibly impressed with how quite my gun was – he was sitting next to me and expecting a pretty big blast. Another shooter from our club noted that the rifle sounded “pretty cool” – which I must admit, it did. If you play Battlefield 4, you’ll know what I’m talking about. I was even approached by a complete stranger who said he would love to get one himself.

With the grand sacrifice of $250, and a little weight on the end of my rifle, I improved my shooting experience greatly. And the rifle did do really well on the day in the end, as my wife placed top of Division B with it.

Some caveats

When I got my suppressor I was given two bits of advice. Firstly, use a lubricant on the threads to ensure you can get it off after you shoot (nickel-based is good, copper-based is bad). Secondly, take the suppressor off after you shoot, or the stainless will attack the barrel.

Anyone who is familiar with the concept of sacrificial metals will quickly grasp that last one. I would just add one last piece of advice. The burnt powder and gunk that is on the crown of the barrel when you remove the suppressor – wipe this off immediately. I waited until I got home and cleaned my rifle, and it had hardened and become very difficult to remove.

My overall opinion is that this is a product which will help you enjoy shooting more – especially larger calibres, and will improve your accuracy. If those are two things you would like to do, and at a reasonable price too, then this is the suppressor for you.

Check out MAE.nz for more of their range.
Auckland NZDA Prize Shoot

The annual NZDA Auckland branch Prize Shoot is a great day out for Auckland shooters of all abilities. Falling in September each year, the weather can be a bit hit and miss, but aside from that, it’s a perfectly pleasant day on the range with your favourite rifle and some mates.

This year – the 46th Prize Shoot – I shot for my second time and my wife completed her first centrefire competition. We both did fairly well, but she truly excelled. I’ll claim that it’s because I sighted the rifle in through my shooting (we shared a rifle). However, all credit to her, as she outshot some great shooters.

The field

That’s another thing that makes the day enjoyable – there are shooters of all abilities. I placed well ahead of some very experienced shooters, but was beaten by someone shooting for their first time ever. And vice versa. It really is a great field of competitors, where everyone can benchmark their performance against others.

NZDA 100 metre standing shoot
100 metres is more than enough from the standing position.

At the top of Division A were the usual suspects, including Paul Carmine. My wife, Kassie, took out Division B – which got her called up second in the order of prize recipients, allowing her to choose a really nice Hunting and Fishing backpack for her prize.

This year there were four ladies and two junior shooters. In total, there were just under 40 shooters, making up two details. Last year there were around 60 shooters (despite the inclement weather), and apparently previous years have had a similar turnout. Perhaps timing a competition to coincide with Bathurst wasn’t the best move…

The format

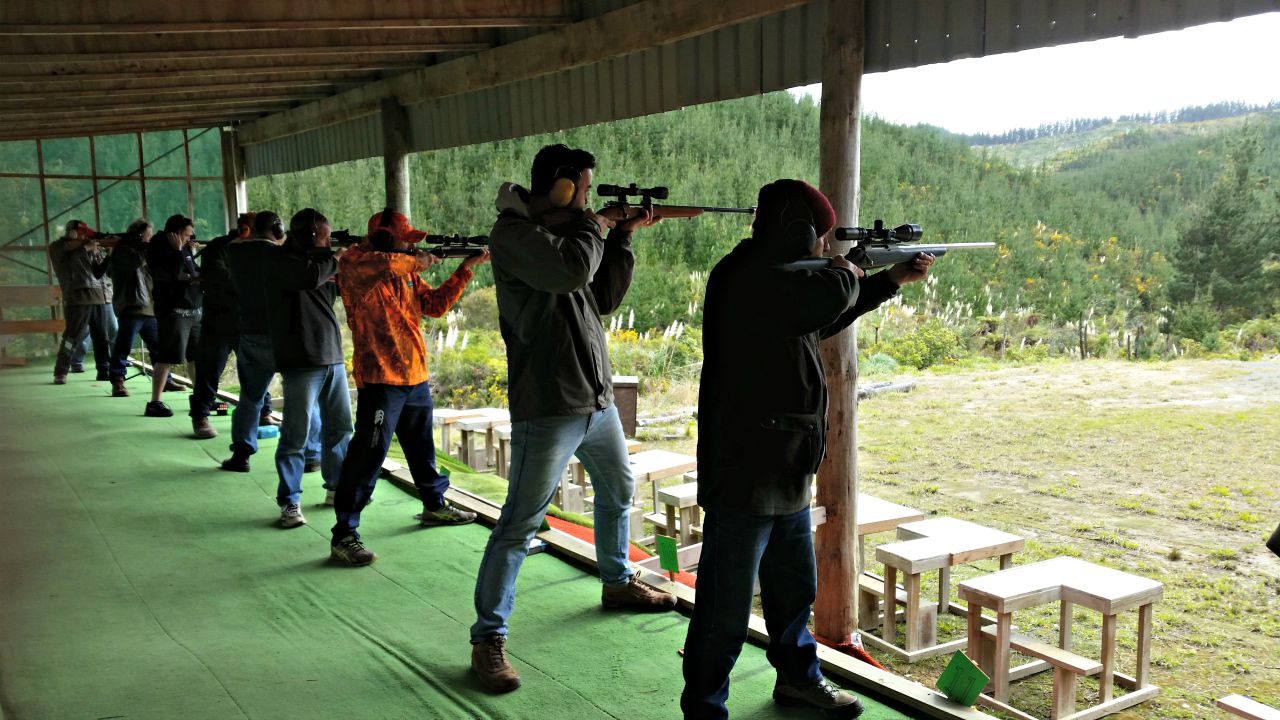
The format of the shoot is very simple and easy to follow. Once the safety instructions and competition rules had been read out, the first detail (Squad A) went to the mound for sighting in and the prone target shoot.

Rest and bipods are allowed for sighting in, however, you want tomake sure you're sighted in before competition day if possible.
Rest and bipods are allowed for sighting in, however, you want to make sure you’re sighted in before competition day if possible.

Sighting in is done on a target on the right hand side of the frame, and five minutes are allowed for unlimited sighters.  The range for the competition is 100 metres. I got 13 rounds off in this time, trying to get my rifle on point. The lesson here being to always sight your rifle in before competition day if you’ve done some work on it. After 13 rounds, there was a decent amount of mirage created by the heat of the barrel and my new MAE suppressor. However, by taking my time this didn’t affect my prone shoot.

You can use a rest or bipod to sight in, however the rest of the competition is shot without any aids (aside from a shooting mat and a kneeling roll).This means no slings, jackets or gloves.

The prone shoot is 5 shots in 7 minutes – plenty of time. After this is finished and the rifles are cleared and removed from the mound, scorers go forward to retrieve targets. Squad B is next, but in the meantime, people stand around chatting and enjoying the all-day sausage sizzle.

After Squad B, the same process is followed and Squad A goes up for 5 rounds in the kneeling position, also in 7 minutes. Rinse and repeat for Squad B. The last shoot of the day is 5 rounds standing, again in 7 minutes. This is what separates the men from the boys. Some of those scoring in the 40’s in the prone event struggle to scrape 20 together in the standing position.

In between these, there is a 5 round rapid shoot on the 25 metre range, to be completed in 40 seconds. Again, making sure you know your hold under/over and your parallax settings before competition day is invaluable. If you’re sharing a rifle with your partner or buddy, you will be accommodated with an extra rapid at the end – although you’ll probably have time in between while targets are retrieved and people yack on about how they pulled that one shot. Targets are also given out once scored, so there is plenty to talk about during the day.

The rifles

Generally speaking, the rifles are hunting rifles in hunting calibres. There are some rifles that would look more at home in an F-Class shoot, and some that would be quite comfortable in the lineup for a military service rifle shoot. The most exotic calibre of the day was probably .310 Cadet, with one .22 Hornet and a 6BR making an appearance.

As far as I could see, the only semi-auto was a Norinco M305 (the Chinese version of the M14), whereas last year a couple AR-15’s placed very highly in the field. At the 2014 Prize Shoot I did take an SKS – what a mistake. The iron sights had not been sighted in and after I took the muzzle brake off, the scope’s zero was so off that I wasn’t on the paper. It was an exercise in frustration, and using the iron sights and a whole lot of compensation, I managed to get some scoring shots in the kneeling and standing events.

This year I went armed with my 1943 Husqvarna M38, chambered in 6.5×55. This rifle was sporterised when I got it, and has since been modified even more. Over the last ten or so months it has a new matte black coating applied, the bolt has been replaced and the cocking piece cut down to reduce lock time. I’ve also installed a Vortex Diamondback BDC 4-12 x 40, and a new adjustable BOLD Trigger, which was kindly supplied by Boyds. Completing the setup was a brand new MAE suppressor, which thoroughly impressed my shooting buddies as well as those that heard it perform.

I also have a new Boyds Gunstock waiting to be fitted to this rifle, but I didn’t want to rush the bedding and finishing before this shoot. It should be ready before the 300m Swiss Club shoot in November. And I’ve learnt my lesson – sight in beforehand!

The load I was shooting was as follows:

Projectile: SMK HPBT 142 gr
Powder: ADI AR2208 34.7 gr
Brass: PPU (twice fired)
Primer: Federal Gold Medal Large Rifle Match

Aside from my wife and I, there was one other person shooting 6.5×55. The most common calibre by far was  .223 Remington, with 14 shooters using this round. There was one .243 and three .270s, with eight .308 rifles as well. The winning rifle was a .222. There were also four other rifles in this calibre on the day, two placing very low in the field and the other two coming in near the top.

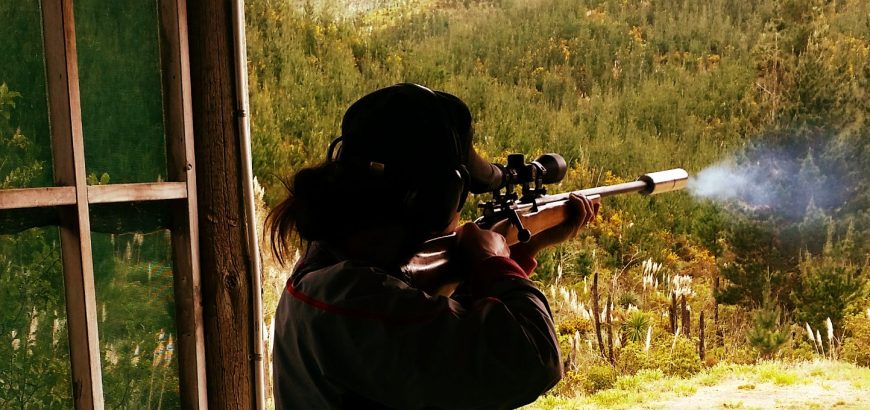
The MAE suppressor cut down felt recoil and the loud crack of the rifle, making it a pleasure to handle.

The prizes

The prizes for the shoot are kindly donated by several sponsors, including major Auckland gun stores, as well as private individuals and club members. Also on offer was a one-year membership to the club, as well as a couple magazine subscriptions.

There were some great prizes to be had, including four of these Leupold knives.

Dotted along the prize table were all sorts of cool items for the garage, range, shed, field or bush. Ranging from knives and a machete to ammunition, books, cleaning products, car accessories and even a leather-working voucher.

Everyone walked away happy, having picked a prize that was probably worth more than the $25 they paid to enter the competition. With free sausages all day, and a lot of shooting to do, it adds up to a very worthwhile day.

With the prizes on display all day, everyone eyes up what they want, and probably spend a fair bit of time vacillating between equally awesome prizes. Last year the knives were first to go, however this year they stuck around for a bit. There were a fair few on offer, and myself and two other members of HSSRC managed to score three out of the four limited edition Leupold hunting knives. The first place junior made a bee-line for the machete, which was clearly something he’d been eyeing up all day.

Whether you only break out the centrefire rifles a few times a year or you regularly enjoy taking your hunting rig out, the NZDA Annual Prize Shoot is a rewarding experience in more ways than one, and is something I’d definitely recommend.

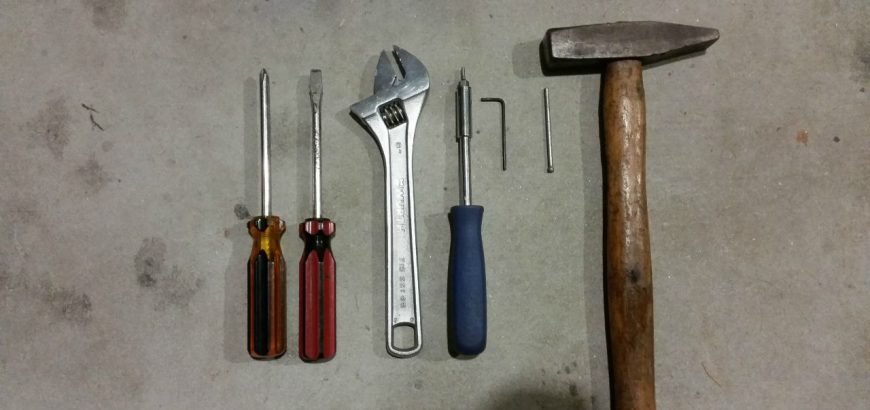
The tools needed for this job are pretty simple and should all be in your tool box already.

Installing an aftermarket triger

Modern rifles with their out-of-the-box accuracy guarantees usually come with adjustable triggers, but if yours didn’t, help is on the way. Whether it’s an old military surplus rifle that you’re modifying or a modern hunter that needs a little bit of work, installing a new trigger is easy and worthwhile.

A stiff trigger pull can be the difference between a bullseye and the 9 ring, or the difference between a clean kill and a long walk through the bush chasing a wounded animal. If you want to see the difference a good trigger can make, one of the best examples you could have would be to try a 10/22 with a match trigger, and then shoot one with the standard trigger. After shooting with a lightened trigger for so long, I thought the safety was on when I tried to pull the standard trigger.

The tools you’ll need

There’s not much to this job really. Most stock triggers are removed by driving out the pin that holds the unit in place. This pin also acts as the fulcrum for the trigger set and reset. To drive this out, you’ll need a hammer and punch – or a filed down nail if you don’t have a punch to hand.

Depending on the trigger unit, you may need a small spanner or wrench to adjust lock nuts, and probably some allen keys or screwdrivers to adjust pull and sear engagement. Depending on your rifle, you’ll probably need a large flat head screwdriver to undo your action screws.

The tools needed for this job are pretty simple and should all be in your tool box already.

The trigger of choice

Of course all of this is moot if you don’t have a trigger to install. There are a few options out there, depending on your breed of rifle. Ruger 10/22s, AR15s and Rem 700s have a multitude of aftermarket bang switches, however if you’re improving an older rifle you may have to do some digging to find the trigger you need.


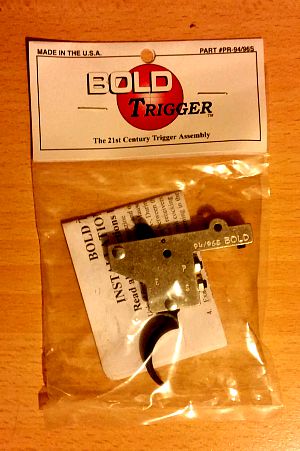
Nice new trigger thanks to Boyds Gunstocks.

My most recent trigger install is a BOLD Trigger from Boyds for my Husqvarna M38. As I’ve mentioned before, I don’t like using a safety – an empty rifle is the best type of safety – so I went for the version without the side safety. However, if you do like to use your safety in addition to safe gun handling practices, the side safety is much more convenient than the toggle on the back of the bolt on the old Swedes.

The 94/96 trigger fits the M38 perfectly. Boyds also stocks triggers for the 98-family Mausers, as well as a Mosin Nagant trigger. Other hardware obtainable from the gun stock manufacturer include trigger guards and floor metal, as well as sling swivel studs and action screws.

Extra inletting

Depending on your trigger, action and stock, there could be some extra in letting to do. Thankfully with the Boyds stock this rifle is destined for, there is ample space for the trigger. However, before I get round to bedding and finishing that stock, I’ll be taking out a bit of material from the current stock to allow the larger trigger unit to fit.

For this job you may want to use a mill. However, hand tools or a dremel will do just fine.

The easy part

The easy part is the install itself. For most triggers, all you’ll need to do is punch out the retaining pin, put the new trigger in the old one’s place, and insert the pin again. That’s almost all there is to it.

With the BOLD Trigger, there’s a grub screw forward of the pin which, when tightened, keeps the unit in place. The mechanism is quite different from the original trigger, so you won’t need the old spring or any of that. If there is any issue with fit (as there can be with the many variations of these beloved milsurp rifles), the instructions that come with your trigger should tell you where you need to add or remove material.

Adjusting the pull and sear engagement

This is where your new trigger comes into its own. It will have its usual factory setting – 3 pounds for the single-stage BOLD Triggers – and an adjustable range. The range on my new trigger is 2-4 pounds, and the sear engagement can be altered too.

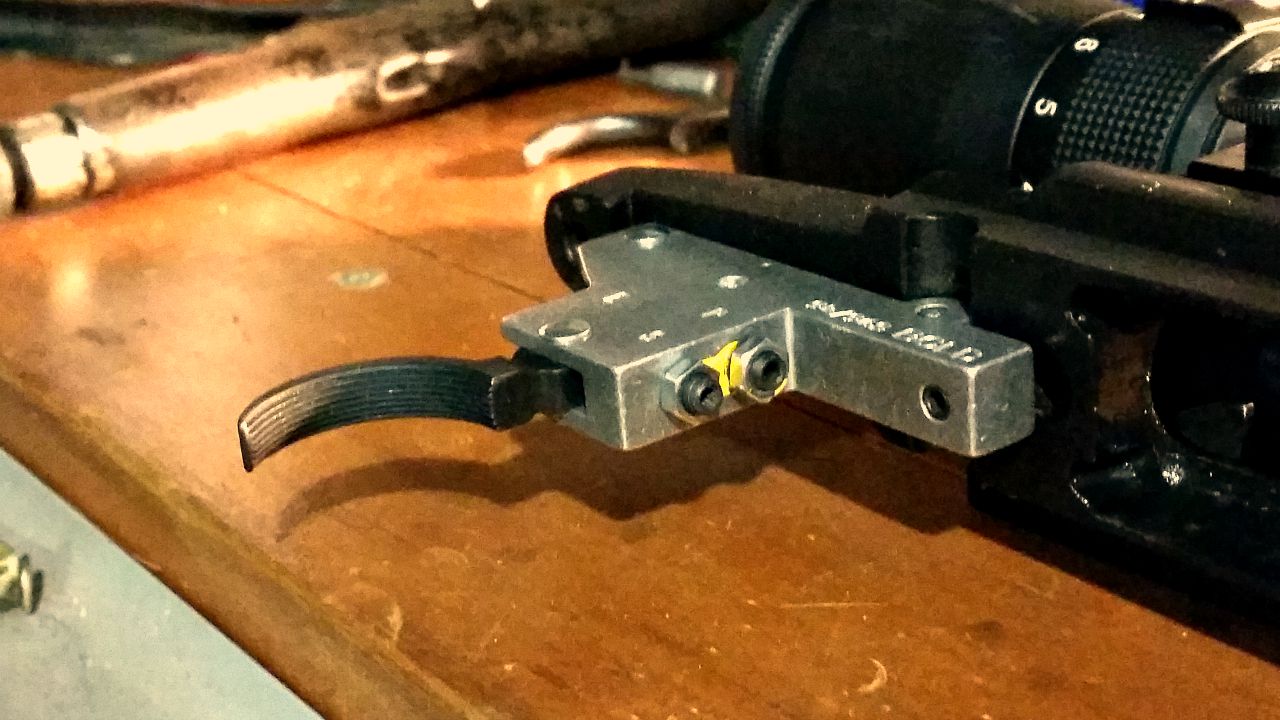
On my model, this is done by loosening the locking nuts and adjusting the grub screws with an allen key. In the photo below, you can see I’ve started on this in the photo below, as the factory seal yellow paint has been broken.

The yellow factory seal on the adjustment screws is broken.

I’ve adjusted my trigger to the lightest it will go. This rifle will be a range-only queen, so the heavier pull you’d want on a hunting rifle is not necessary. When adjusting sear engagement, work the bolt rapidly to make sure it won’t fire on closing – too little sear engagement and you could end up with an unsafe rifle.

Once the trigger pull is where you want it – I shouldn’t have to say this, but obviously you’re testing this on an empty chamber or dummy round – it’s time to tighten up the locking nuts. Your particular trigger may have different instructions or mechanisms, so make sure you follow the included install directions.

Of course, the number one concern when modifying a rifle is safety when operating, as well as during the install process. If you’re unsure of how to properly install or set your trigger, your local gunsmith should be able to help you out for a very reasonable fee, as the the work involved is not onerous.

Service rifle shoot at Waiuku

I’ve never had good luck with a shoot at Waiuku. I’ve been to the range twice before and both times been hit torrential rain and gales, making shooting uncomfortable, if not impossible. Well, third time was the charm as I attended the Waiuku service rifle shoot this Saturday past.

Firstly, let me say that Waiuku has great facilities that enable a wide range of shooters to enjoy themselves. It’s also one of those rare clubs where pistol, rifle and shotgun are all welcome. However, I’ll leave a review of the range for another post. For clarity’s sake, this isn’t the same Waiuku range were ASRA does their winter shooting (The Farm).

On to the shoot itself. Well, it’s a 45 round shoot which I was hoping to do with my .303, until I realised that morning that I only had 20 rounds in the safe. With an abundance of 7.62×39, it turned out that the trusty SKS would get a work out this morning.

Service rifle shoot

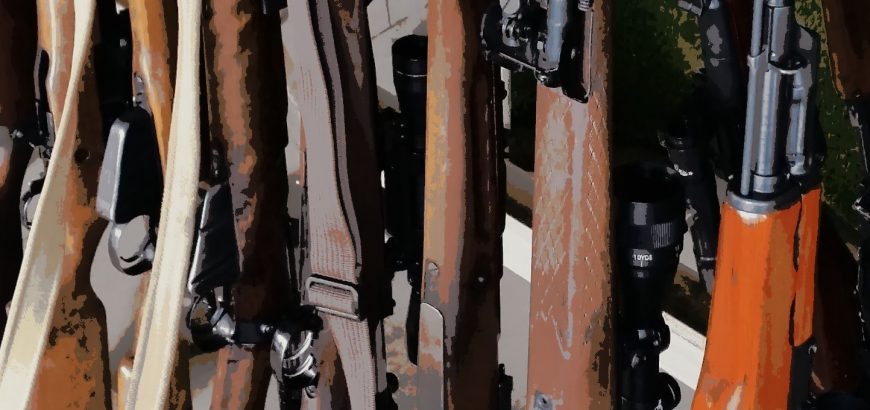
If you’re into your military surplus rifles, going along to a service rifle shoot should definitely be top of your list of things to do. With everything from WWI Lee Enfields, through to Mausers and AK47s and AR15s, every major armed conflict in recent history was represented.

The shoot was run in two details and as previously mentioned, was 45 rounds. This consisted of a Trinity and Action M match and a 10 round sniper shoot.

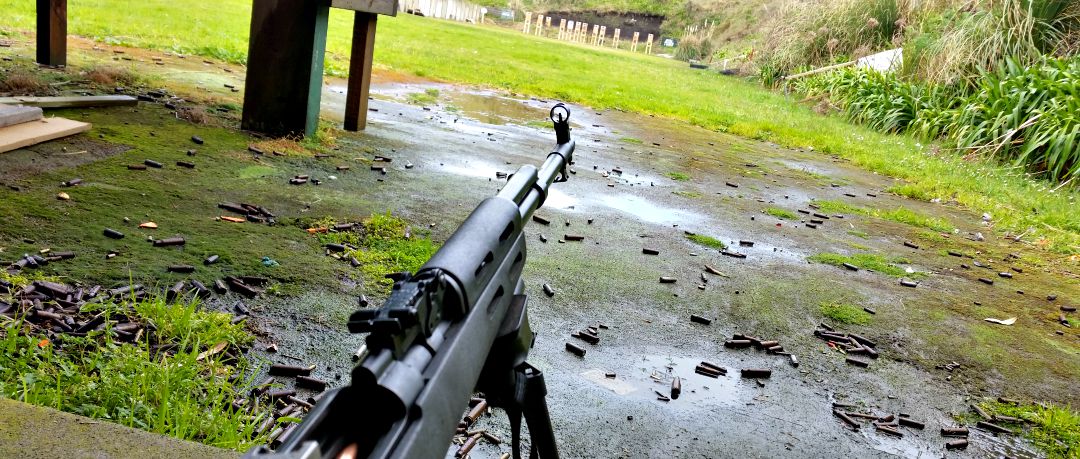
The Soviet weaponry and rusted casings are reminiscent of the Nicholas Cage movie Lord of War.

The trinity shoot is 5 rounds each in the standing, kneeling and prone positions. With no sighters or spotting scopes, you’ve got to know you’re rifle well. The SKS performed well, but was shooting low – which was more me than the rifle, as my wife was shooting too high with the same gun. One thing I may consider doing in the near future is replacing the front sight post with a skinnier one that doesn’t blot out the entire target. Those rifles that were scoped were limited to a magnification of 4x.

After those fifteen rounds, targets were checked, which is when a few of us actually got to see where our rounds were going. For myself, another shooter with an unsighted SKS and another with a new suppressor on his AR, the results were less than stellar.

The next ten rounds allowed us to compensate where we needed to, but the faster pace and movement involved in the Action M shoot means you can’t spend too much time trying to compensate, especially with open sights at 100 metres.

An Action M is usually shot in 60 seconds (at least it was when I last shot one at the Auckland Service Rifle Assn), and consists of 2 rounds prone, 2 rounds standing, one kneeling – reload another 5 round mag or clip – one kneeling, 2 standing and 2 prone. It’s 75 seconds for bolt actions, which is okay if you have a removable box magazine or stripper clips. However, when I shot this last with a Swedish Mauser and no stripper clips, it was certainly challenging. The rules for different types of matches are made by the NZ Service Rifle Association.

In light of the range of rifles and abilities present on the day, and the generally non-competitive nature of the shoot, no strict timing was done, although everyone went as quickly as they could.

SKS on bipod
The sniper shoot allowed for rests or bi-pods. Handy hint; your car’s floor carpeting can be used if you forget your shooting mat.

The last ten rounds was a sniper shoot which allowed shooting aids, such as rests, bi-pods and spotting scopes – this is where many people were able to turn the tables – despite the smaller targets. Having someone spotting for you is also very helpful when you’re on iron sights.

Although I didn’t place highly, I did enjoy the day and seeing all the old relics shooting (and their rifles too). About a third of the shooters were from HSSRC, so there were some friendly faces, and a few us enjoyed shooting some silhouettes with the rimfires on range 2 afterwards. All-in-all, for $20 and the cost of ammo, a good day was had all round.

Finishing the day off with some silhouettes at 25, 50, 75 and 100 metres was good fun.

3 gifts you can buy for a shooter or hunter

It can be hard to find the perfect gift for someone. It can be harder if they’re into shooting and you’re not – harder still if you don’t have a firearms licence and can’t legally purchase the things they would like. However, there are a few go-to things you can consider, and they won’t break the bank either.

Things made out of ammo that aren’t ammo

Shooters like things that go bang. However, the next best things might be something that looks like it goes bang. However, not all mementos are created equal. Ask any golfer, and they’ll tell you every year they get terrible golf-club or golf-ball shaped items to bury in a draw somewhere. Every now and then they get something that’s actually kind of cool. It’s pretty similar for hunters.

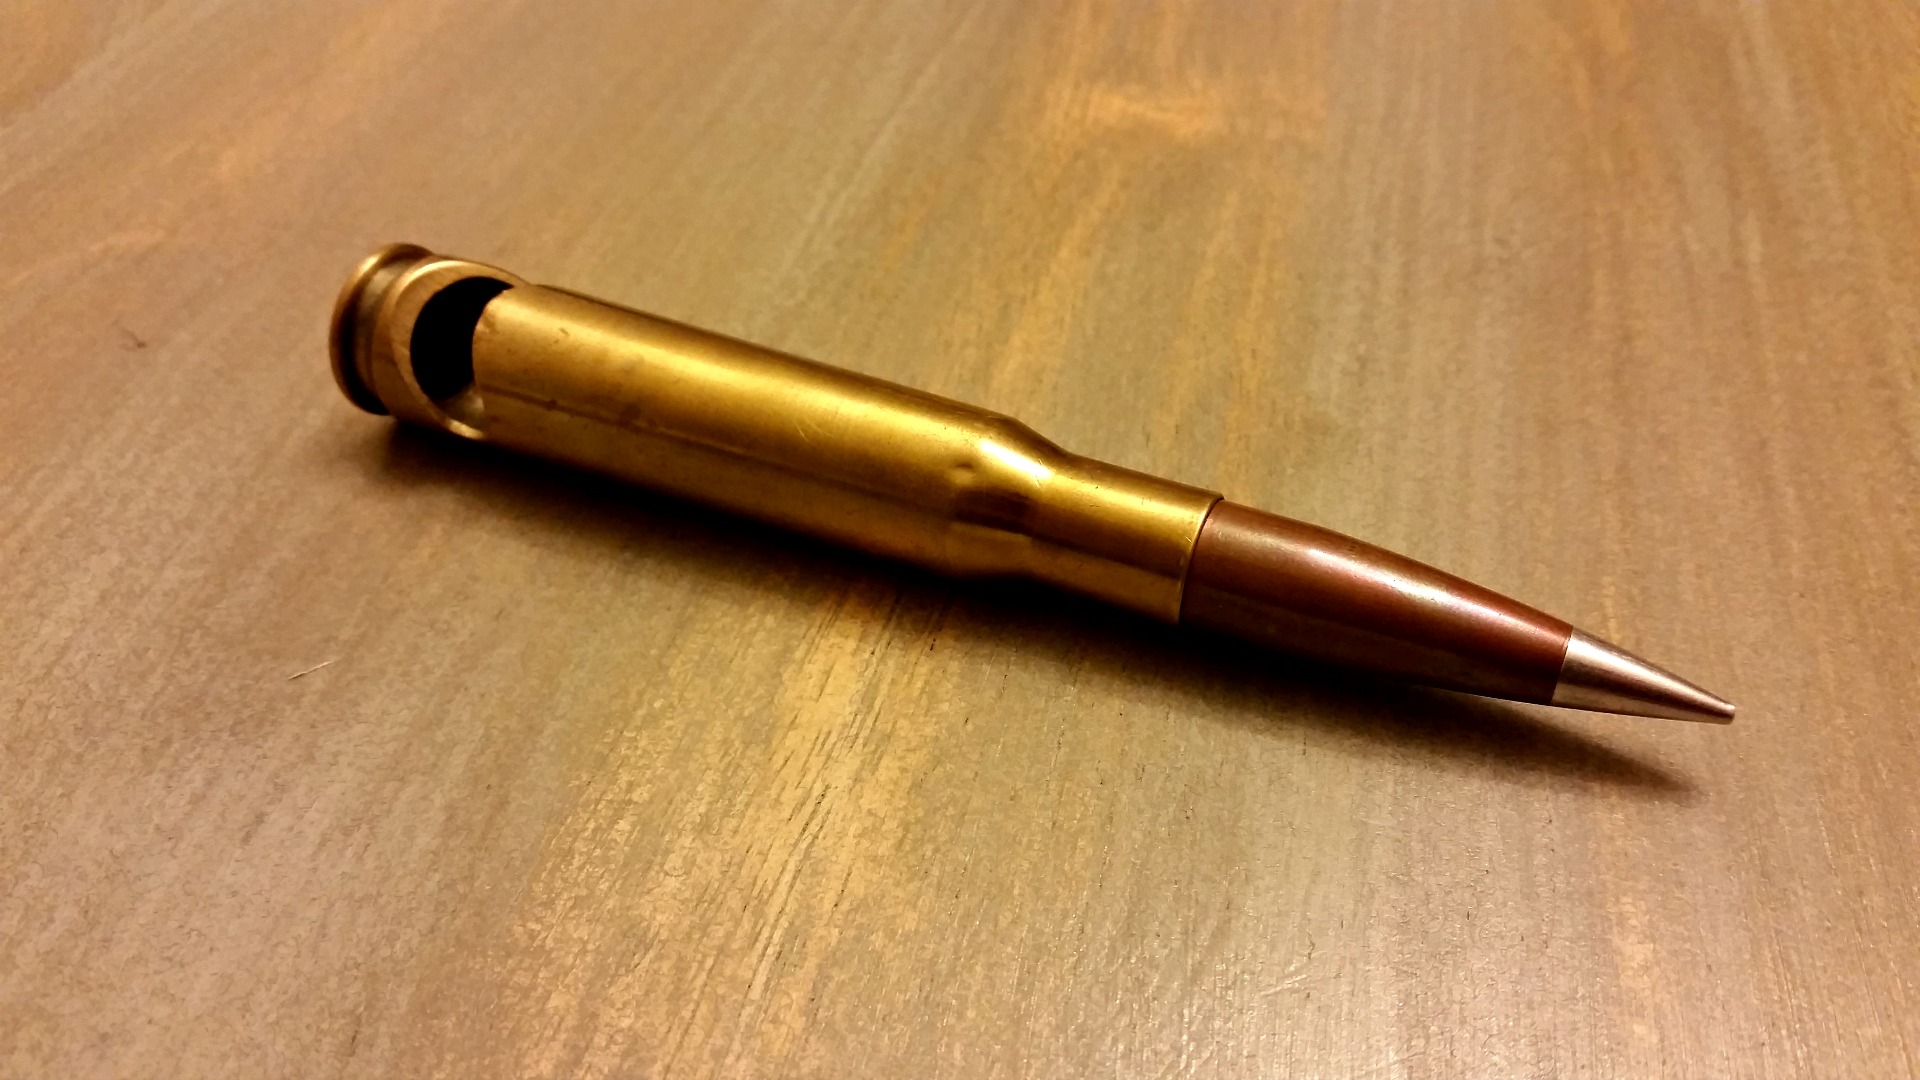
It's hard to find a cooler bottle opener than this .50 cal case from Gunworks.
It’s hard to find a cooler bottle opener than this .50 cal case from Gunworks.

A barbecue lighter shaped like a shotgun may not get someone’s juices flowing, but a bottle opener made out of a .50 cal. case with a 750 gr A-MAX projectile seated in it might just get the right reaction. Yeah – 750 grains – that’s four to five times the average .308 projectile weight. My wife and I got one for my father-in-law last Christmas – and I liked it so much I got myself one too. The brass is obviously softer than bottle caps and will mark after use, but hey, it looks so freakin cool. You can get them from Gunworks in Christchurch, and because it’s not live ammo it can be sent anywhere. They have other options too.

Another cool ammo-looking option can be cuff links. These can be done poorly or very well, so be selective. The imitation 12-gauge cuff links my wife got me are not only well made, but look pretty damn good too.

A magazine subscription

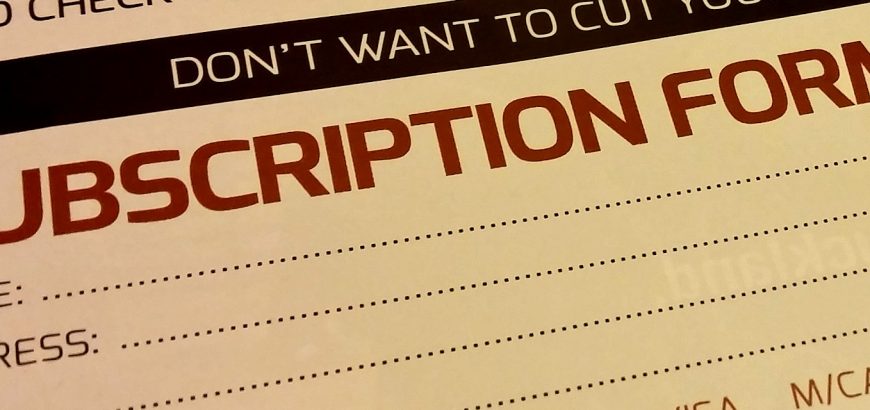
If you’re significant other or best friend has a hunting magazine lying around but they don’t have a subscription to it, that could be a great option. Look for the subscription page and photocopy or scan it, or find the magazine’s website. It’ll be pretty obvious if you tear out the page…

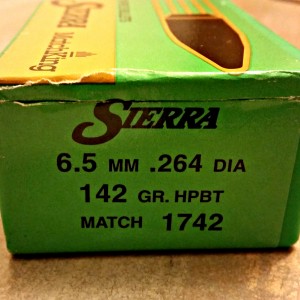
Make sure to take a picture of the product code so you can find what you need at the store.

While everything and anything can be found on the internet, gun magazines are a great way for shooters to enhance their knowledge of local shooting spots, new equipment or competition results.

Reloading supplies

Well, you can’t buy ammunition for your partner if you don’t have a licence, but if they reload, you can buy them everything they need to make their own. You’ll still need to have ID, as primers and powder are explosives.

How do you know what to get? Go over to their shooting bench and see what’s running low. Make sure to take a picture of the item or the product code to show the guys at the gun store. Also, make sure to shop around. When you’re spending near a hundred bucks on projectiles or a box of primers, looking at different websites or stores can save you around 10 per cent.

Projectiles running low? Gift idea right there.
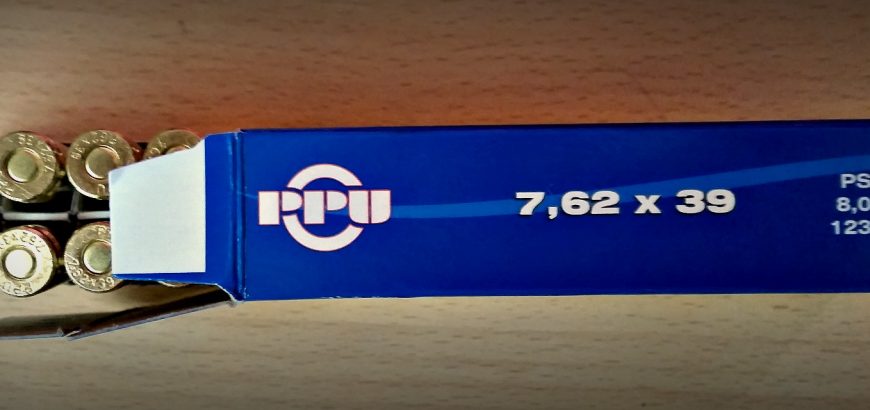
PPU 7.62X39

Product review: Prvi Partizan ammo

Prvi Partizan ammo has been on the market for years – decades even – but has only just started to make an impact in New Zealand. Or so you thought. Abbreviated to PPU, Prvi Partizan as we know it today has been around since the 1940s, although the company traces its roots back to the late 1920s and has had a few different names as wars and politics have shaped Europe.

My Serbian friend tells me it’s pronounced “pr-ah-vi”, not “privvy” as most people sound it out. It translates roughly to “first partisan” and gets its name from the long and thing rifles produced for partisan forces by the factory in earlier years.

War – what is it good for?

Well, most of the sporting arms and ammunition we enjoy today share their history with their military counterparts. A tonne of the most popular hunting and sporting cartridges today are military cartridges from the past 100 years or more, including:

  • 7.62×51 NATO (.308)
  • 5.56×45 NATO (.223)
  • .300 AAC Blackout
  • 7.62×39
  • 7.62x54R
  • 6.5×55
  • 7.5×55
  • 7.92×57 Mauser
  • 30-06
  • .303
  • .338 LM
  • .50 BMG
The price of PPU makes it hard not to stock up.

Not to mention the endless array of pistol ammunition too. Of course the search for bigger, better and boom-ier things has led to a surge in development in the cartridge market today, much of which is driven by shooters who demand a high level of accuracy. Ammunition that used to only be available to wildcatters for varminting or bench rest shooting is now common place in the USA and is making its way over to New Zealand as well. Rimfire is also growing in leaps and bounds with the .17 WSM making waves in the shooting community.

But what about those stalwarts of scrub hunting and cheap and cheerful plinking? The cut down .303 bush guns and the semi-auto fun-makers in 7.62×39? Well, PPU is your knight in shining armour. For those that love shooting their military calibre rifles without breaking the bank, the ammunition produced by Prvi Partizan is worth your consideration.

On the plus side

While you might think Prvi hasn’t been in the New Zealand market for a while, it actually has. If you’ve shot Highland ammo, you’ve shot PPU. It’s the brand they’ve been using down here. In terms of military cartridges, Highland hasn’t been the cheapest, but it’s a step up from the dirty steel-cased stuff from Russia. It’s certainly better than putting corrosive ammo through your firearms, especially if you’re not that thorough with your cleaning.

Annealing marks on .303 and 7.62x39 PPU factory rounds.
Annealing marks on .303 and 7.62×39 PPU factory rounds.

Prvi Partizan ammunition is brass cased and generally considered to be good brass for reloading. Many Swedish Mauser fans rate the 6.5×55 PPU brass behind Norma and Lapua, but ahead of the American-made stuff. In terms of how soft or long-lasting it is, I can’t personally say. I’m on my second round of firing with this lot of brass and haven’t seen anything untoward yet, but we have a ways to go before anything should be cropping up. When I do get my brass into the higher firing counts I’ll post again to let you know, but considering I have over 140 cases for 6.5×55 alone, I doubt that will be any time too soon.

Considering how good the brass is, it’s certainly worth the price. This is especially the case with calibres like the .303 where you might only have a few options, all of which are more expensive. Not only do you get an acceptable level of accuracy out of it, but you have (I’m guessing) between 6 and 10 more reloads out of them – if not more.

What is the cost? I’ve seen the blue boxes cropping up in a few stores around the country and they’ve ranged in price from $31 to $36 for big rounds like the .303 and 6.5×55. The 7.62×39, which I’ve bought for a reloading experiment, runs at around $30, but if you go to the right Hunting & Fishing, you can pick it up for $25. Most stores will give you a bulk discount if you buy a few packets anyway.

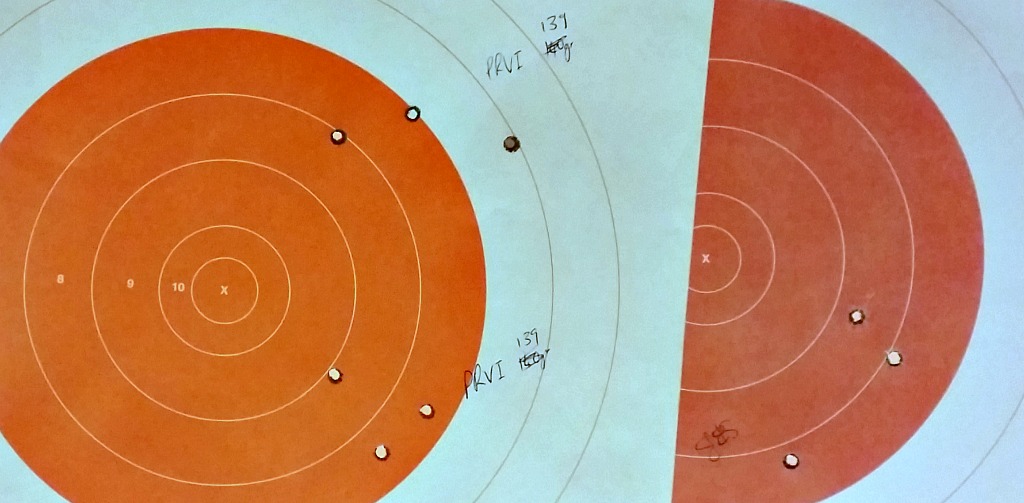
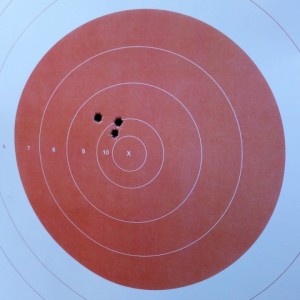
How accurate is it? Well, how long is a piece of string? How accurate a particular round is will be determined by many contributing factors, not least of which are shooter skill and the particular firearm in question. The picture below shows PPU 139gr FMJ 6.5×55 three shot test groups, one is about 1.5 MOA and the other is 2.6 MOA. These are shot from my cut-down 20.5″ barrelled Husky M38. The other target, for comparison, is another reasonably priced brand, Sellier & Bellot 140gr SP, at 2.4 MOA.

PPU 139 gr FMJ and S&B 140 gr SP


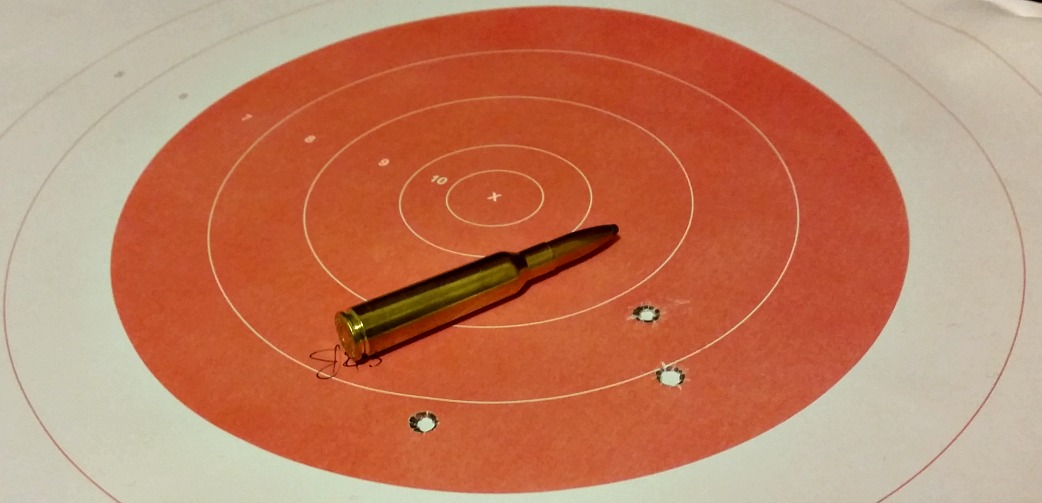
This is not bad, considering many are happy to get 3 or 4 MOA groups with milsurp rifles and cheap ammo. However, you don’t get many people bragging about S&B brass for reloading. The picture below shows the S&B group with an unfired round for reference. Bearing in mind that the orange circle is about the size of a kill zone on a deer, this is very reasonable accuracy. If these groups were zeroed in, every shot would be a clean kill.

S&B 2.4 MOA group with unfired 6.5x55 round for comparison.
S&B 2.4 MOA group with unfired 6.5×55 round for comparison.

The negatives with PPU

Well, no one on the range is going to look at your ammo tin on the range and think your other car is a Porsche. But, if you don’t mind that, there’s not much to gripe about with Prvi Partizan. So far I have only shot .303, 7.62×39 and 6.5×55 in PPU and each has performed better than I would expect budget ammo to. I also find it to be quite clean, generally speaking.

However, if you’re wanting superb accuracy without hand loading your own ammo, this may not be the ammo for you. I would suggest trying it – your rifle may love it – but you may be better off paying one and a half or two times the price to get match-grade ammo.

0.64 MOA group shot off a bi-pod with PPU brass, Federal Match primers, 142 gr SMK HPBT projectiles and 34.7 grains of AR 2208.

There may also be variations in weight of brass and even wall thickness or hardness. This is pure, untested speculation. The only reason I say this could be possible is that the low price indicates that the machinery that produces this brass may not be as thoroughly regulated or maintained as those operated by Hornady or Lapua. The staff may not be as well compensated. But who knows?

What you may wish to do is individually weigh up the clean and empty brass out of a box or two, and see what the variation is between cases. Some spread is to be expected, but too much could have an effect on reloading. You could also see how much water each case holds to determine case-wall thickness and internal capacity. Anyway, I’ve been managing to get smaller than 1 MOA groups out of this brass, so I’m not complaining.

Overall, I think it is well worth the purchase. The accuracy is good enough for hunting ammo if you get the soft point variety, and there’s certainly a place for it in the safe if you just want plinking ammunition or a source of cheap brass.