Home made suppressors

As long as there have been firearms, there have been people trying to improve their performance. Quicker, quieter, lighter, more accurate – these are the motivations of the backyard tinkerer, qualified gunsmith, field armourer and firearms designer alike.

A suppressor, otherwise known as a silencer, sound moderator or sound suppressor, has always been a favoured project for the budget-minded or mechanically curious. One such person recently listed a “V” can suppressor on Trademe, and I couldn’t help but get in touch.

Alan from Hamilton took it upon himself to build a “can suppressor”. The term can suppressor came about as sound moderators tend to look like a beverage can, especially the thicker muzzle-forward variety. This example is literally made from a V can.

The Trademe listing humorously asks;

“Do you want to give your bullets “A guarana and caffeine charged V energy Woo-Hoo”?”

And the answer should be, “Yes, yes I do.”

The tech specs

The top (the end that you drink from) is cut out, and has been replaced with a moulding of ultra high molecular weight polyethylene (UHMWPE). If you just got totally lost, replace UHMWPE with plastic and you’ll get the general idea. This is then drilled and tapped to accept a male 1/2x20UNF thread, the most common thread for rimfire rifles. There’s always the exception, like the Ruger 10/22 anniversary edition, but hey, what can you do?
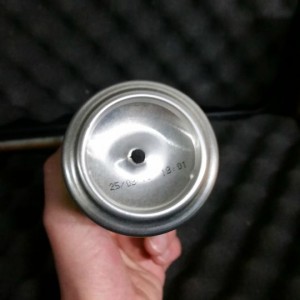
V can suppressor
The exit hole is cut with a subsonic hollow point.

The other end of the can is a blank canvas, waiting for your first round to punch a perfectly lined-up exit hole. Two things about this. Firstly, it does produce a jagged edge. You could deburr this if you like, but realistically, because it sits below the rim of the can, you probably won’t get your fingers anywhere near it. Secondly, use a subsonic round to do this.

Not only is there less chance of developing too much pressure in the contained environment, but the hollow point should help you create a slightly oversize hole for the following rounds to fit through easily.

The good and the bad

Well, on the positive side, it’s dirt cheap to make if you’ve got the skill. And if Alan chucks a couple more up on Trademe, they are pretty inexpensive to buy – not that economy rimfire suppressors are hard to come by. Also on the plus side of the list is the novelty factor. If we’re honest, everyone’s going to want to check it out and have a go. Lastly, it’s very, very light.

Does it reduce sound? Remarkably – especially when compared to not having a suppressor on at all. In a follow up post, I will do a proper test with a sound meter. The test will be done with two barrel lengths – 16″ and 22.5″ – and with three different sized cans, compared to a regular suppressor and a bare muzzle.

Unfortunately due to technical difficulties, we weren’t able to capture all five rounds I put through the can on video, but we did get the last one. For comparison, listen to how loud it is when I work the bolt afterwards.

On the negative side, you won’t be able to try this trick with a centrefire rifle – you’ll likely end up with a pretty, green mess at the end of the barrel. Also, because this is a relatively simple construction without baffles, the sound is “tinny” – excuse the pun – even if it is reduced.

Of course, being made out of a drink can means that it isn’t the sturdiest object in the world, and if you whack it into a tree or drop it on the ground, you’ll probably end up with a very skew and unusable suppressor. Of course, you didn’t think it was going to be a hardy, hunting-ready solution, did you?

At the end of the day, for a very reasonable cost, you get a novel sound-reduction solution that will help you keep the noise down at the range or in a field full of rabbits or possums. If you do plan on taking it out in the bush, take care of the muzzle end of your rifle – which is much easier with a short or cut-down barrel. For bush use, you should probably think of this as a disposable option. And at such a low cost – why not?
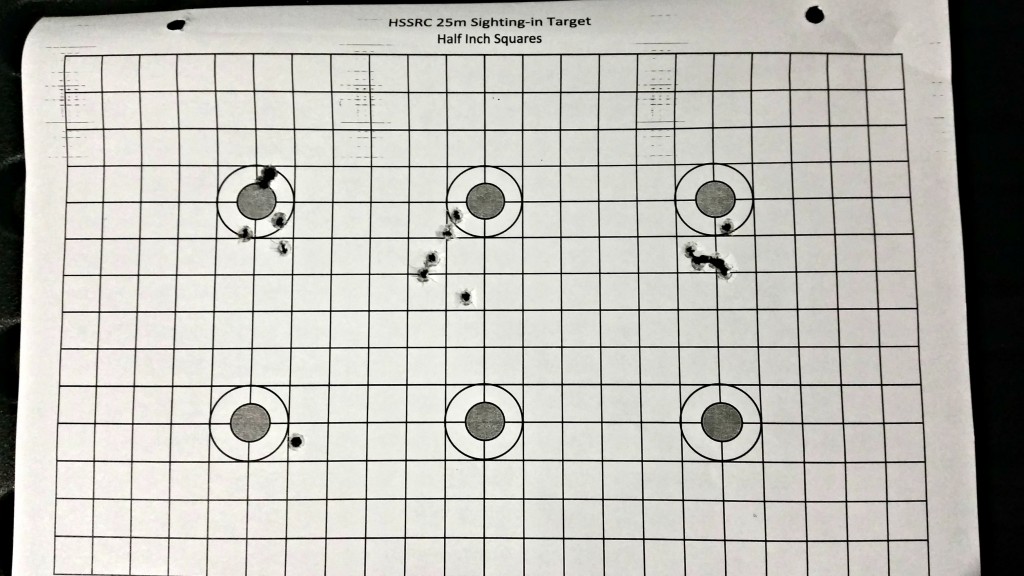
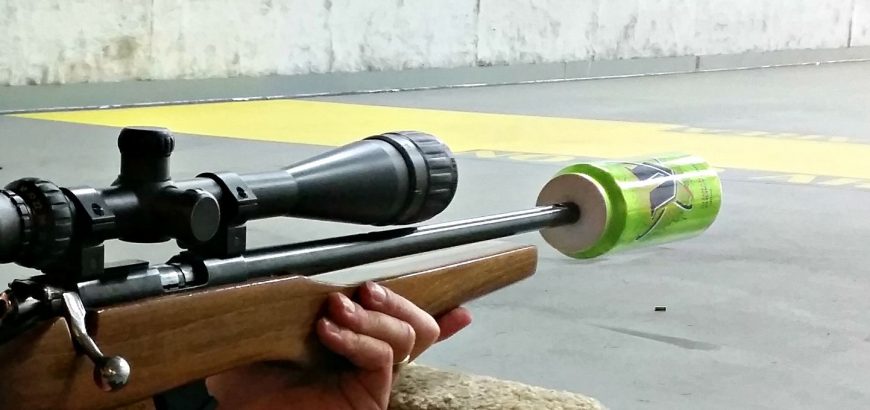
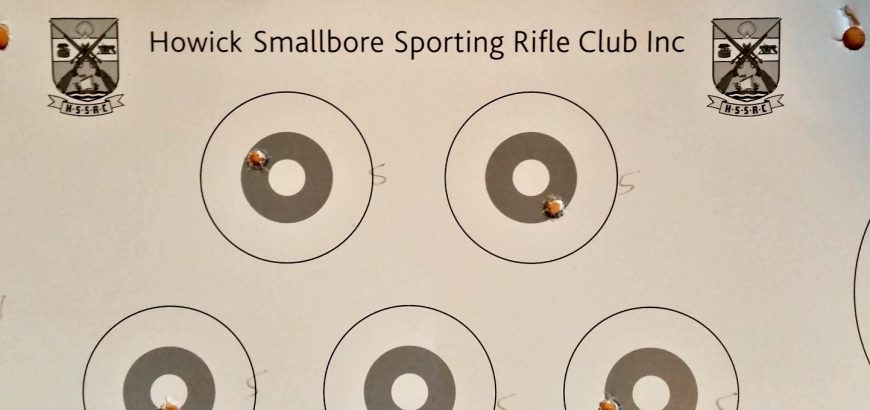
The top right target is 5 CCI SV rounds put through the V can suppressor, showing no loss in accuracy. The bottom left is the initial HP Sub through the bottom of the can.

Service rifle shoot at Waiuku

I’ve never had good luck with a shoot at Waiuku. I’ve been to the range twice before and both times been hit torrential rain and gales, making shooting uncomfortable, if not impossible. Well, third time was the charm as I attended the Waiuku service rifle shoot this Saturday past.

Firstly, let me say that Waiuku has great facilities that enable a wide range of shooters to enjoy themselves. It’s also one of those rare clubs where pistol, rifle and shotgun are all welcome. However, I’ll leave a review of the range for another post. For clarity’s sake, this isn’t the same Waiuku range were ASRA does their winter shooting (The Farm).

On to the shoot itself. Well, it’s a 45 round shoot which I was hoping to do with my .303, until I realised that morning that I only had 20 rounds in the safe. With an abundance of 7.62×39, it turned out that the trusty SKS would get a work out this morning.

Service rifle shoot

If you’re into your military surplus rifles, going along to a service rifle shoot should definitely be top of your list of things to do. With everything from WWI Lee Enfields, through to Mausers and AK47s and AR15s, every major armed conflict in recent history was represented.

The shoot was run in two details and as previously mentioned, was 45 rounds. This consisted of a Trinity and Action M match and a 10 round sniper shoot.

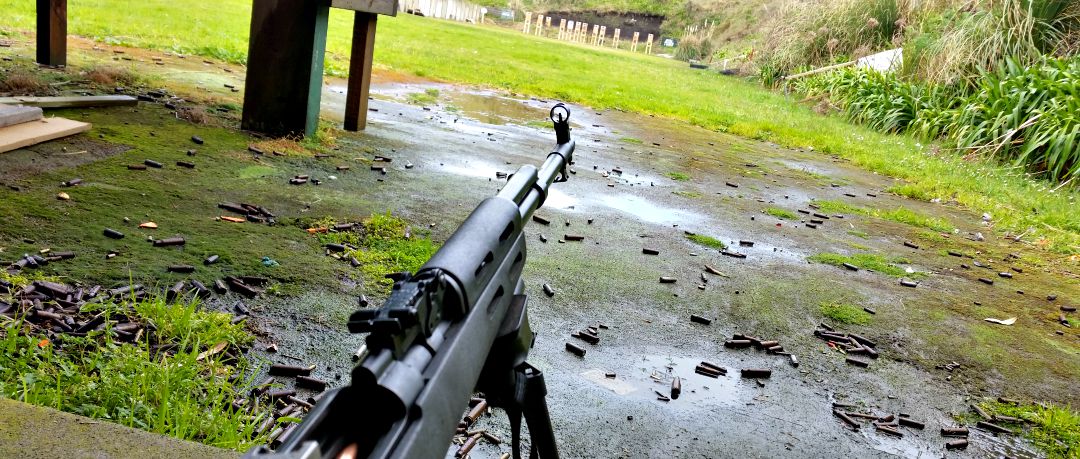
The Soviet weaponry and rusted casings are reminiscent of the Nicholas Cage movie Lord of War.

The trinity shoot is 5 rounds each in the standing, kneeling and prone positions. With no sighters or spotting scopes, you’ve got to know you’re rifle well. The SKS performed well, but was shooting low – which was more me than the rifle, as my wife was shooting too high with the same gun. One thing I may consider doing in the near future is replacing the front sight post with a skinnier one that doesn’t blot out the entire target. Those rifles that were scoped were limited to a magnification of 4x.

After those fifteen rounds, targets were checked, which is when a few of us actually got to see where our rounds were going. For myself, another shooter with an unsighted SKS and another with a new suppressor on his AR, the results were less than stellar.

The next ten rounds allowed us to compensate where we needed to, but the faster pace and movement involved in the Action M shoot means you can’t spend too much time trying to compensate, especially with open sights at 100 metres.

An Action M is usually shot in 60 seconds (at least it was when I last shot one at the Auckland Service Rifle Assn), and consists of 2 rounds prone, 2 rounds standing, one kneeling – reload another 5 round mag or clip – one kneeling, 2 standing and 2 prone. It’s 75 seconds for bolt actions, which is okay if you have a removable box magazine or stripper clips. However, when I shot this last with a Swedish Mauser and no stripper clips, it was certainly challenging. The rules for different types of matches are made by the NZ Service Rifle Association.

In light of the range of rifles and abilities present on the day, and the generally non-competitive nature of the shoot, no strict timing was done, although everyone went as quickly as they could.

SKS on bipod
The sniper shoot allowed for rests or bi-pods. Handy hint; your car’s floor carpeting can be used if you forget your shooting mat.

The last ten rounds was a sniper shoot which allowed shooting aids, such as rests, bi-pods and spotting scopes – this is where many people were able to turn the tables – despite the smaller targets. Having someone spotting for you is also very helpful when you’re on iron sights.

Although I didn’t place highly, I did enjoy the day and seeing all the old relics shooting (and their rifles too). About a third of the shooters were from HSSRC, so there were some friendly faces, and a few us enjoyed shooting some silhouettes with the rimfires on range 2 afterwards. All-in-all, for $20 and the cost of ammo, a good day was had all round.

Finishing the day off with some silhouettes at 25, 50, 75 and 100 metres was good fun.

Cutting down a .22

Sporter barrels on .22s are usually long and thin. This means they’re lighter when carried in the field, but they can also be whippy and harder to control than bull-barrelled rifles. Another way to achieve that relative stiffness in the barrel is to reduce the length of it.

I’ve had two Norinco JW-15s, and while the 22.5-inch barrel is okay, the 16-inch barrel is a real shooter. If you head on over to nzrimfire.com you’ll find plenty of people who have taken full length Norincos and cut them down to as little as 13 inches with great success. I guy I used to shoot with cut his down to 14 inches and found no drop off in accuracy.

Thankfully in New Zealand there are no minimum barrel length laws, just minimum overall firearm length rules – which means you can take full advantage of this, and make your rifle more manoeuvrable, easier to get in and out of your truck and pretty accurate to boot. In the video below I’m shooting an old Voere that I bought for parts – the barrel has been cut down to 8 inches and lets out a little burst of flame with standard velocity CCI.

So, what is the trade off with cutting down your .22? Well, you can burn off all the powder in your average .22LR case in about 12 – 13 inches of barrel. However, you still won’t have achieved maximum muzzle velocity. You’ll also get more variation in muzzle velocity, as the longer barrels allow for a more consistent burn, resulting in a more consistent muzzle velocity. While you can still gain a lot more speed out of a longer barrel, 16 inches is often said to be the “sweet spot” for .22s.

.22LR cases on bench
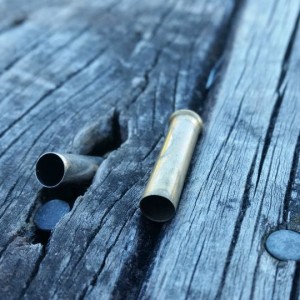
The humble .22LR doesn’t need too much barrel to burn it’s full powder capacity.

After that point, muzzle velocity still increases, but in much smaller increments per inch, and your follow through becomes much more important. I suppose if you wanted to teach yourself excellent shooting habits, a target rifle with a 28 or 30-inch barrel would be ideal. However, if you just want a nice shooter, go for a 16-inch tube, or do it yourself if you have the confidence/competence. Some manufacturers do release 13 and 14 inch options for their rifles (Anschutz has a 14-inch sporter), however, if you’re doing the job yourself, give it the extra couple inches to be on the safe side. I guess I should put my money where my mouth is and trim down that 22.5-inch Norinco… Oh well, add it to the list.

Should I clean my .22LR barrel?

There are many opinions, myths and vagaries about rifle cleaning. Some will tell you to clean and polish your bore after every trip to the range, others will tell you cleaning your rifle is a waste of time or a bore snake will do the trick. However, one thing’s for sure – maintaining your .22 is completely different.

What’s the difference?

Whether it’s rimfire or centrefire, some fouling is often needed to get a barrel shooting to the same, reliable point of impact. Lead rimfire projectiles are much softer copper-jacketed bullets, doing minimal damage to the bore, and the lead deposits left in the barrel don’t do any harm either. Copper not only wears down the barrel, but leaving it in the bore can lead to quicker deterioration of the rifling after subsequent shots.

So, the question then becomes – if fouling is good and lead isn’t harming your barrel, why would you clean your .22?

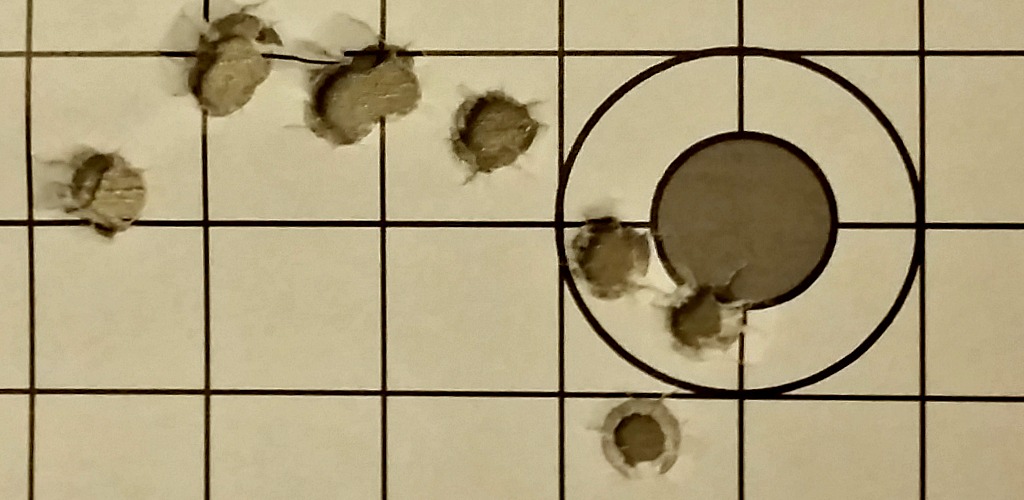
This picture shows how a clean barrel walks to its point of impact once it fouls up.

How often to clean your .22LR barrel

I don’t personally clean my barrel very often. The standard is “when accuracy starts dropping off”. And to be honest, I’ve never got to that point. I give my .22 a couple pulls through with the bore snake and some Hoppes No. 9 after a couple thousand rounds – give or take a few. But, lead crud is nasty on the action.

I mainly shoot bolt action when I’m shooting rimfire, which means I can feel when the bolt starts getting stiff or it doesn’t feed nicely. Semi-autos tend get gummed up a bit more, as gasses from firing come back into the action. What to do? Use some bore solvent and angled brushes, cotton swabs or cloth to clean the gunk out. Every now and then disassembling the bolt or action could be necessary to ensure reliable functioning. Some shooters also like to clean up the crown, however, I shoot with a suppressor, so I’m not super-fussed on that score.

If you have any questions or tips for cleaning your rifle – share them in the comments below.

Regular target at HSSRC

Where to shoot in NZ: HSSRC

If you’re new to shooting – perhaps you’ve never seen a rifle up close – learning more about the sport can be daunting. The best way to go about it is to find a local club where you can develop your knowledge and trial different equipment before buying your own. You can also get a feel for different shooting disciplines and even competition, to see what most piques your interest.

A great place to get started is the shooting range in Howick. If you’re in East Auckland it’s a convenient place to shoot, and it’s fully indoors which is great in winter. There are quite  a few different clubs operating out of this range, including a couple sporting smallbore clubs, a target shooting club, air rifles and a pistol shooting club as well.

My favourite organisation at this range (and I’ve tried almost all of the options on offer), is the Howick Smallbore Sporting Rifle Club (HSSRC). It’s an extremely friendly environment and has a wealth of experienced shooters willing to lend a hand. The range is great and the club equipment is very good – the shooting fees are cheap too. You can hire a rifle, pay your range fee and pay for your ammo for less than a movie ticket – not a bad way to spend a Friday evening. You’ll also be fully supervised (if you’re unlicensed) throughout the shoot with full instruction – easy as!

Moving on in the club, you can participate as a range officer or assistant range officer, or help new shooters as well. You can also participate in the inter-club tournament and the club fun shoots and end-of-year prize shoot. There are plenty of opportunities to get involved, which you’ll find out as you go along. You’ll also find most shooters here engage in a couple different disciplines, and can not only help you with your shooting technique, but can also point you towards other clubs and competitions you might enjoy.

If you’re looking for a good place to learn, or you’re new to the area and already a competent shooter, this could be the place for you.

The club shoots on Friday evenings from around 7 pm onwards, and has plenty of gear available. You can also purchase ammo at very reasonable rates. Once you become a member (which doesn’t cost much at all), your weekly shoots and ammo will be even cheaper. If you’d like more info, leave a question in the comments below, or head on over to the HSSRC facebook page.


Choosing a calibre for a secondary AR-15 upper?

Best upper for AR-15

So you’ve bought your first AR-15 and you’re super excited by the fact that you can swap in just about any upper you want to create a whole new weapon. But which is the best upper to choose? While the .223 is a great round, it’s not the be-all and end-all of rifle shooting (nothing is), so what about about a different calibre?

Here’s my take on what you can achieve my swapping out the upper on your AR-style rifle.

How about a .22LR Upper?

Well, not the worst idea actually. If you want a cheap way to practice with your AR or to introduce younger shooters to the sport, using 22LR ammo is a great and inexpensive way to do it. However, there are some conversions that use your 5.56 barrel – don’t do it. It can work, but it won’t be a satisfactory way to shoot either caliber, and it requires more work.

Rather, spend the money on a full upper and magazine, like this one from gunsupplies.co.nz, which will work with any milspec receiver. Although, to be honest, for not much more you could buy an entire .22LR AR-type rifle.

7.62×39 anyone?

Okay, let’s be honest, I’m a big fan of the humble 7.62×39 Soviet cartridge. It’s cheap and dirty and does the job. But, would I put it through an AR upper? Not really to be honest. While the AR platform is great. there’s not much reason to get it to shoot cheap Russian ammo.

If you want a cheap way to shoot this calibre, you can get a Chinese SKS for a third of the price of a 7.62×39 upper, and again, you have a whole new rifle to enjoy. You also won’t feel nearly as bad using it as a knock-around bush gun.

AR-15 in .300 BLK

If you want 7.62×39 ballistics in an AR-15, .300 BLK might be the way to go. Developed for spec-op military applications, this round is AR-friendly. It feeds from a standard STANAG magazine with no modifications, and without reducing the capacity, so at least you can use your current AR mags.

If you’re looking for something novel and interesting to shoot, which is designed for the platform and actually useful, the .300 AAC Blackout could be the answer. It is more expensive to shoot than any of the other rounds, and would probably necessitate reloading to make it a viable addition to your safe.

Which AR-15 upper should I choose?

Well, my personal preference would be to have one completely milspec rifle for service rifle competitions, a 20 inch barreled set up for 3-Gun, and perhaps a .300 BLK upper to enjoy shooting something a bit different.

But hey, that’s just me! What would you choose as your ideal black gun set up?