Trigger adjustment for Tikka T3
It goes without saying that the Tikka T3 is one of the most popular bolt action rifles in New Zealand. It’s loved by hunters for it’s simple operation, superb accuracy and reasonable price point. Competition shooters are increasingly turning to the T3 as the basis for customised F-Class rifles and the like. With an abundance of after-market parts and a fairly modular set up, it makes perfect sense as a platform to rival the Remingtons and Howas on the range.
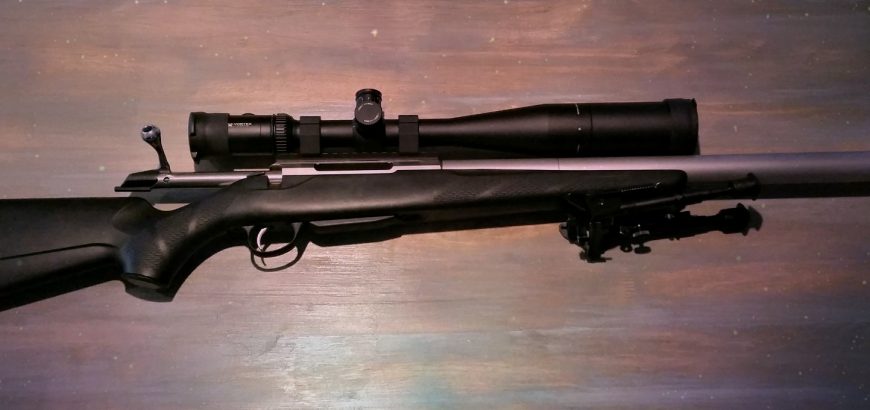
One of the great things about the Tikka T3 is that you don’t have to spend much money to make it a good shooter. Out of the box it has its 3-shot MOA guarantee, as well as some included rings and an adjustable trigger.
Common alterations to T3’s include the obvious, such as new scopes and suppressors. But others go a bit further with bipods, chassis systems, magazine/floor-metal replacement, etc. One thing that most shooters won’t need to change is the trigger. Your top end shooters may opt for an aftermarket trigger, but the majority of us can get away with the factory unit with no trouble.
Trigger overview
Adjustable from 2 ¼ – 4 7⁄16 lbs (10 – 20 N), the rifle comes set from the factory at around 3 lbs ( 13 – 15 N). Some models will allow access to the trigger pull weight adjustment screw through the magazine well once the mag is removed. On others you will need to remove the barrelled action. Even if you can access the screw through the mag well, you may as well take the gun apart, as it will probably be quicker and easier. With only two action screws to remove, it really isn’t hard work to do this, and you’ll get familiar with the innards of your gun too.
The factory setting is safe and light enough for hunting, however I personally prefer a lighter trigger (around the 2 lb mark). Since I never walk around with a round in the chamber, I don’t mind a light trigger from a safety perspective.
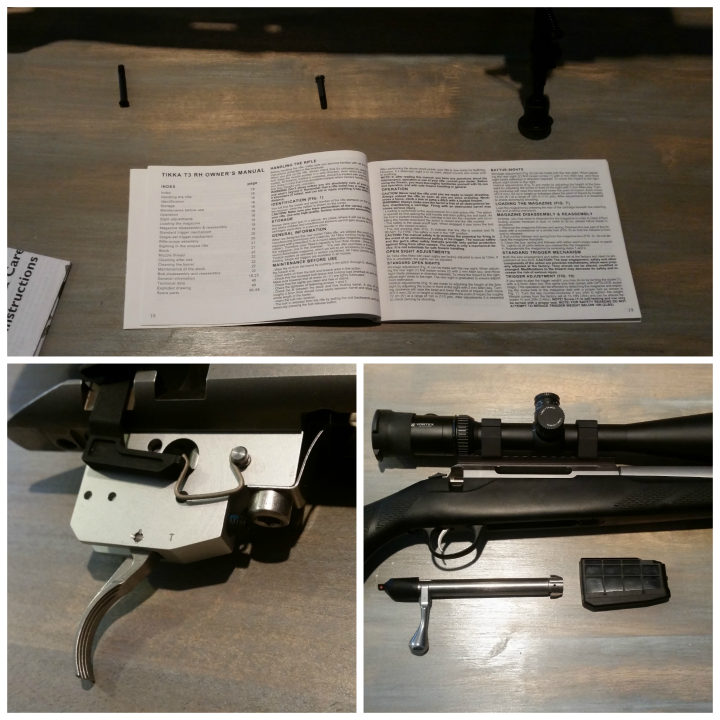
The trigger breaks cleanly and crisply, and many are happy with it without feeling the need to lighten the pull weight. If you’re shooting from a bench or mound for groups, you may want to lighten the trigger, as I find even a 3 lbs pull weight can cause you to torque the rifle a bit while pulling the trigger, producing occasional flyers.
If this is your first rifle (good choice!), getting used to a heavier trigger is not a bad thing, as it results in good trigger control practices. If you’ve got a heavy calibre and you’re worried about developing a flinch, a heavy trigger pull can accentuate these tendencies, as you anticipate the break.
In terms of function and looks, the T3 trigger unit is certainly above average for a factory rifle, and many will find it perfectly suitable without replacement. The easy adjustment makes it even more widely appealing.
If a safety is important to you’ll probably like the Tikka arrangement. It’s a thumb safety which when engaged will lock the bolt in the closed position, the firing pin in the cocked position and will keep the sear and trigger blade from moving. The red indicators for ready-to-fire are pretty clear on the safety and the bolt shroud.
Adjusting the trigger
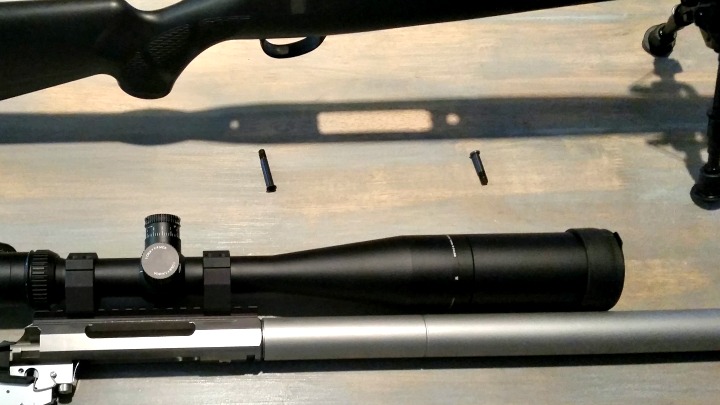
The trigger pull weight is easily adjusted with a 2.5 mm allen key – the same size your scope rings use. The screw is self-locking, so you’ll definitely need the tool to make the adjustment, You also won’t have to worry about it working loose. The screw will only move so far in either direction, so it’s simply up to you to find the weight you like. If you have the tools, you can even measure your trigger pull weight to be 100% sure. This will also inform future trigger decisions, as you’ll know what weights you do and don’t like.
The trigger pull weight is the only adjustable part of the trigger, so don’t worry about anything else on there. If you are uncomfortable with making your own trigger adjustments, a competent gunsmith is your best friend.
If you need pictures or more guidance, consult your instruction manual. If you bought your rifle second hand, Sako has an online version of their Tikka T3 rifle user manual here. If you do take your rifle apart to do this adjustment, having a torque driver on hand to put everything back together to the correct specs is ideal.
A few learnings from my trip to Taupo this weekend
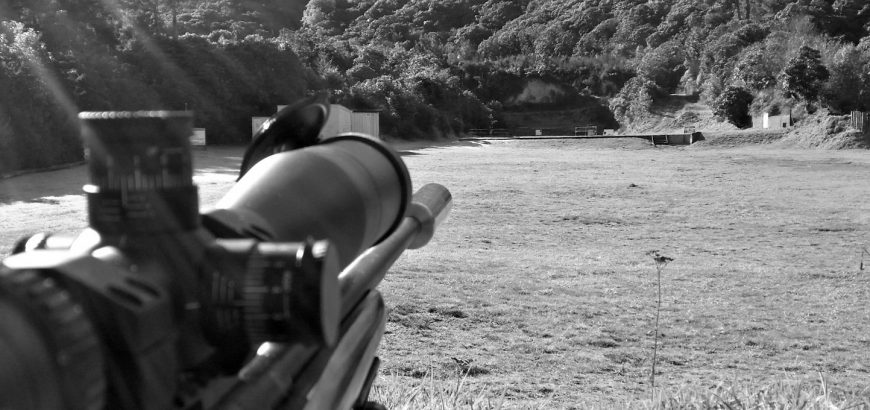
I’ve always enjoyed shooting at the Taupo NZDA range. It’s accessible, cheap, and often on the way to a hunt or a holiday. Hey, it’s even worth just driving down there to spend the day if you’re from Auckland, Hamilton, Tauranga, Rotorua, etc.
So, while I was enjoying some time away with my wife this weekend, I managed to take a couple guns down to the range to test out loads, etc. Here are a few things I learned…
The cost to shoot at Taupo has gone up
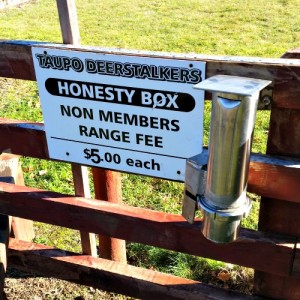
While you used to be able to shoot at the NZDA range for a couple bucks, you’ll now feel your wallet cry as you pull out $5 to shoot. As long as you want. On three ranges. With other casual shooters and locals. I take it back, it’s still cheap as chips!
You can see where they’ve spent the money too, with lots of new safety signage and other bits and pieces. This leads me on to the second and third things I learned…
Get there early and you can use the 200m range
While using the 100 metre and 50 metre ranges is great, having a chance to check your drops – or zero – at 200 metres is great.
With the other shooting positions forward of the 200, you’ll need to either be shooting while no one is around or with others who want to shoot a longer distance.

Pay absolute attention on ranges you are unfamiliar with
I read the signage, checked all the ranges, made sure the flag was raised and closed the gate to the 200 metre mound before I commenced firing. However, when I opened the gate up again, I noticed another flag that I should have raised but didn’t see.
Thankfully the closed gate makes it pretty clear, and the flag at the carpark shows the ranges are in use, but if shooters make mistakes, you can soon find yourself not welcome at a range – particularly if your foul ups are of a more serious nature.
Anticipate cold weather and wet ground
Heading to Taupo from Auckland for just a few days, I didn’t bother checking the weather, and to be honest it didn’t cross my mind that there may be some fairly heavy frosts (compared to north of the Bombays). First thing I did was rotate the shooting benches into the sun so I could sit somewhere dry when I moved up to the 100 metre mark later in the day.

But, on the grass mound of the 200 metre range, it’s pretty cold and wet if you don’t have a shooting mat. Well, it’s not the first time the carpet at the back of the station wagon got used as a shooting mat! So, my final lesson for the out-of-town shooter, always take a shooting mat and a towel if you can!
While you’re at it – a cap or sunnys is a good idea. I’ve never shot at Taupo when it hasn’t been bright sunshine coming straight down at you.

Why do some shooters wear yellow glasses?
Those new to shooting sports will easily become overwhelmed with all of the associated bits and pieces you need to buy before you can really get into your chosen discipline. While you can always get cracking with a gun, some ammo and basic maintenance gear, there’s always something else that you probably “need”.
One of those things that I never really understood was yellow safety glasses. Well, I understood the theory, but I didn’t really think they would make that much of a difference…
So what does the colour do?
Well, yellow isn’t the only colour available. In fact, there are many glasses that come with interchangeable lenses and packs of these in various colours/tints.
The various shades are for shooting in different lighting conditions. You can get some that are similar to sunglasses, – these are great for extreme brightness, such as sunny days in winter, over frosted or snowy ground. You also get those with purpley-blue tints, which are great for picking up orange against a green background. In other words – perfect for trap shooters who have tall trees or hills as their backdrop.
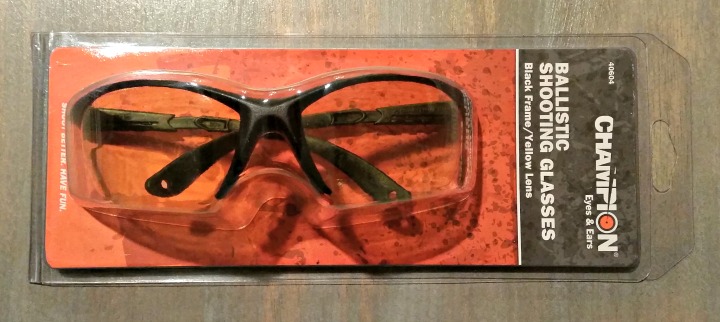
Yellow and orange glasses are great for increasing contrast. These are brilliant for a few reasons. For older shooters with weaker eyes, these really help the targets “pop” into the foreground.
It’s not just for those that have eye conditions or who have been shooting longer than you’ve been walking. They’re also great for shooters who engage fast-moving targets, such as Olympic clays, or who themselves move fairly rapidly, such as IPSC pistol shooters.
Do they really work?
As I mentioned before, I never really bought into the higher contrast for better shooting theory. I thought it was just something else to spend money on. However, having recently been bought a pair for my birthday, I am thoroughly convinced.
Since I’ve picked up pistol shooting, I’ve been using clear safety glasses to protect my eyes. Of course safety glasses of some description are mandatory on pistol ranges. So, having gone through the first few weeks of my tyro course with clear glasses from the work bench, I thought I was doing fine.
When I tried out the yellow glasses, it was a particularly rainy/overcast/cloudy day. It was varying between overly bright and overly shady, with everything looking like a different shade of grey.
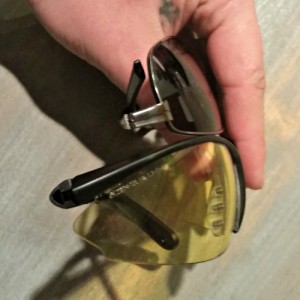
Not only did the Champion brand shooting glasses I was wearing make it easy to pick up the black bullseye from 50 yards out (on a Service Pistol shoot), but they didn’t fog up or need cleaning with the changing weather and fast-paced match. I was seriously impressed.
Safety
Shotgun shooters are generally wearing glasses for their beneficial effects on their vision, while pistol shooters and 3-gunners are wearing them for those benefits, but also to protect their eyesight, as they have barrels and ejection ports much closer to their faces, and expend hundreds of rounds of ammo at some considerable pace.
I’ve personally witnessed a potentially blinding incident first hand, when a reloaded 9mm round blew up in the gun, forcing burning powder up towards the shooters face through the open ejection port. The round had weakened in the webbing, so after the head of the case separated, the gas had nowhere to go but up.
Fortunately, the shooter was wearing safety glasses and after a bit of time to recover from the fairly intense experience, she was fine.
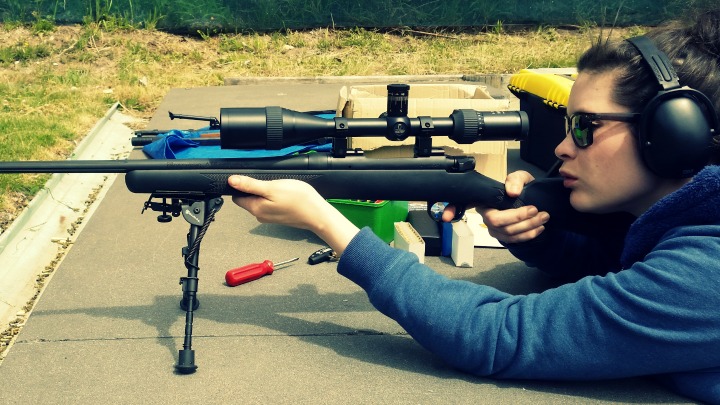
In fact, I would even recommend bolt action rifle shooters wear glasses in some instances. I always wear a pair when I test brand new loads, fire a rifle I haven’t fired before, or after modifying anything near the bolt. I’ve heard of ruptured primers sending hot gases backwards along firing pins and straight into a shooters face. Anything can happen. In an ideal world, all shooters would wear their “eyes and ears” at all times.
What about sunglasses/reading glasses/safety glasses?
While the above are better than nothing, they are less than ideal. I would (and have) used these over nothing.
Sunglasses and normal eye glasses provide good protection from the front, but generally don’t wrap around to the sides of the face or protect from the bottom. Sunglasses can also make it harder to see the target in many situations.
Shooting glasses and safety glasses wrap around better. Cheap safety glasses will scratch easily and will also fog up when you’re running through a course. And if you’re going to spend the money buying fog-proof safety glasses, you may as well try out some yellow glasses or a set with a few options.
Product review: DOCTERsport 8-25×50 AO
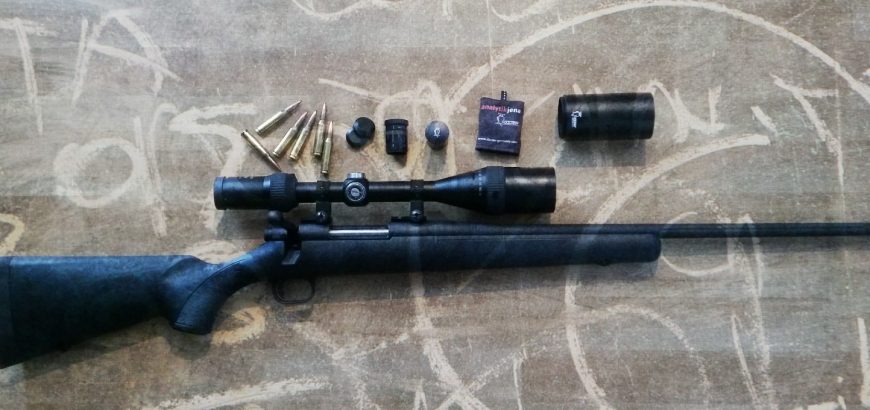
Writing a gun blog certainly has its advantages. One of those is exposure to brands and products you may not otherwise have come in contact with. A perfect example of this is this quality European scope, which I may not have tried out if I didn’t spend a lot of time researching firearm-related products.
The DOCTERsport series is aimed at target shooters, whereas most of the riflescopes made by Docter are built for the European hunter. With this kind of heritage, you know the scope is going to be made to pretty exacting standards, as hunting in the Northern hemisphere can occur at temperatures and elevations unknown to Kiwi hunters.
Speaking of heritage, other factors contributing to Docter’s all-round excellence are it’s shared heritage with Carl Zeiss and its more recent past with Analytik Jena, a company that specialises largely in precisely manufactured and tightly toleranced lab and medical equipment. Docter was recently bought (along with the bulk of AJ’s business) by capital investment firm NOBLEX GmbH. The new owner has assured customers that they will continue to manufacture existing Docter products and parts, and will even invest more into the optics business. Hopefully this will mean continued advancement from an already great producer of high quality scopes.
Being European…
The simple fact that this scope is manufactured in Germany by a known maker of fine glass means a lot. It means great optical clarity, fantastic quality and technical specs like you can’t believe. It also means measurements and manuals are in metric units. For example, the lower magnification scopes in the range have adjustments of 7mm per click at 100m – thankfully for those that are used to imperial or MOA measurements, this is 1/4″ at 100m. For the 8-25×50 model you are looking at 3.5mm at 100m, or 1/4″ at 100m, per click.
Light transmission
The scope has fantastic light-transmitting properties. According to Docter, more than 90% of light is transmitted during the day and more than 86% at dusk – not bad in failing light!
At the highest end of the magnification range, you do lose some clarity, but not as much as you’ll notice in cheaper scopes. I only really noticed it the other week at max magnification, shooting in a thunderstorm, with heavy clouds. Under normal shooting conditions, you won’t notice a lack of light at all.

The 8-25×50 model
This end of the series has the largest objective bell (57mm tube – 50mm lens) and zoom range, so you know you’re dealing with a long-range scope. However, there are a couple aspects to consider when using this scope for extended ranges. Firstly, the 4.5-15×40 and the 8-25×50 are the only AO models in the range, so you’ll be parallax free if you have your settings right. That’s one for the positive column.
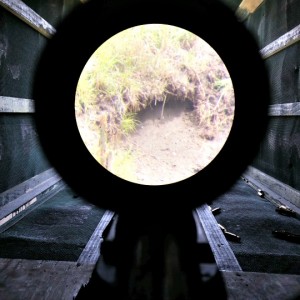
On the negative side of the ledger, the adjustment range is not huge. In fact, in the AO models, it’s significantly less than the fixed parallax versions. I’m no scope manufacturer, so I’m guessing it’s to do with two things – introducing more gearing for the Adjustable Objective, and having a limited amount of space in the housing.
The lower end scopes in the range have an adjustment range of 150cm at 100m. So, theoretically (if you’re zeroed in the exact middle of the adjustment range), you can adjust 75cm up or down at 100m. At extended ranges, this will translate into greater vertical or horizontal distance. However, obviously, if you’re working in MOA or MilRads, it’s one constant number.
With the 8-25×50 model, your adjustment range is just 56cm at 100 metres. However, if your rifle and mount are true, this is okay. If you want to shoot beyond 300m – 400m and you’re shooting a calibre with a significant drop, you’ll run out of adjustment range. Also, with any scope, if you’re at the end of the adjustment range, you’ll have other issues with gearing. So, if you want to get truly long range, you’ll need to get adjustable bases or a 20MOA rail – although, let’s be honest, if you’re serious about long range, you have those anyway.
When I first tried this scope on my 6.5×55 I could barely get on paper at 25m, and at 100m I just didn’t have enough adjustment to get on paper. I was too low and to the left. However, the issue was not with the scope. This limited adjustment range highlighted the fact that whoever mounted the bases on my rifle had done a pretty poor job of it, with the rear base sitting higher than the front and off to the side a fraction as well.
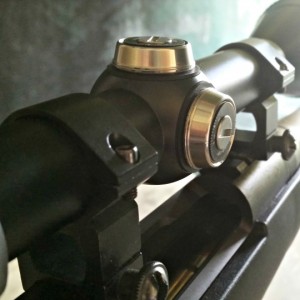
Mounting the scope on my 7mm-08, I enjoyed the crystal-clear clarity and the extras Docter had sent along. The first time I used this scope on my Mossberg was at the NZDA Taupo range in the height of summer, with huge amounts of glare and mirage. Thankfully, the long sun shade made for easy shooting and eliminated a lot of mirage from barrel heat as well. You know careful thought and consideration has been put into the machining of these threads, as the logo lines up nicely with the top of the scope, as does the logo on the large eye piece.
I say the eye piece is large, but it’s not overly so. It’s more that it is longer and bulkier, than wider. So it shouldn’t get in the way of bolt handles on modern rifles, but it has a lot of tolerance for eye relief, allowing you to mount the scope in a way that suits your shooting style. It also has a great fast focus ring that extends a fair way.
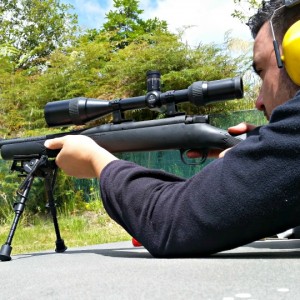
Adjustments and reticle
This scope does have a lot of features, and this review article is probably dragging on a bit, so I’ll finish up with a quick overview on the adjustments and reticle.
There are various options for reticles – Plex, Dot and Cross Hair. The scope that I was sent to review is the Cross Hair variety, and it is exceptionally thin. This is great for seeing more of your target at long range, but it’s difficult to use in quick-fire applications, where you would want the Plex reticle. In my personal opinion, it’s a bit too fine, but for those that shoot long distance all the time, it could be just what they want.
There are no reticles with holdover marks (unless you count the post on the Plex), so it’s a scope designed for shooting at known distances. Again, this does mean a cleaner and less obstructed view through the scope.
Most Docter scopes come with finger-adjustable turrets under caps. This particular model comes with tool (or coin) adjustable turrets under low profile caps. The reason for this, is that there are optional target-style turrets that are finger adjustable, and screw into the coin adjustment slot. I like the idea of target turrets, but this method does make them a bit too sloppy in my opinion. The tactile response to adjustments is just not as good as other Docter scopes, but you do gain the benefit of being able to see
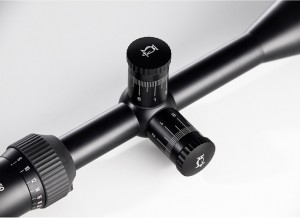
your zero markings from behind the gun.
Not only can you clearly see the markings on the target turrets, but because the magnification and parallax adjustments are on rings that slope towards the shooter, you can clearly see these as well, without moving from your shooting position.
These other rings are also quite coarsely geared for a scope of this price and magnification level. Coarse doesn’t mean bad. Coarse means quicker, but less fine adjustments. Whereas finer gearing means more precise adjustments, but long throws, which slow you down.
The scope does, of course, come with all you would expect in terms of ruggedness. Fantastic rubber armour where it’s needed, as well as all the usual shock, fog and water-proofing you’d expect in a modern scope.
Overall impression
Overall, the scope is worth the money spent if it suits your style of shooting. It is designed for target shooters, shooting at known distances in variable conditions. If you’re after a hunting scope or something to throw on your AR, Docter have some other brilliant scopes for those applications, but this is not the one.
Docter scopes are not easy to find in New Zealand, but Serious Shooters does have a decent stock, Wilhelm Arms may still have some stock if you ask Richard, and there are Australian and European stores that will ship to NZ if you don’t mind a bit of a wait.
The 8-25×50 currently retails around NZ$1700, but if you can find it on special, you can usually shave off a couple hundred bucks. For a German quality scope with this many features, you’re doing well at a price like that.
If you want a chance to win the scope used in this review, head along to our Facebook page, and also check out the terms and conditions here.

Mounting a scope on a .303
The old .303 has been a staple of the Kiwi bush for decades, and will most likely continue to be around for decades to come. Usually the pristine, fully wooded specimens are locked away in gunsafes and taken out for service rifle shoots, and even old sporters get treated with a degree of respect, reflecting their heritage from the culling days.
However, some sporters are the perfect base for a project that’s a little bit fun – a little bit different. So, looking out for the perfect beginning of a bush rifle project, an easy scope mounting scenario was high on the list for me.

Most of the older rifles with scope mounts have rails that bridge the gap between the front of the action and the stripper-clip/bolt guide. I think I’ve only seen one with weaver-style rings jimmied into place, and one with a scout-type mount that fit over the rear sight – similar to what you see on some Mosin Nagant scout projects.
Anyway, these older rails – they all tend to lack any Weaver or Picatinny type cross sections – the slots where the recoil stop sits. If you try and fit modern rings to one of these older rifles, you’ll find that after a few shots, the rings will start to slide back or loosen.
So, this means if you buy a rifle with one of these old rails you have a couple choices.
Find some old rings
You could try and find some old style rings that lack a cross-bar. These are similar to the dovetail rings you get for rimfire rifles and for modern Tika rifles. The difference is the width of the ring bases, so you may not be able to find a modern type that will fit your older rifle – especially if the angle of the lips doesn’t mate up with the angle of the rail.
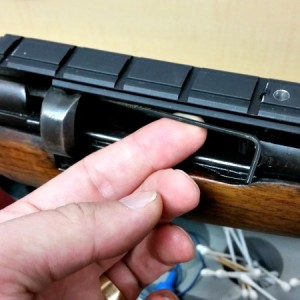
So, you may have to try and find some old school rings. However there are two downfalls to this approach. Firstly, older rings were phased out for a reason. The cross bar on picatinny and Weaver style scope rings means the rings cannot slide back on the rail under recoil.
The second downfall is that you will be getting an unknown quantity. They will probably be for 1″ tubes only, and you won’t know whether they’re good quality, well-aligned, etc.
Remove the rail and replace
There are a few modern rail types that you can fit to your .303. There are ones that you drill and tap into the side of the action – I’m not a big fan, but others like them. They’re quite similar to the kind of aftermarket rails you’d use on an AK, Mosin or SKS – basically actions that aren’t designed for scope rails.
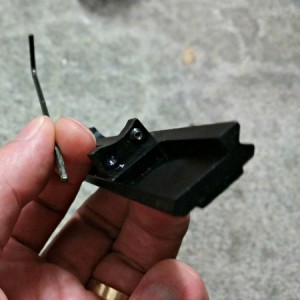
Because the rear ring of the action is quite different to modern actions, your standard MOA rails probably won’t be much help. However, ATI produces a mount that uses one screw into the front ring of the action and a couple grub screws against the rear ring of the action. While these two rear screws are not drilled and tapped into the action, the force they apply seems to be strong enough to keep the rail in place under recoil.
I’ve been using one on a project .303 for a while now, and have had no complaints.
With any aftermarket scope mounts on an SMLE, you’re going to have a pretty high scope. So, you’ll probably need to look at an aftermarket stock or some sort of cheek riser to allow easy and repeatable eye relief. More on that in another article soon, as this project continues to evolve.
