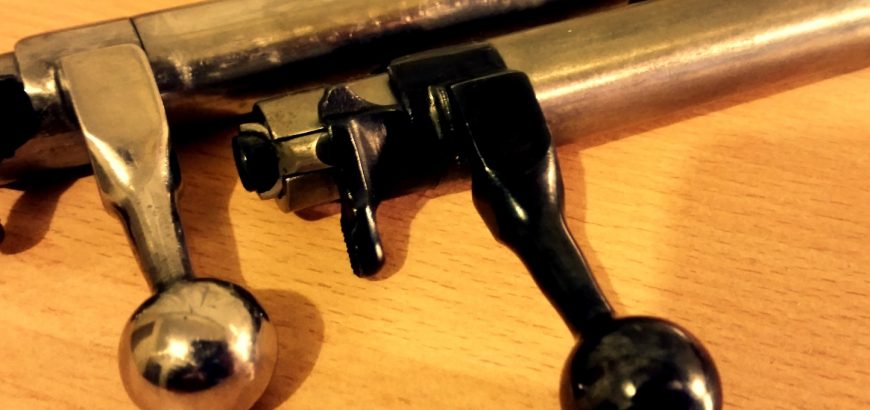
Bluing does a couple things for a rifle. It provides some level of protection against the elements, and it helps achieve a classic styling that other coating systems can’t achieve. However, there are some situations where you might want to remove the bluing from your rifle, including polishing your steel to a high shine, or preparing your rifle for another type of coating.
You can strip the factory bluing off your rifle with a very rudimentary list of kitchen/garage supplies. Here’s a look at this simple process:
1. Completely disassemble and clean firearm
Every metal part that you are going to be removing bluing from needs to be detached from the firearm. For my last project I removed the bluing from the floor metal, trigger and bolt handle. Even if you are doing your entire rifle, it still needs to be taken down. And I shouldn’t need to say this, but make sure the thing is unloaded before you do anything.
Once you have all of your bits and pieces ready, do a thorough degreasing with brake cleaner, degreaser, dish soap and water or something similar.
2. Time to get cooking
So, there are blue removal products out there made by many fine manufacturers. You could even try sandblasting your parts if you have the equipment. However, the method I’m going to focus on is cheap, reliable and effective – and probably better for the environment too. Instead of using harsh chemicals, you can simply use a couple bucks worth of vinegar.
Most people say to just leave the parts in vinegar for 30 minutes, check to see if the bluing has been removed, rinse and repeat until done. What I like to do is to heat the vinegar in the microwave (with no metal parts in it) until almost boiling. Try not to breathe it in as you move the dish to the garage, as it’s acrid and will set you off coughing. Nasty stuff.
Drop your parts in the hot vinegar and watch as the bluing literally bubbles off of the metal in spectacular fashion. It will only take a few minutes before you notice changes in the colour of your metal. When the metal looks clear, pull it out so you don’t start it oxidising again.
If you’re doing a barreled action you probably won’t have a big enough container to completely cover it in vinegar. What you can try is wrapping it in paper towels soaked with vinegar. This may be a little slower and could require a bit of extra cleanup to get it just right.
3. Attack the metal
So now you have some bare steel completely free of bluing and rust. Make sure to thoroughly clean and degrease again, removing all traces of bluing, vinegar and anything else that shouldn’t be there. Now it’s time to pull out the ultra-fine sandpaper and steel wool, and remove all of the factory imperfections and slight bluing residue that you can spot.
It’s your call from here. Some people like to coat their firearms with ceramic or paint-on applications, while others like to try more exotic metal finishes. I’m a big fan of matte colours on rifles – usually black. For firearms that spend 99 per cent of their time on the range and seldom see adverse weather or bush conditions, you can afford to go for looks over protection.
My JW-15 which is only used at an indoor smallbore range, has had the bluing removed from the bolt handle, trigger and floor metal as mentioned above, and was polished thoroughly with autosol. I do have to make sure the humidity level in my safe is under control and that the metal surfaces are oiled when not in use for long periods, but realistically I find that the same applies to my factory blued firearms. I’ve got to admit though, that shiny metal is pretty sexy!
