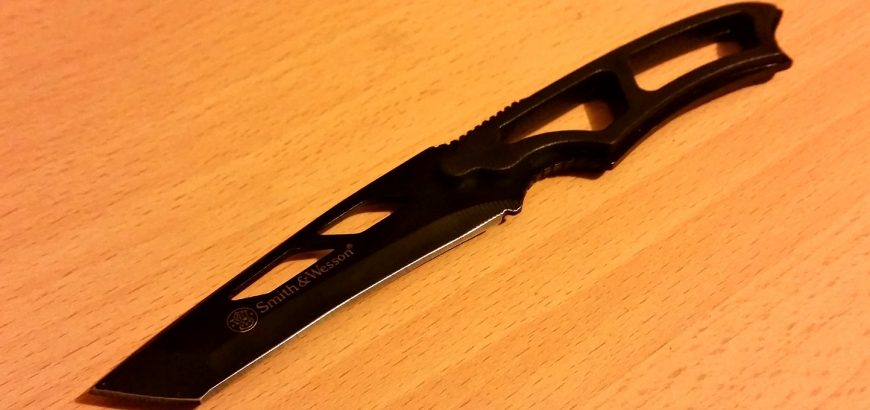
SW990 Tanto-style, black-oxide finshed knife.

Smith & Wesson SW990 review

Smith & Wesson is well known for their popular sporting rifles and innovative firearm designs. They also make many hunting and shooting accessories, including the SW990 knife. It’s a tactical-style knife at a CB price-point, what’s not to love? Here’s my review of this offering from S&W.

The purpose of the knife

As long as you buy this knife for the purpose for which it was designed, you should be happy. This is not your main skinning knife or an 18th birthday present – it’s a functional backup knife with some pretty cool features.

Firstly, this knife comes in two designs. There’s the drop point blade in a bead-blasted, stainless finish. There’s also the modified Tanto-style, which has more of a tactical look, and a black oxide finish. The blade itself is 440C stainless steel. This type of stainless steel is very common in knife-making and features a very high carbon content and corrosion resistance.

It’s a full-tang design, which means optimal strength. The blade and zytel handle are both skeletonised, which may be to reduce weight, etc, but realistically I think is just because it looks cool. The thumb ramp and finger guard are both notched for better grip. The overall length of the knife is 170 mm, with a 75 mm blade. Including the sheath, the length comes to 195 mm – it’s a pretty compact unit.

This knife comes with a plastic sheath that is meant to be hung around the neck or attached to a backpack. My particular knife didn’t come with the ball chain I see advertised on other sites, but I didn’t pay much for it, so I can’t really complain. The sheath has two small holes to loop the chain through so that you can attach it to your pack, or as mentioned before, hang it from your neck.

The nearly indestructible plastic sheath also features an emergency whistle, which is a great thing to have if you’re hunting or climbing and the darkness or weather rolls in quicker than expected. The sheath also has a very positive lock, keeping the knife in place, even when it’s hanging upside down.

Although designed and marketed by S&W, the knife is produced in China. Worried about quality? Well, there’s not much that could go wrong with this simple, no-frills design. The only negative thing I have to say about this cheap and well-made knife is that it is not as sharp as I would have expected. Of course, this is easily remedied with a bit of sharpening – which is not unusual with a new knife.

Overall, for the $10.50 it cost me on Trademe, plus the $5 overnight courier  to my work, I’m very pleased with this knife, and it will be going on my backpack before the next time I head out.

If you’d like to know where you can get one of these (aside from a quick Google search), leave a comment and I’ll give you the name of the Trademe trader I bought mine off – he (or she) seems to have plenty more.
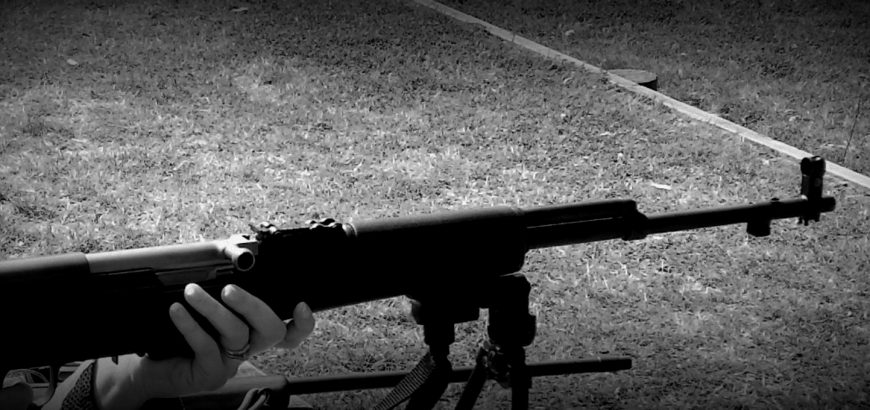
SKS on bipod at the range.

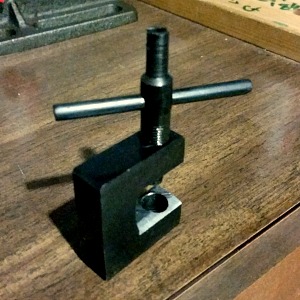
SKS front sight tool

The SKS is an immensely popular rifle in New Zealand. Whether it’s for budget-conscious hunting or recoil-reduced plinking, there are plenty of reasons to have one or two of these fun-makers in your gun safe. However, if you’ve picked up your favourite communist rifle and found that the grouping is out, you’re going to need to invest in a front sight tool – something I’ve recently done. Here are my do’s and don’t of this process.

This is what you should do when buying a front sight tool

SKS front sight tool
As you can see I have filed down the inside edge of the tool to fit around the hooded front sight.

You should definitely shop around. How much are they at the gun store – 50 bucks? Forget that. Go to Quartermaster Supplies and pick one up for $20. Most tack-on accessories for milsurp rifles can be found there for cheap. I paid $28, including all tax and couriered to my work. Sure beats paying almost twice as much at some of the big-name stores, and wasting time and petrol too.

You will probably need to file down one edge of the tool. I think these would fit an AK-style rifle without it (don’t have one on hand to check), but you’ll definitely need to shave off one of the inside edges of the U-shaped device, so that it can accommodate the round post-protector ring. This took me all of 5 minutes with a file, and a quick sand to debur. Just one edge is fine – you can flip it around to adjust the other way.

Sighting in should be done with the FORS principle in mind. That is Front Opposite, Rear Same. If you move the front sight to the left, the point of impact shifts to the right. If you raise the post, the POI will move down. If that just doesn’t make sense, check out the video below. This guy explains it fairly well – and it’ll save me repeating myself.

This is what you should not do when buying a front sight tool for the SKS

Do not try and drift the sight across with a hammer and punch. I have – naively – tried this, and not only is it frustrating, but you’ll soon end up with scuffs all over your bluing and you probably won’t move it much in the end. Spend the $28 – it’s worth it.

Don’t adjust your front sight while the gun is loaded. Seriously. Load one round at a time when sighting in if you have to, but don’t put your hand near the dangerous end of the rifle, and your body or face over the action when it’s loaded. Doesn’t that just sound like a recipe for disaster? The best safety is an empty chamber.

Don’t try and sight it in alone, unless you want a long and frustrating day at the range. Get someone on a spotting scope telling you where you’re impacting – it’s easier, and it’s always nice to have company.

You shouldn’t assume one shot is enough to determine where the rifle is shooting. I prefer to shoot a group of two or three before adjusting iron sights on a rifle like this at 100 or 200 yards. If it was a scoped target rifle on a bipod, with a more accurate round, then yes, one shot would be enough to figure out where to move your POA.

And lastly, don’t sight in with your plinking ammo and expect it to be spot-on with your good stuff. Sight in with the ammo you need to be most accurate with. The difference isn’t much, but the SKS can sometimes need all the help it can get when it comes to extracting every last bit of accuracy out of it. At least most bullets are of a similar weight and diameter when it comes to the SKS, so there won’t be a great deal of difference.

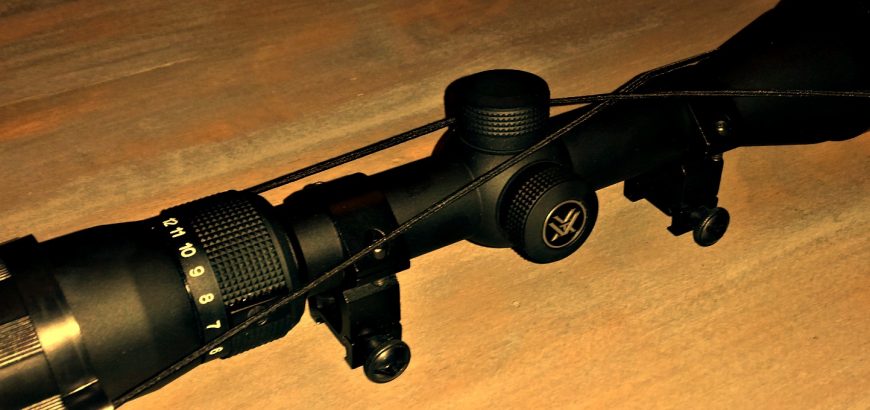
Vortex Diamondback scope

Product review: Vortex Diamondback 4-12 x 40 BDC

Firstly, buying this scope was a mistake. But it’s a mistake I’m very glad I made. I intended to buy the adjustable objective version of the Vortex Diamondback 4-12 x 40 BDC, but ended up with the fixed-parallax type. I couldn’t return to the store and swap it, because I had just left the country where I purchased it.

With the AO version, my idea was to use it at its maximum zoom at a 25 yard range on a rimfire target rifle. However, without that AO bell, the scope just won’t focus at 25 yards at any magnification greater than 8 x or 9 x. So, I reluctantly told my wife we’d need to take this brand new scope off her rimfire rifle and put it on my 6.5 x 55 that was in need of some glass. This is the point where I’m glad this happened.

The technical specs

The parallax setting on this scope is 100 yards – perfect for getting sighted in at the range, and more than adequate for the average hunting shot in the New Zealand bush. The adjustments go out  60 MOA in elevation and windage. With my 6.5 x 55 it was pretty much bang-on at 100 yards, maybe a total of 7 clicks left and a few up or down, I can’t remember. If you’re aiming to shoot long distance (600 – 1000 yards) you’re probably going to want to mount this on a 20 MOA rail.

The Bullet Drop Compensation (BDC) points are graduated in MOA, and so is your turret adjustment. How many times have you bought a mildot scope and found out later it has MOA turrets? So, this is nice to know right off the bat.

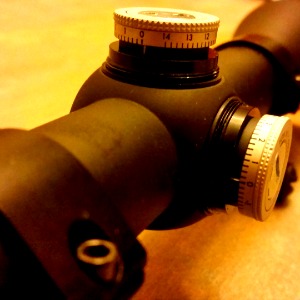
Vortex Diamondback scope with caps off.
The turret markings are easy to see from behind the gun.

The turrets are capped and resettable. This is nice, as now that I have my zero I can use the windage or elevation adjustments to my heart’s content without worrying about getting my 100 yard zero perfect again. The caps are nice and low and are easy to grip. Be careful when resetting the zero that you don’t damage the turrets, as I found them to be very tight and had to hold them in place with vice grips while I used a screwdriver to loosen the turret. Any extra pressure while doing this and you could have tool marks on your nice new scope. I covered the surface of my grips with masking tape to prevent teeth marks.

You have a total of 5 points of vertical aim, including the crosshairs and the top of the post. You also have 3 hash marks either side of the crosshairs horizontally, as well as the post edges. How to use the BDC? Check out this video from Vortex.


Quality and ease-of-use

The scope has the usual things that manufacturers claim, such as fog-proof, shock-proof and weather-proof everything. Except, this scope really does. I have mounted two scopes on this rifle – the other I won’t name. The unnamed piece-of-junk was used on one range trip for about 3 hours. Yes, there was wind, rain and sun. When I took it off to mount the Diamondback I noticed that the unnamed scope’s exterior coating was peeling off. After one trip!

Subjected to the same conditions, the Vortex scope still looks brand new. That’s probably why they provide an unlimited, unconditional warranty. Which, to be honest, is half the reason I bought it – that shows confidence!

The clarity was exceptional, and the lense coating wasn’t just for show. I had plenty of light, no glare and just a great shooting experience. The scope also features a fast focus adjustable eye-piece with a decent amount of range on it. This was perfect for when different shooters wanted to try it out. Also, the markings on the turret are easy to see without changing your shooting position much – which is not something I can say for every scope in my safe.

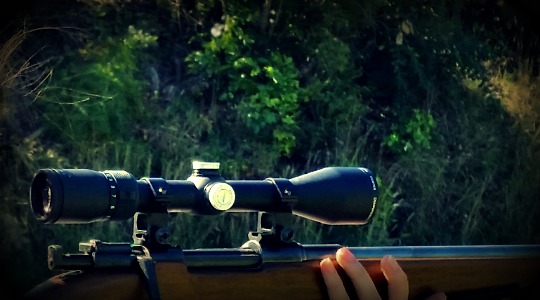
Vortex Diamondback scope on M38 Husky.
Adjustments on the range are done with ease.

Quality of manufacture is something that really shows when you shoot at an outdoor range. It’s also something that greatly determines how long a scope will last and whether you’ll enjoy shooting with it or not. In my humble opinion, the Vortex range is excellent. They are also reasonably priced. In the USA (where I bought mine) they were very affordable. In NZ, they are probably middle of the road. Either way, still worth it for the high-quality optic you’ll be getting. I would definitely purchase another scope from their range.

You also get some handy extras with your scope. There are the standard removable lense caps and a *really nice* cleaning cloth. I would suggest making use of Vortex’s incredibly intricate Long Range Ballistics Calculator. Not only will you be able to figure out your elevation and windage hold, but you’ll probably convince yourself to buy some new rifle while you check out all the ballistics tables you can produce for just about every calibre known to man.

You know the old addage of spend as much on your glass as you do on your rifle? Well, this is one scope that breaks that rule. I would happily mount Vortex optics on rifles that would generally be seen toting the latest Swarovski or Leupold glass.

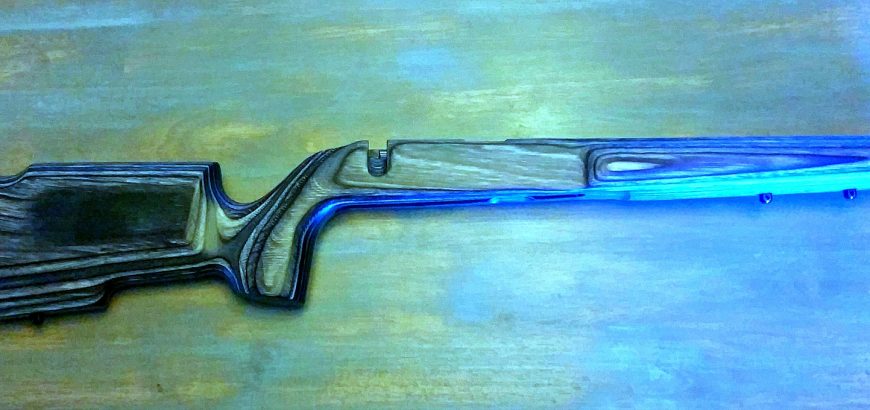
Pro Varmint for JW-15 stock in Pepper Laminate.

Product review: Boyds Pro Varmint gun stock for JW-15

Boyds gun stocks have long been a way for shooters to improve their favourite rifles. Whether it’s replacing a boring factory stock, modifying a sporterised milsurp rifle or finding a better fit for your shooting, there’s usually an option from Boyds that will fit the bill. For one of my rimfire project rifles it was a combination of improving the fit to my body, as well as increasing the aesthetic appeal.

When I first started working on JW-15s Boyds didn’t have anything available for them. Neither did anyone else. This is what got me into building my own stocks, which I’ve done a couple of. However, since then the good guys at Boyds have increased their range (as they always seem to be doing) and the JW-15 now has 5 different designs available.

Some of the designs are the same ones that much more expensive rimfire rifles come in, such as Savage’s Mark II BSEV and BTVS. Of course, the amount of money you could spend customising a JW-15 is probably about the same cost as buying a much better rifle – but where’s the fun in that?

While the Barracuda and SS Evolution are popular rimfire gun stocks that you can see on most ranges, strapped to a Ruger 10-22, the design I like most for the relatively long barrel on my JW-15 is the Pro Varmint, which seems to be the same stock the Savage Mark II TR sports. However, the black textured paint isn’t my cup of tea, so I opted to pay an extra US$15 to go for the Pepper Laminate instead. Visually, the stock is outstanding and I love the look.

Features of the Pro Varmint stock

Standard features include a sling stud under the base of the butt and two studs towards the front of the fore-end, one of these obviously for mounting attachments such as a bipod.

The stock is much heavier and more solid than the synthetic (i.e. plastic) stock the JW-15S comes in and makes it feel less like a toy and more like a real rifle. It’s also better suited to the average New Zealander’s length of pull.

The inletting is good and is done to Boyds’ house action. Obviously there is variation in rifles, probably more so in Norinco’s case, so yours may require some extra finishing. I found I had to relieve a couple millimetres of material where the recoil lug sits, which was not a big deal at all.

Boyds Pro Varmint stock for JW-15, showing inletting.
Precise inletting and a deep barrel channel on the Pro Varmint.

The barrel channel is extra deep, decreasing weight and ensuring a free floating barrel. You may need to do some fine sanding to make sure your barrel is free-floating, but mine was fine. The fore end also has a nice swell, so it fits perfectly in your hand.

There are also plenty of optional extras, including different finishes, varying lengths-of-pull, custom recoil pads and even laser engraving or chequering.

Downsides to the Pro Varmint stock

There aren’t many, but there are some. Because of the variations in rifle manufacture, you could find slight fitting and finishing is needed in order to get a solid fit for your action. Keep in mind that Norinco weapons have been banned from the states for a long time, so the action they have is probably very old. However, as I mentioned above, there was not much needed to get mine fitted snugly.

What I will probably do (and what I would recommend to anyone going for high accuracy) is bedding the rifle with Terminal Ballistics bedding compound or something similar. I’ve bedded two actions with Nathan Foster’s compund, and loved the result.

When shipping to NZ, Boyds has an order limit of US$100 (before postage). This is because of legal complications with US Customs. Unfortunately, it limits your ability to go for optional extras as some stocks are $99 already. The Pro Varmint was $75, and I changed to the Pepper Laminate for $15. Options like the adjustable comb height ($60) are just out of your reach with the $100 limit.

I can’t remember the cost of postage, but it’s still worthwhile when you consider how much Boyds stocks cost to buy over here. What you could do is buy it when you’re on a trip to the States or ask family/friends over there to buy it for you and send it over. Don’t try NZ Post’s YouShop, as they won’t ship rifle parts. You’ll end up paying for return postage to the supplier. Also, they charge by volumetric weight, which can end up costing a lot more than you expect.

I did have one minor issue with my rifle stock, and that was a tiny chip near the tang. It’s not a deal-breaker, and certainly not worth the effort/cost involved in sending it back for a replacement.

The final verdict

I’m extremely happy with my Boyds stock. As I mentioned before, I’m getting another one soon for a different rifle, so that should say a lot. Although there are minor detractors, these can be addressed fairly easily.

I would definitely recommend finding an alternative method of postage so that you can get all of the great features that your heart desires, and I would also advise that you bed your new stock.


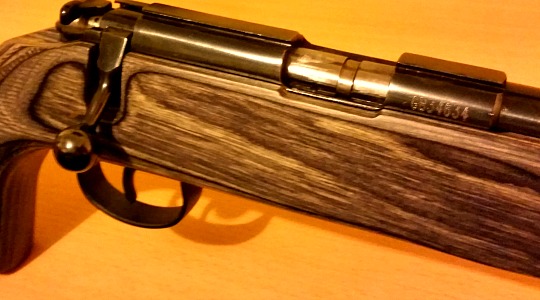
The JW-15 sits snugly in the Pro Varmint.