Crown of 303 barrel.

Cleaning tips for centrefire rifles

Everybody has their personal references when it comes to cleaning their rifles. From the guys who wipe down with an oily rag to those that give their gun a thorough birthday every time it sees fresh air, everyone got the “perfect” cleaning method.

I’ll be honest. The way I clean my guns may not suit you, or it could be just what you like. So why bother going through the whole process? There are plenty of books, product manuals and nooks of the internet that will give you all the info you need to clean a weapon. And they’ll likely all be different. If you’re starting out in shooting, read a few of these, hop on the online forums and figure out your own path.

So, instead of running you through cleaning from start to finish (which you have your own ideas on), I’ll go over a few quick tips which you may not have encountered.

3 quick tips for cleaning your rifle faster

1. Roll-your-own

It’s annoying isn’t it? You run a patch through your bore and it comes out filthy, but only a tiny bit of it. So you end up going through a bunchy of patches (and time) trying to get as much gunk out of your rifle as possible.

Well, instead of threading your patch through, you can either use circular patches to make a swab (not my favourite – too much effort), or roll your patch around a Parker Hale style jag. Instead of having only the front tip of your cloth/jag picking up dirt, you create a cylinder that exposes the sides of the jag to the barrel. This way you use almost the entire patch, instead of about a quarter of it.

Here’s a great blog post on brush/jag types and different solvents. If you’re starting out and figuring your way around cleaning a rifle, it’s a good place to start from.

2. Go both ways

A lot of people will tell you to never run a brush both ways through the barrel. Why? Because they don’t want to damage the crisp edge of the crown – the very last surface contact a projectile has with your rifle’s barrel. While there is some merit to this thinking, the effects of a brass/bronze brush, or even a nylon brush, on hammer forged steel should be minimal.

I’m not as gung-ho about this as some people who will vigorously scrub with the brush completely exiting the bore, but I will happily pull my brush backwards and forwards through the barrel, without pushing the entire brush through. It just makes me feel better. I give the whole barrel a thorough going over and push the brush out at the end and remove the brush before pulling the rod back through.

And no, never clean from the muzzle end. There are too many reasons why you shouldn’t and none why you should. Aside from protecting the crown, you don’t want to push all the junk back into your action and magazine.

However, your solvent should be doing most of the work when it comes to cleaning, so you should only really be brushing if you are dealing with a heavily fouled barrel.

3. Leave it wet

Yup, that solvent should do most of the job. So why not leave it working? Once you’ve got your barrel to an acceptable level, I like to run another wet patch through.

For a rifle I shoot fairly regularly, I will run a patch of Hoppe No. 9 through and let the solvent work away. Before shooting I’ll put a dry patch through and be surprised (every time) at how much carbon and copper had been too stuck in there to come out the first time.

If I’m cleaning a rifle that will likely go back in the safe for a few months, the last patch I’ll run through will be soaked in lubricating oil. Not because I’m trying to lube anything up, but because it has a high viscosity and likes to cling to the inside of the barrel, instead of running out like regular oil. This will be a protective layer that will inhibit any rust formation. A rifle that is being stored in the safe for that long usually gets a wipe down all over the metal and wood with an oily rag, to keep everything from getting that thin layer of red that likes to pop up in safes in Auckland’s muggy climate.

Hope that’s clear as mud! Leave your own cleaning tips in the comments below.

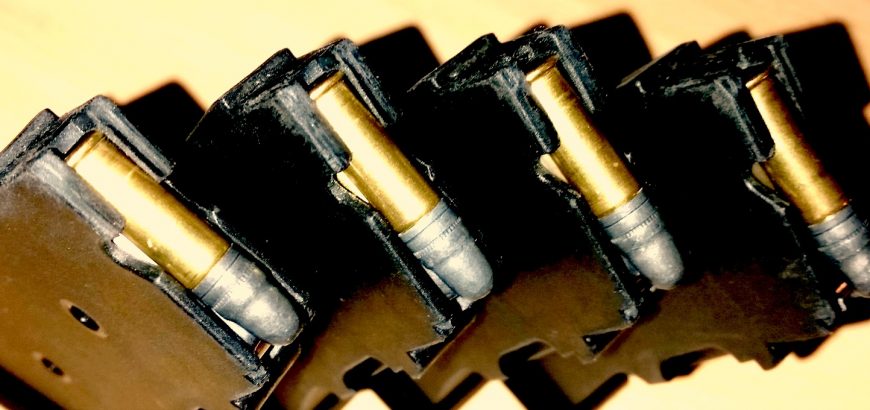
Four loaded CZ 452 magazines.

Disassembly of CZ 452 Magazines

Any smallbore range across New Zealand will have a few CZ 452 magazines floating around. Whether they’re attached to a Brno Model 2 or Norinco JW-15, these magazines hold up to thousands and thousands of rounds being put through them. Occasionally – you might even think about cleaning them.

How often to clean your CZ 452 magazine

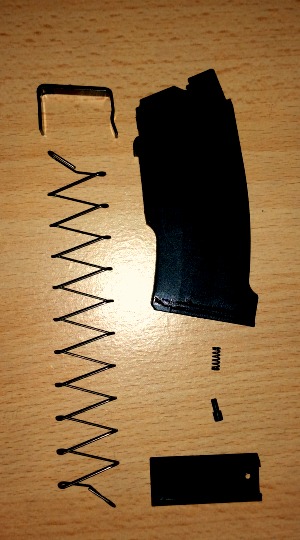
Disassembled CZ 452 Magazine
The spring-loaded button needs to be handled with care.

Simply put, not that often. There’s lots of discussion around how often you should clean a rimfire rifle. Some like to clean after every trip to the range, but I personally prefer not to clean that often.

I find that that once a rimfire barrel has been fouled it shoots more consistently. That’s my experience anyway. Cleaning every trip undoes this fouling and means wasting ammo before every shoot getting it fouled again. So, when do I clean? When accuracy drops off, or when feeding becomes slightly tougher. Usually, the latter strikes first.

I take the same approach to my magazines. I clean when feeding becomes an issue. I usually use multiple magazines and consequently they don’t get fouled that quickly. If I haven’t had any issues by the time I give my rifle a birthday, then they get a clean too. Might as well.

Disassembly and reassembly of the magazine

Pulling apart the CZ 452 magazine is very easy. They’re well made and there are no sharp parts or difficult processes involved.

At the base of the magazine there is a small dimple. Inside here is a spring loaded button. Press is down with a pen, nail or punch and slowly slide the base off the magazine. I say slowly because if you’re not careful, the spring will shoot that little steel button out. Good luck finding that again.

To get the spring and button out, cover them with your thumb while you slide the magazine floor off, and slowly release them into your hand. Next, pull the main magazine spring and the follower out. Take note of which way the follower is facing – it needs to go back the same way.

Cleaning is simply a matter of wiping everything down. You can dowse the spring and follower in Hoppes No. 9 if you like. A quick squirt of gun oil once everything is clean and dry isn’t the worst idea either.

Assembly is pretty easy, it’s the exact opposite. Again, be careful you don’t lose the spring or steel button.

Any questions? Post a comment.

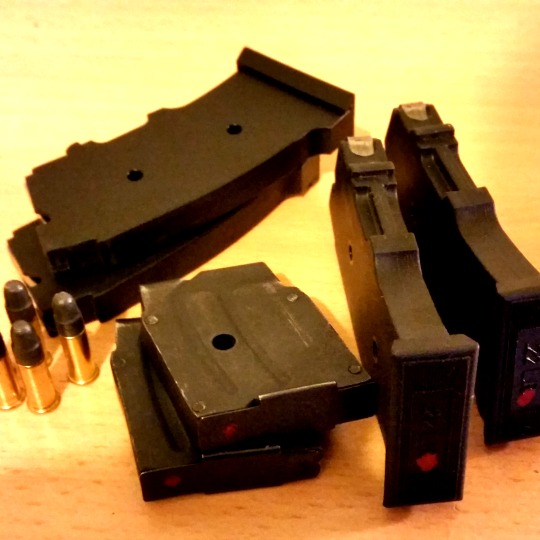
CZ 452 and Norinco JW-15 magazines with 22LR rounds.
Because CZ and Norinco mags are quite common, I marked mine with my wife’s red nail polish to make them easily identifiable.


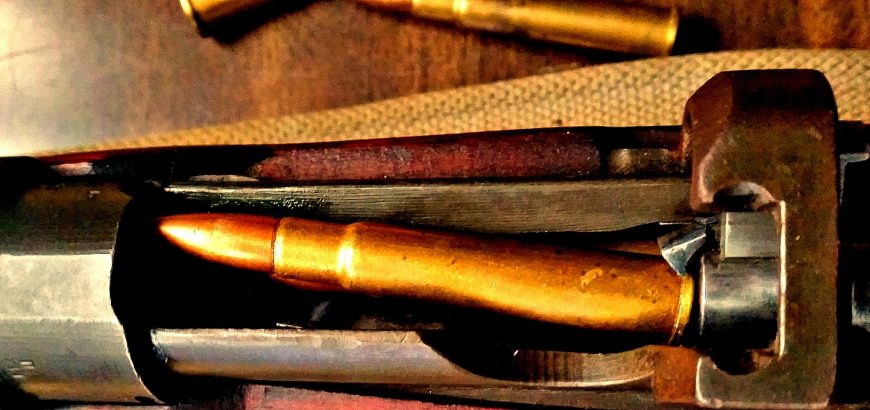
No.1 Mk iii extracting Mk 7 round.

303 SMLE bolt stiff on extraction

Getting my own .303 was a dream come true. It’s a cartridge and rifle with a storied history and a pretty good performance, even by modern standards. What I was particularly looking forward to was the “buttery smooth” action I’ve heard so much about. But mine wasn’t. After removing a good deal of rust and gunk from this historic weapon, I headed down to the local service rifle club to have a shoot. The results were less than spectacular.

I didn’t have much ammo on me at the time, and was primarily going to shoot my SKS and M38, but I did want to put at least half a mag through my brand new (to me) No. 1 Mk iii SMLE. The rifle printed high and to the right, but still in a very tight group with the surplus CAC Mk 7 ammo I had on hand. The elevation was due to shooting at 100 yards with the 200 yard (minimum) setting, so I was fine with that, and it appeared the front sights were off a bit to the right. Not a major.

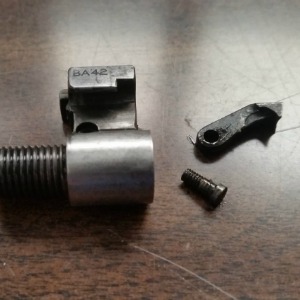
.303 bolt face, extractor claw and screw.

But getting those empty rounds out was difficult. I couldn’t stay in a shooting position and had to use two hands. My thoughts were it needed some cleaning after a long period of disuse. When I got home some quick research on the internet turned up a few that thought it could be due to fouling, so off I went to the garage to get some cleaning done.

One month later with a box of brand new Prvi Partizan .303 I went down to Taupo NZDA range to get the long guns out. After enjoying drilling tight groups with my Husky, it was a bit of a let down to pick up the Enfield and experience the same issues as before. I hadn’t changed the sights, but compensating worked fine. But still, every round was a real hard task to extract. My wife had a few shots and enjoyed the rifle, but didn’t enjoy the experience because of the tough-to-open bolt. I was crestfallen all the way back to Auckland, thinking I had managed to buy a dud surplus rifle.

What the issue actually was

So this time I took to cleaning with fervour. I disassembled the extractor and bolt face, gave everything a thorough degreasing and a light coat of Ballistol. Determined to not have the same issue again, I gave all of the bearing surfaces a generous application of oil and attempted to chamber a round. No problem. Extraction? Problem.

What?

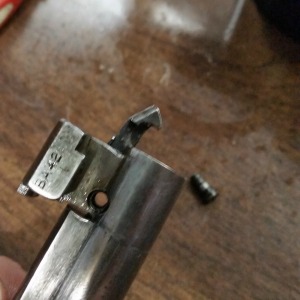
Bolt face with extraction claw slightly pulled out.

This was beyond frustrating. I then took a closer look at the extractor claw and saw that it had become quite sharp after (many) years of use. So I undid the extractor screw, pulled the extractor claw out a bit (not all the way – that V-spring is a pain), and gave it a very light rounding off with a fine file. Extraction seemed to improve.

After three more delicate treatments like this, the bolt is now working like a charm. Now I’m actually looking forward to having a shoot with it again!

P.S. If you’ve got the same problem and want to try this fix, remember that you could damage your rifle – which as we all know can have serious consequences. Take it to a professional gunsmith if necessary.

Also, do not try chambering and extracting live rounds unless you are at a range, pointed in a safe direction. At all other times use a dummy round that you have made yourself, or buy a cheap practice round – they’re about $20 for two.