Choosing a calibre for a secondary AR-15 upper?

Best upper for AR-15

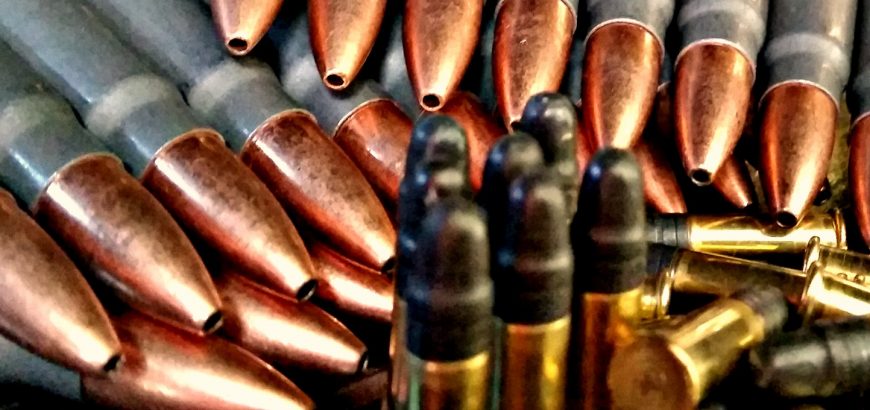
So you’ve bought your first AR-15 and you’re super excited by the fact that you can swap in just about any upper you want to create a whole new weapon. But which is the best upper to choose? While the .223 is a great round, it’s not the be-all and end-all of rifle shooting (nothing is), so what about about a different calibre?

Here’s my take on what you can achieve my swapping out the upper on your AR-style rifle.

How about a .22LR Upper?

Well, not the worst idea actually. If you want a cheap way to practice with your AR or to introduce younger shooters to the sport, using 22LR ammo is a great and inexpensive way to do it. However, there are some conversions that use your 5.56 barrel – don’t do it. It can work, but it won’t be a satisfactory way to shoot either caliber, and it requires more work.

Rather, spend the money on a full upper and magazine, like this one from gunsupplies.co.nz, which will work with any milspec receiver. Although, to be honest, for not much more you could buy an entire .22LR AR-type rifle.

7.62×39 anyone?

Okay, let’s be honest, I’m a big fan of the humble 7.62×39 Soviet cartridge. It’s cheap and dirty and does the job. But, would I put it through an AR upper? Not really to be honest. While the AR platform is great. there’s not much reason to get it to shoot cheap Russian ammo.

If you want a cheap way to shoot this calibre, you can get a Chinese SKS for a third of the price of a 7.62×39 upper, and again, you have a whole new rifle to enjoy. You also won’t feel nearly as bad using it as a knock-around bush gun.

AR-15 in .300 BLK

If you want 7.62×39 ballistics in an AR-15, .300 BLK might be the way to go. Developed for spec-op military applications, this round is AR-friendly. It feeds from a standard STANAG magazine with no modifications, and without reducing the capacity, so at least you can use your current AR mags.

If you’re looking for something novel and interesting to shoot, which is designed for the platform and actually useful, the .300 AAC Blackout could be the answer. It is more expensive to shoot than any of the other rounds, and would probably necessitate reloading to make it a viable addition to your safe.

Which AR-15 upper should I choose?

Well, my personal preference would be to have one completely milspec rifle for service rifle competitions, a 20 inch barreled set up for 3-Gun, and perhaps a .300 BLK upper to enjoy shooting something a bit different.

But hey, that’s just me! What would you choose as your ideal black gun set up?
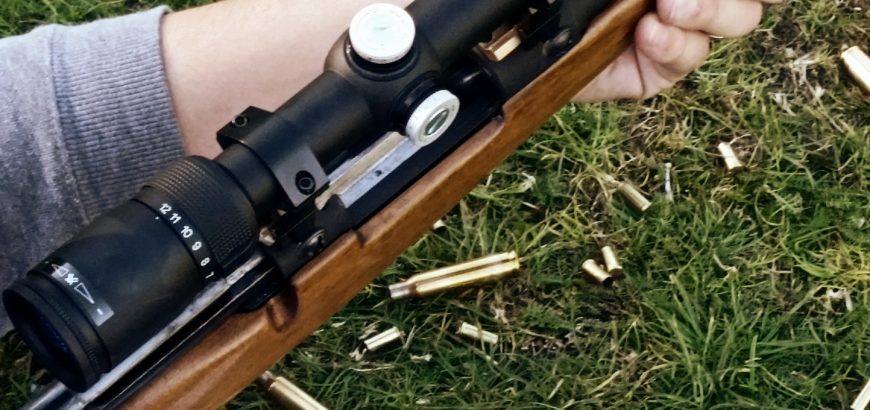
Should I Loctite my scope bases?

If you’re putting together a rifle for the first time, or you’ve just bought a package deal that was loosely thrown together, you may not be aware of the intricacies involved in proper scope mounting. One of the questions often debated in forums all over the internet is whether or not to apply Loctite to scope base screws, and if so, which colour to use?

Well, I made the rookie mistake of driving three and a half hours to do some target shooting after reassembling a rifle I had coated with a nice new finish. I completely forget to Loctite to the scope bases. I sent a few factory rounds down range to foul the barrel, and got a group size under 2 inches at 100 yards. Sounds about right.

I then painstakingly went through shooting 3-shot groups with my reloaded ammo (I was working up a new load), and watched in absolute horror as my groups opened up to 3 or 4 inches. Thinking I may have overheated the barrel, I gave the old shooting iron a rest and threw some lead downrange with a few other toys while it cooled off.

Taking up the prone position again I looked forward to drilling some really expensive Sierra Matchkings into ragged little holes 100 yards away. No such luck. I was shooting groups that opened up to 7 inches. What the…? I could not figure out how I had screwed up this batch of reloads so badly. Until I adjusted the scope settings for a friend of mine to shoot at 50 yards. Wait – was that a bit of wiggle in the scope mounting? Indeed it was. I had managed to get about $50 worth of ammo down range with no particular success before I realised that my loads were fine – the scope bases had come loose.

Don’t make my mistake

Frustratingly, after driving home for three and a half hours I noticed the blue bottle of Loctite sitting on my gun bench, like a big fat “I told you so” from the universe.

In short, don’t make my mistake – Loctite your scope base screws. I took a perfectly good 1-inch shooter and turned it into a minute-of-dinner-plate loser by forgetting this simple step. And I’m sure my scope didn’t appreciate flopping around like that either.

Make sure your threads are completely clear of debris or grease when you do this. And while some people say red Loctite is okay to use, I prefer to use blue – I find it is much easier to remove. While you may not take your scope bases off regularly, if you want to upgrade or change to a 35 MOA rail, or whatever, you’ll wish you had used the blue variant.

Pro Varmint for JW-15 stock in Pepper Laminate.

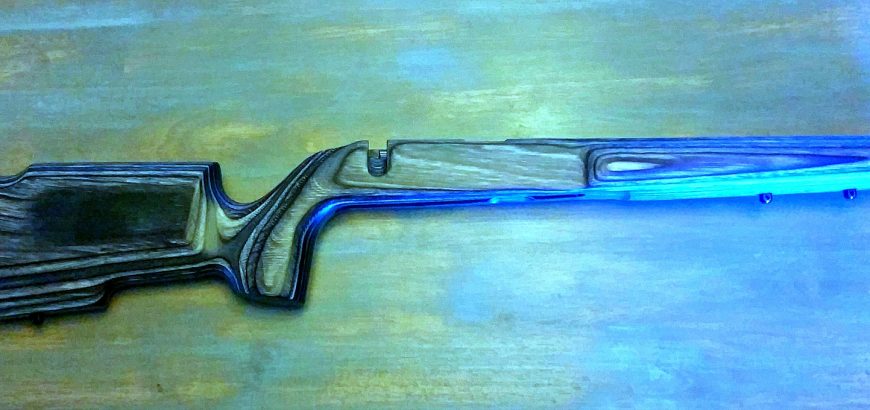
Product review: Boyds Pro Varmint gun stock for JW-15

Boyds gun stocks have long been a way for shooters to improve their favourite rifles. Whether it’s replacing a boring factory stock, modifying a sporterised milsurp rifle or finding a better fit for your shooting, there’s usually an option from Boyds that will fit the bill. For one of my rimfire project rifles it was a combination of improving the fit to my body, as well as increasing the aesthetic appeal.

When I first started working on JW-15s Boyds didn’t have anything available for them. Neither did anyone else. This is what got me into building my own stocks, which I’ve done a couple of. However, since then the good guys at Boyds have increased their range (as they always seem to be doing) and the JW-15 now has 5 different designs available.

Some of the designs are the same ones that much more expensive rimfire rifles come in, such as Savage’s Mark II BSEV and BTVS. Of course, the amount of money you could spend customising a JW-15 is probably about the same cost as buying a much better rifle – but where’s the fun in that?

While the Barracuda and SS Evolution are popular rimfire gun stocks that you can see on most ranges, strapped to a Ruger 10-22, the design I like most for the relatively long barrel on my JW-15 is the Pro Varmint, which seems to be the same stock the Savage Mark II TR sports. However, the black textured paint isn’t my cup of tea, so I opted to pay an extra US$15 to go for the Pepper Laminate instead. Visually, the stock is outstanding and I love the look.

Features of the Pro Varmint stock

Standard features include a sling stud under the base of the butt and two studs towards the front of the fore-end, one of these obviously for mounting attachments such as a bipod.

The stock is much heavier and more solid than the synthetic (i.e. plastic) stock the JW-15S comes in and makes it feel less like a toy and more like a real rifle. It’s also better suited to the average New Zealander’s length of pull.

The inletting is good and is done to Boyds’ house action. Obviously there is variation in rifles, probably more so in Norinco’s case, so yours may require some extra finishing. I found I had to relieve a couple millimetres of material where the recoil lug sits, which was not a big deal at all.

Boyds Pro Varmint stock for JW-15, showing inletting.
Precise inletting and a deep barrel channel on the Pro Varmint.

The barrel channel is extra deep, decreasing weight and ensuring a free floating barrel. You may need to do some fine sanding to make sure your barrel is free-floating, but mine was fine. The fore end also has a nice swell, so it fits perfectly in your hand.

There are also plenty of optional extras, including different finishes, varying lengths-of-pull, custom recoil pads and even laser engraving or chequering.

Downsides to the Pro Varmint stock

There aren’t many, but there are some. Because of the variations in rifle manufacture, you could find slight fitting and finishing is needed in order to get a solid fit for your action. Keep in mind that Norinco weapons have been banned from the states for a long time, so the action they have is probably very old. However, as I mentioned above, there was not much needed to get mine fitted snugly.

What I will probably do (and what I would recommend to anyone going for high accuracy) is bedding the rifle with Terminal Ballistics bedding compound or something similar. I’ve bedded two actions with Nathan Foster’s compund, and loved the result.

When shipping to NZ, Boyds has an order limit of US$100 (before postage). This is because of legal complications with US Customs. Unfortunately, it limits your ability to go for optional extras as some stocks are $99 already. The Pro Varmint was $75, and I changed to the Pepper Laminate for $15. Options like the adjustable comb height ($60) are just out of your reach with the $100 limit.

I can’t remember the cost of postage, but it’s still worthwhile when you consider how much Boyds stocks cost to buy over here. What you could do is buy it when you’re on a trip to the States or ask family/friends over there to buy it for you and send it over. Don’t try NZ Post’s YouShop, as they won’t ship rifle parts. You’ll end up paying for return postage to the supplier. Also, they charge by volumetric weight, which can end up costing a lot more than you expect.

I did have one minor issue with my rifle stock, and that was a tiny chip near the tang. It’s not a deal-breaker, and certainly not worth the effort/cost involved in sending it back for a replacement.

The final verdict

I’m extremely happy with my Boyds stock. As I mentioned before, I’m getting another one soon for a different rifle, so that should say a lot. Although there are minor detractors, these can be addressed fairly easily.

I would definitely recommend finding an alternative method of postage so that you can get all of the great features that your heart desires, and I would also advise that you bed your new stock.


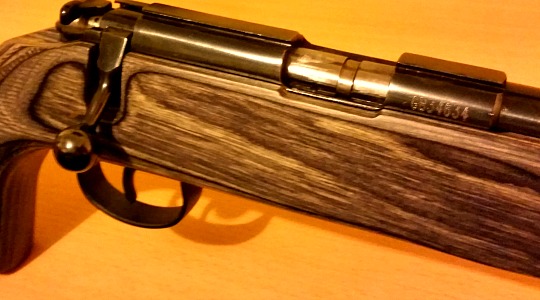
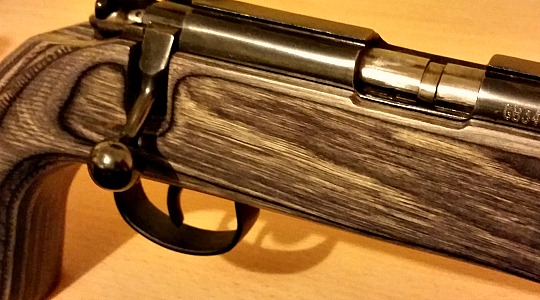
The JW-15 sits snugly in the Pro Varmint.
JW-15 with adjusted trigger in Boyds varmint stock.

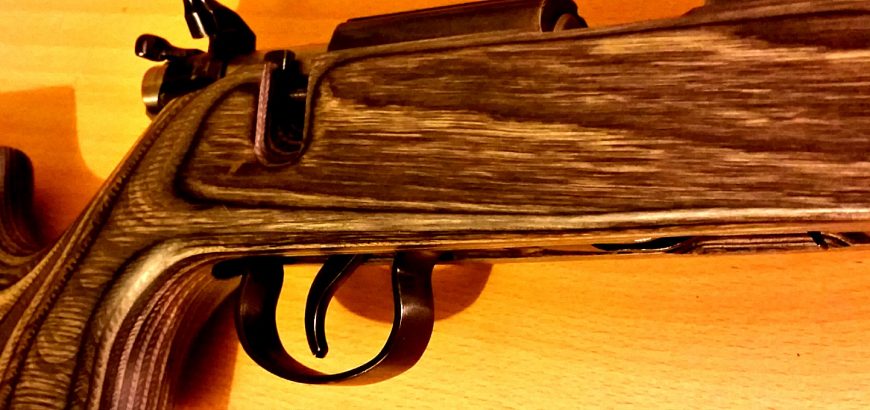
JW-15 trigger improvement

There are many that will say that the Norinco JW-15 is an excellent tool. An implement meant to be thrown on the quad bike or back seat, and touted around the farm for practical purposes. I agree with those people 100 per cent, but I also think that with a little bit of elbow grease, this humble Brno-clone can be a decent shooter. One of the first things you can improve is the trigger.

Simplicity is…

The trigger on the JW-15 is not pretentious at all. It can be gritty with excessive over-travel (a symptom of the Mauser-style trigger not absent in the Brno), but the ones I’ve tried all break like a glass rod at weights that are not excessive for average shooting.

With such a blank canvas, there is plenty of room for improvement with this trigger.

Trigger weight spring

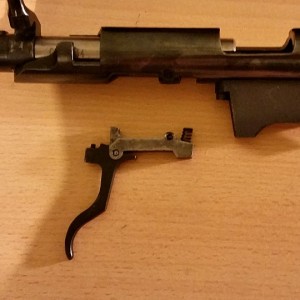
The JW-15 trigger unattached from the rifle.
The trigger mechanism in the JW-15 is uncomplicated to say the least.

This is an easy one. I simply cut off a few coils to lighten my spring. Beware though, that if you cut off too much, the trigger won’t spring back into place after you’ve pulled it – which makes it pretty useless.

If you are not so bold or would like to return your firearm to original spec one day, replacing this spring with a lighter/shorter one will do the trick. I know of some people who have used springs from ballpoint pens. I’ve not found a pen spring that would do the job, but you might.

Polish

A lot of the machining on the JW-15 requires some work with a file, sandpaper and grinding paste to get to an acceptable level. The trigger is no exception.

Just about every part of the trigger could do with at least a polish. If it’s brand new, you’ve got a lot of grease to remove before you get to this point.

Sear adjustment – it’s your call

Adjusting the sear is a risky move. It can take a perfectly safe firearm and make it a loose cannon. There are three ways to adjust the sear on the JW-15, and none should be attempted without a serious level of confidence or skill. The last thing you want is a rifle that will go off when you bump it.

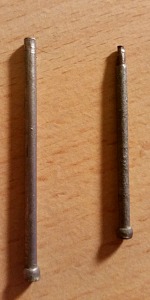
Makeshift punches.
If you don’t have a punch set handy, you can readily make your own with some nails and a grinder.

The first way is to adjust the grub screw behind the trigger. This will move the trigger to the rear and lower the sear in relation to the firing pin – i.e. less of the sear is engaging the firing pin. This means less effort is required to break that engagement, dropping the pin and firing the chambered round.

This method is reversible, and with thorough testing of the trigger mechanism is the safest way of adjusting the sear. I like to check this by ramming the bolt home as hard and fast as possible. If the firing pin drops while you are cocking it, there is not enough positive sear engagement – with enough force, you made the firing pin go right over the sear and hit what would be a live round. Obviously you test this with a dummy round.

The second way is to (lightly) polish the sear surface and/or sear ledge. This means taking away the grittiness of the finish, not changing the shape. This is an irreversible step, and too much polish will leave you with a rifle that won’t cock or that will fire every time you try and close the bolt. In other words, a useless, dangerous gun.

The third, and most dangerous (and pretty stupid) way, is to lightly round off the tip of the sear. What this does is remove the “harshness” from the trigger pull, making it soft and easy. Don’t mistake this for a lighter trigger pull – there is a difference.

The issue here is that the sear is angled sharply like that so that it holds the sear ledge till the very last millisecond, providing a clean and safe break. When one of these surfaces is rounded, the other can easily break the hold when the rifle is bumped or dropped. I don’t know anyone who would recommend trying to change the shape of the sear or sear ledge – at least not for the DIY operator.

The lightest trigger in town

I find the best combination for a light trigger on these rifles that is safe and pleasant to use involves taking a few coils off the spring, polishing the individual trigger components and adjusting the grub screw to lower the sear as much as possible without creating an unsafe action.

Remember, as always, that whatever you do with your firearm is up to you. Everything here is for informational purposes only, and if you’re uncomfortable, unskilled or lacking in confidence, you should either take your rifle to a qualified gunsmith or leave the thing alone.

JW-15 with modified trigger and Boyds laminate stock.
With a bit of TLC the JW-15 is a joy to shoot.
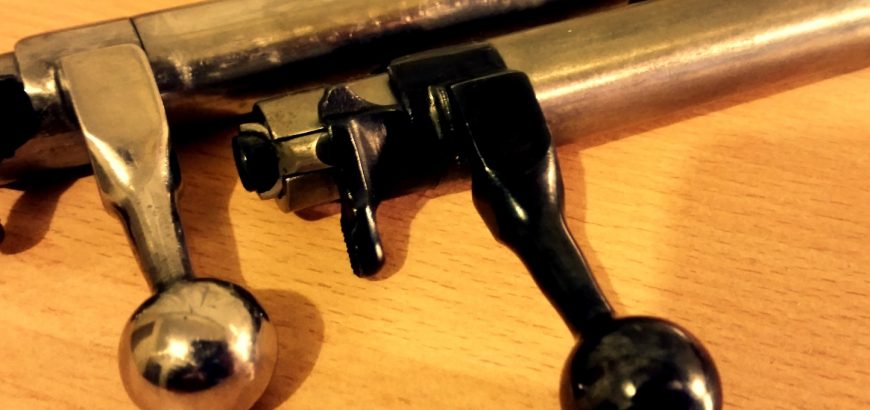
JW-15 bolt with and without factory bluing.

Removing bluing from your rifle

Bluing does a couple things for a rifle. It provides some level of protection against the elements, and it helps achieve a classic styling that other coating systems can’t achieve. However, there are some situations where you might want to remove the bluing from your rifle, including polishing your steel to a high shine, or preparing your rifle for another type of coating.

You can strip the factory bluing off your rifle with a very rudimentary list of kitchen/garage supplies. Here’s a look at this simple process:

1. Completely disassemble and clean firearm

Every metal part that you are going to be removing bluing from needs to be detached from the firearm. For my last project I removed the bluing from the floor metal, trigger and bolt handle. Even if you are doing your entire rifle, it still needs to be taken down. And I shouldn’t need to say this, but make sure the thing is unloaded before you do anything.

Once you have all of your bits and pieces ready, do a thorough degreasing with brake cleaner, degreaser, dish soap and water or something similar.

2. Time to get cooking

So, there are blue removal products out there made by many fine manufacturers. You could even try sandblasting your parts if you have the equipment. However, the method I’m going to focus on is cheap, reliable and effective – and probably better for the environment too. Instead of using harsh chemicals, you can simply use a couple bucks worth of vinegar.

Most people say to just leave the parts in vinegar for 30 minutes, check to see if the bluing has been removed, rinse and repeat until done. What I like to do is to heat the vinegar in the microwave (with no metal parts in it) until almost boiling. Try not to breathe it in as you move the dish to the garage, as it’s acrid and will set you off coughing. Nasty stuff.

Drop your parts in the hot vinegar and watch as the bluing literally bubbles off of the metal in spectacular fashion. It will only take a few minutes before you notice changes in the colour of your metal. When the metal looks clear, pull it out so you don’t start it oxidising again.

If you’re doing a barreled action you probably won’t have a big enough container to completely cover it in vinegar. What you can try is wrapping it in paper towels soaked with vinegar. This may be a little slower and could require a bit of extra cleanup to get it just right.

3. Attack the metal

So now you have some bare steel completely free of bluing and rust. Make sure to thoroughly clean and degrease again, removing all traces of bluing, vinegar and anything else that shouldn’t be there. Now it’s time to pull out the ultra-fine sandpaper and steel wool, and remove all of the factory imperfections and slight bluing residue that you can spot.

It’s your call from here. Some people like to coat their firearms with ceramic or paint-on applications, while others like to try more exotic metal finishes. I’m a big fan of matte colours on rifles – usually black. For firearms that spend 99 per cent of their time on the range and seldom see adverse weather or bush conditions, you can afford to go for looks over protection.

My JW-15 which is only used at an indoor smallbore range, has had the bluing removed from the bolt handle, trigger and floor metal as mentioned above, and was polished thoroughly with autosol. I do have to make sure the humidity level in my safe is under control and that the metal surfaces are oiled when not in use for long periods, but realistically I find that the same applies to my factory blued firearms. I’ve got to admit though, that shiny metal is pretty sexy!