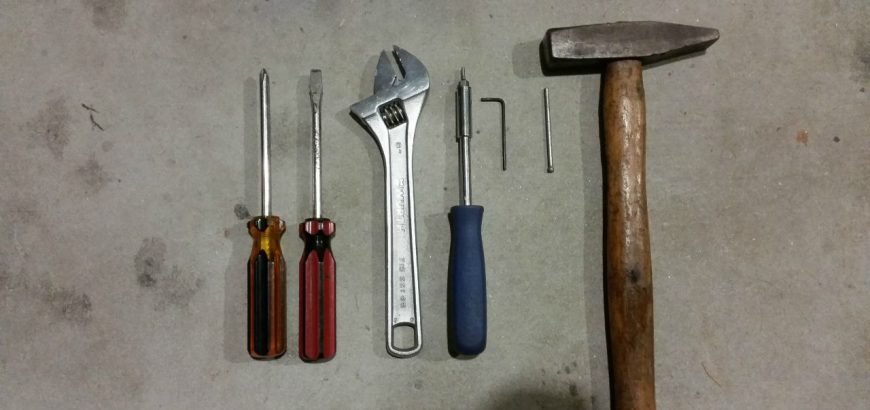
The tools needed for this job are pretty simple and should all be in your tool box already.

Installing an aftermarket triger

Modern rifles with their out-of-the-box accuracy guarantees usually come with adjustable triggers, but if yours didn’t, help is on the way. Whether it’s an old military surplus rifle that you’re modifying or a modern hunter that needs a little bit of work, installing a new trigger is easy and worthwhile.

A stiff trigger pull can be the difference between a bullseye and the 9 ring, or the difference between a clean kill and a long walk through the bush chasing a wounded animal. If you want to see the difference a good trigger can make, one of the best examples you could have would be to try a 10/22 with a match trigger, and then shoot one with the standard trigger. After shooting with a lightened trigger for so long, I thought the safety was on when I tried to pull the standard trigger.

The tools you’ll need

There’s not much to this job really. Most stock triggers are removed by driving out the pin that holds the unit in place. This pin also acts as the fulcrum for the trigger set and reset. To drive this out, you’ll need a hammer and punch – or a filed down nail if you don’t have a punch to hand.

Depending on the trigger unit, you may need a small spanner or wrench to adjust lock nuts, and probably some allen keys or screwdrivers to adjust pull and sear engagement. Depending on your rifle, you’ll probably need a large flat head screwdriver to undo your action screws.

The tools needed for this job are pretty simple and should all be in your tool box already.

The trigger of choice

Of course all of this is moot if you don’t have a trigger to install. There are a few options out there, depending on your breed of rifle. Ruger 10/22s, AR15s and Rem 700s have a multitude of aftermarket bang switches, however if you’re improving an older rifle you may have to do some digging to find the trigger you need.
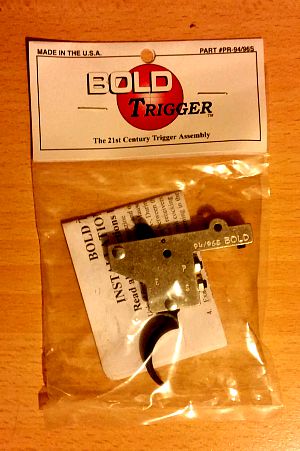
 

Nice new trigger thanks to Boyds Gunstocks.

My most recent trigger install is a BOLD Trigger from Boyds for my Husqvarna M38. As I’ve mentioned before, I don’t like using a safety – an empty rifle is the best type of safety – so I went for the version without the side safety. However, if you do like to use your safety in addition to safe gun handling practices, the side safety is much more convenient than the toggle on the back of the bolt on the old Swedes.

The 94/96 trigger fits the M38 perfectly. Boyds also stocks triggers for the 98-family Mausers, as well as a Mosin Nagant trigger. Other hardware obtainable from the gun stock manufacturer include trigger guards and floor metal, as well as sling swivel studs and action screws.

Extra inletting

Depending on your trigger, action and stock, there could be some extra in letting to do. Thankfully with the Boyds stock this rifle is destined for, there is ample space for the trigger. However, before I get round to bedding and finishing that stock, I’ll be taking out a bit of material from the current stock to allow the larger trigger unit to fit.

For this job you may want to use a mill. However, hand tools or a dremel will do just fine.

The easy part

The easy part is the install itself. For most triggers, all you’ll need to do is punch out the retaining pin, put the new trigger in the old one’s place, and insert the pin again. That’s almost all there is to it.

With the BOLD Trigger, there’s a grub screw forward of the pin which, when tightened, keeps the unit in place. The mechanism is quite different from the original trigger, so you won’t need the old spring or any of that. If there is any issue with fit (as there can be with the many variations of these beloved milsurp rifles), the instructions that come with your trigger should tell you where you need to add or remove material.

Adjusting the pull and sear engagement

This is where your new trigger comes into its own. It will have its usual factory setting – 3 pounds for the single-stage BOLD Triggers – and an adjustable range. The range on my new trigger is 2-4 pounds, and the sear engagement can be altered too.

On my model, this is done by loosening the locking nuts and adjusting the grub screws with an allen key. In the photo below, you can see I’ve started on this in the photo below, as the factory seal yellow paint has been broken.
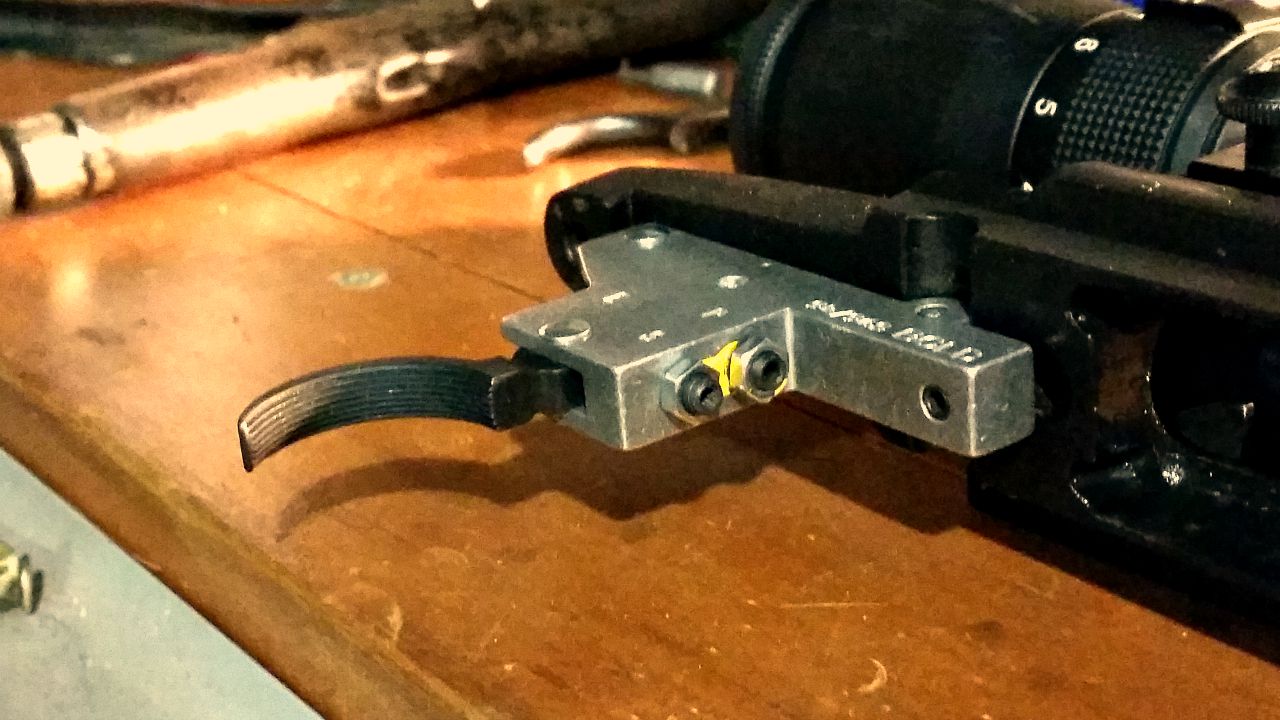
The yellow factory seal on the adjustment screws is broken.

I’ve adjusted my trigger to the lightest it will go. This rifle will be a range-only queen, so the heavier pull you’d want on a hunting rifle is not necessary. When adjusting sear engagement, work the bolt rapidly to make sure it won’t fire on closing – too little sear engagement and you could end up with an unsafe rifle.

Once the trigger pull is where you want it – I shouldn’t have to say this, but obviously you’re testing this on an empty chamber or dummy round – it’s time to tighten up the locking nuts. Your particular trigger may have different instructions or mechanisms, so make sure you follow the included install directions.

Of course, the number one concern when modifying a rifle is safety when operating, as well as during the install process. If you’re unsure of how to properly install or set your trigger, your local gunsmith should be able to help you out for a very reasonable fee, as the the work involved is not onerous.
Home made suppressors

As long as there have been firearms, there have been people trying to improve their performance. Quicker, quieter, lighter, more accurate – these are the motivations of the backyard tinkerer, qualified gunsmith, field armourer and firearms designer alike.

A suppressor, otherwise known as a silencer, sound moderator or sound suppressor, has always been a favoured project for the budget-minded or mechanically curious. One such person recently listed a “V” can suppressor on Trademe, and I couldn’t help but get in touch.

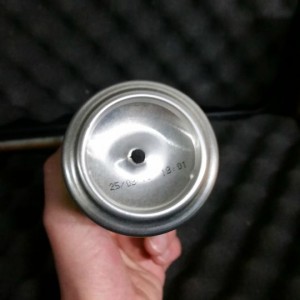
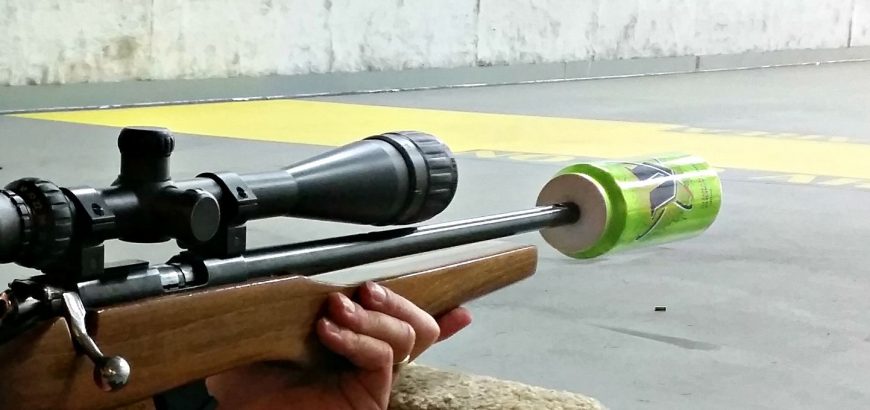
Alan from Hamilton took it upon himself to build a “can suppressor”. The term can suppressor came about as sound moderators tend to look like a beverage can, especially the thicker muzzle-forward variety. This example is literally made from a V can.

The Trademe listing humorously asks;

“Do you want to give your bullets “A guarana and caffeine charged V energy Woo-Hoo”?”

And the answer should be, “Yes, yes I do.”

The tech specs

The top (the end that you drink from) is cut out, and has been replaced with a moulding of ultra high molecular weight polyethylene (UHMWPE). If you just got totally lost, replace UHMWPE with plastic and you’ll get the general idea. This is then drilled and tapped to accept a male 1/2x20UNF thread, the most common thread for rimfire rifles. There’s always the exception, like the Ruger 10/22 anniversary edition, but hey, what can you do?

V can suppressor
The exit hole is cut with a subsonic hollow point.

The other end of the can is a blank canvas, waiting for your first round to punch a perfectly lined-up exit hole. Two things about this. Firstly, it does produce a jagged edge. You could deburr this if you like, but realistically, because it sits below the rim of the can, you probably won’t get your fingers anywhere near it. Secondly, use a subsonic round to do this.

Not only is there less chance of developing too much pressure in the contained environment, but the hollow point should help you create a slightly oversize hole for the following rounds to fit through easily.

The good and the bad

Well, on the positive side, it’s dirt cheap to make if you’ve got the skill. And if Alan chucks a couple more up on Trademe, they are pretty inexpensive to buy – not that economy rimfire suppressors are hard to come by. Also on the plus side of the list is the novelty factor. If we’re honest, everyone’s going to want to check it out and have a go. Lastly, it’s very, very light.

Does it reduce sound? Remarkably – especially when compared to not having a suppressor on at all. In a follow up post, I will do a proper test with a sound meter. The test will be done with two barrel lengths – 16″ and 22.5″ – and with three different sized cans, compared to a regular suppressor and a bare muzzle.

Unfortunately due to technical difficulties, we weren’t able to capture all five rounds I put through the can on video, but we did get the last one. For comparison, listen to how loud it is when I work the bolt afterwards.

On the negative side, you won’t be able to try this trick with a centrefire rifle – you’ll likely end up with a pretty, green mess at the end of the barrel. Also, because this is a relatively simple construction without baffles, the sound is “tinny” – excuse the pun – even if it is reduced.

Of course, being made out of a drink can means that it isn’t the sturdiest object in the world, and if you whack it into a tree or drop it on the ground, you’ll probably end up with a very skew and unusable suppressor. Of course, you didn’t think it was going to be a hardy, hunting-ready solution, did you?

At the end of the day, for a very reasonable cost, you get a novel sound-reduction solution that will help you keep the noise down at the range or in a field full of rabbits or possums. If you do plan on taking it out in the bush, take care of the muzzle end of your rifle – which is much easier with a short or cut-down barrel. For bush use, you should probably think of this as a disposable option. And at such a low cost – why not?

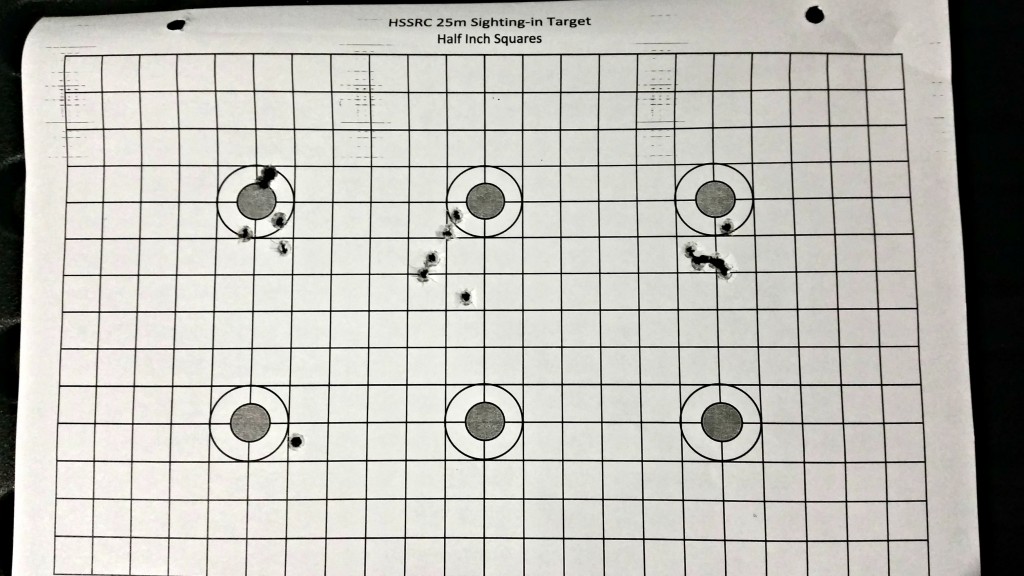
The top right target is 5 CCI SV rounds put through the V can suppressor, showing no loss in accuracy. The bottom left is the initial HP Sub through the bottom of the can.

Cutting down a .22

Sporter barrels on .22s are usually long and thin. This means they’re lighter when carried in the field, but they can also be whippy and harder to control than bull-barrelled rifles. Another way to achieve that relative stiffness in the barrel is to reduce the length of it.

I’ve had two Norinco JW-15s, and while the 22.5-inch barrel is okay, the 16-inch barrel is a real shooter. If you head on over to nzrimfire.com you’ll find plenty of people who have taken full length Norincos and cut them down to as little as 13 inches with great success. I guy I used to shoot with cut his down to 14 inches and found no drop off in accuracy.

Thankfully in New Zealand there are no minimum barrel length laws, just minimum overall firearm length rules – which means you can take full advantage of this, and make your rifle more manoeuvrable, easier to get in and out of your truck and pretty accurate to boot. In the video below I’m shooting an old Voere that I bought for parts – the barrel has been cut down to 8 inches and lets out a little burst of flame with standard velocity CCI.

So, what is the trade off with cutting down your .22? Well, you can burn off all the powder in your average .22LR case in about 12 – 13 inches of barrel. However, you still won’t have achieved maximum muzzle velocity. You’ll also get more variation in muzzle velocity, as the longer barrels allow for a more consistent burn, resulting in a more consistent muzzle velocity. While you can still gain a lot more speed out of a longer barrel, 16 inches is often said to be the “sweet spot” for .22s.

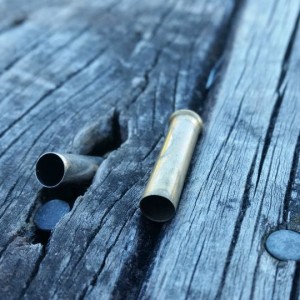
.22LR cases on bench
The humble .22LR doesn’t need too much barrel to burn it’s full powder capacity.

After that point, muzzle velocity still increases, but in much smaller increments per inch, and your follow through becomes much more important. I suppose if you wanted to teach yourself excellent shooting habits, a target rifle with a 28 or 30-inch barrel would be ideal. However, if you just want a nice shooter, go for a 16-inch tube, or do it yourself if you have the confidence/competence. Some manufacturers do release 13 and 14 inch options for their rifles (Anschutz has a 14-inch sporter), however, if you’re doing the job yourself, give it the extra couple inches to be on the safe side. I guess I should put my money where my mouth is and trim down that 22.5-inch Norinco… Oh well, add it to the list.

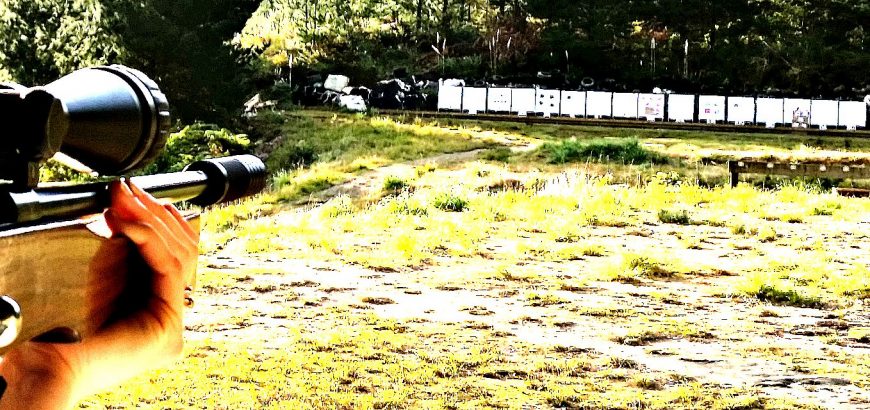
Shooting a sporterised Husky M38 at Deerstalkers Auckland range.

Get started shooting: How to get an A Category licence

While you might go to the range or shoot a .22 on someone’s private land – under immediate supervision – to get your first taste of shooting, if you’re serious about owning or shooting firearms, the next step is getting your A Category licence. Here’s a quick guide on the process, what to expect and what an A Cat licence entitles you to do.

What firearms can I own with an A Cat licence?

There are no restrictions on the amount of A Cat firearms you can own. They’re not registered against your name, and you can go buy one from the store straight away, assuming you have your licence and all the associated safety measures in place.

Firearms that are considered A Cat compliant are basically rifles or shotguns that are manually loaded. This means pump actions, lever actions, bolt actions, etc. You can have any features you want on these guns, as long as the overall length is more than 762 mm (30 inches). Anything shorter than that is considered a pistol, and will require a B-endorsement on your licence – which is a whole other story.

This means you can shorten your barrel, or have it in a bullpup configuration, whatever. There is no real minimum barrel length, as long as the overall length is over 762 mm. Which makes sense, as the issue with handguns is conceal-ability.

You can also own a semi-automatic sporting rifle or shotgun, but there are restrictions on these to make sure they don’t fall in to the MSSA (Military Style Semi-Automatic) category, which is governed by an E-endorsement on your licence.

In order to keep your semi-automatic firearm in A-Cat compliant condition, you’ll need to make sure:

  • The magazine holds 7 rounds or less of centrefire or 15 rounds or less of rimfire ammo
  • The mag also can’t “appear” to hold more than the above
  • The butt isn’t collapsible, telescoping or folding
  • There is no bayonet lug present
  • There is no flash suppressor
  • It doesn’t have a free-standing “military style” pistol grip

The pistol grip is the latest addition to the MSSA restrictions, and has been met with a cold-shoulder from the shooting community. Essentially it made a whole lot of unregulated A-Cat firearms illegal and meant people had to modify their rifles or dispose of them. New rifles or shotguns are now usually provided with thumbhole or Dragunov-style stocks.

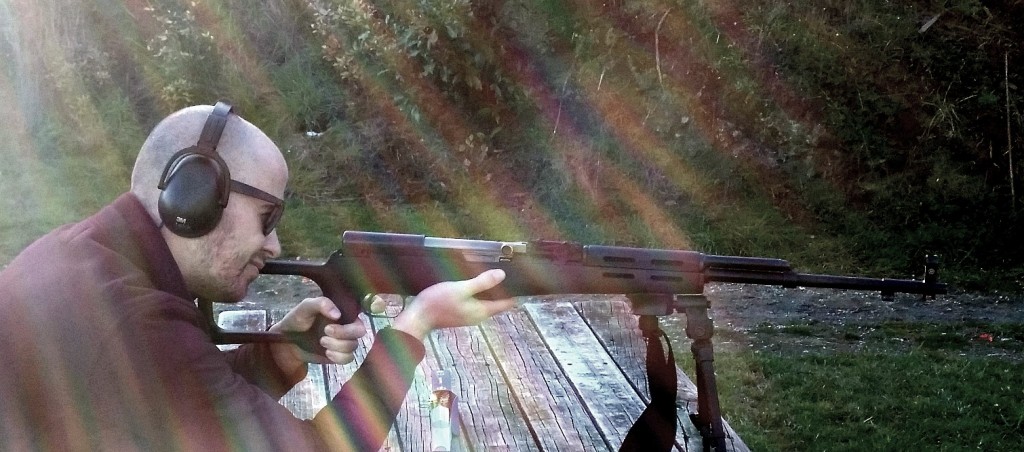
SKS with Dragunov stock
The SKS my friend Nick is shooting here would be illegal with a free-floating pistol grip instead of the Dragunov-style stock

What do I need to do get my firearms licence?

Well, there’s the obvious stuff first. For those with criminal records or histories of domestic or other violence, a licence to hold a potentially lethal weapon isn’t exactly on the cards. The police firearms officer will do a background check on you, and they’ll also ask to interview two referees. If you’re married or otherwise attached, one of those referees will have to be your spouse, while the other must be a non-related person you’ve known for a couple years or more. Those referees are basically to attest to the fact that you’re a fit and proper person to own a firearms.

However, before you’ve even done this step, you’ll have to sit a test that shows you have a solid understanding of how to safely store and use hunting or sporting weapons. Start your study by asking your local police station for a copy of the Arms Code or get it online. Once you have a thorough understanding of what is involved in the responsible and safe ownership and operation of firearms, you can apply to sit the test.

The test will be held at your local police station, and is facilitated by volunteers who have a wealth of practical firearms experience. They’ll take you through the main points of gun safety, including how to carry a gun in the field and ensuring the firearm is made safe before and after use. There’s a short video and practical demonstrations of how to hold, load and unload a rifle or shotgun.

After all this there is a multi-choice test, for which you have to get almost all of the answers right in order to pass. If you don’t get it right the first time, you’ll have to study up some more and attend another information evening before you can sit the test again.

Once you have your proof of having passed the test, you can go to the local post shop and pay for your licence. The cost is $126.50. You’ll need to get proof of payment along with passport photos to the police. At this point you’ll arrange for your safety check to be done at home. Talk to the police or your local arms officer about what the safety standards are.

For an A Category licence, a good standard is to have a lockable safe with separate ammo compartment (bolts and ammo must be stored separately so as to make the firearm inoperable). These can be picked up for a few hundred bucks on Trademe or other websites, and are usually supplied with expanding bolts and pre-drilled holes so you can secure the safe to either a concrete floor, or the walls and floor if you’re securing to wood (say, inside a closet). The firearms officer will check to see if the safe is actually securely fastened – it’s no good if a potential thief could just lift it up and take the entire safe away, guns and all.

Once you’ve sat your test, paid for your licence and supplied photos, had your referees interviewed and safety checked, it’s just a matter of time before your licence arrives in the post. It could take a few weeks or more, depending on how busy they are – so don’t freak out! Also remember that your licence is valid for ten years and will have to be renewed before it expires if you’re to keep your firearms. Which reminds me…

JW-15 in Boyds laminate stock.

Custom rifles vs Factory rifles – who wins?

Let me preface this by saying… How long is a piece of string? If you’re looking for the definitive guide on the all-time showdown between factory and custom rifles, you’ve got a long wait ahead of you. There’s no way to say one is categorically better than the other, but depending on your needs, one will suit you more than another. Here’s a quick run down on the two options.

Custom vs “Custom”

Well, maybe there are three options. There are rifles that are custom built by fantastic gunsmiths, or even several different people (i.e. barrel manufacturer, suppressor builder, stock maker, etc), and they can run into the tens-of-thousands of dollars. Chances are you’re not comparing a $35,000 rifle built on a Surgeon action to a Weatherby. So, realistically, these types of custom rifles fall outside of the scope of this discussion.

There are even the customised Remington 700s, Sakos and others you can buy direct from a gun store, which have been assembled with a host of accessories and a non-factory stock, etc, which offer “custom” rifles at lower costs and with a lot less effort. This a kind of middle-ground which, again, falls outside of the debate of custom vs factory.

Factory rifles

There are a host of incredibly good choices out there when it comes to factory target or hunting rifles. And the fact of the matter is, with modern production techniques and better quality control standards, many of these rifles are incredibly accurate out of the box.

Sako guarantees the Tikka T3 line to produce an MOA 3-shot group out of the box, and they boldly make the same claim with their T3 varmint and tac and 5-shot group. That’s pretty impressive. However, that doesn’t mean your new Tikka T3 Lite in stainless/synthetic will do that with any ammo you feed it. Bear in mind, Sako tests rifles with ammunition they produce themselves.

So, you may need to find just the right brand of ammunition, or even reload your own to get that level of accuracy.

The great thing about factory rifles is that if you look after them and keep track of how many rounds you put through them, you’ll generally get a pretty good resale value if you decide to switch calibres or clean out the safe down the line. Selling firearms is just foreign to me – I want more, not less – so I couldn’t really relate personally. However, for some, it’s a major benefit.

Another aspect of factory rifles, and this is one that I can understand, is that you have warranties and guarantees form manufacturers and retailers. If something goes wrong with a stock-standard rifle, you’re usually okay. Again, this comes down to incredibly efficient modern materials and processes – a lot of manufacturers are so confident, they will give you a lifetime warranty, even with their base models.

Custom rifles

A lot of firearm owners like to try and get more for less. They’ll buy a rusty old milsurp and try restore it, or even convert a P14 action from .303 to a .338 Lapua long-distance shooter. It’s this undeniable urge to make something better and more accurate – but cheap.

Many people try, and many people fail. The old adage “cheap, accurate, reliable – pick two” still stands true. However, not all is lost. Many backyard tinkerers find that they learn more about gunsmithing, rifle maintenance and internal or external ballistics by working on their own firearms than if they bought an out-of-the-box MOA-shooter. It gives you a more holistic view and respect for firearms, and generally makes you a better shooter. The more you know about how your rifle works, the better you can work with it.

Modified Mauser bolt action.
This modified Mauser bolt action was a lot more work, but is a joy to shoot.

What I have found with my own projects, from JW-15s to Swedish Mausers, is you’ll probably spend enough money in the end to have bought a tack-driving factory rifle. So why would you do it?

  1. The initial outlay is low. Three or four hundred for an M38 in 6.5×55 which might need a lot of work to be great, but at least in the meantime, it’s still good.
  2. It’s a project. If you yearn to create your own sub-MOA rifle and constantly look up the latest Boyds’ rifle stocks or DPT muzzle devices, then this probably for you.
  3. It’s unique. Hey, it’s the gun you built, not the one Howa, Marlin or Remington made. There’s a certain amount of pride in this, and you can make it look and feel the way you want.
  4. Individual needs. Hey, if you need a bush gun – cut down a .303. If you want an odd-looking F-Class gun, try your hand at “improving” an old Mauser. The best part is never feeling bad about cutting into the steel – coz it only cost $250.

Who wins?

Well, if you want a reliable, dependable and accurate rifle to take hunting or to the range, you could go and get yourself a Tikka T3 Lite in stainless/synthetic for less than $1200. Chances are your home-improved P14 or Model 1896 is going to end up costing you more with a new/improved stock, bedding, barrel and chambering, suppressor, bases drilled and tapped, etc, etc.

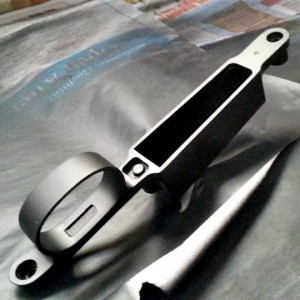
floor metal
Floor metal from 1943 looking fresh and ready to go.

However, if you want something unique that you can enjoy working on for months – or even years – pick up a donor action to work with. Even an older (pre-1964) M70 or Remmy 700 is fun to use. And the best part is if you buy a complete milsurp, you can probably enjoy shooting it “as is” to start with for very little outlay.

I’ve heard many Tikka T3 owners say their rifle is “boringly accurate”. And that is high praise for any manufacturer. So, at the end of the day, if you want to drill tiny holes into paper or leave gaping exit wounds in deer at 400 yards – get the factory rifle. If you want to feel like you earned your way to shooting sub-MOA or making long-distance kills, a project might be on the cards.

Modified M38 bolt.

Mauser bolt modification

Spend any time exploring gun forums and corners of the internet dedicated to military surplus firearms, and you’ll quickly encounter the opinion that Mauser’s bolt design is the standard by which all other bolt actions should be judged, and that most subsequent “improvements” were purely cost-saving modifications.

As a big fan of the small-ring Mauser variants, especially in the super-accurate Swede, it was only a matter of time before I started pulling apart my Husqvarna M38 to see what I could improve. Most Mauser bolt mods are bent handles to allow for scope clearance – something which has been covered ad nauseam all over the place.

So, instead of going over the same ground about oxy-acetylene torches, vices and hammers to get your military Mauser into sporting condition, I’m instead going to look how to reduce lock time by shaving some material off the cocking piece and firing pin. As always, remember that modifying your firearm is dangerous/irreversible/stupid, etc.

What is lock time?

Lock time is the minuscule period of time between when you pull the trigger and when the firing pin crushes the primer to set off the powder inside the cartridge. In other words, how long it takes the firing pin to travel to the primer from the time it is released by the pull of the trigger and the disengagement of the sear. The term lock time comes from the age of muskets – flint locks and wheel locks – the time it it took for the lock to work.

Essentially, the longer the lock time, the more likely it is that the shooter’s natural movements will move the rifle off target. The other period of time that is quite significant is how long it takes the bullet to leave the barrel, as again, the shooter can move slightly during this time.

So, naturally, it’s in a shooter’s best interests to have as short a lock time as possible. Modern bolt actions are incredibly quick compared to old military surplus rifles, and the chief ways in which lock time can be decreased are through eliminating excess material which causes resistance, friction or drag, and making modifications to the main spring, or replacing it and/or the firing pin. There are a few “speed lock” products out there, which are kits aimed to help you reduce the length of travel of the striker, and usually the trigger pull as well. Often, they will also convert your cock-on-closing Mauser to a cock-on-opening action.

Personally, I quite like the cock-on-closing action on older rifles, as it allows you to “feel” more of the chambering and extraction process – a real plus for reloaders.

Removing material

This is something you can’t afford to do wrong, especially if you’re working on a rifle with hard-to-replace parts. Fortunately for me, I had recently bought a replacement bolt due to a different issue and had some good parts on the old bolt to work with.

If you’ve spent any time on Mauser-related forums, you’ll have come across Dutchman, or Dutch. A very knowledgeable gentleman with his own website dedicated to everything Mauser. I came across one of his posts, in which he showed the modifications that were made to cocking pieces and firing pins in order to produce the bolts for the super-accurate CG63s and CG80s. With this as inspiration, I set off on my own bolt-modification adventure.

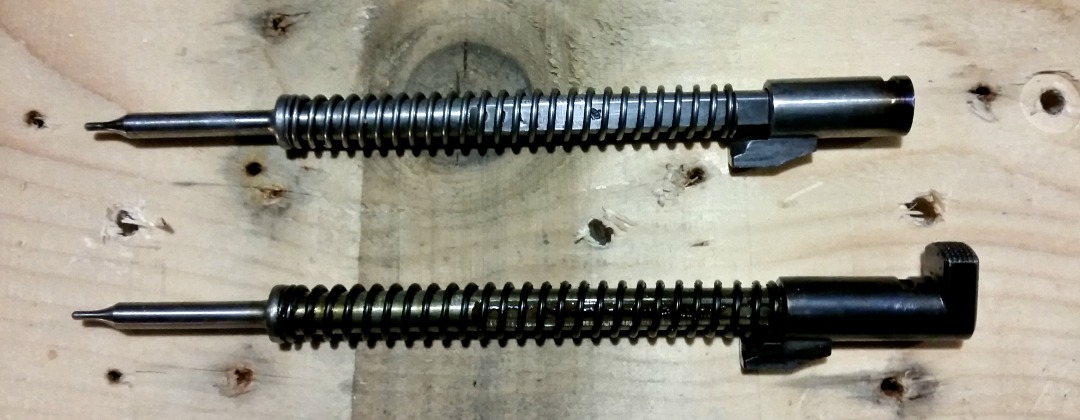
I removed the thumb piece on the back of the cocking piece to reduce weight and drag, and made the firing pin short enough to match. As you can see in the picture below, the previous owner of this rifle cut down the main spring to decrease cocking effort on the rifle, but this can lead to unreliable firing and pierced primers, so I’ll be swapping that spring for the one on the blued bolt I recently bought.

Modified Mauser firing pin.

As you can see in Dutchman’s post, there is more material that can be removed in order to reduce friction, as he shows some rifles with scalloped bolt sleeves. Whether I attempt this or not is still yet to be seen, I’d like to see the difference this makes first before going any further. The sear engagement on the cocking piece can also be altered according to his pics, but it looks like a welder would be needed to reinforce the sear engagement section. There’s also the fact that you’ll need to case harden this section again, as a cut-up sear piece will quickly wear away, creating a dangerous firearm.

I’ve opted to leave this bit for now, as I’m planning on replacing the factory trigger with a Timney trigger in the near future. I want to see what it’s like with the new bang button, before I go and make any permanent changes.

It’s all about the looks

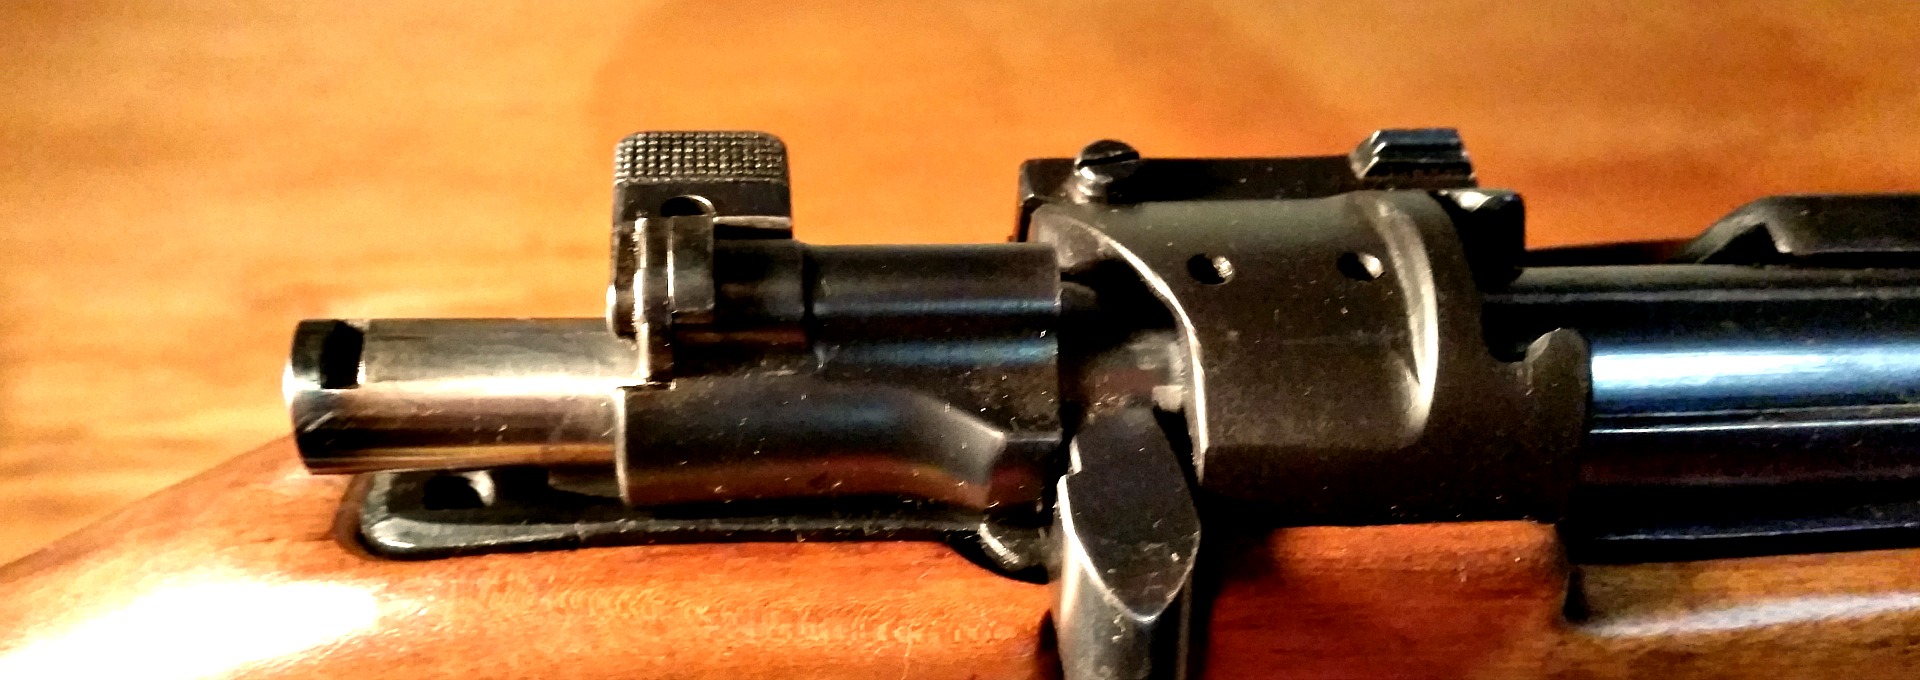
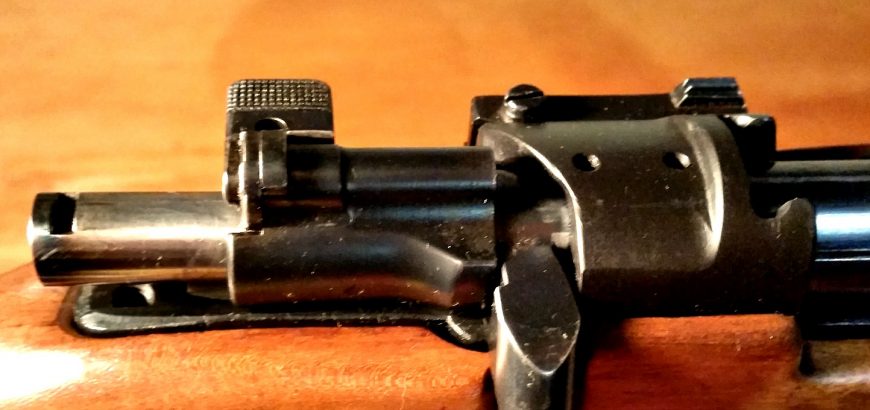
The flush fit of the cut firing pin is much more attractive than the thumb piece.

Well, not all about the looks, but it does play some part. I’ve got to admit, the cut down cocking piece looks a lot more modern and svelte than its military-style counterpart. I’ll take this opportunity to remind you that this rifle was not in collectors condition when I got it from the previous owner, so it is purely a project – no one is cutting up a pristine M38 here!

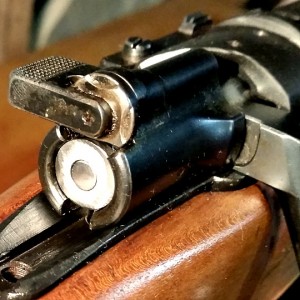
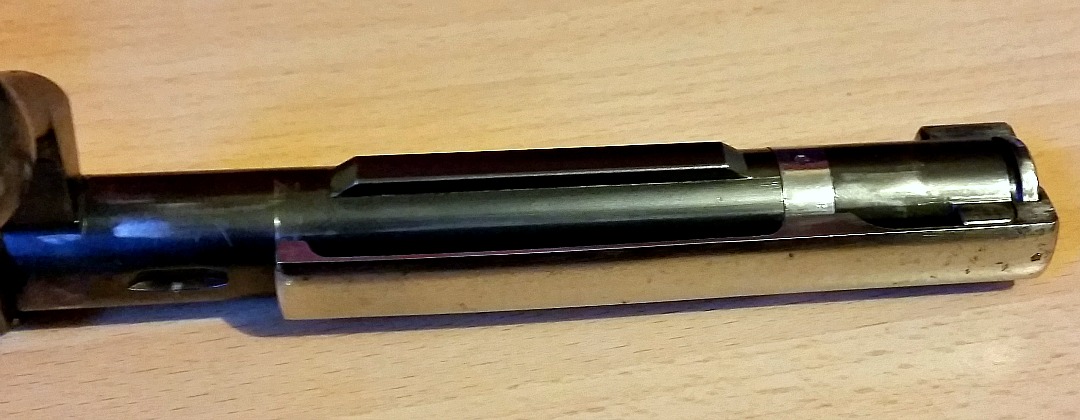
Another thing I wanted to do was break up the solid black of my rifle. The “new” bolt I bought had been blued and combined with the matte black paint job I did on the action and barrel, it was starting to look pretty boring. For a bit of contrast I took the un-blued extractor and extractor collar from the original bolt and added it to my new hybrid monster. The end result is a little bit of flair, with no real practical relevance. Be warned though, that while the extractor is easy enough to remove, the collar does not spring back into shape nicely for you to put teh extractor back on. You’ll need to hold it shut while sliding the extractor over – which isn’t easy without the armourer’s tools. I used a pair of circlip pliers, which while tricky to do, managed the job in the end.

The blued bolt body creates a contrast for the polished extractor and extractor collar.