New product announcements – optics, stocks and brass

We truly live in the golden age of civilian firearm innovation. As various shooting sports gain popularity around the world for their challenging formats and supportive communities, manufacturers have been given the feedback and audience required to push their product lines ever-further.

While shooting sports and hunting have always benefited from advances in military tech, we’ve now reached (and well passed) the tipping point where armed forces personnel look to the likes of PRS and 3Gun competitions to evaluate equipment they would not otherwise have come across. In this recent interview with Kerry from The Gearlocker, the 6.5 guys describe how the lack of gear restrictions in PRS-style shoots becomes a wealth of knowledge for military and LE types.

Here are 3 very recent new product announcements from some of my favourite manufacturers.

Vortex “Huey”

Vortex Optics has recently announced the UH-1, which they’ve affectionately nicknamed the Huey. It’s a holographic optic in its own class. The release in their VIP newsletter describes the UH-11 as having fewer moving parts than your average holo sight, increasing reliability, as well as a near elimination of forward signature of the illuminated reticle – a first for this type of sight.
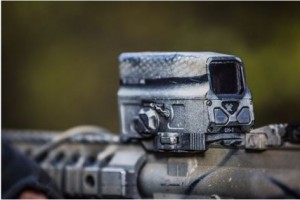
Loving that camo look? One of the Vortex staffers performed a spray can overhaul on this optic.
Loving that camo look? One of the Vortex staffers performed a spray can overhaul on this optic. Image credit: Vortex Optics.

The reticle itself is the new EBR-CQB. The term CQB and  the feature of being near invisible to anyone/anything forward of the shooter hints that this sight is more suited to military and LE applications. This is one of those situations where battlefield considerations lead to the development of an optic that many civvy shooters would love to own for multigun style competitions, or even just for fun.

I also love the fact that it can use rechargeable batteries and has an onboard charger port. These are the kinds of user-focused features that most manufacturers would put in the ‘too hard basket’.

If you want to read more about this product, or any new announcements from Vortex, make sure to subscribe to their newsletter.

Boyds stocks for the Howa 1500 Mini

Earlier this year Howa released a ‘mini’ action, for shorter-than-short-action calibres. While this is limiting for some who might want to rebarrel down the line, it’s a boon for those who want to save weight, decrease bolt throw and action length, and increase reliability for their smaller cartridges in a dedicated platform. To those who think a rebarrel may be in the cards – get yourself a standard short action or long action!
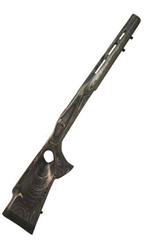
Which would you pick? The Varmint Thombhole in Pepper laminate would be my choice. Image credit: Boyds Gunstocks
Which would you pick? The Varmint Thumbhole in Pepper laminate would be my choice. Image credit: Boyds Gunstocks

The problem with introducing a brand new, and very unique, action length and profile, is that even though shooters may be familiar with the 1500 platform, aftermarket manufacturers have nothing to support the product any longer.

Thankfully, Boyds Gunstocks is forever expanding their range of stocks to upgrade your favourite hunting or competition rifle. The latest announcement concerns the Howa 1500 Mini;

“The Howa 1500 Mini was released in March 2016.  Boyds now makes gunstocks for this hot little beauty in all three of its barrel configurations: The Lightweight barrel, which is a #1 contour; the Heavy barrel, which is a #6 contour; both at 20 inches; and the Standard barrel, which is a #2 hunting contour at 22 inches in length.”

Boyds has made sure that all of our favourite stock designs are available; Classic, Featherweight Thumbhole, Heritage, Platinum, Prairie Hunter, Pro Varmint, and Varmint Thumbhole designs. And for those of you that always get left behind with new product development (yes, I’m talking about left-handed shooters), don’t worry, Boyds has you covered too with many LH options as well.

If you’re reading this, wishing Boyds made something for your obscure rifle, check out their website, it’s all there. And if you can’t find it, use the product request form to ask them to consider your action for their next product development.

To keep up-to-date with the latest happenings from Boyds, make sure to subscribe to their mailing list using the form on their website, or hop onto their Facebook page.

Lapua brass for 6.5 Creedmoor

Last, but not least, the 6.5 Creedmoor has gained enough ground swell for Lapua to consider it as a worthy cartridge for their premium brass.
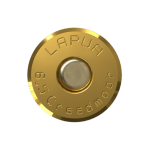
Small primers and flash holes FTW. Image credit: Nammo Lapua

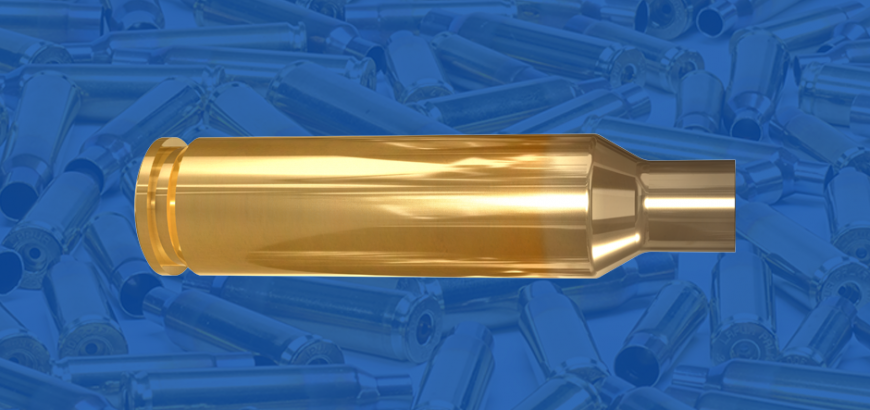
This doesn’t just mean high quality brass for those riding the Creemoor train, but also brass with precision shooting in mind. Lapua has developed its Creedmoor brass in line with its other target brass, including their popular .308 Win. Palma brass, in that it has a small rifle primer and a non-standard smaller flash hole of 1.5mm as opposed to the standard 2mm. Lapua claims this aids in consistent ignition of powder and more accurate down-range performance.

All you 6.5 Creed fans can expect to get your mitts on some shiny new Lapua brass early in 2017. You can read more about this latest Lapua product release here.

Feature image credit: Nammo Lapua
How to replace the stock on a Short Magazine Lee-Enfield (SMLE)

There are two types of Lee-Enfields out there. There are the pristine or refurbished, fully wooded, original-as-they-come investments. And then there are the sporters. These chopped and changed pieces of history make excellent first time hunter’s tools, or the basis of many a project.

We’re going to take a quick look at how to remove and replace (or upgrade) the furniture on your 303, and talk about some of the interesting things you’ll find along the way. Whether you’re building an awesome wildcat, such as a 25-303 or even a 40-303, or just beautifying grandad’s old hunter, I hope the steps in this article are helpful for your project.

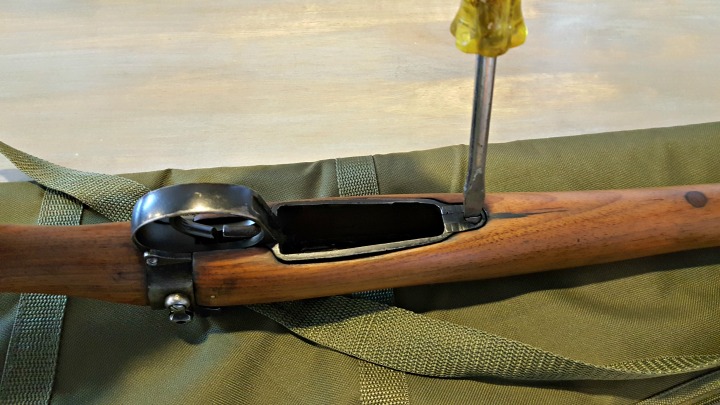
Remove the floor metal

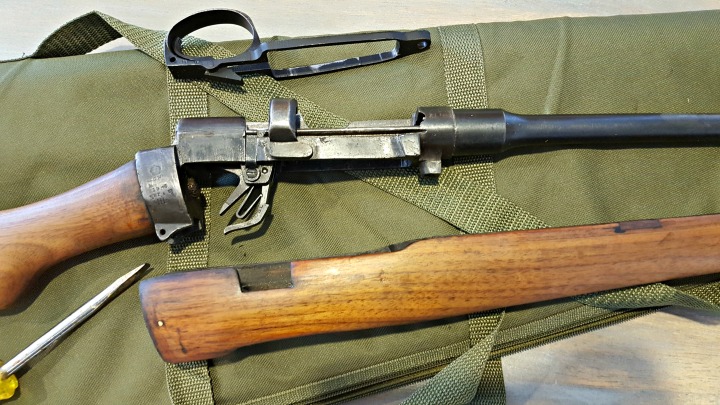
A large flat screwdriver is needed for the single action screw.
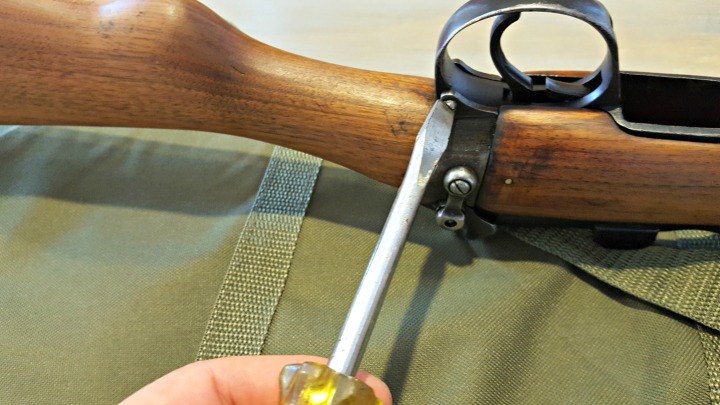
Remove the screw from behind the trigger guard, which the floor metal hinges on.
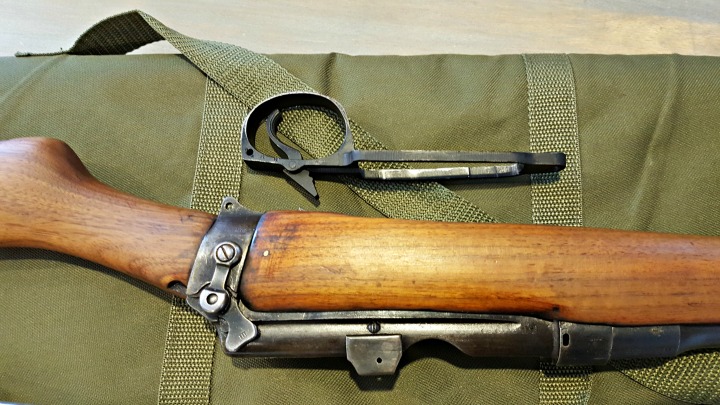
The floor metal should simply pull away. You may need to jiggle it a bit or get the right angle to slide the attached trigger out.
Depending on how your rifle's been treated over the years, you may need a bit of elbow grease to pull the fore wood off, but it should slide off easily.
Depending on how your rifle’s been treated over the years, you may need a bit of elbow grease to pull the fore wood off, but it should slide off easily.

Remove the butt plate or pad

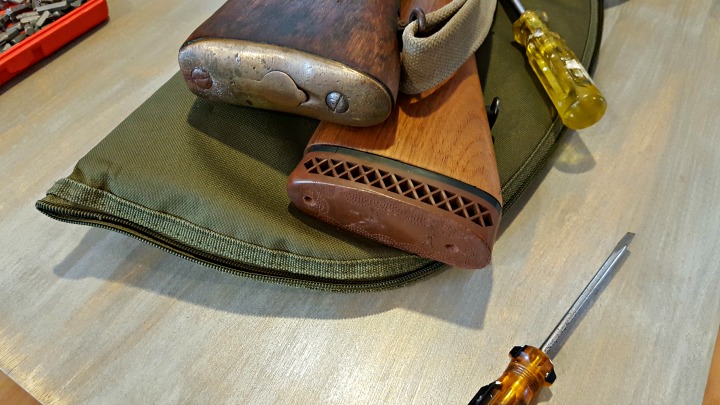
If your rifle still has the brass butt plate, you can skip this next step by prying open the storage trap and removing anything that may be in there (oil bottle, pull through, etc).
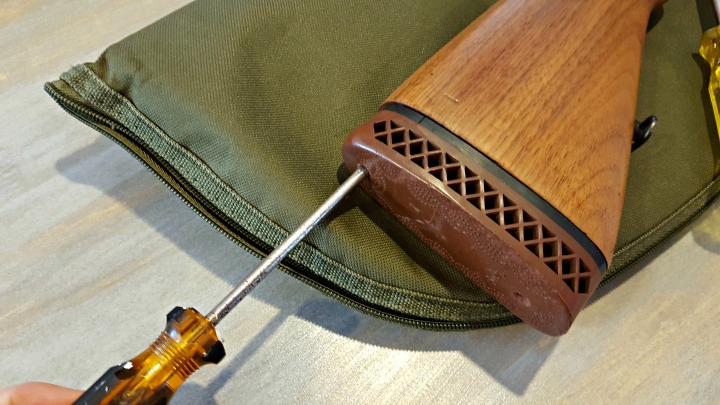
For rifles with recoil pads on, it's time to unscrew these. More modern pads will likely require a No 2 Phillips head to remove the screws. Older pads like this are probably secured with a flat head screw.
For rifles with recoil pads on, it’s time to unscrew these. More modern pads will likely require a No 2 Phillips head to remove the screws. Older pads like this are probably secured with a flat head screw.

Unscrew the butt stock

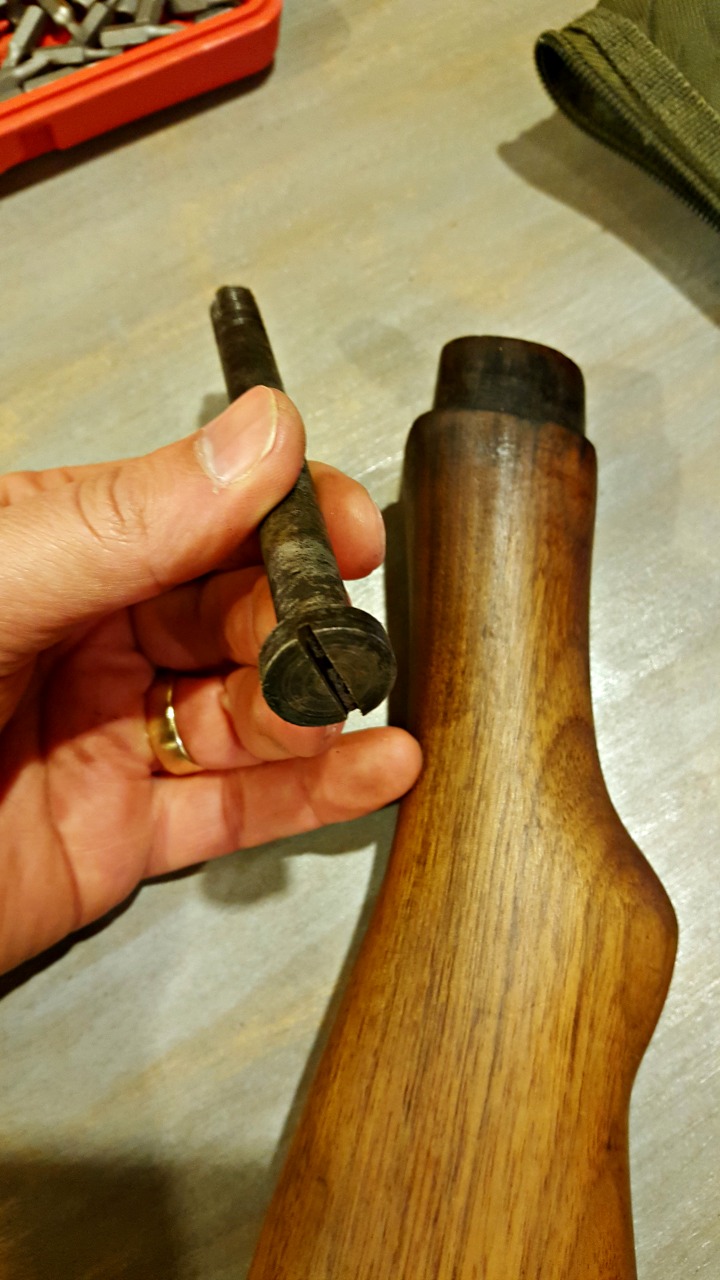
The stock is held in place by a retaining bolt similar to that found in common shotgun designs. This means you'll either need an extra long screwdriver or extended socket driver.
The stock is held in place by a retaining bolt similar to that found in common shotgun designs. This means you’ll either need an extra long screwdriver or extended socket driver.
The bolt requires a large flat head driver. If your driver continues to turn after the screw should be out, but the wood won't come off, give it a sharp tap. It's probably held on by years of grease and tension.
The bolt requires a large flat head driver. If your driver continues to turn after the screw should be out, but the wood won’t come off, give the stock a sharp tap. It’s probably held on by years of grease and tension.

Select a stock to replace or upgrade your current furniture

There’s a chance you’re doing a straight swap for reproduction or original SMLE furniture. This could be because you’re replacing a broken stock, or restoring the rifle to its as-issued condition. Firstly, good luck finding furniture for a No 1 Mk iii. I’ve tried. You may as well keep your sporter and buy a whole specimen, because that’s the kind of money you’re looking at shelling out.

On the other hand, you could be looking to upgrade your old beater to something more functional. You do get synthetic Monte Carlo stocks that will lighten your rifle and bring your eye better in-line with a scope, but plastic just doesn’t feel right for these fine old beasts.

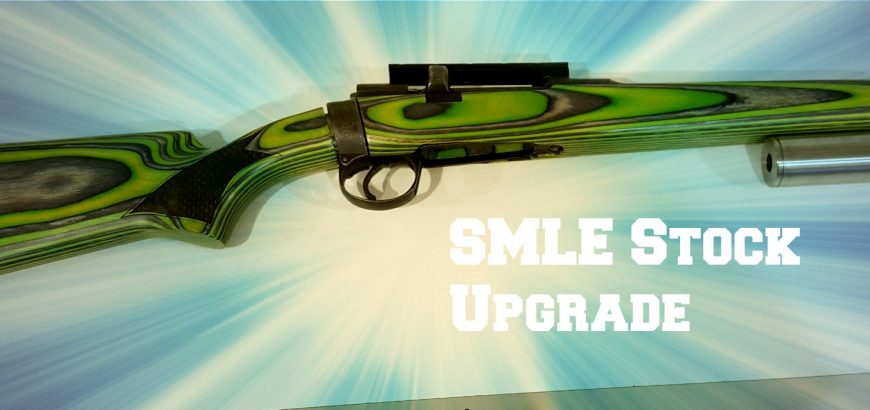
I’ve decided my project 303 needs a hardwood solution, and the Boyds laminate Field Design stock got the nod. With the customisation options available, you can create a unique firearm that not only performs better, but is a joy to look at every time you take it out of the safe.

We’ll have a review of the stock itself coming soon, and a detailed write up of the stock upgrade and other improvements to this rifle. In the meantime, below are some steps to take when fitting your new stock.

Fit and finish

Different iterations of the SMLE will have varying parts that need to be accommodated. There is so much variance in tolerances from arsenal to arsenal, that you’ll be glad if your stock manufacturer has left this last step for you to do yourself.

Pictured here is a cutout I had machined by a friend for the rear ring of the action. On the other side of the rifle, butt stock needs a slight radius to accommodate the safety lever.
Pictured here is a cutout I had machined by a friend for the rear ring of the action. On the other side of the rifle, the butt stock needs a slight radius to accommodate the safety lever.
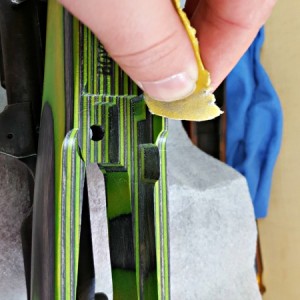
Engineers/machinists blue or a permanent marker will help you find high spots on your action. Sand down your new stock to suit. An engineer that helped me work on this rifle said "there's not a single square section on this action", and he's absolutely right - war time quality isn't the greatest.
Engineers/machinists blue or a permanent marker will help you find high spots on your action. Sand down your new stock to suit. An engineer that helped me work on this rifle said “there’s not a single square section on this action”, and he’s absolutely right – war time quality isn’t the greatest.
Et voila! There's still some more work to be done on this rifle, but after reversing the disassembly steps, the stock will be complete.
Et voila! There’s still some more work to be done on this rifle, but after reversing the disassembly steps, the stock upgrade will be complete.

Gun Rack update

First off, an apology to regular readers for the gap in new content recently. It’s been a crazy couple months with a new addition to the family and purchasing our first home too.

Unfortunately my first born needs at least a few more years before he’s of any use as a reloading assistant, but for now he’s definitely entertaining. The reloading bench is also unfortunately far away from being ready, as I’m replacing my entire workshop set up (finally!). So it will take a little while for things to get back to normal, but we do still have a backlog of articles to get through. Here’s what you can expect to see in the coming month and a bit.

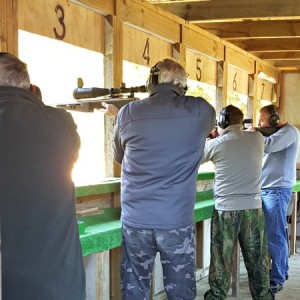
25 metre rapid shoot - always catches you up with your holdover!
25 metre rapid shoot – always catches you up with your holdover!

2016 NZDA Prize Shoot

This is a shoot I look forward to every year – and it seemed like I had no excuse going in, considering my rifle was successfully and repeatedly printing 6 mm groups… However, my placing was average, and as always I learned something new about being prepared for a competition. Look forward to telling you guys more about the day soon!

Venturing into F-Class

So I tried my hand at F-Class at the Franklin Rifle Club, shooting at 600 yards with some pretty good success. We’ll talk a bit more about F-Class in general, as well as give a little bit of info on the club and other long range destinations around the country.

I’d rather be out on the line… #tuesdaysucks #workweekblues

A photo posted by The Gun Rack (@gunracknz) on

Putting the finishing touches on a Boyds Field Design stock for my SMLE # 1 Mk iii.

How to replace the stock on an SMLE

The good ol’ .303 is a staple for NZ, Australian and Canadian shooters, and features strongly in militaria collections around the world. However, with the abundance of used and abused SMLEs out there, you’re bound to want to work on one at some point. This article will provide you with a quick look at how to remove and replace the wooden furniture on a sporterised No 1 Mk iii.

Product review: Boyd’s Field Stock for 303 SMLE

So, once you’ve removed the stock of your old .303 beater, you might want to spruce it up with a solid wood laminate stock from Boyds – which is exactly what I did. You can look forward to reading more about this stock – and the cool features available – soon.

Monster bush build

So, my project .303 didn’t only get brand new furniture from Boyds Gunstocks. It’s also wearing an MAE 6-30 ST suppressor, a Vortex Razor red dot site and is waiting for a fresh coat of Cerakote, when I can tee up a time with Victor from Cerakote NZ. This short-barreled bush build will be shooting subsonic lead and is begging to be taken out pig hunting. More on this monster in the near future.

DOCTER binocular reviews

What’s better than one pair of DOCTER binocs? Two! We’ll be taking a look at some more excellent optics from DOCTER, and talking about what to consider when purchasing new glass.

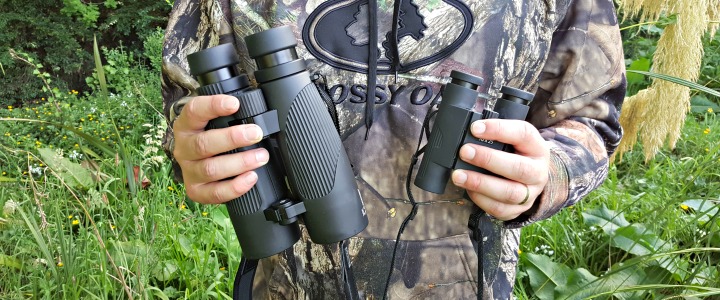
Hmm... what's gonna do the job?
Hmm… which is gonna do the job?

Product review: MDT TAC-21 Chassis for Tikka T3

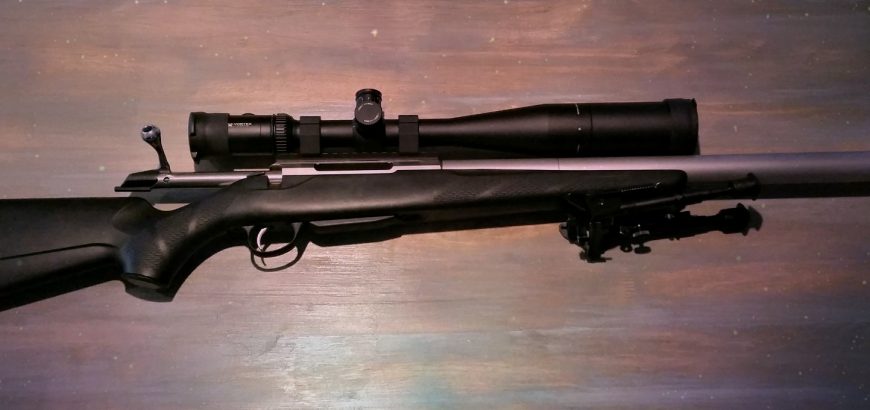
What could make my Tikka T3 sexier? The TAC-21 chassis from MDT! We’re waiting on some magazines which are on back order, but when those arrive we’ll be taking this chassis out for a proper test drive. It’s already assembled and I’ve had a good amount of time to get a feel for it. I think this is going to make a good mid-range F-Open rig!

Rifle stock bedding and finishing: Part 3

Hey, it’s only been a year since we did part 1 in this series on rifle stock bedding and finishing! Before the end of the year we’ll take a look at the final steps in the process and also some of the excellent stocks available to complete your project.

So, these are some of the bits and pieces to look forward over the coming month and a bit, hope that’s whetted your appetite! Look forward to catching up iwth you on our Facebook and Instagram pages, and of course, right back here with some fresh new articles!

Can you put a BRNO Model 2E or CZ 452 in a JW-15 Stock?

In late June I had a question from Ken in Gisborne about whether or not you could fit a BRNO Model 2E in a JW-15 plastic after market stock. Immediately you probably have two questions.

  1. Why am I only answering this question now; and,
  2. Why would you put a beautiful European-crafted rifle in a cheap, ugly stock?

So, I’ll quickly answer those:

  1. I replied to his email, so don’t you worry!
  2. Ken is unable to obtain an original stock – and I imagine his beautiful rifle is pretty hard to shoot without a stock!
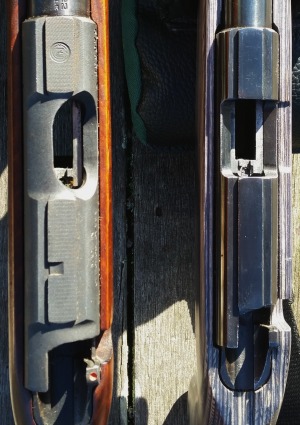
Comparing the JW-15 and BRNO Model 2, you'll see a lot of similarities, but even more differences.
Comparing the JW-15 and BRNO Model 2, you’ll see a lot of similarities, but even more differences.

Easy way to find out stock dimensions

If you ever come up against a similar issue yourself, you may need a quick work around to see if you can do something similar. The other question you often get is “Can you put a CZ 452 in a JW-15 stock?” Usually this comes from people who want a light, farm-ready 22LR, without having to ruin their wood stock or buy a new rifle. FYI, the CZ 452 and BRNO Mod 2E are practically identical. Here’s a nice little write up that someone has done on the BRNO, which saves me repeating a lot of the same points.

Essentially, as with many European brands, there was sharing of parts and designs, and eventually a merger. The rifle was largely unchanged. And the difference between the 2E and the 2 is that the 2E is the luxe version. Nicer stock, etc.

Anyway, I digress. A quick, easy way to confirm barrel and action dimensions for stocks? Head on over to the Boyds’ Gunstocks website. They give you the barrel dimensions and centre to centre measurements between action screws for all their house actions (that they base their aftermarket and OEM stocks on). While you’re there, you may be tempted to buy a whole new Boyds stock, and why not? They’re awesome quality, solid wood and modern designs!

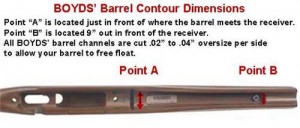
So, using my little cheat, this is what the Boyds website reveals:

Boyds barrel measurements. Image from Boyds' website.
Boyds barrel measurements. Image from Boyds’ website.

BRNO Model 2E measurements:

Barrel Dimensions: Point A = 1 1/16″ and Point B = 15/16″

  • Center to Center of Action Screws: 6 1/8″
  • Over All Length of Part: 30″
  • Comes with Boyds’ 1/2″ Rubber Recoil Pad.

CZ 452 measurements:

Barrel Dimensions: Point A = 1 1/16″ and Point B = 15/16″

  • Center to Center of Action Screws: 6 1/8″
  • Over All Length of Part: 30″
  • Comes with Boyds’ 1/2″ Rubber Recoil Pad.

Norinco JW-15 measurements:

Barrel Dimensions: Point A = 59/64″ and Point B = 43/64″

  • Center to Center of Action Screws: 3 25/32″
  • Over All Length of Part: 31 1/2″
  • Comes with Boyds’ 1/2″ Rubber Recoil Pad

Other differences

The biggest barrier is the difference in action size.

While my quick cheat above provides a very useful starting point for stock comparison, there are other things to consider as well. When considering a rifle like the JW-15, which is essentially the cost-saving, poor cousin of the BRNO/CZ, you’ll usually get differences in dimensions where changes have been made in the manufacturing process to reduce costs. Often you’ll find this in stamped instead of milled parts, simpler contours, thinner barrels, etc.

Below are some of the basic differences that unfortunately make this stock swap a no-go.

Action shape

The BRNO/CZ action is longer, thicker and circumference and a little bit different where inletting is concerned (this last isn’t the biggest concern in stock swapping, as you can alter inletting). Somehow the Mauser-action origins seem more apparent in the lines of the BRNO, even though the JW-15 has a similar, but simplified, shape.

Barrel contour

The Chinese rifle has a much simpler barrel contour, while the Czech rifle follows traditional lines. The thickness of the barrel is a fair bit different, but where it meets the larger action is the biggest difference, as the BRNO barrel swells up to meet the threads.

The BRNO barrel is close to what we'd consider a bull barrel in a modern rifle, and the contour differs significantly to the JW-15.
The BRNO barrel is close to what we’d consider a bull barrel in a modern rifle, and the contour differs significantly to the JW-15.

Action screws

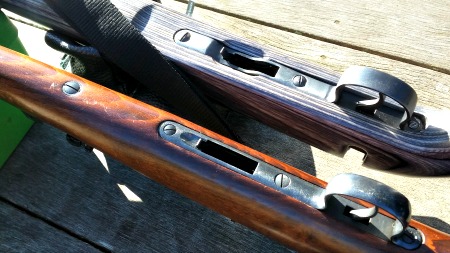
Another clever simplification in the Norinco is reducing the amount of screws and metal work by merging the forward action screw with the recoil lug. Looking at the image below you’ll see three screws on the JW-15 and four on the BRNO. The rear screw on both is a wood screw, which secures the trigger guard to the stock.

The next screw forward on both rifles is a simple action screw. In front of the trigger is the last action screw. In the JW-15, this screws up into a recoil lug dovetailed into the action. The BRNO has another screw, independent and forward of the floor metal. This screws up through a steel collar into a recoil lug that forms the hidden part of the rear sight assembly.

Differences in inletting and dimensions are indicated by the presence of fewer screws in the Norinco.
Differences in inletting and dimensions are indicated by the presence of fewer screws in the Norinco. Also notice the softer metal the screws are made of.

Bits and pieces

There are various other bits and pieces that differ, such as the mag well and the trigger unit. The trigger in the Model 2E is a fine example of a single stage trigger, with adjustable over-travel, and a clean break around 3 lb. This is streets ahead of the simple, but practical, trigger in the JW-15. These can be toyed with to produce more acceptable results, as detailed in this previous article on JW-15 trigger improvement.

Verdict

If you are considering swapping things up with either of these rifles, an aftermarket stock specific for the JW-15 or BRNO would be far better than trying to adapt one to the other.

Trigger adjustment for Tikka T3

It goes without saying that the Tikka T3 is one of the most popular bolt action rifles in New Zealand. It’s loved by hunters for it’s simple operation, superb accuracy and reasonable price point. Competition shooters are increasingly turning to the T3 as the basis for customised F-Class rifles and the like. With an abundance of after-market parts and a fairly modular set up, it makes perfect sense as a platform to rival the Remingtons and Howas on the range.

Having a torque driver on hand to put everything back to spec again is ideal.

One of the great things about the Tikka T3 is that you don’t have to spend much money to make it a good shooter. Out of the box it has its 3-shot MOA guarantee, as well as some included rings and an adjustable trigger.

Common alterations to T3’s include the obvious, such as new scopes and suppressors. But others go a bit further with bipods, chassis systems, magazine/floor-metal replacement, etc. One thing that most shooters won’t need to change is the trigger. Your top end shooters may opt for an aftermarket trigger, but the majority of us can get away with the factory unit with no trouble.

Trigger overview

Adjustable from 2 ¼ – 4 7⁄16 lbs (10 – 20 N), the rifle comes set from the factory at around 3 lbs ( 13 – 15 N). Some models will allow access to the trigger pull weight adjustment screw through the magazine well once the mag is removed. On others you will need to remove the barrelled action. Even if you can access the screw through the mag well, you may as well take the gun apart, as it will probably be quicker and easier. With only two action screws to remove, it really isn’t hard work to do this, and you’ll get familiar with the innards of your gun too.

The factory setting is safe and light enough for hunting, however I personally prefer a lighter trigger (around the 2 lb mark). Since I never walk around with a round in the chamber, I don’t mind a light trigger from a safety perspective.

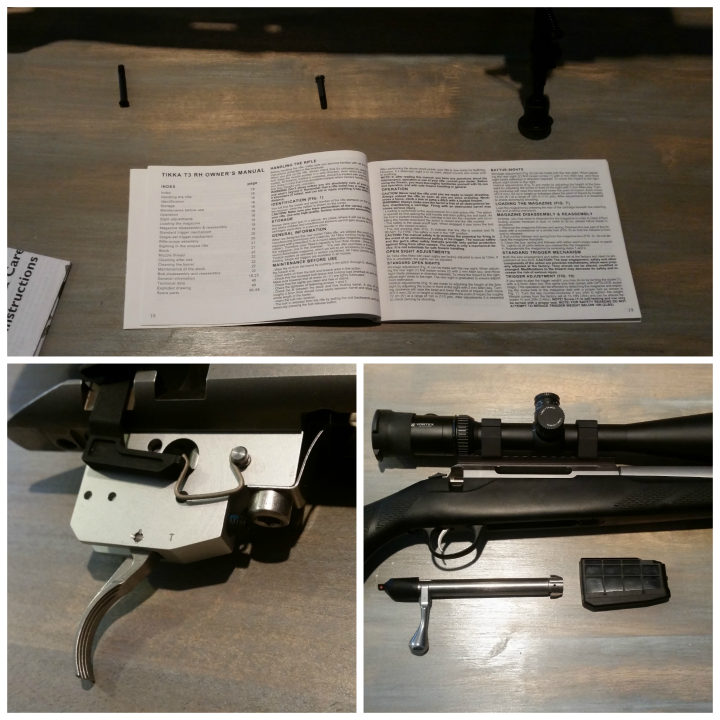
The user manual has all the info you need, but it's quite a simple job really.
The user manual has all the info you need, but it’s quite a simple job really.

The trigger breaks cleanly and crisply, and many are happy with it without feeling the need to lighten the pull weight. If you’re shooting from a bench or mound for groups, you may want to lighten the trigger, as I find even a 3 lbs pull weight can cause you to torque the rifle a bit while pulling the trigger, producing occasional flyers.

If this is your first rifle (good choice!), getting used to a heavier trigger is not a bad thing, as it results in good trigger control practices. If you’ve got a heavy calibre and you’re worried about developing a flinch, a heavy trigger pull can accentuate these tendencies, as you anticipate the break.

presentation17

In terms of function and looks, the T3 trigger unit is certainly above average for a factory rifle, and many will find it perfectly suitable without replacement. The easy adjustment makes it even more widely appealing.

If a safety is important to you’ll probably like the Tikka arrangement. It’s a thumb safety which when engaged will lock the bolt in the closed position, the firing pin in the cocked position and will keep the sear and trigger blade from moving. The red indicators for ready-to-fire are pretty clear on the safety and the bolt shroud.

Only a couple action screws and the Tikka comes apart easily. Although the "floor metal" is plastic, unlike other factory rifles the trigger guard can be removed to be easily replaced with a metal unit.
Only a couple action screws and the Tikka comes apart easily. Although the “floor metal” is plastic, unlike other factory rifles the trigger guard can be removed to be easily replaced with a metal unit.

Adjusting the trigger

The trigger pull weight is easily adjusted with a 2.5 mm allen key – the same size your scope rings use. The screw is self-locking, so you’ll definitely need the tool to make the adjustment, You also won’t have to worry about it working loose. The screw will only move so far in either direction, so it’s simply up to you to find the weight you like. If you have the tools, you can even measure your trigger pull weight to be 100% sure. This will also inform future trigger decisions, as you’ll know what weights you do and don’t like.

The trigger pull weight is the only adjustable part of the trigger, so don’t worry about anything else on there. If you are uncomfortable with making your own trigger adjustments, a competent gunsmith is your best friend.

If you need pictures or more guidance, consult your instruction manual. If you bought your rifle second hand, Sako has an online version of their Tikka T3 rifle user manual here. If you do take your rifle apart to do this adjustment, having a torque driver on hand to put everything back together to the correct specs is ideal.


Mounting a scope on a .303

The old .303 has been a staple of the Kiwi bush for decades, and will most likely continue to be around for decades to come. Usually the pristine, fully wooded specimens are locked away in gunsafes and taken out for service rifle shoots, and even old sporters get treated with a degree of respect, reflecting their heritage from the culling days.

However, some sporters are the perfect base for a project that’s a little bit fun – a little bit different. So, looking out for the perfect beginning of a bush rifle project, an easy scope mounting scenario was high on the list for me.

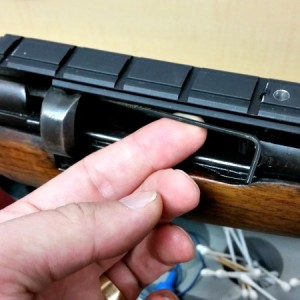
Comparing two SMLEs, one with original fixed sights and one with a scope mounted and iron sights removed.

Most of the older rifles with scope mounts have rails that bridge the gap between the front of the action and the stripper-clip/bolt guide. I think I’ve only seen one with weaver-style rings jimmied into place, and one with a scout-type mount that fit over the rear sight – similar to what you see on some Mosin Nagant scout projects.

Anyway, these older rails – they all tend to lack any Weaver or Picatinny type cross sections – the slots where the recoil stop sits. If you try and fit modern rings to one of these older rifles, you’ll find that after a few shots, the rings will start to slide back or loosen.

So, this means if you buy a rifle with one of these old rails you have a couple choices.

Find some old rings

You could try and find some old style rings that lack a cross-bar. These are similar to the dovetail rings you get for rimfire rifles and for modern Tika rifles. The difference is the width of the ring bases, so you may not be able to find a modern type that will fit your older rifle – especially if the angle of the lips doesn’t mate up with the angle of the rail.

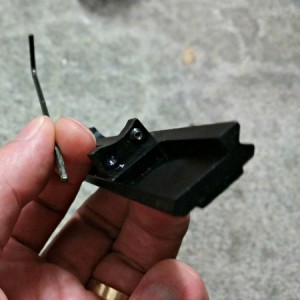
With the ATI scope mount, a longer allen key will be very helpful for the rear grub screws.

So, you may have to try and find some old school rings. However there are two downfalls to this approach. Firstly, older rings were phased out for a reason. The cross bar on picatinny and Weaver style scope rings means the rings cannot slide back on the rail under recoil.

The second downfall is that you will be getting an unknown quantity. They will probably be for 1″ tubes only, and you won’t know whether they’re good quality, well-aligned, etc.

Remove the rail and replace

There are a few modern rail types that you can fit to your .303. There are ones that you drill and tap into the side of the action – I’m not a big fan, but others like them. They’re quite similar to the kind of aftermarket rails you’d use on an AK, Mosin or SKS – basically actions that aren’t designed for scope rails.

The grub screws in the rear of the ATI scope mount use tension to keep the rail in place.

Because the rear ring of the action is quite different to modern actions, your standard MOA rails probably won’t be much help. However, ATI produces a mount that uses one screw into the front ring of the action and a couple grub screws against the rear ring of the action. While these two rear screws are not drilled and tapped into the action, the force they apply seems to be strong enough to keep the rail in place under recoil.

I’ve been using one on a project .303 for a while now, and have had no complaints.

With any aftermarket scope mounts on an SMLE, you’re going to have a pretty high scope. So, you’ll probably need to look at an aftermarket stock or some sort of cheek riser to allow easy and repeatable eye relief. More on that in another article soon, as this project continues to evolve.