10 reasons hunting should be banned in NZ

I can feel the vitriol on your side of the screen already. Hang on a sec – read the article. And by the time you get to the end, if you feel you agree, make sure to share this message on social media.

  1. We need to leave all of the free-range, organic meat in the forests and mountains

    We can’t all be vegans. If we were, who would the vegans judge? Joking aside, there will always be meat-eaters among us, and as much as we praise the benefits of free-range, organic meat, we apparently don’t like it when people go and get it for themselves.

  2. Our families should be further disconnected from their food supply

    We already use words like veal, venison, beef, lamb, mutton, pork and more to distance ourselves from the fact that we eat pigs, cows, sheep, deer, etc. Chicken gets a pass.

    We also allow big corporations to taint our protein sources with genetic manipulation, modified starches, cereal, preservatives and Bic Mac sauce. If we can keep our families completed disconnected from the supply food they eat, they can continue to have little respect for the environment, and feed into the profits of factory farms and global chain “restaurants”.

  3. Our biodiversity should include destructive pests with no natural predators

    I can’t say it enough. I’m sick and tired of tripping over Kiwi and Kakapos and shags. Bloody everywhere. If only someone introduced some voracious pests.

    Oh wait. That happened.

    New Zealand has a great deal of introduced species, from trout to pigs. Most of these animals were introduced by European settlers to bolster food, leather, fur and wool supplies and to provide sport (when they weren’t shooting each other or inhabitants of the land they conquered). With no natural predators in our country, these creatures can thankfully destroy our native flora to their hearts’ content, and compete with (or kill) the fauna that has existed here for thousands of years before humans graced these shores. Ah – balance!

  4. 1080 is great for our water supply

    No, I don’t want to get into a 1080 debate. Save that for Facebook and drunken dinner table talk. Or raise it with your political representatives. Whichever you find more effective.

    So, hunters won’t entirely negate the need for some sort of widely implemented pest control plan. So why have hunters at all? Bloody nuisances. Trying to get rid of pests, enjoy some sport and feed their families, as their predecessors have done for generations.

    But seriously, no matter what your thoughts are on 1080, it’s awesome having it dropped around water catchments and supply and furthering our H2O polution epidemic. Tasty!

  5. We need to raise a generation dependent on devices

    The next generation will clearly experience the most life has to offer them by sitting behind screens varying in size from about 5″ to 50″. Heaven forbid they see what’s out there and learn to enjoy the splendour of nature. Or become concerned about what the previous generation has done with it! Let’s hide our shame behind iPads and TVs till we die, and leave them to figure it out later.

    Why show your children the majesty of nature? They've probably got better graphics on their tablets and TVs.
    Why show your children the majesty of nature? They’ve probably got better graphics on their tablets and TVs.
  6. Our kids already have all the bushcraft they need

    Lets face it. Aside from being able to Google everything they could ever learn in school, kids are also naturally hardy and well-adapted to survival in the bush. When last have you heard of people becoming lost in the bush? Never happens!

    Not only that, but between their smart phones with dead-batteries and no signal, and the skills we never taught them, they know what’s safe to eat, how to find water, light a fire, navigate and cook. Some of them can even tie knots.

    Put a random child here and they'll find their way home, no problem. Or maybe start a new civilisation.
    Put a random child here and they’ll find their way home, no problem. Or maybe start a new civilisation.
  7. Families should defer inter-generational bonding until the kids are old enough to drink

    Look, if there’s one thing New Zealanders are great at, it’s bottling up our thoughts and feelings so we can blurt them out when we’re hideously drunk and it’s only vaguely remembered. Rather than spending time outdoors with your children, leave them with their electronic devices until their around 18 and get plastered together.

    Now you can have that father-daughter, mother-son, whatever-whatever time you’ve always been wanting, and you’ll have almost two decades of emotional regression and mental stunting to add to the mix.

  8. Children should not be exposed to safe firearms handling or sporting use of guns

    It really is best for children to see people shooting other people with guns. That’s why they should only see firearms in movies and video games.

    Look, if children get the idea that they could one day own and operate a firearm in a responsible manner, they may decide to give shooting a go. They may even like it and become proficient at supplying food for their family or become a prodigious sportsperson. Don’t let this happen in your home!

  9. We need to keep New Zealand’s reputation as an outdoors destination down to a low murmur

    These bloody tourists, coming over here, pumping up our self esteem as a nation and giving us some of their hard-earned cash. Infuriating!

    Simply take hunting out of the equation, and at least some of these existentialist, money-spending crazies will stay in their home countries or go to Ireland or something.

  10. If we stop hunters and shooters from having guns, firearm-related crime will disappear

    Should we open this can of worms right at the end of this article? Why not!

    Remember recently 28 firearms were stolen from a pistol club armourer? A bright-spark professor from Otago Uni rightly points out that a firearms register would solve this problem, and we should crack down on law-abiding gun owners to reduce criminal activity. Bravo sir!

    Wait. Wait a second… Aren’t military style semi-automatics and pistols already registered? Why yes, yes they are. And these are the same types of weapons that were taken in this burglary? Affirmative.

    Then what are you talking about kind sir – surely we are safe, as these are registered firearms? Perhaps what the knowledgeable prof is referring to is the wholesale registration of all firearms, which would make old grandad on the West Coast a criminal if he didn’t get the memo. The type of programme that was abysmally implemented and eventually scrapped in Canada, possibly the friendliest nation on the planet…

    This sounds like a fantastic plan, and one surely aimed at the criminal element who would love access to guns so they could get themselves a trophy stag. Or hold up a liquor store. Whatever.

    Clearly a strategy like this would be far more effective than providing police with the additional resources and training they would need to actually solve burglaries and clamp down on other illegal methods of acquiring firearms. It certainly sounds more wise than creating tougher sentences for gun-related crimes, which might create a greater deterrent for those bound for the slammer with their nefarious deeds.

Well, this has been our top 10 list of reasons why hunting should be banned. If you’re upset by it, you need to click on either this link or this link.
72947697

Gun Rack update

First off, an apology to regular readers for the gap in new content recently. It’s been a crazy couple months with a new addition to the family and purchasing our first home too.

Unfortunately my first born needs at least a few more years before he’s of any use as a reloading assistant, but for now he’s definitely entertaining. The reloading bench is also unfortunately far away from being ready, as I’m replacing my entire workshop set up (finally!). So it will take a little while for things to get back to normal, but we do still have a backlog of articles to get through. Here’s what you can expect to see in the coming month and a bit.

25 metre rapid shoot - always catches you up with your holdover!
25 metre rapid shoot – always catches you up with your holdover!

2016 NZDA Prize Shoot

This is a shoot I look forward to every year – and it seemed like I had no excuse going in, considering my rifle was successfully and repeatedly printing 6 mm groups… However, my placing was average, and as always I learned something new about being prepared for a competition. Look forward to telling you guys more about the day soon!

Venturing into F-Class

So I tried my hand at F-Class at the Franklin Rifle Club, shooting at 600 yards with some pretty good success. We’ll talk a bit more about F-Class in general, as well as give a little bit of info on the club and other long range destinations around the country.

I’d rather be out on the line… #tuesdaysucks #workweekblues

A photo posted by The Gun Rack (@gunracknz) on

Putting the finishing touches on a Boyds Field Design stock for my SMLE # 1 Mk iii.

How to replace the stock on an SMLE

The good ol’ .303 is a staple for NZ, Australian and Canadian shooters, and features strongly in militaria collections around the world. However, with the abundance of used and abused SMLEs out there, you’re bound to want to work on one at some point. This article will provide you with a quick look at how to remove and replace the wooden furniture on a sporterised No 1 Mk iii.

Product review: Boyd’s Field Stock for 303 SMLE

So, once you’ve removed the stock of your old .303 beater, you might want to spruce it up with a solid wood laminate stock from Boyds – which is exactly what I did. You can look forward to reading more about this stock – and the cool features available – soon.

Monster bush build

So, my project .303 didn’t only get brand new furniture from Boyds Gunstocks. It’s also wearing an MAE 6-30 ST suppressor, a Vortex Razor red dot site and is waiting for a fresh coat of Cerakote, when I can tee up a time with Victor from Cerakote NZ. This short-barreled bush build will be shooting subsonic lead and is begging to be taken out pig hunting. More on this monster in the near future.

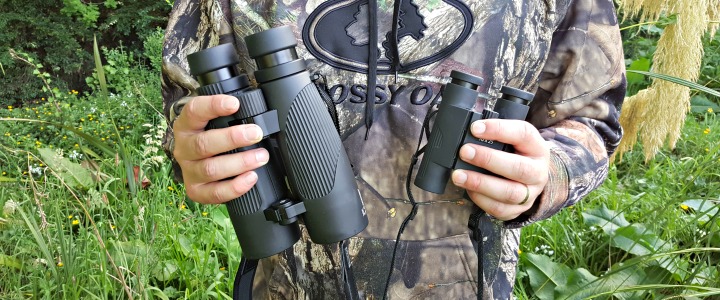
DOCTER binocular reviews

What’s better than one pair of DOCTER binocs? Two! We’ll be taking a look at some more excellent optics from DOCTER, and talking about what to consider when purchasing new glass.

Hmm... what's gonna do the job?
Hmm… which is gonna do the job?

Product review: MDT TAC-21 Chassis for Tikka T3

What could make my Tikka T3 sexier? The TAC-21 chassis from MDT! We’re waiting on some magazines which are on back order, but when those arrive we’ll be taking this chassis out for a proper test drive. It’s already assembled and I’ve had a good amount of time to get a feel for it. I think this is going to make a good mid-range F-Open rig!

Rifle stock bedding and finishing: Part 3

Hey, it’s only been a year since we did part 1 in this series on rifle stock bedding and finishing! Before the end of the year we’ll take a look at the final steps in the process and also some of the excellent stocks available to complete your project.

So, these are some of the bits and pieces to look forward over the coming month and a bit, hope that’s whetted your appetite! Look forward to catching up iwth you on our Facebook and Instagram pages, and of course, right back here with some fresh new articles!

Where to shoot in NZ: Waiuku Pistol Club

It’s been a while since I’ve written a ‘where to shoot‘ post, possibly because I haven’t really been anywhere too exciting in the last little bit. However, that could be because I’m quite spoiled as a member of Waiuku Pistol Club.

At the beginning of the year I was tossing up joining one of three pistol clubs, to get my B Cat licence and start getting into 3 Gun comps. I was looking at Howick Pistol Club, Auckland Pistol Club and Waiuku Pistol Club.

Not many ranges are set up for rifle, shotgun and pistol use.

I have shot pistol at Howick and Waiuku, and done an induction at Auckland Pistol Club. I quickly eliminated APC, because even though the facilities were excellent, only pistols or pistol carbines could be shot there. Since I shoot a lot of centrefire rifle, and a smidgen of shotgun, I didn’t want to shell out for a pistol membership and still have to pay range fees when I wanted to shoot long guns.

Howick was eliminated for the same reason, but also because the indoor range with specific target zones means most competitive pistol matches need to be shot in a modified format. This was disappointing as the range is only 5 minutes from my house!

capture-1


So in the end, even though it’s the furthest of the three from where I live, I ended up joining WPC so that I could shoot long guns as well as learn pistol. The club was also enticing because it had the best range availability. With shooting allowed between 10 am and 4 pm, Wednesday through Sunday, there’s plenty of time to practice and shoot competitions. If you’re a visitor, don’t just rock up – you will be turned away! Visitors can shoot long guns after 12 pm on Saturday or pistols after 10 am on Sunday.

This ensures there is space on the range for you, and also that there are people around who can unlock the ranges and show you around. If you want to head down for a few hours to try before you buy, or just want to sight in your hunting rifle, make sure to follow the WPC visitor’s instructions for an easier experience.

What’s available?

For the princely sum of $20 (cash), you’ll have access to a couple hundred metre ranges and several smaller ranges. There are steel silhouettes for rimfire, falling plates for pistols and shooting tunnels for you guys with magnumitis or particularly short, noisy, braked or ported barrels. If you want to find out more about the ranges, click here.

The range is in Otaua, just south of Waiuku, and is about 45 – 50 mins drive from Manukau. If you’re anywhere south of the Auckland CBD, it’s a very driveable distance for regular trips. I head down just about every Sunday from East Auckland, stopping at the BP service station before the Drury offramp for a healthy breakfast of a pie and coffee.

You and everyone else around you will be glad for the shooting tunnels when big guns like this .300 WSM are on the range. Also great for when there's a bit of rain!
You and everyone else around you will be glad for the shooting tunnels when big guns like this .300 WSM are on the range. Also great for when there’s a bit of rain!

Once you’re there, the club house is warm and dry, and sheltered from the wind if it’s howling. Unlike some ranges in the wider Auckland region, you don’t have to use a long (or short) drop if you’re busting. The club house has ‘facilities’ as well as a safe area for cleaning/maintaining pistols, a well-equipped first aid area and a large seating area for courses, meetings or just having a bite of lunch.

Whatever you need in terms of food and drink, take with you, as there aren’t any shops nearby. Also, you’ll be juuuuust out of cellphone reception for the duration of your visit to the range. Which – let’s face it – is probably a good thing!

Club culture

I’ve heard some people say that they found Waiuku members a bit stand-offish when they visited. This wasn’t encouraging when I was looking at joining. However, this hasn’t been my experience. At least not any more so than other ranges.

When you’re an unknown person at a shooting event or visitor’s day and have access to some pretty powerful hardware, it’s natural for regulars at any range to treat you with a bit of a keen eye until they’re certain you’re someone who is safe and capable.

This is quickly overcome by being sensible and practical (courteous as well), and also asking questions if you don’t know the procedures.

There are plenty of members around who are keen to help you have a good time, and will share their knowledge with you if you ask (sometimes even if you don’t!).

You’ll also sometimes see groups of scouts or Adventure Girls come through – a further testament to the openness of the club towards education and furthering people’s experience with firearms.

If you’re looking for a spot to spend some hours putting lead down range this summer, I’d highly recommend checking out WPC. Also, as we’ve just started a new quarter, it’s a great time to sign up as a member, as you won’t have to pay a full year’s fees.

If you’ve got any questions, pop them in the comments section below or get in touch with the club via their website or Facebook page.

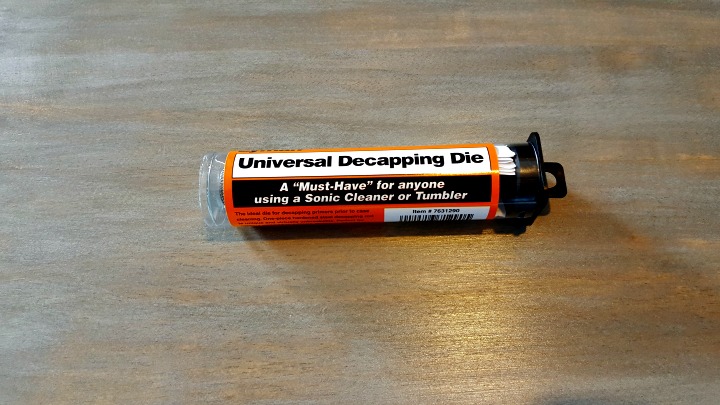
Do I need a universal decapping die?

If you’re just getting into reloading, or perhaps you’ve decided to look at reloading a second calibre, you may have come across a decapping die and wondered if there should be one on your reloading bench. Well… maybe. Full length sizing dies (the ones you probably will start with) and neck sizing dies will deprime your brass as you size the case. But there are a few situations where you may want a decapping die.

Cleaning or tumbling brass

Very quickly, there are two reasons to clean your brass with either an ultrasonic cleaner or a media tumbler. Firstly, this adds another step to your reload process, but it does mean your primer pockets will get a clean (more likely with an ultrasonic cleaner), as well as the inside of the case, reducing powder residue build up at the neck. Secondly, cleaning the gunk off the outside of your case will keep your sizing dies in better condition for longer.

First go with the ultrasonic cleaner turned out some nice brass – almost like new!

A photo posted by The Gun Rack (@gunracknz) on

So, how do you decap without actually sizing the case? Well, it’s obvious now, but a universal decapping die is the answer to that question. Because the die body is oversized, it will not contact the walls or neck of the case, meaning you don’t have to apply any lubrication and the case shape won’t be changed.

It’s a quick process and I can deprime hundreds of 9mm cases in an hour. Chuck that lot in the cleaner, deprime some more, and start resizing the cleaned cases once they’re dry. It just becomes part of your routine.

Keeping your case shape

Sometimes you want to do something different with your brass. For example, if you slug your old 303 SMLE and find it’s got an oversize bore (surprise surprise), you may want to load it with oversize cast lead projectiles, with a .314 or even .316 diameter if you’re really trying to save an old mate.

In cases like these (no pun intended), you may not even want to resize your brass. You could simply trim your brass to length and flare the case mouth if necessary (that’s another die you’ll need), or it may fit just fine. There’s nothing to say you have to rezise a case again to shoot it, which is the basic principle behind neck sizing. If it’s fired in the same rifle it should chamber easily.

I’m sure there are other scenarios where you might want to keep case shape, but that’s the first that springs to mind. Otherwise, if you’re a cartridge collector, wildcatter, or ammunition hobbyist of some sort, I’m sure you already have a decapping die on hand. You could even be using one of these dies if you want to use spent cases to make jewelry or art, or if you want to modify a case to be a case-length gauge. All sorts of things you can do…

Types of decapping die

I’m sure there are many out there, but the two that I have tried have been Lyman and Lee. The Lyman is a one-piece hardened steel decapping rod, which they claim is “virtually unbreakable” and is suited to all calibres between .22 and .45, excluding .378 and .460 Weatherby. They even say it’s suitable for crimped in military primers (I haven’t tried).

The Lyman die's use case seems pretty clear!
The Lyman die’s use case seems pretty clear!

The Lee universal decapping die is based on a collet design, and if the decapping rod is subjected to too much force/resistance, it will simply slide up and you can reset it with a couple of spanners. Both designs work fine and neither die is too expensive. The Lee universal decapping die is available from Gunworks for $30 and if you can’t find the Lyman die at a local store, you can order directly from their website.

The Lee is spartan in presentation, but clever in its implementation.

Other things you will need

You will need a case holder for all the different rounds you intend to decap. This sounds obvious, but, for example, if you’ve decided to get a head start and begin cleaning cases you’ll be reloading in the future, you may not have thought to buy a case holder yet. Thankfully these only cost about $13 or $15, and you’ll need one anyway. Or, you can get a bunch of various common sizes in one of the Lee case holder sets (make sure they’re not for the autoprime).

Of course you’ll need a press and a bench, etc, etc, but you knew that already.


What do I need to start reloading? Part 1: Materials

Good question – glad you asked! There’s a lot of stuff you could buy if you wanted to start reloading, but actually only a few essential things to start your first load and get hooked with the reloading addiction. This is a quick list of the bits and pieces you’ll need to get going.

Beware – any loads mentioned in this article are my own, and are not to be taken as gospel! Use a reloading manual or manufacturer’s instructions to find the right load for your firearm and application.

Oh, and here’s the difference between handloading and reloading if you were wondering!

Why reload?

Okay, before we get straight into the list – why reload? Ammunition is expensive. Each time you pull the trigger on a rifle, you’re sending $2 – $5 downrange, depending on your calibre and ammo preference. My 6.5×55 reloads cost $1.27 to shoot, roughly. But it’s not just about cheap and cheerful. I could cut that almost in half if I bought cheap projectiles. No, that’s $1.27 for ammo that I would call “match grade”. The results speak for themselves – see below:


#oneraggedhole #tikkaT3 #SMK

A photo posted by The Gun Rack (@gunracknz) on

Aside from being economical, reloading allows you to fine tune your ammunition depending on your rifle and intended application. I have two identical loads for my Tikka T3, one for target shooting and one for hunting – the only difference is the projectile and COAL (cartridge overall length).

There’s a lot you can do with reloading, so take the time and get stuck in – you’ll save some money, improve your accuracy/performance, and develop what is really a whole new hobby.

If you’re going to sight in and hunt once a year, then no worries, a pack of factory ammo will last you plenty of trips!

What are the essentials?

Obviously you need a firearm to shoot the ammo in! You also need safety glasses for while your reload (primers are explosives!). You need yourself, a solid reloading bench, some basic maths skills, and a whole bunch of other really obvious stuff. But, I’ll be splitting what you need into materials and tools. This is part one on materials.

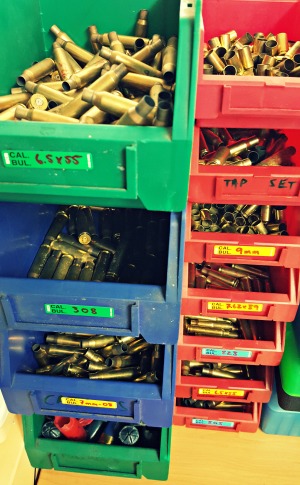
Even if you aren't reloading yet - start saving your brass now!
Even if you aren’t reloading yet – start saving your brass now!

Brass

This is what makes reloading economical. You can reuse your brass many times over, which turns into a considerable saving. If you neck size and reload for one rifle only, reusing your brass will also increase accuracy. Where to get brass? You can buy it online, or from stores such as Reloaders Supplies or Serious Shooters. Or, what I do is buy ammo, shoot it, and reuse the brass.

I shoot and reload PPU or Sellier & Bellot for cheap plinking ammo (.303, 7.62×39, etc.). For my 7mm-08 and .308 I use a mixture of Hornady, Remington and Winchester. For my “match” 6.5×55 ammo, I shoot and reload Norma ammo. Lapua is also a good candidate. For 9mm pistol rounds I use whatever I have at hand.

Using brass from factory ammo also means you have a base line to start with, figuring out what your gun does and doesn’t like.

Cost example:

ADI 300 Blackout brass x 100 – $69 from Reloaders Supplies. That’s 69 cents each, and anecdotally you’ll be getting around 10 loads per, so call it 7 cents per round.

Federal American Eagle loaded 300 BLK ammo x 20 – $55 from Serious Shooters. That’s $2.75 per round if that was that. But if you plan on getting another 9 loads (at least) out of the brass, then call it 27.5 cents per round (including your first, loaded shot). It’s not as cheap, but you do get that first shot, and you get to experiment with different weight projectiles without buying a bunch of different types.

Projectiles

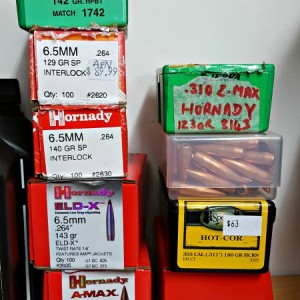
Projectiles (bullets) are likely to be your biggest expense if you’re aiming to make quality ammo. My most expensive pills are about $1.03 each, depending where you buy em. There are plenty more expensive out there. Plenty! But if you shoot a cheap/common/small calibre, like .223, you’ll be able to pick up bullets for much, much cheaper. Have a look at your usual stores and you’ll see what I mean.

Different projectiles will enable you to experiment with your firearm and produce application-specific ammunition.

You can get cheaper still with cast lead or plated projectiles, but these come with their own challenges and idiosyncrasies. Stick with copper jacketed bullets as you start out and life will be simpler.

Make sure you choose a projectile specific to your needs. Manufacturer websites are pretty clear, otherwise, read up on your calibre in Nathan Foster’s knowledge base, or ask your local gun store staff. A good example is, Sierra Matchkings (SMK) are super accurate, but dicey performers on game. Hornady ELD-X is great on game, and pretty accurate to boot. Prvi Partisan .31 calibre lead-tipped projectiles are actually great for effective wounding on game, but certainly not match accurate.

Cost example:

Prvi Partisan 6.5mm (.264) 139 gr projectiles x 100 – $60 from Gunworks. That’s 60 cents per round.

Berger VLD Target 6.5 mm (.264) 140 gr x 100 – $106.95 from Workshop Innovations. Looking at $1.07 per round. As you can see, there is a vast difference, but these two projectiles are for vastly different applications.

For comparison, a bag of 500 ADI 22 calibre 62 gr projectiles would set you back $100. That’s 20 cents a round for cheap AR-15 plinking ammo.

Powder

Powder is a big expense up front, but lasts for ages. It’s good to have a few varieties on hand for different loads and applications, but once you find one that you definitely will use a lot, buy in bulk to save even more money. Also, buying in bulk eliminates the variance you can get between batches of powder, as you’ll be working from the same batch for longer.

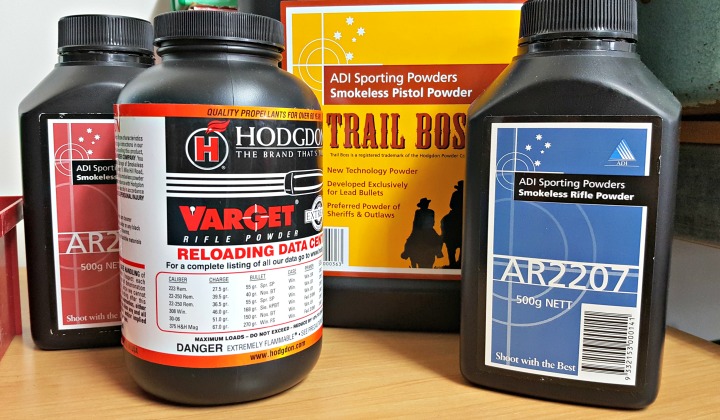
As I’ve said before, I’m a big fan of ADI powder. ADI (based in Australia) produces a bunch of powders for other brands, so if you find Americans talking about Varget, it’s fine because you can buy ADI AR2208, which is the same thing. But, where it becomes awesome is ADI powders are sold in 500 gram containers for around the same price of an American or European brand 1 pound container, which is about 454 grams. Immediate savings!

Different powder for different uses, but ADI is always a safe bet. Buy in bulk to make your reloading $ go further!

There are many good powder brands, and if you will end up reloading for multiple calibres, try and find loads that like the same powder to save on cost even more. My 6.5×55, .303, .308 and 7mm-08 are all fed a steady diet of 2208. Funnily enough, they’re all similar charge weights as well. This leads to multiple efficiencies.

You should definitely get yourself a reloading manual, but if you do decide to stick to ADI, they provide some awesome reloading data on their website.

Cost example:

ADI AR2208 500 g – $65 from Broncos. I use around 40 grains for most loads with this powder, so let’s call it 34 cents per round. If you bought the 4 kg container, your cost per round would drop to 30 cents.

IMR 4198 1 lb – $69 from Reloaders. I use 26.5 grains of this for my 7.62×39 loads. That’s 264 rounds, so 26 cents per round.

Primers

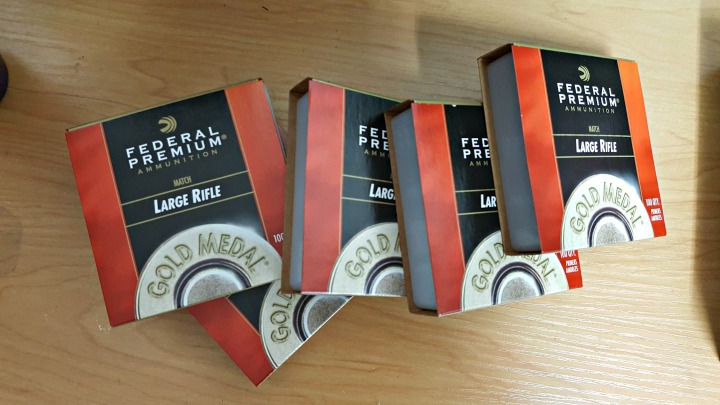
The things that go bang! I won’t spend too much time on primers except to say that they are actually different. It’s good to experiment, but when you start loading in volume, try and stick to one type of primer, otherwise you should realistically back off your load and work up again as the reaction inside the chamber will be different. Better yet, buy in bulk. I have found all of my loads requiring a large rifle primer tend to like Federal Gold Medal match primers. So I buy boxes of 1000 at a time.

Again, not only are you saving more dollar dollar bills y’all, but you’re keeping consistent by staying in the same batch of primers. Primers are quite cheap, so buying in bulk is not such a big deal.

Cost example:

Winchester Large Rifle primers x 100 – $12.99 from Gun City.

Federal Premium Gold Medal Large Rifle primers x 1000 – $90.95 from Workshop Innovations.

Primers are another area where buying in bulk saves a little bit of cash, but also improves consistency.

What will my first lot of materials cost me?

Let’s use the common 308 as an example. Using the ADI Powders load data and some prices from NZ shops, let’s figure out the minimum you would have to spend to load your first 100 rounds, as well as how economical you can get by buying in bulk.

Supplier Item Quantity Cost Cost per round
Reloaders Suppliers Sierra 30 cal 155 gr HPBT Match 100 $78.00 $0.78
Broncos ADI AR2208 powder 500 g $65.00 $0.37
Broncos ADI AR2208 powder 4 kg $465.00 $0.33
Gun City Winchester 308 Win brass 50 $69.99 $1.40
Gun City Winchester 308 Win brass (10 x) 50 $69.99 $0.14
Workshop Innovations Federal GM210M LR Primers 100 $9.95 $0.10
Workshop Innovations Federal GM210M LR Primers 1000 $90.95 $0.09
Cost per round for first 100 only (will have left over powder) $2.65
Cost per round with bulk buying and 10 loads from each case $1.34
Cost per round of equivalent factory load low end manufacturer $3.00
Cost per round of equivalent factory load high end manufacturer $3.40


As you can see, depending on the life of your brass, you can half the cost of your ammo and produce some excellent results. Especially when you consider that you can set your seating depth and a host of other things that will increase your accuracy from a given load.

Having said that, there’s more to getting started than bullets and brass. The cost of reloading equipment will factor into your decision to start loading your own ammo or not. Make sure to check back for Part Two in this series, in which we will look at the easiest equipment to get started with.


Can you put a BRNO Model 2E or CZ 452 in a JW-15 Stock?

In late June I had a question from Ken in Gisborne about whether or not you could fit a BRNO Model 2E in a JW-15 plastic after market stock. Immediately you probably have two questions.

  1. Why am I only answering this question now; and,
  2. Why would you put a beautiful European-crafted rifle in a cheap, ugly stock?

So, I’ll quickly answer those:

  1. I replied to his email, so don’t you worry!
  2. Ken is unable to obtain an original stock – and I imagine his beautiful rifle is pretty hard to shoot without a stock!
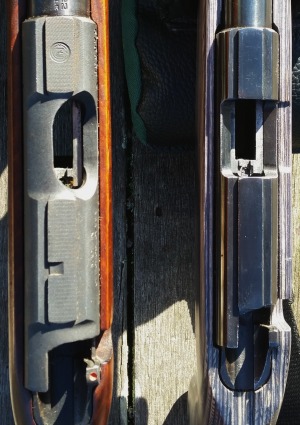
Comparing the JW-15 and BRNO Model 2, you'll see a lot of similarities, but even more differences.
Comparing the JW-15 and BRNO Model 2, you’ll see a lot of similarities, but even more differences.

Easy way to find out stock dimensions

If you ever come up against a similar issue yourself, you may need a quick work around to see if you can do something similar. The other question you often get is “Can you put a CZ 452 in a JW-15 stock?” Usually this comes from people who want a light, farm-ready 22LR, without having to ruin their wood stock or buy a new rifle. FYI, the CZ 452 and BRNO Mod 2E are practically identical. Here’s a nice little write up that someone has done on the BRNO, which saves me repeating a lot of the same points.

Essentially, as with many European brands, there was sharing of parts and designs, and eventually a merger. The rifle was largely unchanged. And the difference between the 2E and the 2 is that the 2E is the luxe version. Nicer stock, etc.

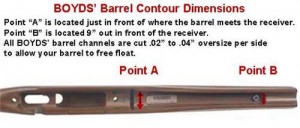
Anyway, I digress. A quick, easy way to confirm barrel and action dimensions for stocks? Head on over to the Boyds’ Gunstocks website. They give you the barrel dimensions and centre to centre measurements between action screws for all their house actions (that they base their aftermarket and OEM stocks on). While you’re there, you may be tempted to buy a whole new Boyds stock, and why not? They’re awesome quality, solid wood and modern designs!

So, using my little cheat, this is what the Boyds website reveals:

Boyds barrel measurements. Image from Boyds' website.
Boyds barrel measurements. Image from Boyds’ website.

BRNO Model 2E measurements:

Barrel Dimensions: Point A = 1 1/16″ and Point B = 15/16″

  • Center to Center of Action Screws: 6 1/8″
  • Over All Length of Part: 30″
  • Comes with Boyds’ 1/2″ Rubber Recoil Pad.

CZ 452 measurements:

Barrel Dimensions: Point A = 1 1/16″ and Point B = 15/16″

  • Center to Center of Action Screws: 6 1/8″
  • Over All Length of Part: 30″
  • Comes with Boyds’ 1/2″ Rubber Recoil Pad.

Norinco JW-15 measurements:

Barrel Dimensions: Point A = 59/64″ and Point B = 43/64″

  • Center to Center of Action Screws: 3 25/32″
  • Over All Length of Part: 31 1/2″
  • Comes with Boyds’ 1/2″ Rubber Recoil Pad

Other differences

The biggest barrier is the difference in action size.

While my quick cheat above provides a very useful starting point for stock comparison, there are other things to consider as well. When considering a rifle like the JW-15, which is essentially the cost-saving, poor cousin of the BRNO/CZ, you’ll usually get differences in dimensions where changes have been made in the manufacturing process to reduce costs. Often you’ll find this in stamped instead of milled parts, simpler contours, thinner barrels, etc.

Below are some of the basic differences that unfortunately make this stock swap a no-go.

Action shape

The BRNO/CZ action is longer, thicker and circumference and a little bit different where inletting is concerned (this last isn’t the biggest concern in stock swapping, as you can alter inletting). Somehow the Mauser-action origins seem more apparent in the lines of the BRNO, even though the JW-15 has a similar, but simplified, shape.

Barrel contour

The Chinese rifle has a much simpler barrel contour, while the Czech rifle follows traditional lines. The thickness of the barrel is a fair bit different, but where it meets the larger action is the biggest difference, as the BRNO barrel swells up to meet the threads.

The BRNO barrel is close to what we'd consider a bull barrel in a modern rifle, and the contour differs significantly to the JW-15.
The BRNO barrel is close to what we’d consider a bull barrel in a modern rifle, and the contour differs significantly to the JW-15.

Action screws

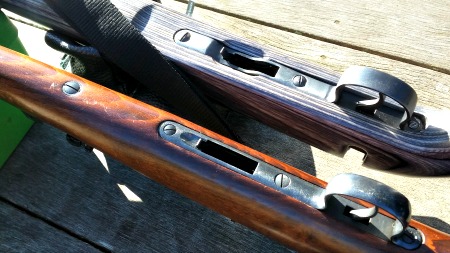
Another clever simplification in the Norinco is reducing the amount of screws and metal work by merging the forward action screw with the recoil lug. Looking at the image below you’ll see three screws on the JW-15 and four on the BRNO. The rear screw on both is a wood screw, which secures the trigger guard to the stock.

The next screw forward on both rifles is a simple action screw. In front of the trigger is the last action screw. In the JW-15, this screws up into a recoil lug dovetailed into the action. The BRNO has another screw, independent and forward of the floor metal. This screws up through a steel collar into a recoil lug that forms the hidden part of the rear sight assembly.

Differences in inletting and dimensions are indicated by the presence of fewer screws in the Norinco.
Differences in inletting and dimensions are indicated by the presence of fewer screws in the Norinco. Also notice the softer metal the screws are made of.

Bits and pieces

There are various other bits and pieces that differ, such as the mag well and the trigger unit. The trigger in the Model 2E is a fine example of a single stage trigger, with adjustable over-travel, and a clean break around 3 lb. This is streets ahead of the simple, but practical, trigger in the JW-15. These can be toyed with to produce more acceptable results, as detailed in this previous article on JW-15 trigger improvement.

Verdict

If you are considering swapping things up with either of these rifles, an aftermarket stock specific for the JW-15 or BRNO would be far better than trying to adapt one to the other.