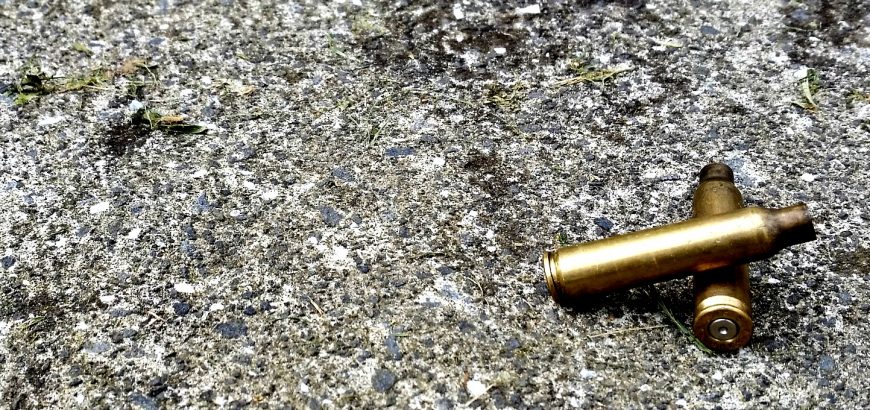
Ejected .223 brass

Starting out in 3-gun competition: Affordable AR-15 options

One of my goals over the next couple years is to get into 3-gun competition. I say the next couple years because this will necessitate qualifying for and buying a pistol, with all the hefty club fees and added security that goes with that. Not to mention it’s a lengthy process.

On top of that I will, at some stage, need to get an E-Cat licence, as it’s hard to be competitive in these games with a 7-round magazine. This is starting to get expensive. And then there’s the shotgun which, when all is considered, is the least of my concerns.

So, before I’m elbow-deep in debt and fired casings, I’ll probably want to get an A-Cat AR-15 which I can practice with in the meantime. While I’d love a $3000 AR-15 variant chambered in .223 Webley, I’ll settle for a more run-of-the-mill offering for now. Fortunately, getting into black rifles isn’t nearly as expensive as it used to be, even just a few short years ago.

Here are my top picks for affordable AR-15s to help get you into your desired shooting sport. Remember, if you’re going to do service rifle shooting, you may need to modify these to comply with your club’s rules.

NEA-15 Carbine

You can spend a couple hundred more to get these in a fuller-length version, but the point of this blog post is to find the most cheap and cheerful AR variants out there.

The NEA-15 is a Canadian export which is on the cheaper side of things when it comes to North American firearms. As with any AR, they are highly accessorisbale, and have many interchangable parts which will help you customise your new rifle.

You can pick these up for $1799 from NZAR15.com, and they come in a variety of configurations. At the time of writing they have chamberings of 5.56 mm and 300BLK available, colour options of Flat Dark Earth (FDE) or black, and barrel lengths of 12.5 or 14.5 inches.

The barrel twist is 1:7 – perfect for those long, heavy bullets that dominate sport competitions. However, the extremely short barrel will make practising at longer ranges a bit more difficult. Most serious 3Gun competitors use 18 – 20 inch barrels. Bear in mind that some shots can be up to 500 yards in a 3Gun match.

S&W M&P-15 Sport

Smith & Wesson has some great offerings in their M&P (Military and Police) range. The Sport variant is an AR-type rifle that compromises on some features and gives more in other areas. The S&W M&P-15 Sport is a well-balanced offering.

The 16-inch barrel is a pretty good all-rounder, as is the 1 in 9 inch twist rate. The large trigger guard is great for those with larger hands and/or gloves in winter. It comes with adjustable sights already fitted as well, which is a bit of a saving – unless you’re going for magnified optics anyway. On the downside, the foregrip doesn’t have the wealth of rails found on the NEA-15 or most other modern AR-variants. And the forward assist. There isn’t one.

How many times have you seen an AR user engage the forward assist to re-chamber a round? Never? Me neither. And realistically, if you did have a reclacitrant round that wouldn’t chamber in the middle of a match or fast-paced shooting situation, you’d simply rack the bolt and chamber a fresh round. I personally don’t like it, because that means there’s a live round on the deck – but it’s not exactly dangerous. I’ve shot with many ex-military types who advise to simply rack the bolt in a high-pressure or high-speed scenario, regardless of whether you have a forward assist or not. Get the offender out of there and chamber a fresh round is the most common response.

Some ups, some downs, but the most attractive thing about this AR is it’s price point. You can pick one up from gunsnz.com for a mere $1595.

Chinese AR-15 copies

There are an abundance of AR clones out there, and just about everyone is making them. There are a couple Chinese-made versions floating around, including the Ranger offerings. realistically, these are probably made using the same tooling as many other more “up-market” brands. Most manufacturers purchase their parts from each other anyway, and simply assemble to varying specifications. Why pay an extra grand for a fancy rollmark?

I haven’t fired a Chinese AR yet, but have handled one and found the finish to be as good as any other budget-minded AR-15 clone. The Chinese weapons that I have owned have all had varying levels of fit and finish, but were pretty damn accurate with a little coaxing. My cheapest rifle regularly outscores guns that are 4 or 5 times the price, even 10 times the price I paid for mine. But then again, I did spend the better part of 6 months getting it that way.

A great bonus with the Chinese guns is that they are most likely pretty close to milspec – ideal for service rifle competitors. Other than that, I would personally opt for one of the other rifles mentioned here, especially seeing that they are a little cheaper in general than what is being asked for Norinco or Ranger weapons at the moment.

The most important thing is fit, finish and feel when you personally inspect and handle the rifle. It also helps if it’s milspec or pretty close, so that you can change uppers and lowers later down the line.
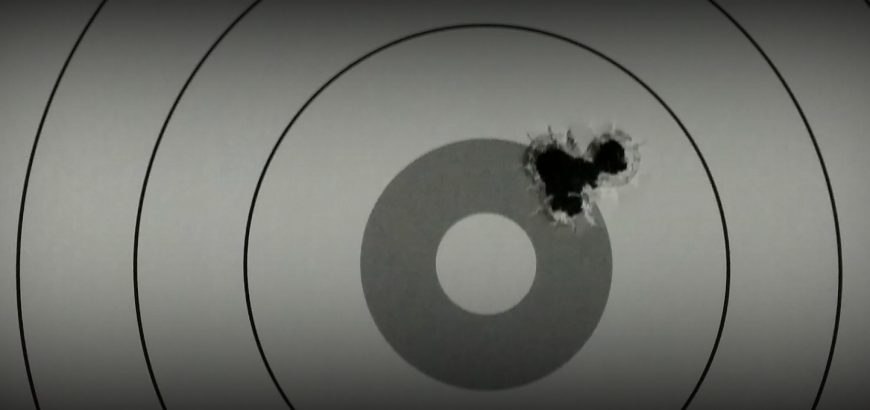
Three shot group on smallbore target

What are you shooting? Where to get targets for the range

If you’re heading down to the range to do a bit of practice or to shoot some really tight groups, you’re going to need something to aim at. Most ranges will have posts that you can staple targets to, but the targets themselves – where do you get them?

This can depend on what kind of shooting you want to do.

Low-magnification shooting

When shooting milsurp rifles without optics or with low-magnification scopes, it can be annoying heading downrange all the time to check where you’re landing. A good solution to this is the Shoot-N-C target from Birchwood Casey.

It’s a black target which comes in various sizes, and reveals a high-viz yellow impact mark when you strike it with a bullet. Easily visible at 50 yards, and pretty visible at 100 yards. At the longer ranges, you can get a pretty good idea of your shot placement through your scope, without needing a spotting scope.

Precision shooting

When it comes to having the exact target for the shooting that I want to do, having custom targets is great. I like using this website to create my own targets in PDF form, and then print them off in A3 size for the range.

They’re also great for air rifle targets at home, or whatever the case may be. You can do all sorts of customisation to get the ideal size of bull, number of rings etc. I like setting mine up as a 1 inch bull with 1 inch rings – this makes it easy to estimate MOA at a glance, before I get the calipers out.

No time to waste

If you’re after a target and don’t care what it is, or don’t have time to make your own, you can print off free targets from many corners of the web.

A lot of scope, ammo and rifle manufacturers will have printable targets on their websites. Otherwise, search for “print your own rifle targets” and you’re bound to come across some easy-to-use websites with stacks to choose from.

Shooting at Taupo NZDA range.

Where to shoot in NZ – Taupo NZDA

Land in New Zealand is at a premium, especially in Auckland. Because of this and the high density of our cities, finding a place where you can comfortably shoot a centrefire rifle has become quite a challenge. Living in the suburbs, I get to shoot rimfire at the local range, and even pistol if the mood strikes me, but there aren’t any convenient locations to shoot high-powered rifles within less than a 45-minute drive.

When I do go to the range, I like to take a few rifles and boxes of ammo and really make a day of it. One of the best ranges for this is the NZDA range in Taupo.

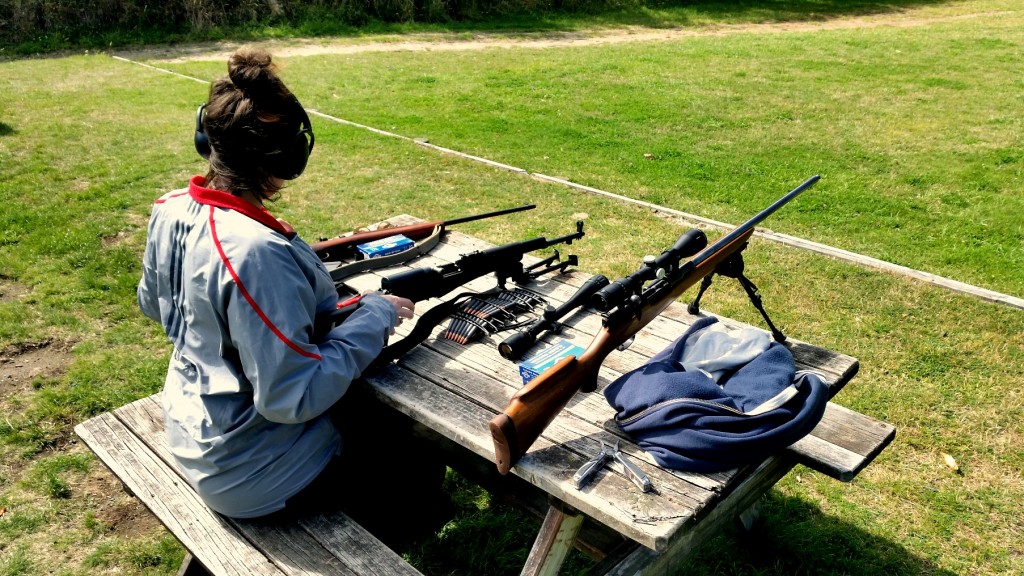
My wife with .303, SKS and M38 at Taupo NZDA.
My wife getting ready for a day of shooting at the Taupo Deerstalkers range.

Shooting in Taupo

From Auckland it’s about a two and a half hour drive to Taupo’s NZDA range. Given that you’re loaded up with firearms and ammunition, you can’t exactly stop and sight-see, so it’s pretty much straight driving.

Once you arrive at the range there’s a stainless steel honesty box attached to the fence, in which you drop the princely sum of $2 per shooter. Compared to Auckland ranges which will charge you between $15 and $30 per person, this is where you make up your petrol money.

There are a few clubs that operate from the same location, and they have some shorter ranges and other facilities. However, as a non-member, you have access to the open air 100m range. There are markers so you can set your target at different distances. For example, the black powder guys I was shooting next to last time set theirs at 25m, while I used my scoped hunting rifle at 100m. The guys sighting in their 7mm-08 to my right started at 25m and worked their way back to 100m.

The best part about shooting here is that you have the freedom to go up and check your target as often as you like or as little as you like, provided the range is clear and you aren’t bugging the other shooters. This is in contrast to going to a range where a called shoot is taking place and you have to wait for guys to empty three mags before you can check your 5-shot group.

Of course, how much you enjoy the range will probably depend on how busy it is, but if you use your head, you can plan it so there aren’t many people around. Worst comes to worst, you may have to just wait your turn. Generally speaking if you shoot semi-regularly in the North Island, you start bumping into the same people when you go out, and they’re a pretty decent bunch.

All-in-all you can while away a good amount of time and ammo at the Taupo Deerstalkers range at a very low cost and with very little interference. The drive isn’t too bad, and if you’re shooting with a mate, you can divvy up the driving to break it up a bit. The ability to take your own target and check it at will ranks highly in my books. The range is relatively sheltered from cross-wind too, so provided the weather plays its part – you’re in for a good day.

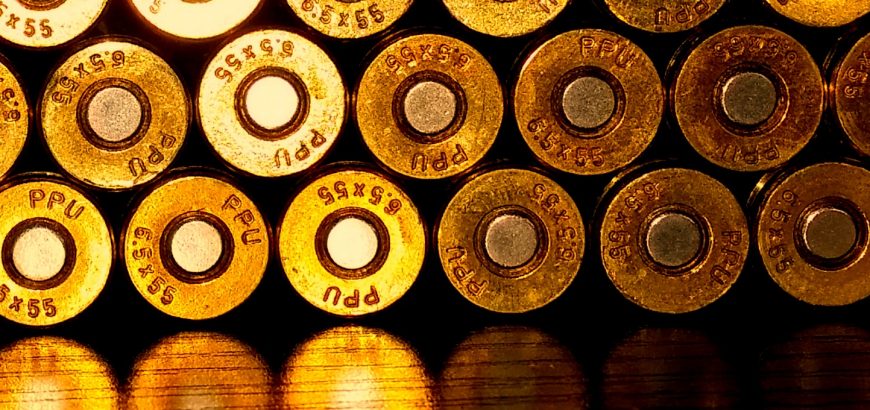
PPU brass and Federal Large Rifle Match primers.

Accuracy in reloading

Just how important is accuracy in reloading? Well, it depends how accurate you want your rounds to be. The key to achieving consistently good rounds is removing every source of variance possible – you are going for repeatability. In other words, to get your bullets in the same hole every time, you need to make sure that all  the variables that go into making them are as controlled as possible.

Match vs. Plinking ammo

If you’re reloading ammo to burn at the range, you can afford to take a “set and forget” approach to your reloading. Once you have your powder trickler set to the right volume, you should be getting fairly consistent charges. You’ll also only need to measure your COAL a few times to ensure that the rest will be coming out the same. This is good enough for general ammo production, and will be as good or better than factory ammo at a third of the cost (depending on your components, etc.).

However, for match ammunition or for working up a load for a new rifle, a lot more precision is required. I tend to weigh every charge on a scale before seating the projectile. Every round is exact. If it’s not, I pour another charge and start again. Because the powder trickler goes off volume and the scale goes off weight, some standard deviation is to be expected.

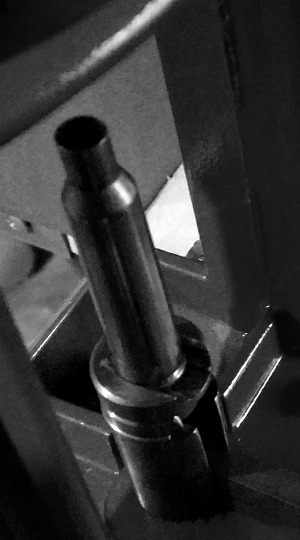
Resized case in shellholder.
Match performance is the result of repeatable procedures.

I also measure the COAL of every single round. Not because my settings have changed, but because slight variations in even the most expensive bullets do happen. Those that aren’t exactly the same get pulled or used for target practice. Why be so pedantic? Because we’re eliminating every possible variation to make sure our ammo production is as uniform as possible from round to round.

I know of people that do this to the extreme. The weigh every bullet they use. They have a log for every casing, rejecting ones that produce inferior accuracy due to differences in metal hardening or other aspects that are beyond the average reloader’s comprehension. This is for the accuracy fanatics. And more power to them, but I enjoy a fine level of accuracy for the amount of effort I put in. It’s each to his/her own. If I had to be as pedantic about my reloading, I probably wouldn’t enjoy the actual shooting as much. But everyone is different, and for some of the shooting fraternity, ultimate accuracy is the ultimate goal.

A proper work space

Whether you’re reloading for 3-gun, varminting or 1000 yard shots, one thing’s always necessary; a properly prepared working area. A space that is free from clutter, mess and distraction is essential.

Before I learnt this lesson, I’ll admit I knocked over a few cases full of powder and so on. Everything should have its place in a reloading station. A good example of how much your work area affects your ammunition production is a mistake I made a few days ago…

Working up a load I was preparing six rounds at 1-grain intervals to take to the range. With six different charges, that’s a total of only 36 rounds, but there’s a lot of finicky business around getting the charge weights right every time. About half way through I move my scale from one bench to another to make room for something. Once settled on the other bench, the charge come up at a different weight.

Now this wouldn’t be a problem if I was using a digital scale, I would be able to hit TARE and know I was working with a clean slate. However, with my mechanical scale, things aren’t quite so simple. The difference in weight readings was because my bench was on a lean… Something had got under one of the legs and was causing the weight on one side of the scale to dip down. The difference was about 1.2 grains. Yup, I just painstakingly produced about 18 rounds that were completely useless because I had no idea what the actual charge was.

Not the worst set back in the world, but a good lesson to learn – always prepare your space thoroughly before starting your reloading procedures.

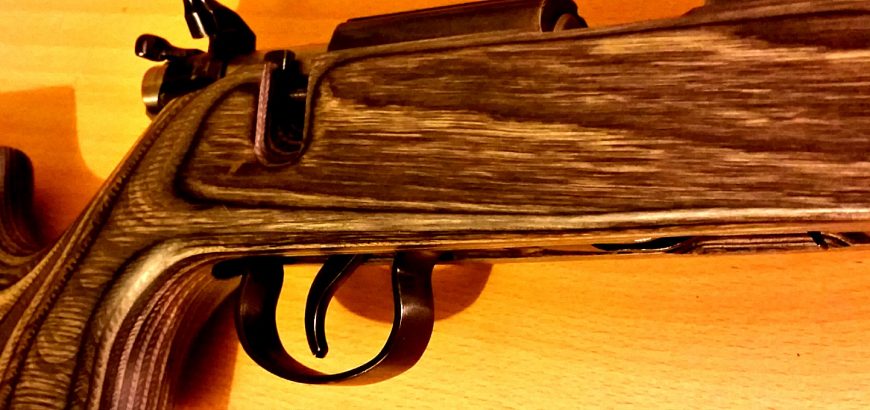
JW-15 with adjusted trigger in Boyds varmint stock.

JW-15 trigger improvement

There are many that will say that the Norinco JW-15 is an excellent tool. An implement meant to be thrown on the quad bike or back seat, and touted around the farm for practical purposes. I agree with those people 100 per cent, but I also think that with a little bit of elbow grease, this humble Brno-clone can be a decent shooter. One of the first things you can improve is the trigger.

Simplicity is…

The trigger on the JW-15 is not pretentious at all. It can be gritty with excessive over-travel (a symptom of the Mauser-style trigger not absent in the Brno), but the ones I’ve tried all break like a glass rod at weights that are not excessive for average shooting.

With such a blank canvas, there is plenty of room for improvement with this trigger.

Trigger weight spring

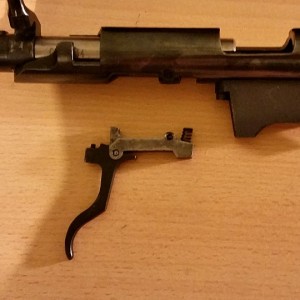
The JW-15 trigger unattached from the rifle.
The trigger mechanism in the JW-15 is uncomplicated to say the least.

This is an easy one. I simply cut off a few coils to lighten my spring. Beware though, that if you cut off too much, the trigger won’t spring back into place after you’ve pulled it – which makes it pretty useless.

If you are not so bold or would like to return your firearm to original spec one day, replacing this spring with a lighter/shorter one will do the trick. I know of some people who have used springs from ballpoint pens. I’ve not found a pen spring that would do the job, but you might.

Polish

A lot of the machining on the JW-15 requires some work with a file, sandpaper and grinding paste to get to an acceptable level. The trigger is no exception.

Just about every part of the trigger could do with at least a polish. If it’s brand new, you’ve got a lot of grease to remove before you get to this point.

Sear adjustment – it’s your call

Adjusting the sear is a risky move. It can take a perfectly safe firearm and make it a loose cannon. There are three ways to adjust the sear on the JW-15, and none should be attempted without a serious level of confidence or skill. The last thing you want is a rifle that will go off when you bump it.

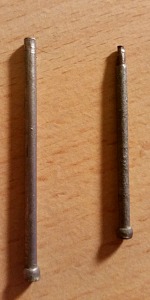
Makeshift punches.
If you don’t have a punch set handy, you can readily make your own with some nails and a grinder.

The first way is to adjust the grub screw behind the trigger. This will move the trigger to the rear and lower the sear in relation to the firing pin – i.e. less of the sear is engaging the firing pin. This means less effort is required to break that engagement, dropping the pin and firing the chambered round.

This method is reversible, and with thorough testing of the trigger mechanism is the safest way of adjusting the sear. I like to check this by ramming the bolt home as hard and fast as possible. If the firing pin drops while you are cocking it, there is not enough positive sear engagement – with enough force, you made the firing pin go right over the sear and hit what would be a live round. Obviously you test this with a dummy round.

The second way is to (lightly) polish the sear surface and/or sear ledge. This means taking away the grittiness of the finish, not changing the shape. This is an irreversible step, and too much polish will leave you with a rifle that won’t cock or that will fire every time you try and close the bolt. In other words, a useless, dangerous gun.

The third, and most dangerous (and pretty stupid) way, is to lightly round off the tip of the sear. What this does is remove the “harshness” from the trigger pull, making it soft and easy. Don’t mistake this for a lighter trigger pull – there is a difference.

The issue here is that the sear is angled sharply like that so that it holds the sear ledge till the very last millisecond, providing a clean and safe break. When one of these surfaces is rounded, the other can easily break the hold when the rifle is bumped or dropped. I don’t know anyone who would recommend trying to change the shape of the sear or sear ledge – at least not for the DIY operator.

The lightest trigger in town

I find the best combination for a light trigger on these rifles that is safe and pleasant to use involves taking a few coils off the spring, polishing the individual trigger components and adjusting the grub screw to lower the sear as much as possible without creating an unsafe action.

Remember, as always, that whatever you do with your firearm is up to you. Everything here is for informational purposes only, and if you’re uncomfortable, unskilled or lacking in confidence, you should either take your rifle to a qualified gunsmith or leave the thing alone.

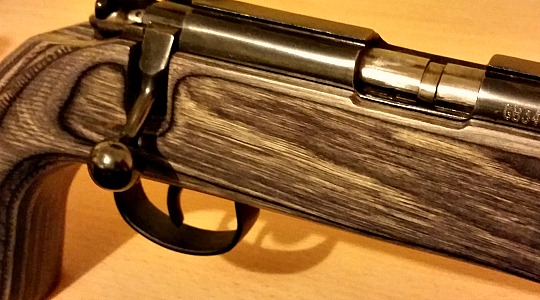
JW-15 with modified trigger and Boyds laminate stock.
With a bit of TLC the JW-15 is a joy to shoot.
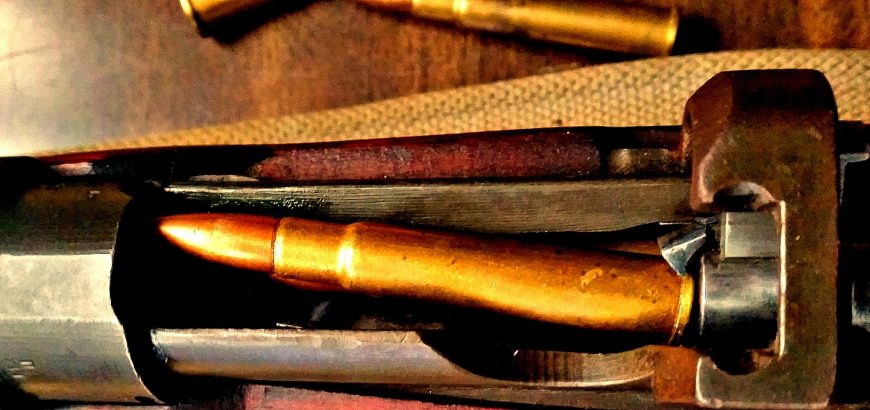
No.1 Mk iii extracting Mk 7 round.

303 SMLE bolt stiff on extraction

Getting my own .303 was a dream come true. It’s a cartridge and rifle with a storied history and a pretty good performance, even by modern standards. What I was particularly looking forward to was the “buttery smooth” action I’ve heard so much about. But mine wasn’t. After removing a good deal of rust and gunk from this historic weapon, I headed down to the local service rifle club to have a shoot. The results were less than spectacular.

I didn’t have much ammo on me at the time, and was primarily going to shoot my SKS and M38, but I did want to put at least half a mag through my brand new (to me) No. 1 Mk iii SMLE. The rifle printed high and to the right, but still in a very tight group with the surplus CAC Mk 7 ammo I had on hand. The elevation was due to shooting at 100 yards with the 200 yard (minimum) setting, so I was fine with that, and it appeared the front sights were off a bit to the right. Not a major.

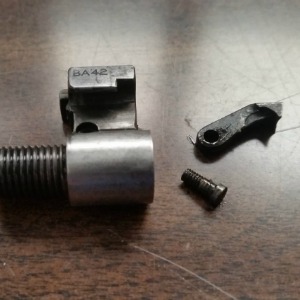
.303 bolt face, extractor claw and screw.

But getting those empty rounds out was difficult. I couldn’t stay in a shooting position and had to use two hands. My thoughts were it needed some cleaning after a long period of disuse. When I got home some quick research on the internet turned up a few that thought it could be due to fouling, so off I went to the garage to get some cleaning done.

One month later with a box of brand new Prvi Partizan .303 I went down to Taupo NZDA range to get the long guns out. After enjoying drilling tight groups with my Husky, it was a bit of a let down to pick up the Enfield and experience the same issues as before. I hadn’t changed the sights, but compensating worked fine. But still, every round was a real hard task to extract. My wife had a few shots and enjoyed the rifle, but didn’t enjoy the experience because of the tough-to-open bolt. I was crestfallen all the way back to Auckland, thinking I had managed to buy a dud surplus rifle.

What the issue actually was

So this time I took to cleaning with fervour. I disassembled the extractor and bolt face, gave everything a thorough degreasing and a light coat of Ballistol. Determined to not have the same issue again, I gave all of the bearing surfaces a generous application of oil and attempted to chamber a round. No problem. Extraction? Problem.

What?

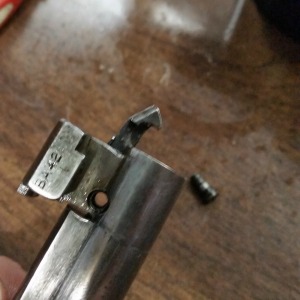
Bolt face with extraction claw slightly pulled out.

This was beyond frustrating. I then took a closer look at the extractor claw and saw that it had become quite sharp after (many) years of use. So I undid the extractor screw, pulled the extractor claw out a bit (not all the way – that V-spring is a pain), and gave it a very light rounding off with a fine file. Extraction seemed to improve.

After three more delicate treatments like this, the bolt is now working like a charm. Now I’m actually looking forward to having a shoot with it again!

P.S. If you’ve got the same problem and want to try this fix, remember that you could damage your rifle – which as we all know can have serious consequences. Take it to a professional gunsmith if necessary.

Also, do not try chambering and extracting live rounds unless you are at a range, pointed in a safe direction. At all other times use a dummy round that you have made yourself, or buy a cheap practice round – they’re about $20 for two.