The dark arts of Chronographs

Chronographs are getting more and more common in shooting circles these days, and you will likely see at least one on your next visit to the range. So what exactly do they do? Well, on a basic level, they tell you how fast the projectile you are firing is traveling once it leaves the rifle.

Why is this important to know? Well, a couple of reasons. Firstly, all things being equal, the more consistent speeds your projectiles travel at, the more consistent you groups should be (ignoring all other factors which contribute to overall accuracy). Secondly, and perhaps most importantly, by knowing how heavy our projectile is, how aerodynamic it is, and how fast it is travelling when it leaves the barrel we can accurately calculate the bullet’s trajectory over any given distance.

Ballistic Precision Chronograph G2 - A light operated chrony by Caldwell Shooting Supplies [image credit: BTI Brands]
Ballistic Precision Chronograph G2 – A light operated chrono by Caldwell Shooting Supplies [image credit: BTI Brands]
As a bit of background on me, having worked at several paintball fields over the years using chronographs to check the speeds of every paintball marker each time it entered the field, I can comfortably say I have spent more time using chronographs than most recreational shooters. I have also previously owned a radar chronograph and currently own a magnetic chronograph. That being said, I’m by no means an expert on the topic, and the purpose of this article is really to  help those new to the topic understand a little bit more about these instruments.

What types of chronographs are there?

The first thing you need to know is that there are three main types of chronograph available to us as shooters; Light Chronographs, Magnetic Chronographs and Radar Chronographs.

I’ll try and explain a little about each below:

Light Chronographs

Light chronographs use a series of light sensors (usually two, but sometimes more) placed at a controlled distance apart in order to measure how long it takes for a projectile to break each of the light beams and calculate speed based on this. These chronographs are set up at a specific distance in front of the rifle or pistol on a tripod or bench (i.e. in front of the firing line, for those shooting on a range this may be a problem) and shots must be made in a way that breaks both beams.

Light chronographs are considerably cheaper to manufacture than the other types, and so can often be purchased for a reasonable amount. This type of chronograph is however affected by ambient light, so much so that even clouds passing in the sky may have an impact on speed readings. To get around this many manufactures create plastic hoods to help control the light above the sensor with varying degrees of success, but the same round is likely to show a slight variation day to day depending on conditions.

For this reason, light Chronographs are generally considered less accurate by nature than the other types available. This may not be an issue in reality however, as 10 or so feet per second variation between shots when you’re talking about 2800 fps is really quite minimal so may be fine for what many shooters require.

One thing I personally don’t like about light chronographs however is I find them hard to read. This is very much a personal thing and I’m sure 95% of people won’t have this issue, but I find trying to read a small LED screen that is 2-3 m in front of me, with a sun reflection, quite difficult. And because it’s in front of the shooting line I can’t just go up for a closer look. Some units do allow aftermarket screens to be connected which are either larger or sit closer to the shooter to get around this (just something to consider).
Having a screen at the shooters position makes life a lot easier.
Having a screen at the shooter’s position makes life a lot easier.

Magnetic Chronographs

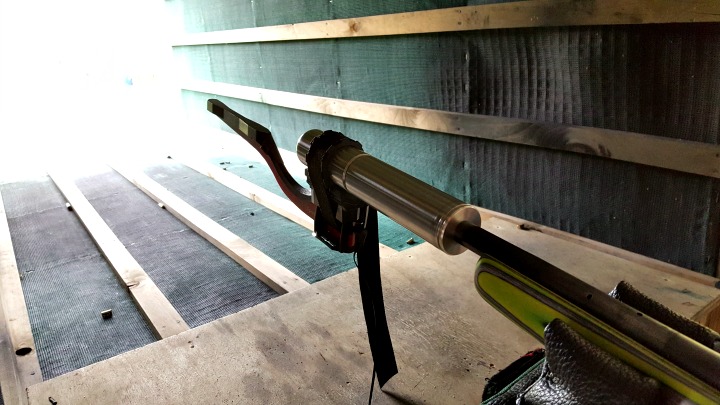
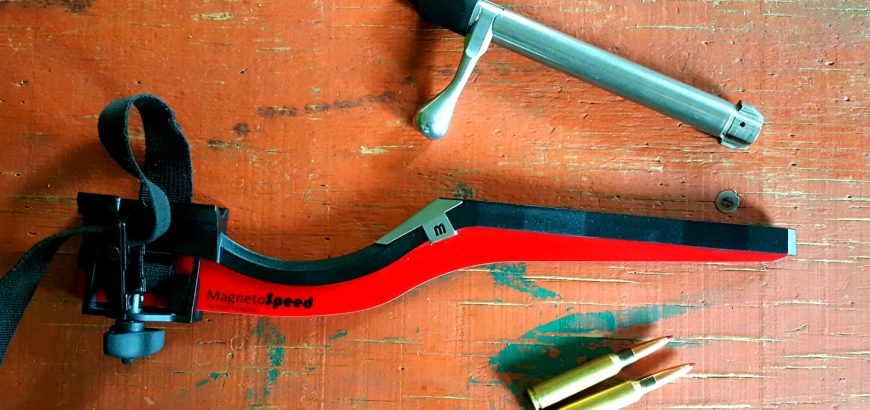
The second type of chronograph is a magnetic chronograph. These types of chronographs use sensors which produce magnetic fields and then measure metal projectiles as they pass through this field. These types of chronographs often mount to the rifle, or have a platform the rifle sits on when firing in order to keep a constant distance from the projectile as it passes.  

The types that mount onto the rifle have positives and negatives, the positives are that the measurements are consistent and accurate as the chronograph and rifle move together it eliminates any error created by the shooter’s/rifle’s position repeatability, it also means that a shooter doesn’t have to go in front of the firing line in order to set it up, and this type of chronograph has the ability to register very fast strings of fire (i.e the ability to register and measure every shot on a full-auto AR-15 without skipping a beat).
If you're going to shoot subs or cast lead bullets, don't forget to adjust your sensitivity settings.
If you’re going to shoot subs or cast lead bullets, don’t forget to adjust your sensitivity settings.

The negative is that you are strapping something to your rifle which has the potential to affect harmonics and adjust your point of impact. I will say I own a barrel mounted magnetic chronograph and have not had any change in point of impact as a result of using it and neither have many shooters I have spoken to. However, I have heard from some shooters who have had very slight point of impact shifts. This may or may not be a problem for you depending on your setup and requirements.

This type of unit may also be difficult to use on certain pistols, particularly those without rail mounts on their frames. One other negative is that solid lead rounds may be difficult to detect without sensitivity adjustment (jacketed bullets are fine), as lead has a very low magnetic field.

[Editor’s note: As long as you remember to adjust your sensitivity settings, you should be fine. I’ve used this type of chrono on subsonic (~950 fps) cast lead bullets with good success.]

Radar Chronograph

The third type of chronograph is a radar chronograph, and you guessed it – this type uses a radar (Continuous Wave Doppler) signal to project downrange and calculate the speed of the projectile as it travels through the radar wave zone.

The benefits of this type of system are that you set it up parallel to your shooting position, so there is no need to go forward of the shooting line. They also don’t touch your rifle, so have no possibility of impacting harmonics, and unlike an on-barrel magnetic chronograph, you set it up once per session and you don’t need to move it in order to test different rifles.

Some radar chronographs also give you the ability to set a tolerance range and any shots outside that range will be indicated by an audible ‘beep’ so you are getting instant feedback without having to monitor the output screen. The downside to this type is that they often struggle to distinguish between different shooters / projectiles as they pass through the radar waves. If you are at a range with people shooting next to you, it’s potentially not going to know whose shot is whose and may give you readings for the guys next to you, also.  Some units have different methods of trying to prevent this, such as microphone triggers / built in software etc.

These units may also struggle to work in some shooting tunnels both due the their need to be set up near the shooter and project forward and also the radar wave “bouncing” off the tunnel walls giving false signals.

Test fire and choosing a chrono

Some recent basic testing we did using a magnetic chronograph and a light chronograph showed 6-7 FPS variation between the two respective readings for the same round, with the light chrono reading faster than the magnetic. With the speeds we were shooting this equates to around a 0.2% variation between the two units which I would suggest is more than accurate enough for most recreational shooters to know what they want to know.

How much you want to spend on a chronograph is up to you, as always there are cheaper and more expensive units out there, and what features you want will also impact price. In general, light chronographs start around $200 NZD for basic models and go to about $500. Magnetic and Radar chronographs start about $400 and go up to about $1000 depending on what functionality you want.

Some of the positives and negatives discussed above may or may not be applicable to you and how you intend to use it. Hence the cheapest light chrono may be fine for your purpose, or you may feel you need to spend $1000 + on a radar unit with all the bells and whistles.  I would suggest if you’re looking for your first chronograph that you will probably use a few times a year to develop loads for hunting, then the cheapest light chronograph will likely tell you everything you need to know.

 

Pig hunters be crazy

New Zealand is full of opportunity for the aspiring outdoorsman. Want to go diving or 4×4 driving? There are clubs a-plenty that will get you on your way. Want to hunt big red stags, eliminate possums or shoot some fallow deer for meat? Get along to your local NZDA and meet up with some like-minded people.

Crossing the first stream was beautiful. By the 6th or 7th crossing you stop focusing on the scenery.

Want to go pig hunting? You can do that too. But, as I learned on my first pig hunt, there are some more considerations to make than you might think. So, let’s think of this as a beginner’s guide to getting into pig hunting.

All you need is a knife

Wrong. Many think that hunting pigs is easier/simpler than other forms and hunting, because you only need a knife and you don’t need to worry about firearms or firearm safety. Let me dispel this myth very quickly for you.

  • Some pig hunters do use guns, but most won’t allow a stranger/novice to shoot over their dogs.
  • Knives hurt too – you still need to be careful.
  • Pig hunting is actually pretty involved, and makes use of more gear and tracking equipment than you may think.

Go with an experienced pig hunter

Heading out with an experienced pig hunter is not only more likely to result in finding game, but they will have all the gear needed for a successful day out. That includes GPS/maps, well-trained dogs with tracking collars, knives and knowledge.

Knowledge is key. And something to be respected. Ask plenty of questions before and during the hunt – without being annoying of course. Ask questions so you know what to bring with you, ask questions so you know what kind of terrain to expect, ask questions so you know the series of events that will unfold when you happen upon your quarry.

Well-trained dogs make all the difference.

Gear

As I said, make sure to ask what you’ll need to take along. You may need to take a knife, but chances are your hunting buddy will have a spare knife you can borrow, rather than spending money on the sport before you know if you’re going to get into it or not.

Interestingly, the classic ‘pig sticker’ shape knife is not favoured by all hunters, although many do use them. A lot of pig hunters carry boning knives or similar. If you’re looking for a knife in Auckland, this store has a huge selection and decent prices.

Other considerations for while you’re out in the bush include your pack, food/water, first aid, and appropriate clothing. A camera or phone for pictures is great, but keep in mind you’ll probably be going through some rough patches of bush and/or crossing streams. You’ll have no one else to blame if you drop your phone in a river, or fall over with it in your pocket. Yes, I fell over in a stream. More than once.

Wearing blaze is great for keeping an eye on your buddy and not getting lost. A spare GPS collar in your bag, or a walkie talkie is good too.

In terms of a pack, I took a Hunting & Fishing day pack, which was great for all it could hold, but man did it get caught up on just about every twig, stick and branch. And supplejack. Oh my goodness the supplejack.

My mate who took me hunting had all he needed around his waist. This included a small first aid kit, water bottle in a holder, food and some other bits and pieces in a bum bag, and of course his GPS unit for the dogs. He had a rifle slung over his shoulder just in case. I could really see the value of iron sights and shorter barrels in a bush gun, as I saw how even this simply profiled firearm got snagged a few times.

This is supplejack. You will have to get through it... A knife or even small secateurs on on your belt will be incredibly useful.
This is supplejack. You will have to get through it… A knife or even small secateurs on on your belt will be incredibly useful.

Clothing and footwear is the one area I would recommend spending some money if you don’t have appropriate gear. If you’re not likely to be heading through gorse and blackberry, shorts are great. Waterproof boots are ideal, and long socks too. An appropriate top for the weather, but I can almost guarantee that short/no sleeves will be the go.

DO NOT, venture out in your brand new gear. You will be feeling sorry for yourself within a couple hours. If you’ve got brand new gear for an upcoming hunt, make sure to wear it in beforehand. Going for a few hikes will not only prevent blisters and sores on a longer hunt from boots and packs not broken in, but will also help with your fitness.

Physically fit

Probably the last piece of advice before I belabour the point. If you’re unfit, crashing through bush for 6 or 12 hours is going to take a hell of a toll. You’ll also probably slow your mate down and drag the whole day out.

On our way through Kauaeranga Valley we caught some peeks of the peaks. If you're lucky, this great outdoors is your gymnasium. If you're not that lucky - you'll have to do something else to raise your fitness.
On our way through Kauaeranga Valley we caught some peeks of the peaks. If you’re lucky, this great outdoors is your gymnasium. If you’re not that lucky – you’ll have to do something else to raise your fitness.

If you work a desk job or have a few too many pies and beersies, get yourself into some sort of fitness regime if you foresee hunting in your near future. The gym is great, and for many it’s the only practical option. However, if you can get out for longer walks/hikes/runs, you’ll thank yourself further down the track. This is the kind of fitness that will really pay off.

Be a good bugger

If someone has taken the time let you tag along to a spot they know of, and they’re imparting knowledge, etc., etc., make sure you sort out some of the expenses. Offer to get the pies or pay for the fuel. No one likes a bludger.

So – did we get a pig on my first hunt? No. I did get a first-hand education in all of the above though, and it will all come in useful the next time I go out. The most important thing I learned? Pig hunters are crazy – in the best way possible.

This is not a sport for the faint of heart or those who can’t dedicate a decent amount of time to training dogs and chasing dots on a GPS unit. It’s a dedication and a lifestyle, and damn it’s fun.

Product review: Boyds Field Design stock for 303 SMLE

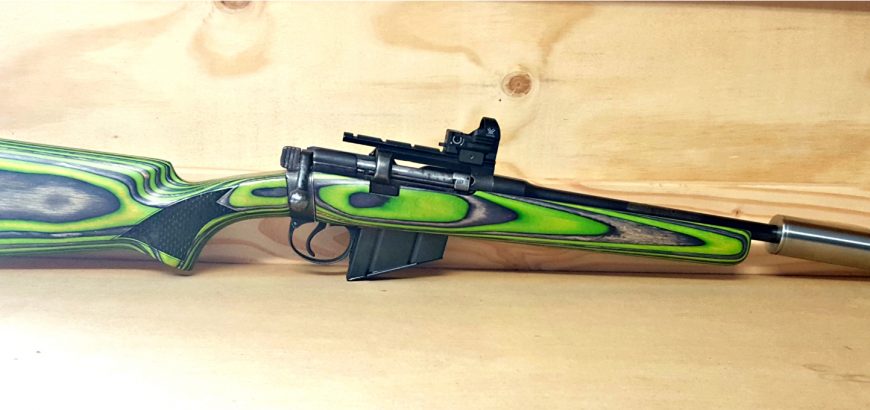
Anyone who follows The Gun Rack on Instagram or Facebook has seen sneak peeks of a very green 303 over the past few months. I’ve really taken my time on this particular gun build, and subsequently the review of this stock, but here it is – The Gun Rack official product review of Boyds Gunstocks’ stock upgrade for the British Lee-Enfield series of rifles.

Guess which firearm is getting a makeover?

A photo posted by The Gun Rack (@gunracknz) on

The build…

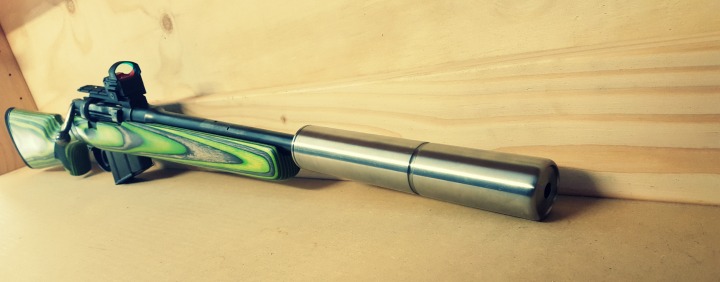
This particular rifle is a quiet bush monster. Monstrous in appearance, but suppressed and subsonic in its implementation. There’s a lot that’s gone into this particular rifle, so – fittingly – we’ll do an entire article covering the various bits and pieces, and the decisions that led to each of them.

One decision that was, unfortunately, made for us, is that I’m no longer going to have the rifle Cerakoted, as a dear and valued member of the NZ shooting community, Victor Alberts, passed away recently while on holiday overseas. Victor was the applicator and artist behind Cerakote NZ, so necessarily we’ll be looking to sort out some other means of protecting the metal on this bush gun.

The rifle that defended the free world – twice

The Short Magazine Lee-Enfield (SMLE) rifle was featured in both world wars and a host of conflicts all around the world. Its younger brother is only now being phased out of service with the Canadian Rangers, who will have a locally made, licensed version of a Sako product (T3 CTR). Other weapons have been trialled, but none compared to the reliability of the Rifle No 4 Mk 2 (since 1941 – not bad).

Even still, the old Lee-Enfield is a devastating tool in the hands of irregular forces around the world, who do not have access to more modern weaponry, or who perhaps have an abundance of old Commonwealth stock. With ballistics and firepower not too far off the .308 Win, it’s not hard to see why the rifle has kept pace.

Anyway, I digress. So, this stunning piece of history came to my possession in a sorry state. Which is okay, as I was keeping an eye out for an old beater that could be beautified without destroying a battlefield artifact.

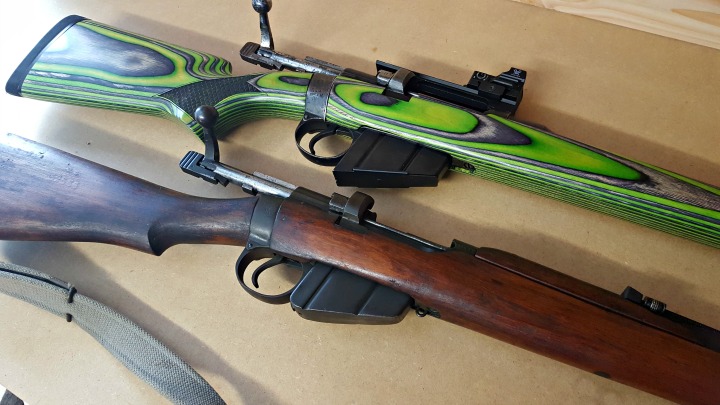
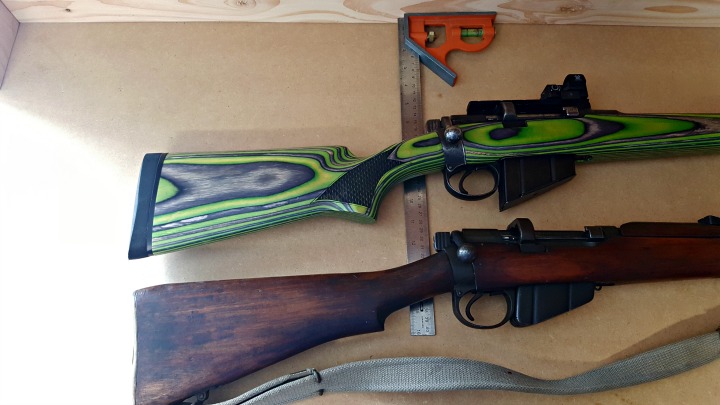
My 1943 SMLE (above) was in a sad state when I bought it - compared to my 1942 (below) which will stay unchanged.
My 1943 SMLE (above) was in a sad state when I bought it – compared to my 1942 (below) which will stay unchanged.

One of the problems with using a wartime rifle (1943), that was mass-produced with unique ‘improvements’ and variations across the world, is that you are bound to run into quality issues. In contrast, I do have a 1942 Lithgow rifle which is beautifully symmetrical and well-machined (even if it is left a bit rough in some areas). But this made-in-Britain wartime specimen is a product of its environment, and loose tolerances, rough surfaces, and poor bluing are to be expected.

In hindsight, I really wish I’d done this build off a Rifle No. 4 instead of an SMLE No.1 Mk iii, as the action lends itself to being rebarrelled to higher-power cartridges, but that may have taken this build in another direction altogether.

If you’re considering a build on a No. 4 or even No. 5 action, Boyds thankfully caters to those, too.

Taking apart the two-piece stock

The Lee-Enfield is everything a modern precision rifle is not. It’s not free floated, the stock is not a single piece and and the ergonomics are all wrong. However it was well-suited to winter clothing and putting a lot of lead downrange, so we can’t really judge the designers for that.

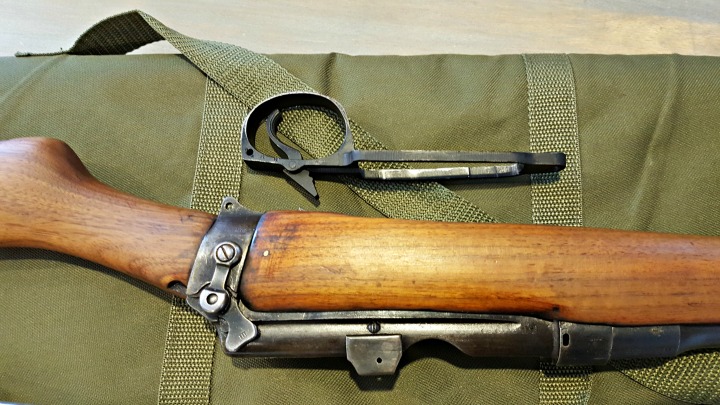
The two piece stock is easily taken apart with some screwdrivers, and potentially a socket driver if you don’t have a really long flat head screwdriver. Check out the easy tutorial here (with lots of pictures!).

Not many rifles will have the trigger come out with the floor metal.

Fitting the Boyds Field Stock Design

Final fitting will be needed.

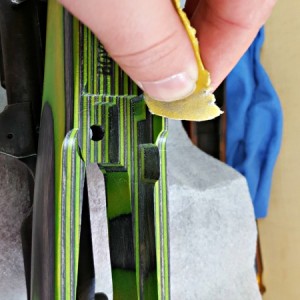
One thing I love about Boyds stocks is seeing the precision lines in the inletting. Now. Take a look at your naked Lee-Enfield. There is not a single square section on that thing. Because the action has so much inconsistency in shape and finish, I spent a fair bit of time sanding and filing around the top of the action and inside and around the sear and trigger slot.

The area around the mag well also needed some relieving of material to get the floor plate sitting properly again, which allowed the barrel channel to move into the appropriate position.

I found it really useful to mark the action with engineer’s blue (a permanent marker will do), to find the high spots on your action that necessitate removing some more wood.

Please be careful removing material, as it’s a lot easier to take off than it is to put on! While I say I spent a lot of time on this, that doesn’t mean I shaved off a lot of the laminate. Rather, I spent a lot of time making sure I didn’t take off too much, so I could still have a snug fit.

When fitting the butt stock, shaving off a small bit of wood off the top of the donut-shaped insert allowed the laminate stock to snug up nicely when I tightened the bolt. However, on the forend side I found there was a bit of a gap between the wood and the characteristic steel band which forms the rear of the receiver and separates the forend and butt stock. I had a shooting buddy of mine machine up a shim to bridge the gap. He put in some counter sunk holes so that I could screw it into the stock once I had all of the metalwork (including the shim) coated, however it’s so far been held in place by friction and is doing just fine.

The shim held in place by friction fills a small gap between action and stock. once coated with the rest of the metal work it will blend in well.
The shim held in place by friction fills a small gap between action and stock. Once coated with the rest of the metal work it will blend in well.

The gap between the forend and steel band I’ll put down to variance between manufacturers of rifles over time. I measured this strip of metal on my two SMLE rifles (one year apart, but one from Australia and one from the UK), and found a 1 mm – 2 mm difference in broadness.

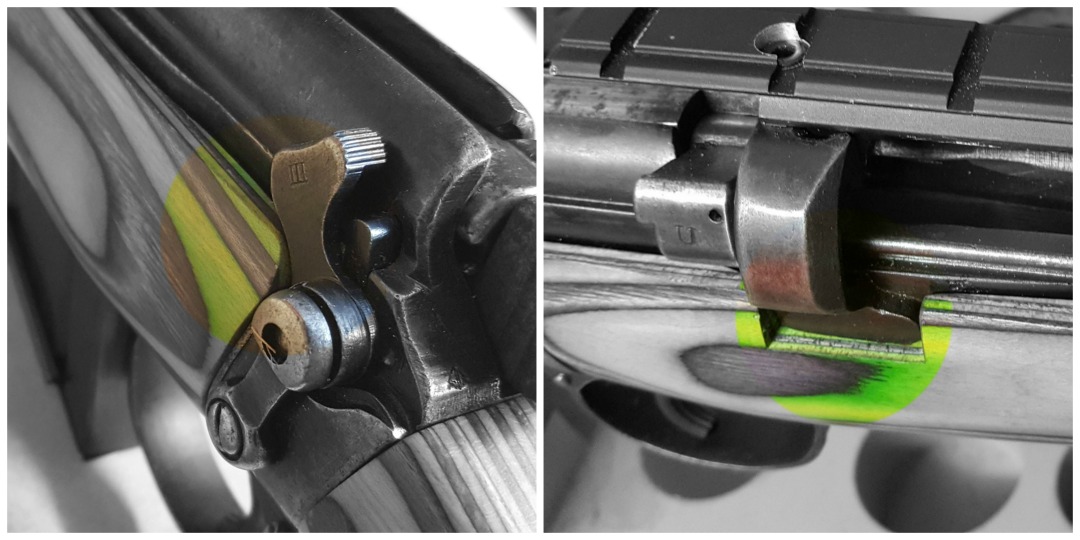
You will definitely need to take out some wood where the rear ring of the receiver interrupts the line of the stock, and also where the safety lever goes in the forward position.

A radius and a square cut will make room for the safety lever and the rear action ring.

Positives of the Boyds Field Stock Design

If you’re looking to improve your Lee-Enfield Rifle or SMLE, you have three options:

  1. Restore the wood with new old stock or modern replicas (on a No 4 this is feasible, on a No 3, near impossible)
  2. Put it in a plastic stock, which will reduce weight, but will deliver more recoil, and increase your noise in the bush with its hollow construction
  3. Choose a hardwood/laminate solution

I’m assuming you landed on option 3, which is why you’re here. The hardwood solution is not only inline with the character of the gun, but also just feels right. I have a couple battle rifles in modern plastic stocks, and I’m too embarrassed to take them to the range, and too put off by the handling and feel to really enjoy them.

The Boyds Field Stock Design (and any of their stocks, really) is a re-imagining of the stock design based around the action and the shooter, not simply a replacement of the existing furniture. This means you can expect an increase in accuracy, stemming from various feature improvements, such as a better inletting, length of pull, cheek weld, positive grip characteristics and also added rigidity when compared to plastic aftermarket (or even original manufacture) stocks.

Line of sight

I found that the Boyds stock in particular raised the eye-line perfectly for the old rifle. With the original stock, if you try and get a positive cheek weld, you’ll be looking at the top of the action. You have to raise your head a bit and compromise your repeatable position on the rifle in order to see the iron sights.

Lining the two up by the rear of the bolt, the difference in drop is quite evident, as is the angle of the butt pad - both changing the handling characteristics of the gun.
Lining the two up by the rear of the bolt, the difference in drop is quite evident, as is the angle of the butt pad – both changing the handling characteristics of the gun.

With the Boyds stock, the decreased drop on the comb means you are looking straight at the iron sights. If you had a low mounted scope, you could use this quite easily with little compromise in cheek weld. I have a Vortex Razor HD red dot sight mounted on mine, which, unfortunately, means added height to the optic. However, this doesn’t bother me because, with its unlimited eye relief, I can have my head just about anywhere on the stock and still have an accurate sight picture.

Solid construction

The Boyds stock is not only solidly made with highly advanced resins, but it feels more substantial when you’re shouldering or handling the rifle. The forend fits an adult male hand well, unlike many skinny stocks, where your fingers will wrap around onto the barrel if you’re not careful. It’s also beefier at the butt end. This is in contrast to the original skinny grip that would have been perfect for gloved hands in the trenches, but not user friendly for acquiring a positive grip in the hot bush and forest we often hunt in.

The slight increases in length, width and girth, add up to a much better length of pull and trigger/bolt manipulation characteristics, without increasing the overall length by much at all.

Choice

If you’re pulling apart an old rifle like this to do something special, why not make it truly one-of-a-kind? From the standard colours offered by Boyds, the Pepper laminate is a sexy rendition. Black and charcoal – it modernises any firearm, while still retaining the warmth of wood. There is also a straight walnut stock if that’s your preference.

The 'Scale' laser engraved chequering adds aesthetic appeal, visual depth, and enhanced grip characteristics.
The ‘Scale’ laser engraved chequering adds aesthetic appeal, visual depth, and enhanced grip characteristics.

I chose a Zombie Hunter custom colour for an extra US$16.50, and my rifle stands out like no other. It’s an attention grabber at the range, and it just looks freaking cool. It’s one of those guns you want to take out and shoot, regardless of whether you’re actually working on a load or hunting or just plinking. I might burn through a lot more ammo just because she looks ‘cool’, but that’s okay. Not to mention, everyone else wants a go at it, too!

I also asked for some chequering on the stock, specifically the ‘Scale’ pattern. It’s laser engraved, and absolutely perfect. It adds some extra grip (of course), but also adds depth to the appearance of the rifle. There are a couple other options to choose from as well.

While you’re at it, you could also look at a custom finish, or a different butt pad option to tame your heavy-hitting wildcat magnums.

Negatives

Hey, nothing’s perfect, and there always have to be some negatives.

My only regret on this build (regarding the stock) is not having sling swivel studs, as a sling will be essential for crashing through some of our heavy NZ bush. However, I’m sure Boyds would have included some had I actually thought to ask. Not to worry, I do have some spare, but that’s definitely something I’ll think about next time. More a mistake on my part than a negative with the stock.

There is one negative, and again, it’s not actually a fault of the Boyds Field Design Stock: It’s the rifle. There is no way on God’s green earth that you will have a perfect fit. Unless you own the Boyds’ house action that they model their stocks off.

There is so much variation in fit, quality and manufacturing tolerances between these old war time rifles, that I can almost guarantee some work for you with sandpaper and a file or two, no matter what brand of gun stock you choose. However, if you’re restoring or upgrading any milsurp rifle, this should be something you expect along the way, so don’t let this put you off.

If hard work is not your cup of tea, there are plenty of modern actions that are very uniform and require little-to-no work to customise. Thankfully, Boyds makes stocks for those rifles, too!

sexy

Conclusion

At the end of the day, I’ve found (once again) that the Boyds product is a substantial improvement on the original stock that came on the gun. Not only this, but dollar for dollar, I can’t imagine another aftermarket stock coming close.

The customisation options offered by Boyds are a real bonus for anyone looking to increase the appeal of their old shooter, and the standard options are plenty for those who don’t like drawing too much attention to themselves or those who are watching their budget.

Would I buy it again? Yes. And I guess that’s the highest recommendation someone can give after thoroughly testing a product.

Product review: Vortex Viper PST 6-24×50

The Vortex Viper isn’t exactly the new kid on the block. In 2016 Vortex Optics have released some high-end scopes, namely the Razor HD AMG and the Golden Eagle HD, and some more functional optics, such as the Crossfire II Scout scope and some new AR red dot sights.

Between those two ends of the spectrum the Viper PST is fulfilling a role that it has had for a while – excellent features, fantastic glass quality and a reasonable price tag.

Price tag

Now, when it comes to scopes, reasonable is a relative term, so let’s define this at the offset. It’s often been said that if you put a $200 scope on a $1000 rifle, you have a $200 rifle. In fact, the saying is so old, the prices don’t make sense anymore. Anyway, the price range on these is around NZ$1500 – NZ$1750, depending on who your local is. So let’s say we’re probably considering a Viper PST for a Tikka T3x, Browning X-Bolt, Remington 700, Winchester M70, etc.

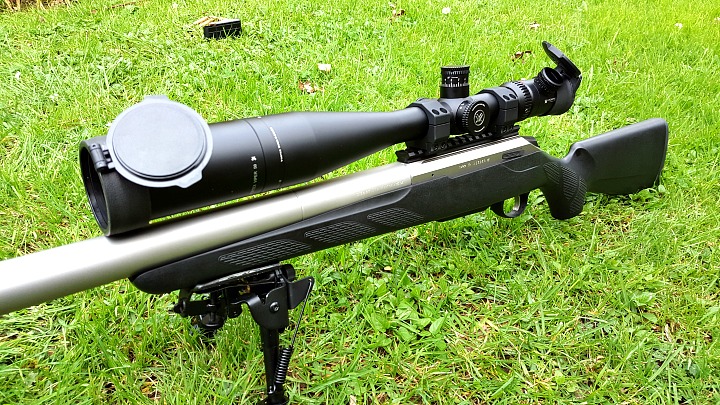
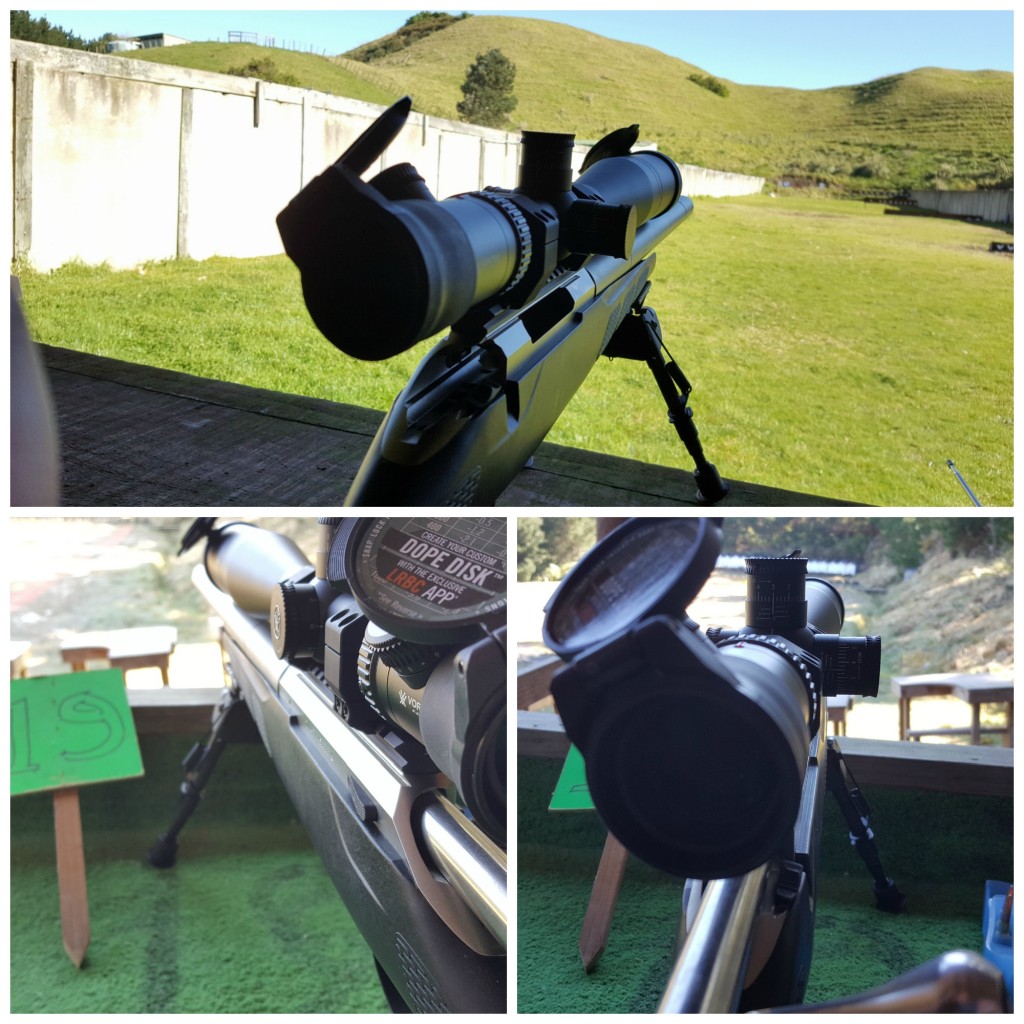
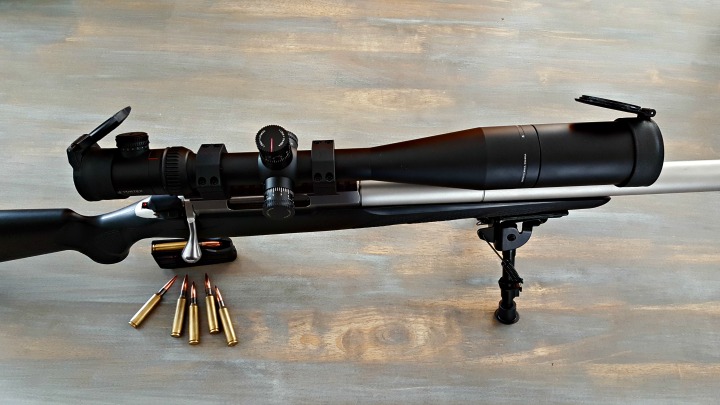
My Viper PST is paired with precision matched 30 mm rings and accessorised with flip caps and a sunshade. A quick throw lever can also be added for fast magnification transitions.

These rifles are all hunting mainstays, and definitely see plenty of use in long-range competition, whether in their standard, or highly modified guises. I wouldn’t bother putting such a nice scope on a rifle of lesser quality than those mentioned above, and I personally think it would be just at home on rifles double the price – regardless of the old saying!

Intended use

If you’re looking at scopes like the PST, it’s pretty likely that you have a specific purpose in mind for your rifle, rather than just looking around for something that simply does the job of magnifying things downrange.

So, who should be looking at this version of the Viper? Well, PST stands for Precision Shooting Tactical, so that’s a fairly good hint. If there’s anything that I despise in gun-related marketing, it’s the overuse of the word ‘tactical’. Apparently everything is tactical these days. But, the Viper PST is suited to tactical-style long range matches, where precision and conservation of movement/thought/energy/time is of the essence.

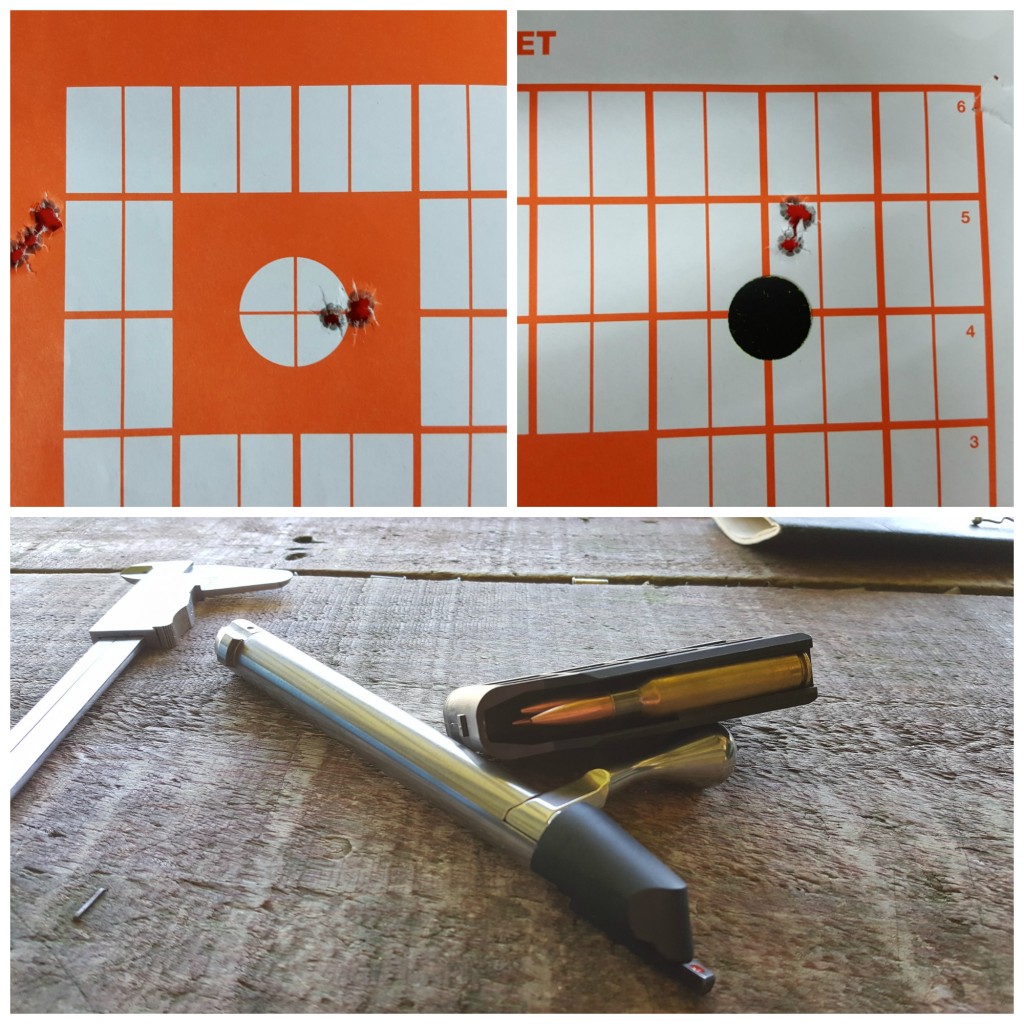
Consistent groups around 0.2 - 0.25 MOA showed the efficacy of the T3 and PST combo. The above was shoot off of a bipod and rear bag at 100 metres. The load was a 142 gr SMK sitting on top of 40 gr of AR2208 (Varget).
Consistent groups around 0.2 – 0.25 MOA showed the efficacy of the T3 and PST combo. The above was shot off of a bipod and rear bag at 100 metres. The load was a 142 gr SMK sitting on top of 40 gr of AR2208 (Varget).

It’s not a scope that’s tactical just because it packs a million features and a corkscrew to boot. No, it’s tactical because the features and controls are perfectly suited to making precise and quick decisions, regardless of shooting conditions. The end-user was clearly present in the minds of the designers at every stage.

What makes the PST great?

This scope got my attention for a few reasons. There’s a focus on clarity (pun not intended), fast decision making and incredible tactile response.

Keeping it clear

The glass on the Viper is certainly streets ahead of just about everything in the price range, and certainly on par or slightly ahead of its closest competitors. I’ve spent hours looking through this scope at 24x magnification, even just at 100 metres, and damn it’s clear. No muddiness at max magnification, and crisp images with brilliant light transmission.

Helping gather the light, is not only a 50 mm objective lens, but a 30 mm tube, ensuring optimum amounts of precious lumens reach your eyes.

My shooting buddy putting together an easy 18 mm group at 100 metres with the Tikka and Viper PST on his first go with this rifle.

A shooting friend of mine had a crack with my Tikka T3 in 6.5×55 topped with the PST and shot a 0.68 MOA 3-shot group (first time on that rifle – not bad for a pistol shooter!). His grouping was spread out vertically, indicating breathing was likely the culprit behind what could have been an even tighter group.

Anyway, he said that he’d read military snipers talking about timing shots between heartbeats, and thought it was a bunch of BS. However, after sitting behind the Viper PST at 24x he noticed his heartbeat, breathing and everything else his body was doing.

When your glass is so clear it highlights not only what’s happening downrange, but what’s happening behind the rifle, you know you’re onto a winner.

Shoot a little later

Well, we all know that some of the best hunting is done at dawn and dusk, when it’s cool and animals venture out of the bush or towards more exposed areas on the hill tops.

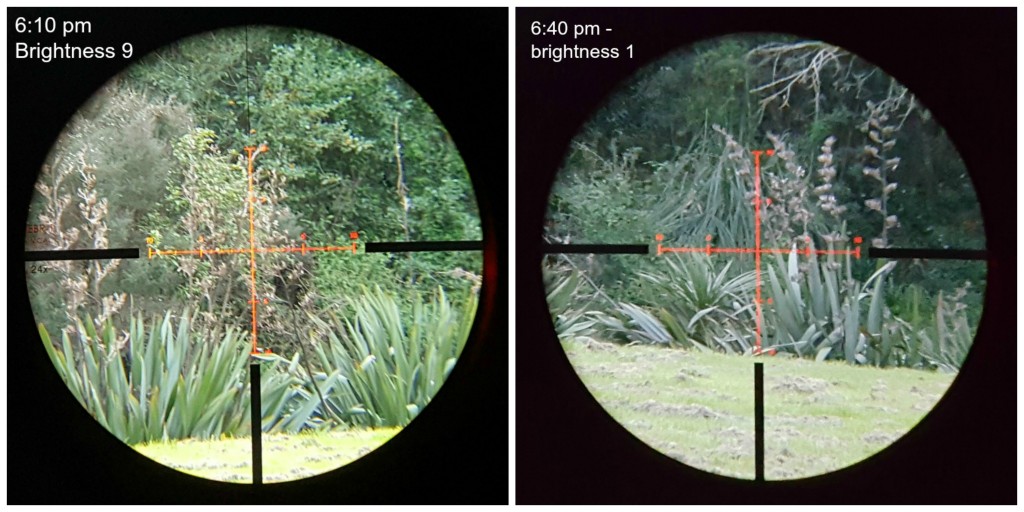
If you are doing some long range hunting, you’ll be pleased to know that not only are the light gathering properties of this scope fantastic, but that the illuminated reticle comes in ten different intensities to help you focus on your crosshair against darker targets in failing light.

Excuse the poor resolution - that's me trying to take a picture through the scope with my cell phone. But, these shots do illustrate how much light you get in the evening, as well as how clear the illuminated reticle is. The first image is 5 minutes before sunset, the second is 25 minutes after sunset.
Excuse the poor resolution – that’s me trying to take a picture through the scope with my cell phone. But, these shots do illustrate how much light you get in the evening, as well as how clear the illuminated reticle is. The first image is 5 minutes before sunset, the second is 25 minutes after sunset.

There’s also an ‘off’ position between each brightness setting, so you don’t have to crank the turret all the way around each time you want to turn off the illumination.

Take that shot!

This particular Vortex is not super lightweight, so you’re unlikely to be taking snapshots with it. At 23.4 ounces (0.66 kg) for the heaviest and most specced out of the range you’re probably planning on using it at precision rifle matches, F-Class or even tops hunting off a bipod or rest. Although, having said that, I got the 3rd highest snap score at the recent NZDA Prize shoot with this scope and a heavy suppressor – so maybe ignore what I just said. Either way, it’s still not as heavy as the top of the line Razor HD AMG, which is a third of a pound (about 150 grams) heavier.

Anyway… The Viper PST is geared towards quick thinking. The CRS Zero Stop means you can crank up your elevation and return to your rifle’s zero with no further thought. The elevation turret also has a bright red fibre optic radius bar, to quickly gauge your adjustments. Gradations are also clearly visible from the shooter’s position on the tactical style turrets.

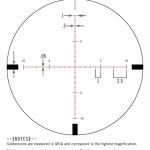
Every part of the reticle is useful for ranging or windage and is deliberate in its construction. Image courtesy of Vortex.

The face end of the scope has a fast focus eyepiece, which is quite standard on most scopes now, let alone highly specced ones. But just beyond this is another piece of fibre optic genius, this time in the magnification ring, meaning you don’t have to lift your head to see what your mag setting is.

Why would you need this? Well, with the EBR-1 reticle (which I have), you have 1 MOA hashmarks for elevation and windage. If this was the FFP model, these would be 1 MOA at all magnification settings. However, considering it’s the SFP model, these readings are only true at max zoom. That means at 12x you’re looking at 2 MOA hashes, at 6x they’re 4 MOA, etc, etc.

Vortex makes this pretty simple for you by only having numbers on the magnification ring that easily multiply to give you round MOA numbers. This means with minimal mathematics, you can still use the EBR-1 MOA reticle to range, correct for wind or lead a target. This makes the decision between FFP and SFP a little easier for those who aren’t ready to make the leap.

If you’re unsure of how First Focal Plane and Second Focal Plane scopes work, check out this pretty cool article which summarises the concept well.

The controls are easily seen and reached from the shooting position without compromising your stance, cheek weld or eye relief.

One last thing about the reticle! The laser-etched EBR reticle is well thought out, and has plenty of useful subtensions, aside from the obvious. What I really like about it is that the thick post edges still draw your eye in like a duplex reticle, while you have the benefit of the finer hash marks in the middle for more precise work.

On the muzzle end of the scope, you’ll find… wait, no you won’t find the parralax adjustment there, because it’s on the left hand side of the scope as a third turret. This means adjustments for range are not only easier to do (those objective bell ones can be pretty tight to turn), but also don’t require you to leave the shooting position.

In case you haven’t noticed, every adjustable part of this scope is easily visible from the shooter’s position without breaking your stance or losing your eye relief. Wow, they’re really making your life easy!

Feel the quality

Well, at this point it probably sounds like all I’ve had to say about the PST is fantastic this, and excellent that, but don’t worry, for those that don’t know me – I’ll cover the downsides too (minimal as they are).

So, for now, we’re still on the good points. One of the greatest indicators of quality to me is the “feel”. This is a unit that I feel confident taking out into the field. The hard anodized finish on the exterior surfaces, along with Vortex’s ArmorTek coating on the lenses makes for one sturdy optic.

My particular scope has been subjected to a fair bit of exposure to all sorts of solvents and chemicals as well, as it is on a fully suppressed Tikka T3, which I take out of the stock to clean after every shoot, but I don’t take the scope off. So, when the barrel gets a clean, the scope gets covered in Hoppes, Shooter’s Choice, CLP, or whatever, and a ton of fouling and crud – which all wipes off nicely.

But when I talk about tactile features, I’m not just talking about the obvious feel of the scope. The mechanical feel is also a major selling point. The gearing is fine enough to be high quality and suitable for minor adjustments, but smooth enough for quick adjustments. The only area where this could be improved is the magnification ring, but a quick throw lever will sort that out.

The adjustments feel very positive and when I experimented tracking clicks along a 1 MOA grid at the range, they corresponded perfectly, as did the reticle. Thankfully, gone are the days when manufacturers thought they could get away with mismatched turrets and reticles (well, most of them), but in case you were wondering, the Viper does have MOA/MOA or Milrad/Milrad, depending on your preference.

What makes the PST not-so-great?

Okay, as promised, I’ll cover the negatives too. I’ve got to admit, they’re pretty minor.

The tube diameter is great for gathering light, but 30mm tubes are still not the most common. They’re more expensive to make, and are still a premium feature. This means if this is your first 30 mm scope, you’ll need to buy new 30 mm rings to match. To my mind, this is not a major sacrifice. Considering you’ve spent a bit on your new scope and rifle, you may as well invest in a quality pair of matched rings.

My scope came with a sunshade, which not only adds a cool factor (the puns keep on coming), but reduces glare on the lens during the brightest periods of the day, as well as mitigating some barrel mirage as well. However, it irked me, just slightly, that the branding on the sunshade wasn’t indexed to the 12 or 3 O’Clock position. Timing an accessory sunshade is such a pedantic thing, but that’s the perfectionist in me coming out, and this obviously has zero effect on the function of the optic.

If you compare this scope to the most expensive Vortex scopes on offer (or others for that matter), you’ll never be happy. But, if you compare and contrast with any other scope in the same price bracket, you’ll be overjoyed with your new purchase.

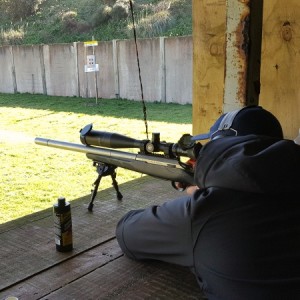
The Vortex Viper PST is not the lightest of scopes, so you'll probably make good use of a bipod or rest.
The Vortex Viper PST is not the lightest of scopes, so you’ll probably make good use of a bipod or rest.

The quality is there, the advanced features and thoughtful concessions are there – it just seems like the perfect scope for venturing into long range. In fact, as I dip my toe into the waters of F-Class this season, this scope will be the one I rely on to deliver consistent performance, clear images and perfect holdover/dial-up. Of all the scopes I have tested in this price range, I would say the Vortex Viper PST offers best-in-class value for money.

If you’re wondering how it can offer the same features and quality as more expensive optics, and don’t think it will live it up to the hype, the Vortex VIP Unconditional Lifetime Warranty will set your mind at ease. The same warranty the company has on all its optics means they’ll replace or repair your product, no questions asked, if it is faulty in any way or becomes damaged while you are using it. That shows real confidence in their product and commitment to their customers (i.e. you). The fact that I don’t know anyone who’s had to make use of this warranty is probably even more more convincing for me.


Meat processing course with The Bloke and Balnagown Hunting

I recently heard a quote that went something like ‘if everyone gave more than they took, the world would be at peace.’ Well, while we can’t claim to be tackling world peace, it’s a fact of shooting sports that many take a lot and give very little.

This is why I was very impressed with an initiative by Kerry Adams of The Bloke to implement a hunter education and deer processing course. It’s something that our community is increasingly missing – those that give back, and also those that know what they’re doing.

For many hunters in their 20s and 30s, they didn’t grow up in a hunting family, or their dad or uncle didn’t pass on what they had learnt from their dad. And with an increasingly globalised Aotearoa, many come from countries where they either didn’t have access to hunting environments, or had very different sorts of hunting available to them.

Two at a time makes the day go quicker. And yup, that's your's truly elbow deep in a deer carcass. Photo credit - Kerry Adams
Two at a time makes the day go quicker. And yup, that’s yours truly elbow deep in a deer carcass.
Photo credit – Kerry Adams

The 6th deer processing course

So the course I attended was Kerry’s 6th, and you can see that all the kinks have been worked out of the event, as everything ran as smoothly as you could want. No doubt Kerry will aim to continuously improve the experience, but I certainly enjoyed my time at Balnagown Hunting and learnt a lot from Richard, the land owner and proprietor.

I heard rumours on the day of the next course being in October, so keep an eye on The Bloke’s FB page, or check out updates at The Gearlocker website.

The format of the day

Even though we had spots of heavy rain, sideways rain, and even frozen rain, the afternoon was well coordinated and followed a pretty good timeline to get you back on track with your weekend by just after lunchtime.

After arriving and parking up near the main house and sheds, we carpooled in a few 4-wheel drives to get to the hunting hut and Richard’s new meat-hanging ‘gallows’ and barbecue area.

Equipment

We started out with some basics on equipment, having a look at a few different rifles and their various accessories. Hunter and writer Dougie kindly provided us with some of our fresh meet for the day, and we got to check out her rifle as well.

After looking at things that go bang for a while, we looked at small, sharp, pointy bits. The knives in Kerry’s box of toys were awesome, but also told a story of trying everything under the sun to come to the conclusion that, generally speaking, less is more. If you’re wondering what knife to buy for your first hunt, I’d wait a sec and hop on this course and actually have a go with some different knives on an animal. So, armed with an insight into which knives to avoid and which ones are suited to small game such as fallow, we commenced with the processing part of the day.

Richard was great at explaining what he wanted us to do, but also let us make some mistakes along the way.

Dressing

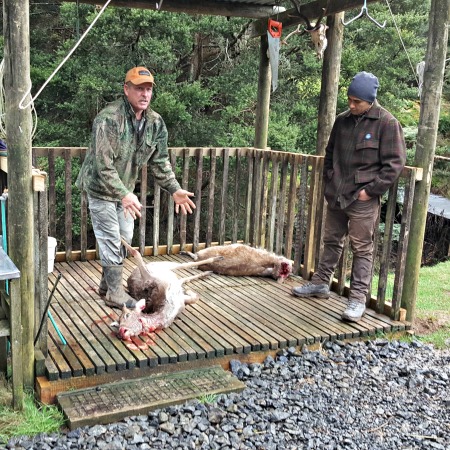
First up, Richard gave us a very good introduction to his land and what he does. After that it was all pretty hands on as Richard took us through skinning and gutting a deer. Most people volunteered at some point and had a crack. With my lack of experience, I took all the opportunity I could to be the guy with the knife. Speaking of knives, there were a couple giveaways too, so a fair few us walked away with a new knife as well.

After the first dear was completely skinned and gutted, we tackled another, but this time field dressed it.

Getting me some backstrap. Photo credit - Kerry Adams
Getting me some backstrap.
Photo credit – Kerry Adams

Breaking the animal down

The two fresh animals were taken away and a couple that were a a few days old and already dressed came back on the quad. This is where the lads from Country Meat Processors jumped in, showing us how to cut off backstrap, spare ribs, etc.

After breaking down the animal we wondered over to the bench and everyone had a crack at butchering a bit of deer, producing their own steaks for the bbq. It was amazing to figure out the different cuts and what really goes on if you usually just send a carcass to the butcher for processing.

Overall impression

After we’d all cleaned up and enjoyed a healthy bbq of venison steak sammies, accompanied by warm coffee, everyone stuck around for a bit of a yarn. There was a vast range of experience among the attendees, with a couple never having put a deer down, to experienced hunters looking to learn some new tricks (like punching out the skin – you’ll find out what that means!).

The banter was good and there was plenty of food. To be honest there was plenty of time to talk and have a cuppa throughout the day as well, it wasn’t like a classroom setting. It was a very relaxed atmosphere in which it was okay to learn and even make mistakes.

Richard was an absolute master at communicating the skills he’s picked up over the years, and if you’re ever in the market for a fallow meat hunt, or even your first ever hunt, a trip to Balnagown may be in order. Kerry was the consummate host, ensuring everyone benefited from the event, and again, it was great to see someone giving back to the hunting/shooting community by taking on such a big task and organising a day that many people benefited from.

Would I recommend it? Absolutely. Whether you’re trying to figure out what to do after you shoot your first game animal, or you’re experienced and trying to find out better ways to do what you’re already doing, there’s plenty to take in throughout the day, and it’s a perfect excuse to spend some time outdoors, talking crap and enjoying the company of fellow shooters.

For a reasonable cost of $80 per person for just over half a day of education, food, great bush scenery and good mates, you really can’t pass it up! I’m even thinking of going again just to cement what I learned the first time.

Product review: Weaver 40/44 Series 6.5-20×44 scope

Every now and then you come across a product that presents you with the best of dilemmas. The problem I have with my new 40/44 scope is choosing which rifle to fit it to. Now, I may sound like a gushing schoolgirl at this point, but read on and let me explain why this scope’s versatility is a nice problem to have.

Price range

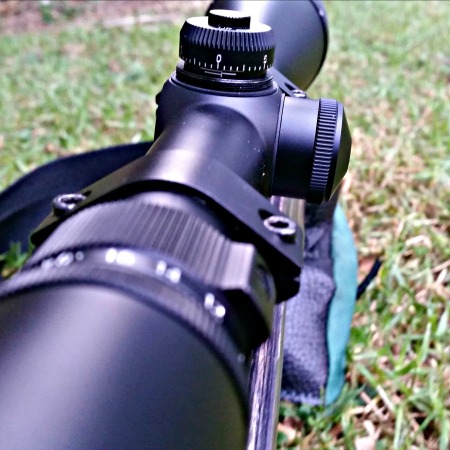
The ocular bells allows plenty of clearance for bolt handles and gloved fingers.
The ocular bell allows plenty of clearance for bolt handles and gloved fingers.

Let’s not kid ourselves, when you’re purchasing optics the first thought you have is, ‘How much is my wallet going to bleed to get the kind of clarity/magnification/quality I want?’

There’s a common saying that if you put a $300 scope on a $1000 rifle, then you’ve got a $300 rifle. I would argue that the 40/44 Series 6.5-20×44 is the exception to this platitudinal rule.

The manufacturer suggested retail price (MSRP) listed on Weaver’s website is roundabout $320-330 USD, depending on the specs you go for. If you’re lucky, you can catch it on special or find a store/site with free shipping and get it to your door for around that price. But! Does it shoot like it belongs in the $300 – $500 USD ($450 – $600 NZD) range?

Quality

Finish

The first thing I did when I unpacked the 40/44 was mount it on a Savage .243 to check out the fit and function. Unfortunately I installed it with rings that were a tad snug, and immediately had some long scratches after I pushed and pulled the scope around finding a comfortable fit.

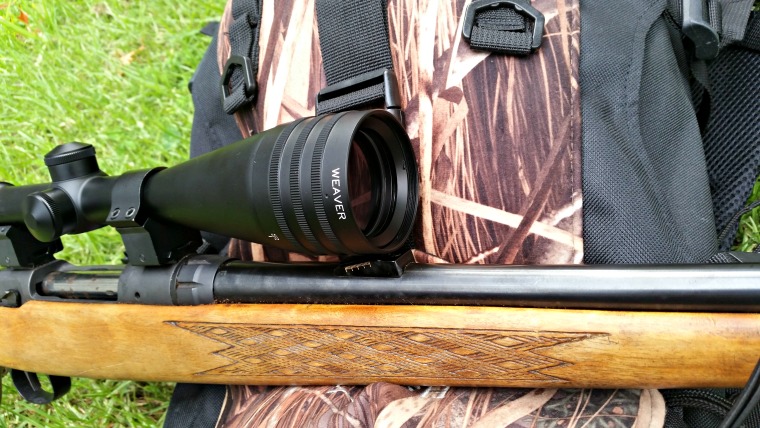
The objective bell clears the rear sight on this Savage nicely.

Feeling pretty upset with myself for ruining a brand new scope (before I’d even had a chance to photograph it for this review too!), I tried to rub the marks out a bit with my thumb. And they lifted. The black, hard-anodized matte finish is built for such rugged use that even scraping it along in tight metal rings didn’t leave any permanent marks on the finish. I’ve had much more expensive scopes (especially with matte finishes) end up with unsightly scratches even from a trip to the range, let alone hiking through the bush.

Mechanical

If there’s one thing that’s a tell-tale sign of poor – or even average – manufacturing quality, it’s sloppy elevation and windage adjustments.

The fine gearing makes for smooth use and precise adjustments.

Even when I was just playing around with the scope before actually going to the range, I could tell that the 40/44 Series was just a little bit better made in this area than most. The clicks were tight and consistent, and there was no play in the adjustment turrets. After taking the turret caps off, adjustments can be made with your fingers, with no special tools or coins necessary.

The parallax and magnification adjustments have a bit of a longer throw than other scopes in the same price bracket. This is actually a good thing. What this indicates is finer internal gearing, which means more precise adjustments can be made. The movement of these parts is also smooth, but resistant enough to the point where you don’t have to worry about unintentional movement.

Optical

The optical quality is really what most people get giddy about when choosing a new scope, although I’d maintain that mechanical quality is just as important.

In my experience there are two major indicators of optical quality in a scope. The first (and most obvious) is light transmission. Is the scope clear, bright and easy to use? The answer in this case is yes. The second, and certainly equal, indicator of quality materials and craftsmanship is the ability of a high-magnification scope to continue to provide optimal light transmission at the high end of its zoom range.

In other words, if I were hiking around the back country with the magnification set around 10 for medium-range shots, but then decided to take a longer range shot requiring all 20x zoom power – at dusk – could I expect the same level of optical clarity?

Many competitor scopes at this level – and certainly the cheap no-name brand scopes on TradeMe – start to get murky towards the end of their range. I had a 6-24x power scope that I realistically couldn’t use beyond 18 or 20 without losing too much light. I’ve also owned an 8-32x scope that may as well have been an 8-24x for all the use the upper range was.

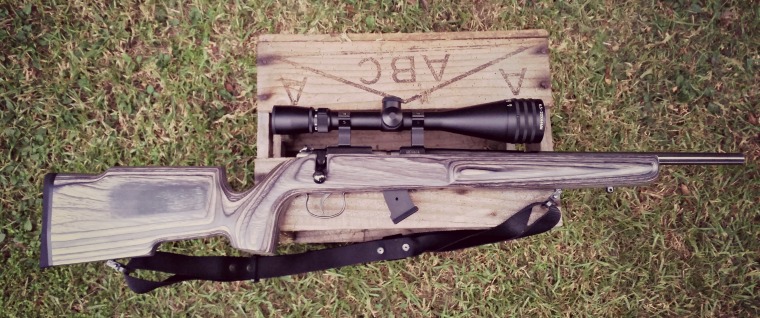
It may be a hunting scope, but it's perfectly at home on this rimfire rifle.
It may be a hunting scope, but it’s perfectly at home on this rimfire rifle, along with the aftermarket Boyds stock.

I’ve glassed tree-lined creek beds with this scope in failing light at maximum zoom, and also used it at maximum zoom at an indoor target range, and in both situations found the light transmission to be excellent. So much so that I would be confident in saying I could use the full potential of this scope, and not just stick to the lower ranges.

Specified use

Of course, how you intend to use any particular scope is up to you. However, certain optics are created with particular uses in mind. According to Weaver’s website, the primary use for the 40/44 in 6.5-20×44 with Dual-X reticle is as a large game hunting setup.

The 6.5-20x version of this scope comes with three reticle options – the Dual-X, Ballistic-X and Varminter. All are variations on the duplex reticle and the use for hunting is readily apparent. The thick posts draw your eye naturally to the finer crosshair in the centre, making for quick target acquisition.

The Ballistic-X version has some elevation holdover hashes for those who prefer to holdover rather than adjust their turrets – useful for shooting on the move, rather than from a prone position. The Varminter crosshair features a round dot in the middle of the reticle to form a natural point of focus for the eye.

If you choose the Dual-X (like I have) or the Varminter, you’ll likely be making elevation adjustments in the field. Using a ‘cheat sheet’ calculator, you can quickly figure out what adjustments you need to make and have these on a card taped to your rifle for quick reference. Alternatively, some time at a range with multiple distance options can help you figure out exactly what your load/rifle/optic combination requires.

Thankfully the 40/44 is designed with quick adjustments like these in mind. After removing the turret caps, you’ll notice the turret markings are easily visible from the shooter’s position.

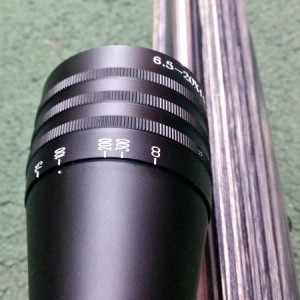
The turret adjustments are easily seen from the shooter's position.
The turret adjustments are easily seen from the shooter’s position.

The ocular bell is also quite compact, which has multiple benefits. It’s easier to see past when making turret adjustments for starters. But more importantly it means more clearance between the bolt handle and the scope. This makes for easier mounting on older rifles, as well as convenient use with gloves when you’re in the mountains.

Overall impressions

It’s easy to see how this scope could be favoured by hunters the world over. It’s not a Super Slam, but for the budget-conscious shooter or the back-up rifle, it’s great value for money with many of the same features as the more expensive scopes. It’s no surprise that it’s a ‘best rated’ product on Optics Planet.

The ruggedness and mechanical reliability means a lifetime of use, while the optical clarity makes it perfect the times of day you really expect to be hunting in New Zealand. The uncomplicated reticle and ease of adjustment makes for more confident shooting in the field too.

While this scope was originally mounted on a .243 Winchester for hunting use, it’s found a new home on my bolt action .22LR along with a Boyds Pro Varmint stock for target shooting. While it may seem a strange application, indoor smallbore target shooting involves known distances without wind variation, making the simple reticle ideal. The high level of magnification also means precise shooting and knowing what your score is before you leave the mound. The large objective lens also means plenty of visibility indoors under artificial lighting. Lastly, the adjustable objective means you can shoot at high magnification at ranges as close as 25 yards.

But, as I mentioned at the beginning of this article, this scope could sit on almost any of my rifles and be fit for purpose. It could go on my 6.5×55 and be used for F-Class, or thrown onto my 7mm-08 for a light, bush-ready rig. Like I said at the start, it’s a good problem to have!