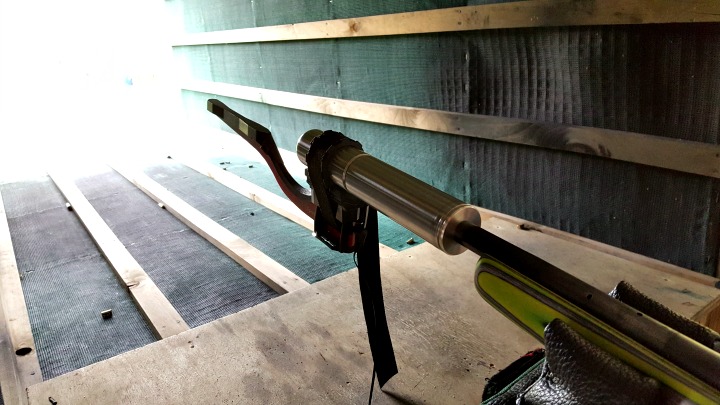
Protean Innovations: The evolution of the bipod

I’ve recently completed a couple rifle builds, and while I was working on them I was on the lookout for a new bipod. I currently run a couple Harris-style bipods that switch between rifles, and one really odd piece of kit that sits on my SKS. I was looking for something different, something better. Top of mind for competition shooting (PRS-style matches) was something like the Harris or Atlas offerings – but then I stumbled on something really unique – Protean Innovations.

I saw some of their bipods in pics and videos on their Instagram page, and I was instantly intrigued. The bipods seemed to be built for exactly the kind of shooting I had in mind. I reached out to see if I could get a unit to test and evaluate, and their CEO Kyle Hayes, got in touch and offered to send me some gear to check out. A week or two later I received a nice little care package with a Gen II bipod and the Stability Tracker bipod (which is their gen 3 model, effectively). Also in the parcel were a bunch of Protean Innovations accessories. And not for nothing, a personal letter signed and sent by Kyle himself. That says something about the kind of company they are.
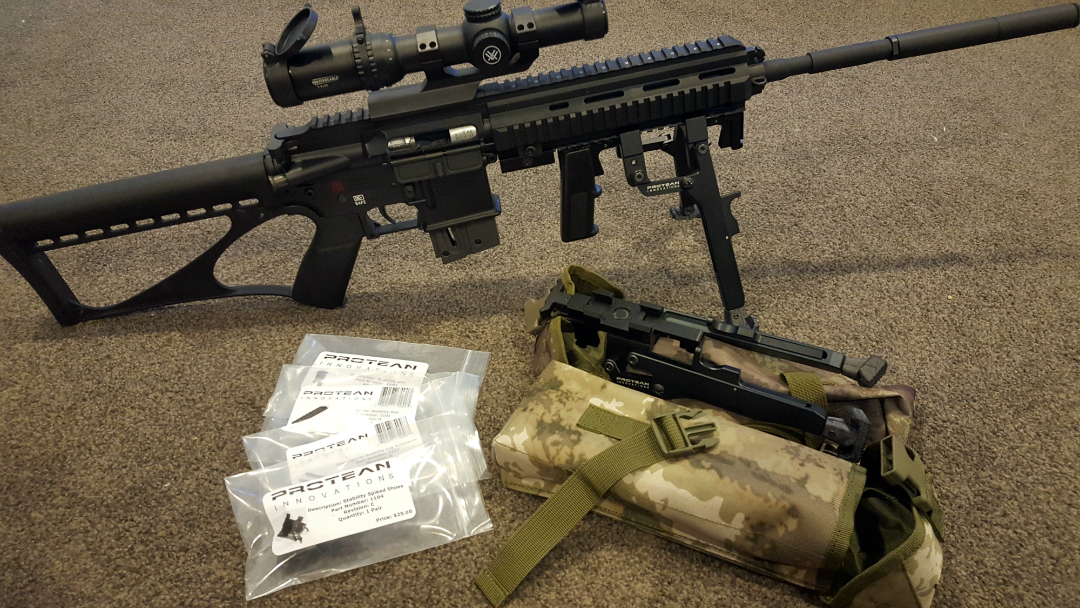
Unpacking the Protean Innovations care package

First impressions

First things first, opening this package was awesome, not only to get some new gear to test out, but also because of the way they package their products. Instead of plastic and cardboard, the Protean Innovations bipods came in their own camo pouches. These can easily be attached to molle webbing, a belt, or whatever else you want. Pro Tip: They also make great water bottle pouches to go on your belt when you’re hunting.

Looking the units over the first thing I noticed was the quality of the materials, workmanship and anodizing/coating. Despite a lot of aluminium-on-aluminium, there is no discernible friction in the system, and all tolerances seem to be exactly right for flawless deployment – precisely what you want in a “quick deploy” kind of system.

Testing

My primary use for these bipods would be for my competition guns, so that’s how I decided to test them. Of course they’re just as applicable to hunting or LE/MIL scenarios, but that’s not my use case, and I’ll leave it to other reviewers to cover those bases.

In terms of competition, I’ve used these at the PSNZ22 run by Precision Shooter, the TSCC Practical Rimfire shoot run by Gillice Practical Rifle Events, and the CNIGC Good Morning Vietnam shoot. I’ve also used the Stability Tracker bipod to get my bolt action centrefire competition rifles ready, but haven’t competed in F-Class this season.

Gen II Bipod

I ran the Gen II bipod on my 22LR HK416D, using the quad rail on the forend to mount the system. The Protean innovations bipod slides along the rail when you hold the deployment trigger, and catches into position when you let go. This allows you to deploy it securely at multiple angles. This can be great for practical shooting competitions, where you often shoot from angled positions, or through barricades/obstacles that have very specific fields of view at certain heights from the ground. For those thinking of a hunting application, it means you can lower your profile as you shoot downhill from a ridge into a valley, or something like that.

What if you don’t have a rail on the bottom of your rifle? Protean Innovations sells a simple and cost-effective adapter, called the Stability Rail, that will attach to your sling swivel stud and give you an easy to use picatinny rail. There are, obviously, other conversion system out there, if you prefer something else.

The Stability Rail is super easy to attach. It also has a hole to attach your sling, useful if you only have one sling swivel stud on your rifle

In this competition, which has a lot of positional shooting and some stages which cannot be shot supported, I used the Stability Grip attachment. This acts as a forward pistol grip, and attaches to the bipod deployment trigger. You can still pull the trigger and move the pistol grip forwards or backwards to deploy or retract the bipod.

I found this system great. It not only allowed me to quickly transition between off-hand and prone-supported positions, but the pistol grip allowed me to take more controlled standing shots, and be confident in my ability to quickly deploy the bipod, without having to play with small buttons or release levers.

Oh, worth a mention, you only need to pull the deploy trigger and slide it forward or backwards to manipulate the bipod. Unlike a Harris bipod, you don’t need to reach all the forward of your rifle and pull back the individual legs. You can stay completely in position on the rifle.

Other accessories that really make this a unique system include the Stability Spiked Shoe and the standard Stability Feet. The feet that come on the bipod from the factory are a quite grippy rubber design, and have a bit of bend in them, allowing you to achieve those angled positions in the field. With the extra grip you get compared to bipods with hard or round feet, you don’t get nearly as much “hop” or “bounce” when shooting larger centrefire rifles on hard surfaces, such as concrete benches or floors.

The feet allow for various angles, and the grippy, relatively soft rubber takes a lot out "bounce" out of heavier recoiling rifles.
The feet allow for various angles, and the grippy, relatively soft rubber takes a lot out “bounce” out of heavier recoiling rifles.

The spiked shoes are easily slipped over the rubber feet in seconds, and stay completely secure. This is a revolutionary approach to bipod feet. While there are endless options for more traditional bipod systems, they usually require tools and can take minutes to switch over – not ideal for field use or in high-pressure competitions.

I thoroughly enjoyed using this bipod in competition, and although I didn’t have my best day shooting, I can confidently say the Gen II and Stability Grip combination greatly enhanced my ability to tackle a very creative shooting course put on by Kerry, Matt and the others from the Precision Shooter crew.

In fact, I ran this bipod again at the Good Morning Vietnam shoot, put on by Central North Island Gun Club, and I can honestly say that without it, I would not have achieved my 3rd place in Open Division.

I was shooting my Aero Precision build, with most parts from NZAR15.com, and yes, I was that guy with the muzzle brake on the competition line. I heard all the comments behind me. However, I wasn’t the only one! So was the guy on my left, and the guy on my right! Thankfully only .223, with .308 and 7.62×39 further down the line.

But, even still, it was quite difficult to maintain a good sight picture with vented muzzle gas coming directly from another competitor’s rifle and getting in behind my glasses, making my eyes sting and glasses fog up in any longer strings of fire.

So, in the couple courses of fire where a supported prone position was allowed, the extra stability, and the option to quickly deploy after running to the firing line, all helped me get rounds down range before my vision became too impaired, and helped me to stay on target when my eyes were dripping tears from the stinging gas exiting the filthy brake next door.

My two rifles for the CNIGC shoot. As you can see, the Protean Innovations bipod is supper easy to slip on and off.

Stability Tracker

Now this is the next evolution in bipods and shooting support. Yup, this is the version after the Gen II, and the features show.

The appearance is refined, and weight reduced, with a single locking mechanism (compared to the two on the Gen II). The function is smoother, and the front attachment trigger is smaller, and less obtrusive.

Another feature which aids smooth operation is the integral picatinny rail which the bipod operates on. With rounded and lower profile rail slots, the operation is greatly eased. The whole unit still attaches to your picatinny rail, but less real estate is taken up for the operation of the system, as the guts of the bipod hangs below and moves on its own mechanism. This also allows Protean Innovations to introduce the piece de resistance, the tracking feature.

With a simple flip of the tracking trigger with either your left or right hand, you can now pan your rifle on the horizontal axis, without moving position or lifting your bipod from its place.
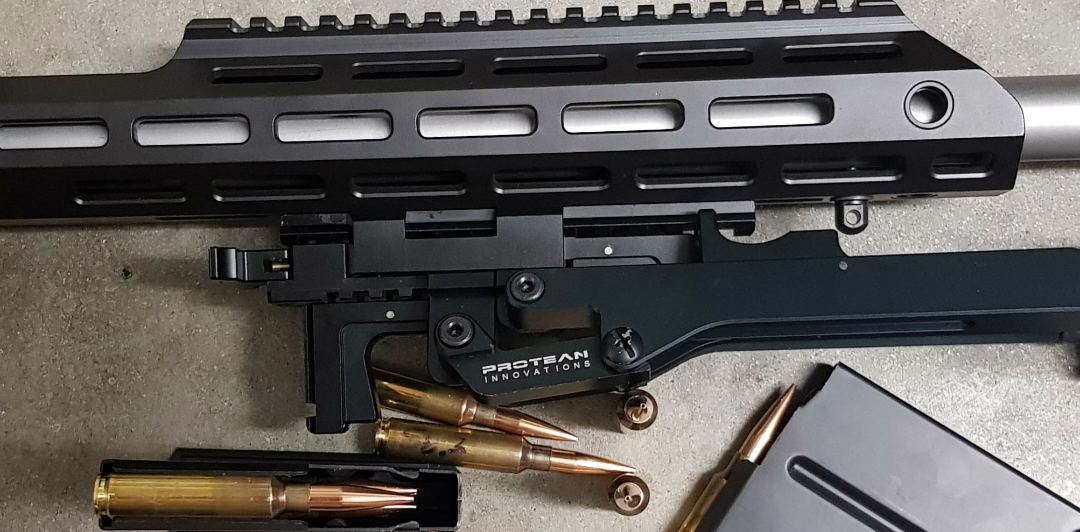
At the rear of the bipod, you can see the deployment trigger hanging down, and the tracking trigger, which looks a bit like a toggle, sitting just below the picatinny rail.

For moving targets this allows you to easily introduce lag or lead without twisting the rifle or running out of horizontal movement, which is very limited on traditional bipods. In competition with multiple targets at varying distances and placements from your shooting position, this can mean being able to engage more targets from the same firing position, without having to move and add time to your run.

To lock the bipod back in place, all you have to do is flip the trigger back to its original position, and as the rifle tracks around to centre, it will click in place. It couldn’t be easier.

I used the Stability Tracker bipod, as well as the Stability Grip again, for Simon Gillice’s practical 22LR event. The bipod ran flawlessly, and as at previous competitions, I had a few people coming up to me and asking where and how they could get their hands on what is objectively a cool looking setup.
Gear for the TSSC Pracitical 22LR shoot.

I did have one failure one the day, and as always, I tell the bad with the good. Between stages I noticed the pin on the tracking trigger was coming loose. Thankfully it didn’t pop out during the stage, or it would have been gone forever. So, I pushed it back in and stopped using the tracking feature for the day, and it was otherwise absolutely fine.

When I got back home, Kyle proved again, exactly the type of company they are. He gave me instruction on how I could stake the hole with a nail and hammer, similar to how you stake an AR15 bolt carrier. This repair worked and has lasted well. But, he didn’t stop there. Kyle later informed me that they took the feedback on board, and had sourced oversized pins to stop this happening in the future. This is a company that is dedicated to a quality product and, as their name says, innovation.

This excerpt below from an email directly from Kyle shows that not only did they seriously consider the issue around the pins, but also that they are constantly refining the design, and looking for better ways to support your rifle.

“For a long term solution I have located a supplier here in the US that makes pins that are oversized. This will eliminate this issue all together. We are continually refining the design. The next production run will have a few enhancements where we will remove some more weight without compromising strength, we will fix the press fit pin issue, and we are working on trimming up the leg extension triggers as well to remove more weight. All in all it should all be even better on the next go around by the time we get to it.”

I did also ask Kyle if a canting version would ever be on the market, but he (quite reasonably) said the R&D showed it would not work. He did do the entire redesign, but found that it added considerable weight, unnecessary complexity, and extra moving parts which made the bipod noisy. With all that weighing against the cant feature, he decided not to pursue it. Not to mention the increased cost to the consumer of the extra feature, which would push the bipod into a price bracket that is probably not viable for your average Joe.
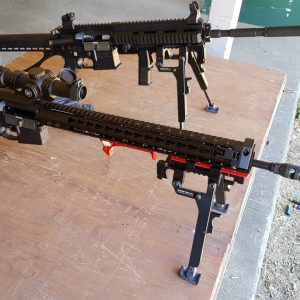
The two models side by side.

I was glad to hear the option had been thoroughly explored before deciding against it, and Kyle has a good point in that you can easily adjust your height using the legs (and extended legs option if you need them), if you often shoot from uneven surfaces. The aim of the system is quick deployment, not lots of finicky adjustment. And if you are on the F-Class line, chances are you are shooting from a flat and stable position. Feedback from PRS shooters and long range shooters has been that a lack of cant has not affected the usability of the bipod.

In our emails, Kyle did say that if he can ever figure out a reasonable way to introduce a cant feature, avoiding the above pitfalls, he will certainly consider it. So, it’s not out of the picture, but it is not a feature the Stability Tracker has right now.

Pros and Cons for the Gen II

The Gen II is a great model, and you can see in it how Protean Innovations continues to evolve their designs. Here are some of the pros and cons of this model.

Pros

  • High quality, solid metal construction and finish
  • Can be made more versatile with optional extras (spike feet, leg extensions, stability grip)
  • Angled shooting positions are easily achieved
  • Can lower your shooting profile when shooting downhill
  • Bipod feet designs reduces bipod hop from recoil
  • Bipod feet design allow for good vertical travel without losing grip
  • Quick deployment of a stable shooting platform when needed, quickly stowed when not
  • Interfaces with a common MIL-STD 1913 Picatinny rail
  • Easily transferable between multiple rifles in seconds
  • Easy/quick to extend legs to correct length
  • Cheaper price than Stability Tracker model

Cons

  • Will need an adapter for chassis or stocks without a rail
  • It is possible to overextend the bipod rearward if you are in a hurry (I was!). There is a simple fix. Either, get used to the operation and take your time, or, I mounted a picatinny-sling swivel stud adapter that I had lying around (took the stud out), just behind the rearward most point of travel, stopping it from going too far back. Easy fix. You could achieve the same with a rail riser, cut down scope ring, or any other picatinny accessory
  • If you push upwards on the stability grip while pushing the deployment trigger forwards to collapse the bipod, it can be a bit difficult to stow the bipod. This is a user issue – once you get used to it, it works beautifully
  • The model is likely to be discontinued as the Stability Tracker takes over as the primary model. If you want one, you’d need to get it in the very near future
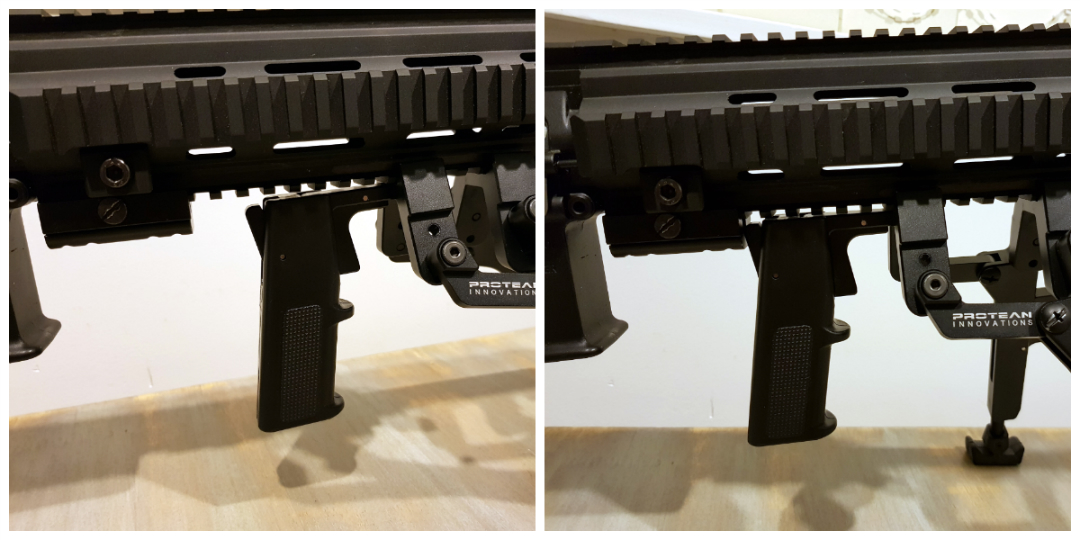
Creating a backstop for the Gen II bipod with Stability Grip means I don't have to think about anything when deploying the bipod.
Creating a backstop for the Gen II bipod with Stability Grip means I don’t have to think about anything when deploying the bipod.

Pros and Cons for the Stability Tracker

The Stability Tracker really is next level when it comes to bipods. Here are the pros and cons.

Pros

  • All the same pros as the Gen II, except that it is obviously a bit more expensive. Also;
  • Ability to pan for lead/lag
  • Smoother operation during deployment/stowing, thanks to its own integral rail
  • Simplified attachment compared to Gen II is even easier and quicker to use
  • Does not have the possibility of overextending during deployment

Cons

  • Will need an adapter if you don’t have a rail on your rifle
  • For a high-end bipod, lack of cant may put some off, but trade-off for weight/complexity is justified

Is this the right bipod for me?

Probably. I can’t personally think of a time when I would not use this system. I still have and use other bipods, but all of my rifles with rails or adapters will now be sharing Protean Innovation products. They’re so easy to switch between rifles, and I like the idea of using one system across multiple rifles. Building familiarity only increases efficiency.
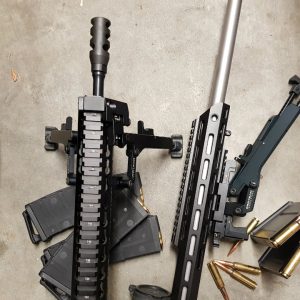
The system is as innovative and user-friendly, as it is cool-looking.

I would definitely recommend the Stability Tracker for anyone looking to shoot PRS-style matches at a competitive level. For hunting, I love the low-profile capabilities the Protean Innovation bipods give you when shooting downhill. And for range use, it has pretty much eliminated the hop I used to get from my more powerful centrefire rifles when shooting off the bench – this is probably the biggest highlight for me.

If you’re in the LE/MIL line of work, this testimonial from one of their customers might resonate with you:

“We have had one army sniper use the Tracker while deployed in Afghanistan. His testimonial was that he pitched his Harris after one mission and never went back to it afterwards. Said he used the tracker the entire time during his tour and refused to use anything else.”

Summary

If you’re looking for a bipod that is innovative and actually improves your shooting experience, I would not look past the Stability Tracker by Protean Innovations. It is robust, quick to deploy, technologically advanced, and a joy to use. The fact that the company are so good to their customers, take on feedback, and actually continue to innovate, is just a huge bonus.
Free Boyds gunstock this Christmas

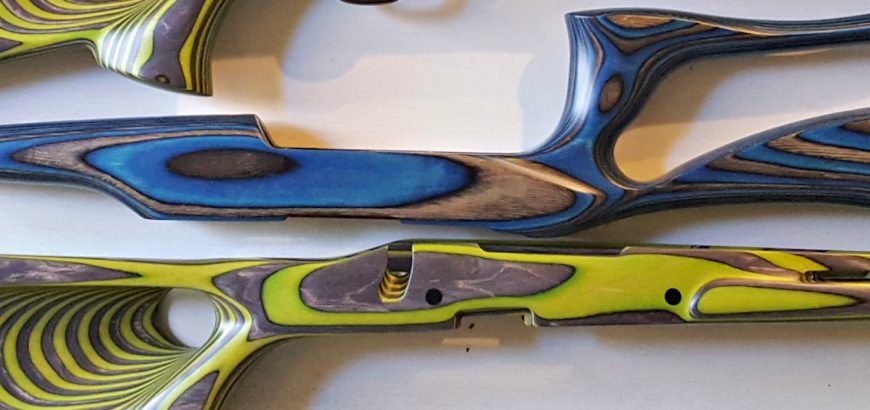
So, it’s been an awesome year, both personally, and for The Gun Rack. Having recently started importing Boyds gunstocks, it’s been great to bring Kiwis (and the occasional Aussie) a product they haven’t been able to have for a long time (certainly not at a decent price, anyway).

To celebrate the end of an awesome year, I’m giving away one free stock to one of you lucky buggers. If you buy a stock in our next order, you will have a 1 in 10 chance of having the full cost of your stock refunded to you, including the GST and shipping costs.

Lots of pepper in this @boydsgunstocks order! #boyds #wood #gunstock #rifle #pewpewpew #accessorize #laminate

A post shared by The Gun Rack (@gunracknz) on

How will it work?

This is the last order for the year, and I already have 2 out of 10 spots filled (those 2 guys will qualify too). For the next 8 people who jump onto this order, simply:

  • Head on over to the Boyds website and find the stock and upgrade options you want
  • Send me an email with the stock details to get a quote
  • Place your order (this includes payment upfront, as usual)
  • Wait for your awesome stock to arrive, and hopefully for some cash to hit your bank account too!

If you want to read more about the ordering process, head over here, or email me. Unfortunately the stock won’t arrive before Christmas, as it takes a while to manufacture, ship, get through customs, courier, etc. However, if you are the lucky winner, you will get your money back as soon as the order is complete (which will hopefully be before Christmas!).

The winner will be chosen using a random draw method of some description. The decision will be random, and it will also be final (And no correspondence will be entered into, etc, etc,. Basically, I’m giving away something free, don’t be a douche if you don’t win).

Merry Christmas everyone, and thanks for being part of The Gun Rack community and our journey importing Boyds gunstocks into NZ (and AU). I’m hoping in the new year to be bringing in some other cool bits and pieces – will keep you updated on that.

Boyds rifle stocks in New Zealand

When I started shooting, I had a penchant for buying budget guns and trying to improve them to compete with much more expensive guns. With some home tweaks, such as trigger jobs and recrowning, a certain level of success could be achieved. The two things I would spend money on would be a good scope, and a stock from Boyds.

While we have access to some great optics in New Zealand, it’s been almost impossible to get a Boyds rifle stock for a long time. With the US$100 export limit on certain firearm-related items, New Zealanders have had to try and buy the cheapest of the stocks on offer, with no upgrades or customisation, or wait for a run-out special that matched their firearm/stock combo. Unfortunately as prices have naturally risen, even the option of squeezing in under $100 has just about disappeared for most items.

Are there any NZ Boyds dealers?

There have also been various businesses in NZ that have had a Boyds dealership at one time or another – but they’ve always been bloody expensive. In many cases, the stocks would have cost more than people had spent on their rifles to begin with – and the options were limited too.

So – we’ve tried to fix this issue.

I’ve long been a fan of Boyds stocks, and you can read about stocks I have used over the years in the product review section of the website. In order to give everyone else access to the same stocks that I’ve really enjoyed using – and at a reasonable cost – we’ve established our own Boyds dealership in NZ.

This Swedish Mauser was my second ever Boyds project, in a Prairie Hunter stock.

The Gun Rack and Boyds Hardwood Gunstocks

Yup, you can get any Boyds stock you want, with any customisations. There’s no federal export limit, and you don’t have to pay a retail store half of the deposit of an Auckland 3-bedroom house either. In fact, we can get you a basic Boyds stock, delivered to your door, for around NZ$525. If you want to spend more and get an adjustable comb, custom colours, change the LOP, or whatever, you can do that too. We’re also able to sell the At-One stock, at around NZ$640, delivered.

So, how come we’re able to do this? Well, we can bring in the stocks because we have a federal export licence from the US government, specifically for Boyds stocks. And how do we do it so cheaply? Quite simple. We’re not greedy. We make a very small amount of money on each stock, and that money means I can buy ammo and other bits and pieces to keep this website going. I’m much more interested in bringing something cool to NZ shooters than I am in making a shed load of money.

If you want to order a Boyds stock, you can email me at info@gunrack.co.nz or head over to the Boyds page on our website to learn more.

Product review: Vortex Strike Eagle 1-6x24mm

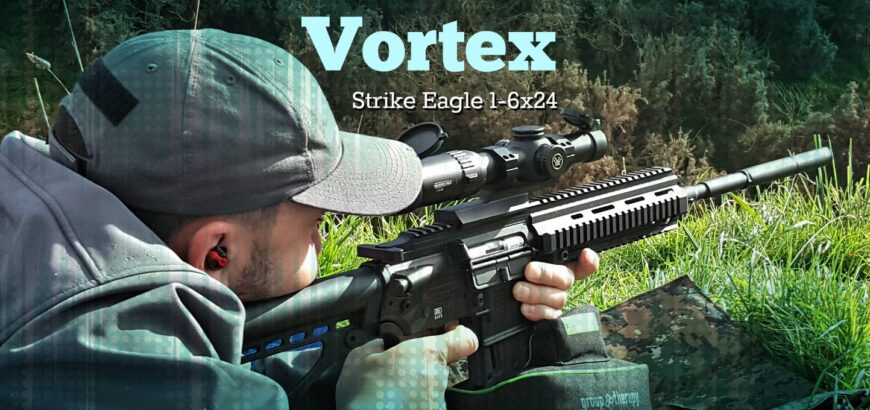
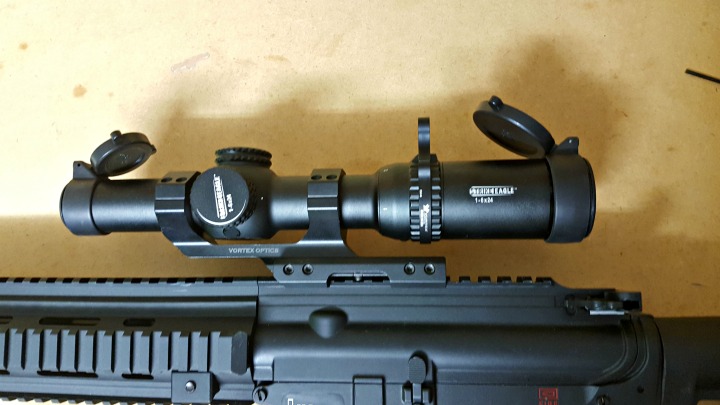
In a market saturated by black rifle parts and accessories, is there room to stand out? The Vortex Strike Eagle has been around for a couple years, and it has certainly carved its niche in the landscape of optics for the ubiquitous AR-15. So, what sets this scope apart?

Image credit: Vortex

The reticle

Really, to gain traction in the glass game these days, you need to be offering innovative sighting systems. It wasn’t too long ago that grid reticles weren’t even a thing. Now, most long range shooters wouldn’t look past them for practical or tactical style shooting competitions. With the Strike Eagle, Vortex went the other direction, tending towards the simple and easy to use.

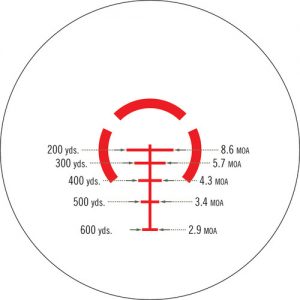
The AR-BDC (AR Ballistic Drop Reticle) is designed to give easy elevation holdover using common .233/5.56 loadings. With a 50 yard zero, the crosshair is good to use from 20 yards through 200 yards, on any magnification setting. On 6 power (top of magnification range), the hashmarks equate to a holdover for 300, 400, 500 and 600 yards.

This makes for very fast shooting for competitions such as IPSC or 3 Gun, and combined with a switchview throw lever, extremely quick transitions from near to long-range targets can be achieved, without relying on a secondary optic or BUS (back up sights). Another feature which aids quick target acquisition is the halo that surrounds the crosshair, drawing your eye to the centre of the reticle.

A Vortex V-4 Switchview Throw Lever is installed in literally a minute, and makes your life so much easier.

There is a newer version of the Strike Eagle, which comes with a 1-8x magnification range and the AR-BDC 2 reticle, which follows the general principals discussed above. It also, however, has holdover notches for 5 and 10 mph winds, again, aiding quick decision-making while engaged in a course of fire.


What if I’m not shooting .223 Rem?

One of the wonderful things about the AR platform is its versatile and modular nature. As such, many of you will likely have an AR-10 or AR-15 in a different calibre, and the AR-BDC hasn’t got you all giddy yet. Well, the manual for the reticle does include drops for your average .308 Win load. And if you’re getting more exotic than that, you can easily use the Vortex LRBC (Long Range Ballistic Calculator) to work out drops for your specific rifle and ammunition.

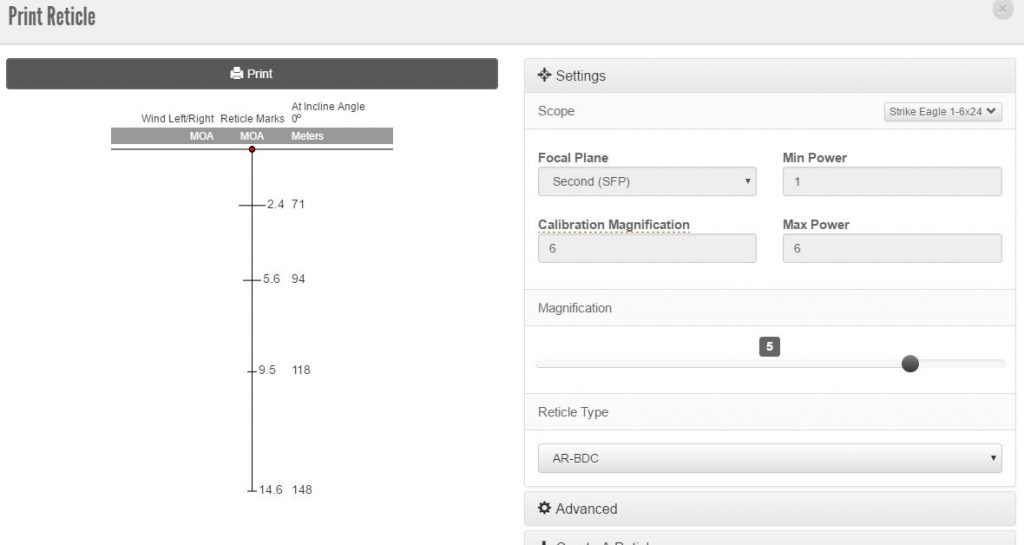
I’ve been using the Strike Eagle 1-6×24 on my .22LR trainer, which is a Carl Walther produced HK416D. By plugging in my ballistic data for CCI standard ammo (which I verified with a chronograph), I was able to find my drops on the various hashes in the reticle. In preparing for the PSNZ22 practical rimfire shoot, which had known distances of 40 m to 150 m, I zeroed at 50 m and used the LRBC to produce the below reticle image.

The Vortex LRBC web app is incredibly useful for figuring out drops and wind holds, and can give you traditional drop charts or reticle images such as the above.

As you can see I had a pretty good holdover for 70, 95, 120 and 150 metres on the 5x setting. Getting used to the magnification settings (or writing them down) you could actually get quite a precise drop on a specific hashmark by change your zoom level.

Outstanding features

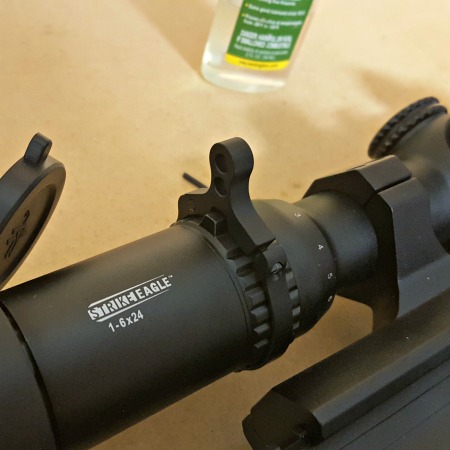
There are a few nice extras that help to keep this scope top of mind when considering an optic for ‘run and gun’ style comps. The included flip caps mean you don’t have to worry about losing or forgetting a bikini style scope cover. It also adds to the ‘tactical’ look that many strive for with their black rifles.

Also included is an illuminated reticle, with 11 brightness settings. Sure, this isn’t anything new, but it’s well thought out. The dial is on the side of the sccope, rather than near the ocular bell. This means you hardly have to lift your head to see the setting you are selecting.

I don’t often make use of illuminated reticles (black targets at extended ranges probably being a notable exception, with my Viper PST), but I found this one particularly useful for the inaugural PSNZ22 shoot, which was shot in overcast conditions in pouring rain. I mean, bucketing down at some points. Having the illuminated reticle on very bright setting (it was still daylight after all), I was able to easily pick up on the subtensions and holdover, despite shooting against black or dull targets, obscured by rain.

Speaking of rain, if you get it on your scope lenses – don’t try and blow it off with your mouth before you shoot. You’ll just fog up the glass for a few seconds, which is very disorientating. And I did it twice!

Build quality

The Strike Eagle is exactly what you pay for. The glass is not the same quality as the Vortex long range scopes, but you don’t need it to be for this style of shooting. The construction is solid, yet refined. Not to mention, backed by the Vortex unlimited lifetime warranty. Did I mention the rain before? Because, damn, did it rain! The Strike Eagle 1-6×24 held up its end of the bargain, delivering outstanding reliability, and has done so on several trips since.

The turrets are capped – so if you’re wanting the ultimate tacticool sniper rifle scope laser sight with external tactical tactile turrets, this might not be the one for you. However, if you’re interested in shooting quickly from a defined zero while holding over at known or ranges, this scope will fit the bill, without the risk of bumping your turrets while throwing your gun around the course.

A cantilever mount with 2 inch offset assures correct eye relief and proper alignment of the 30 mm tube.

The negatives

When I first looked at the Strike Eagle, one of the other writers from the blog noted that when they had seen one in-store, the 1x magnification setting, was actually smaller than normal vision – in otherwise less than 1x. I was concerned about this and wrote to Vortex, and they pointed out that eye relief can make a difference in this department. After playing with the eye-relief adjustment ring, I found the perfect spot, and the magnification was true to what it said on the dial. So, not a negative, but something to keep an eye out for (pun intended).

There was one negative. I found the battery cap on the illumination knob wanted to unscrew when I manipulated the dial in the same direction as the thread. This may have been a missed thread on my scope in particular, or it could be something to watch out for when checking out the scope for yourself. Either way, I did not feel it was a big enough deal to try and send back for repair or replacement. In fact, if I just grasp the dial by the body of the knob, rather than near the edge, there’s no problem.

It’s inconvenient if you’re trying to maneuver yourself and your firearm quickly – it’s just one more thing to be mindful of. However, as I mentioned above, Vortex have the best warranty in the business, so if you find yourself with a part that doesn’t feel quite right, don’t be lazy like me – ask them to fix it, and they will.

Overall impression

Ten out of ten, would buy again. Yes, there are ‘better’ AR optics out there. You could have a very sophisticated piece of equipment, or you could go rugged and basic, I’m sure you could find something that beats the Strike Eagle in one way or another. However, I personally think that very few optics deliver in all the ways this Vortex unit does, and at the same price point.

If you want a reliable and easy to use scope with great features at a reasonable price,  I don’t know what more you could ask for.

Beginners guide to buying a hunting bow

Bow hunting is one of those things I have always liked the idea of. It complements the usual rifle hunting so well, but adds a number of different elements. In recent years I have seen more and more bow hunting photos and trips popping up on my favourite hunting shows and Facebook pages, which started to whet my appetite even more.

I decided I would try and get myself behind a bow to give it a go, I had never even shot a compound bow before, so didn’t really know if I was going to enjoy it or not.

Full disclaimer time, I’m writing this as a reasonably knowledgeable newbie, I’m not an expert by any means. There are plenty of very knowledgeable “pros” on the internet so please do plenty of your own research, I’m writing this to help others who may have thought about giving it a go to get into the sport from a novice’s perspective.

Initially I did a fair bit of internet research, saw what you should look for in a bow, how to shoot one, what others were using, and what sort of things I thought I might want in a bow, should I ever get one. I gave myself a bit of a budget to keep in the back of my head. It wasn’t huge, as I had all my hunting gear and it was only the bow-specific things I needed, but I also didn’t want to buy something cheap and nasty, which I would outgrow in a year or so.

Stag..gering. #CarbonDoneRight @OutbackOutdoors | #IAMDEFIANT #GetSeriousGetHoyt #HoytTaggedOut

A post shared by Hoyt Archery Inc. (@hoytbowhunting) on

Fit for purpose

With all this in mind, I rang a couple of local archery stores, told them I was a complete newbie and asked what I should be looking for, and if they had anything that may suit me. Everyone I spoke to was extremely helpful, and I learned a great deal from the phone calls alone. In particular, how important it is to get a bow fitted to the shooter, rather than just grabbing something off the shelf. You need to adjust draw length, poundage, arrow length, peep sight placement, etc., for each individual shooter. This is all easily done by an experienced archer, but for the completely uninitiated, I would highly recommend going along to a store and getting fitted correctly, rather than just buying off the shelf.

During one of my phone calls the guys from Advanced Archery invited me down after work one evening to shoot a few different bows and get a feel for it. Obviously an opportunity I couldn’t pass up.

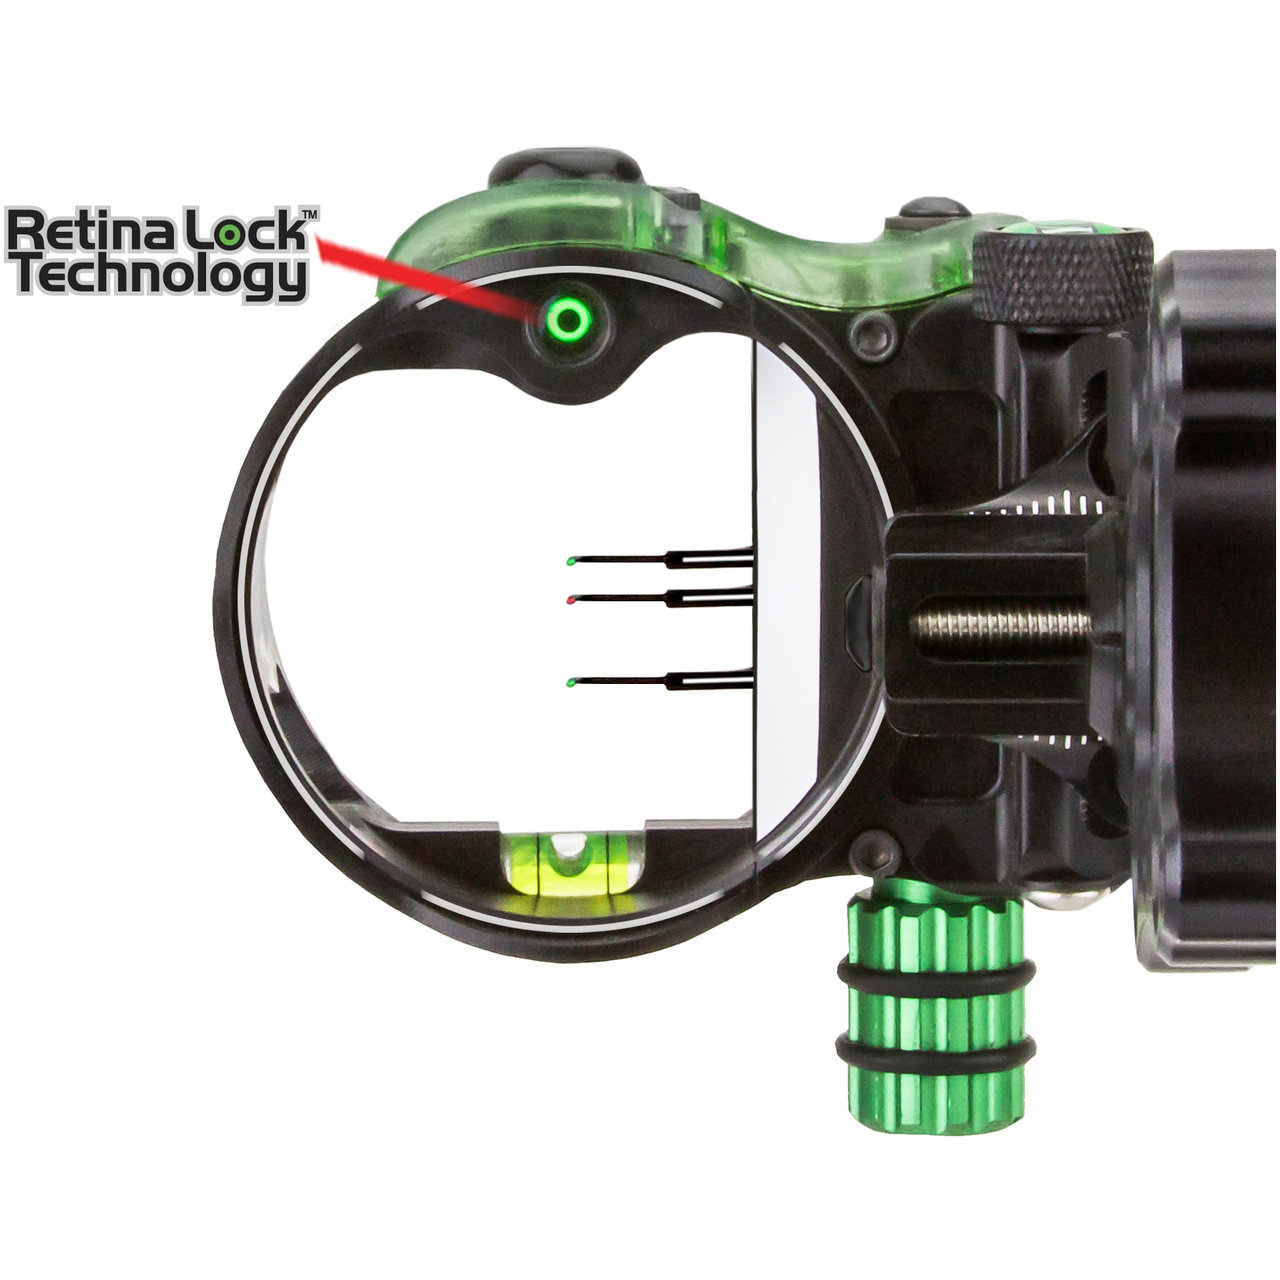
Compound bows and their accessories are probably quite a bit more modern than you expect. Pictured - bow sight with holdover pins. Image credit: Advanced Archery
Compound bows and their accessories are probably quite a bit more modern than you expect. Pictured – bow sight with holdover pins. Image credit: Advanced Archery

Getting measured

I walked into the store having never shot a bow and knowing only what I had read about, or seen on videos. The guys at Advanced Archery sized me up and showed me a huge range of bows that could be adjusted to fit me. They suggested I try them all and were only too happy to spend the time setting each one up for me to shoot. We spent several hours on their indoor range, shooting all different types of bows in all different configurations, and learning lots of little tips and tricks. By the end of the evening I was shooting like a pro (well, shooting a heap better than I was expecting to), and knew exactly what I liked and what I didn’t.

This type of customer service and support is fantastic to see, and as such I would highly recommend going along to check them out! (I have no affiliation with them other than being a happy customer).

What should I look for in a bow?

So, if you’re interested in getting a bow, what sort of things do you need to be looking at?

Well, obviously, each person is unique and has their budget in mind, but in general I would highly recommend getting a bow that has a good adjustment range. Some of the very expensive bows are quite specific. Yes, they are probably better at their intended job than the cheaper bows, but as a newbie you probably want a slightly more forgiving bow (you don’t want to try and learn to drive in a Formula 1 car), but likewise you don’t want a bow that you’re going to outgrow in a short time. For this reason all the big bow makers have started releasing a range of bows that cover a wide range of users (Hoyt Inferno and Mission Craze both come to mind).

There are higher end bows that are modular, and will allow you to adjust by adding or removing modules. There are also adjustable cam models. Of course, this comes down to how much you plan on spending on your bow hunting venture.

Draw length is the adjustment that determines how far back you have to pull the string to load the bow. This is usually measured based on the height of the shooter (Da Vinci taught us that height = arm span) so it’s a fairly simple calculation for those who know what they are doing. There are a few more variables to consider, such as the draw length on your left- and right-hand-side, so getting a custom fitting is a great idea for those new to the sport. Its important to get this measurement right as it will have a huge impact on your repeatability and overall accuracy. A bigger adjustment window will mean it will suit a wider range of shooters (and therefor may help with resale if you ever decide to sell).

What will you be hunting?

Bow Poundage is the next measurement, Most high-end hunting bows should give you a range of at least 10 lbs. This means a 70 lb bow can be adjusted down to 60 lb, a 60 lb bow to 50 lb, etc.  There are a couple of schools of thought on what you should set it at, one is that more is best, the higher the bow poundage the further it will fly and more powerful your shot will go. There is some truth to this, however based on conversations I have had with some of the countries best bow hunters there seems to be a feeling that most new bow hunters here tend to over poundage for our conditions, think shooting turkeys with a 50BMG.

The down sides of too much poundage is that it takes more effort to draw the bow, this has a direct result on how steady you can hold it and how many shots you are comfortable making in a session.  You have to remember with a bow you’re not shooting for long range distance, your shots are generally going to be between 10-40 yards, so you only need enough poundage to humanely kill the animal you are hunting at that range, any more is really a waste and has impact on your accuracy.

What you intend to hunt will have a direct result on where you should set your poundage.  (For those who haven’t shot a compound bow before, when you draw you are pulling through the maximum weight. When you get the bow drawn completely back, it hits what they call the valley in the cams, and the poundage you are then holding is only a quarter or so of the bows actual poundage. This means it is relatively easy to hold at full draw). Again a proper fitting from an experienced shooter will help here as they can watch you shoot and adjust the bow accordingly.

Selecting arrows for hunting

Most shops will sell packages of everything you need (walk in, walk out, go hunting), expect to pay $850 to $1400 ish for a middle of the road bow package or $600 to $1200 for just the bow. Obviously just like firearms you could spend less or spend a lot more, but for a starter package your not going to grow out of in 5 minutes this is what I would suggest.

Can your broadhead do this? #canyours #ragehole #rageinthecage #dothis #wow

A post shared by Rage Broadheads (@ragebroadheads) on

Arrow length, weight and thickness are more variables that are best left to the experts. There is a calculation to be done which takes into account your draw length, the poundage you are shooting, and what you are going to be shooting at. This will all have a direct impact on how the arrow will fly, and therefore accuracy. Arrows aren’t overly expensive, expect to pay $12-$15 each for your first set of arrows depending on what you need, and you can use them many hundreds of times (until you lose them). These will be included in most packages. I’m not going to go into detail on arrow tips in this article, your arrows will come with field points (sharpened tips for target shooting) which can be unscrewed and switched out for hunting tips, tips are a whole article on their own…

Peeps & sights for bows

A "glowpeep" which gets spliced into the string. Image credit: Advanced Archery
A “glowpeep” which gets spliced into the string. Image credit: Advanced Archery

Sight wise, as you would expect, much like rifle shooting there are a number of options. Hunting Bow sights have two parts, the front sight and the peep sight. The front sight attaches to the riser of the bow near the grip, they generally have 1, 3 or 5 pins that extend into a circle, which are set like crosshairs at different ranges (e.g. 20, 30, 40 yards). Again these will come with the packages, but if you want to buy one separately expect $60 – $350, depending on what you want (some come with inbuilt lights, bubble levels, etc.).

The peep sight is a smaller circle which is spliced in to the bow string at the point at which your eye sits when you draw the bow, the idea being you look through the peep sight to align the front sight.

Quivers

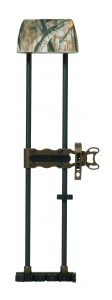
Quivers. These attach to the bow to hold your arrows close at hand and keep the sharp tips covered while you’re climbing through the bush. Again as you would expect there are plenty of manufacturers and styles available so its down to personal preference, but one thing to consider is by putting weight (quiver and 5 arrows) on one side of your bow it will want to cant to that side when you draw it.

Tight Spot quiver. Image credit: Advanced Archery

Not a problem for many people but If I was doing it all again I would pay a bit more to buy a quiver that is light and fits close to the side of the bow to reduce this cant instead of the one I got with my bow. (A company called Tight Spot makes a great quiver for this but expect to pay for it). Packages will come with a basic one which will be fine, or you could buy a basic one for $40ish but if you want a Tight Spot or similar expect to pay around $200ish.

Release aids

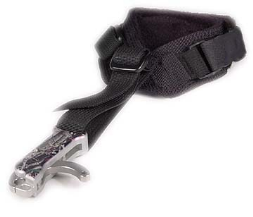
Release aids, when you picture olden day archers you think of people grabbing the string with their fingers and drawing the bow back. These days bow hunters and the majority of target shooters use release aids. For hunting, these generally consist of a strap which tightens around your wrist with a small clamping device which extends out. The idea is you clamp a small string loop which is spliced into the main bow string behind where the nock in the arrow sits, this holds the string tight and allows you to pull the string back without any weight on your fingers. When you’re ready to take the shot you pull a small trigger that extends out just like a rifle.

A release aid - this shouldn't be too difficult a concept for those familiar with firearms. Image credit - Advanced Archery
A release aid – this shouldn’t be too difficult a concept for those familiar with firearms. Image credit – Advanced Archery

Again there are plenty of different brands and models available, they essentially all serve the same basic function, but you are paying for the cleanness of the break much like aftermarket rifle triggers. Most packages will come with one that will work fine, but if buying one expect to pay $40 to $250 depending on what you want (and more if you’re really keen).

A good trigger release aid is one that has no trigger travel. It’s worth the spending the money on, as it will make you a better shooter. If you have any more money in the budget over and above the minimum, this is the first thing to spend a bit extra on – it will make you a better shooter.

That’s essentially all you need to get out there and do it.. If you’re a hunter looking for a new challenge, or a way of simply complimenting your shooting sports I would highly recommend adding a bow to your Gun Rack.

I’ll try to keep you updated with my progress as things happen, but if you have any questions let me know and if I can’t answer them ill find someone who can.

Link to source of feature image

The dark arts of Chronographs

Chronographs are getting more and more common in shooting circles these days, and you will likely see at least one on your next visit to the range. So what exactly do they do? Well, on a basic level, they tell you how fast the projectile you are firing is traveling once it leaves the rifle.

Why is this important to know? Well, a couple of reasons. Firstly, all things being equal, the more consistent speeds your projectiles travel at, the more consistent you groups should be (ignoring all other factors which contribute to overall accuracy). Secondly, and perhaps most importantly, by knowing how heavy our projectile is, how aerodynamic it is, and how fast it is travelling when it leaves the barrel we can accurately calculate the bullet’s trajectory over any given distance.

Ballistic Precision Chronograph G2 - A light operated chrony by Caldwell Shooting Supplies [image credit: BTI Brands]
Ballistic Precision Chronograph G2 – A light operated chrono by Caldwell Shooting Supplies [image credit: BTI Brands]
As a bit of background on me, having worked at several paintball fields over the years using chronographs to check the speeds of every paintball marker each time it entered the field, I can comfortably say I have spent more time using chronographs than most recreational shooters. I have also previously owned a radar chronograph and currently own a magnetic chronograph. That being said, I’m by no means an expert on the topic, and the purpose of this article is really to  help those new to the topic understand a little bit more about these instruments.

What types of chronographs are there?

The first thing you need to know is that there are three main types of chronograph available to us as shooters; Light Chronographs, Magnetic Chronographs and Radar Chronographs.

I’ll try and explain a little about each below:

Light Chronographs

Light chronographs use a series of light sensors (usually two, but sometimes more) placed at a controlled distance apart in order to measure how long it takes for a projectile to break each of the light beams and calculate speed based on this. These chronographs are set up at a specific distance in front of the rifle or pistol on a tripod or bench (i.e. in front of the firing line, for those shooting on a range this may be a problem) and shots must be made in a way that breaks both beams.

Light chronographs are considerably cheaper to manufacture than the other types, and so can often be purchased for a reasonable amount. This type of chronograph is however affected by ambient light, so much so that even clouds passing in the sky may have an impact on speed readings. To get around this many manufactures create plastic hoods to help control the light above the sensor with varying degrees of success, but the same round is likely to show a slight variation day to day depending on conditions.

For this reason, light Chronographs are generally considered less accurate by nature than the other types available. This may not be an issue in reality however, as 10 or so feet per second variation between shots when you’re talking about 2800 fps is really quite minimal so may be fine for what many shooters require.

One thing I personally don’t like about light chronographs however is I find them hard to read. This is very much a personal thing and I’m sure 95% of people won’t have this issue, but I find trying to read a small LED screen that is 2-3 m in front of me, with a sun reflection, quite difficult. And because it’s in front of the shooting line I can’t just go up for a closer look. Some units do allow aftermarket screens to be connected which are either larger or sit closer to the shooter to get around this (just something to consider).

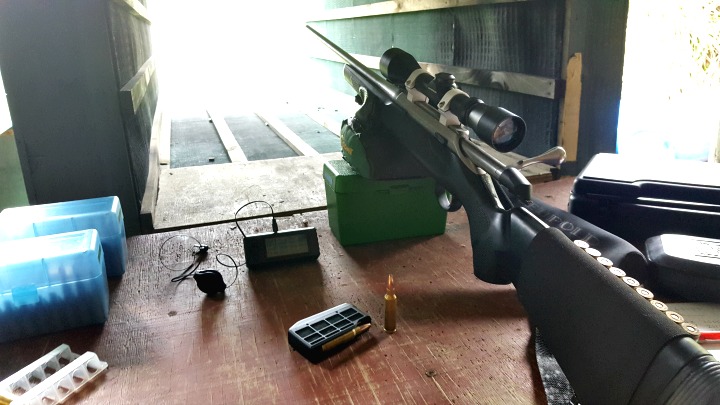
Having a screen at the shooters position makes life a lot easier.
Having a screen at the shooter’s position makes life a lot easier.

Magnetic Chronographs

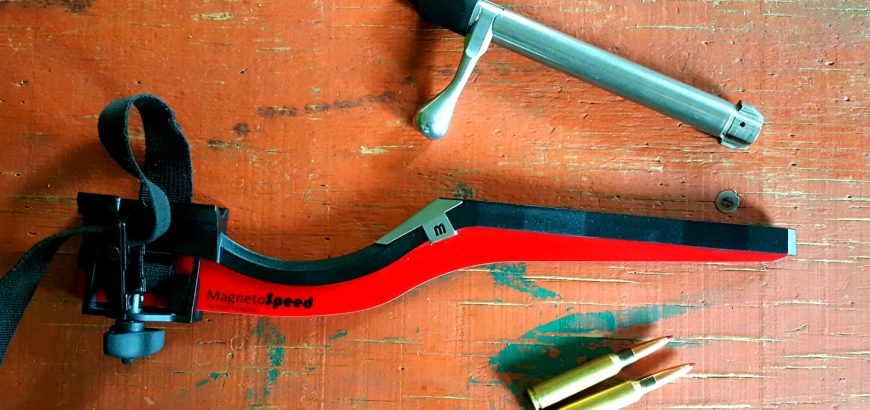
The second type of chronograph is a magnetic chronograph. These types of chronographs use sensors which produce magnetic fields and then measure metal projectiles as they pass through this field. These types of chronographs often mount to the rifle, or have a platform the rifle sits on when firing in order to keep a constant distance from the projectile as it passes.  

The types that mount onto the rifle have positives and negatives, the positives are that the measurements are consistent and accurate as the chronograph and rifle move together it eliminates any error created by the shooter’s/rifle’s position repeatability, it also means that a shooter doesn’t have to go in front of the firing line in order to set it up, and this type of chronograph has the ability to register very fast strings of fire (i.e the ability to register and measure every shot on a full-auto AR-15 without skipping a beat).

If you're going to shoot subs or cast lead bullets, don't forget to adjust your sensitivity settings.
If you’re going to shoot subs or cast lead bullets, don’t forget to adjust your sensitivity settings.

The negative is that you are strapping something to your rifle which has the potential to affect harmonics and adjust your point of impact. I will say I own a barrel mounted magnetic chronograph and have not had any change in point of impact as a result of using it and neither have many shooters I have spoken to. However, I have heard from some shooters who have had very slight point of impact shifts. This may or may not be a problem for you depending on your setup and requirements.

This type of unit may also be difficult to use on certain pistols, particularly those without rail mounts on their frames. One other negative is that solid lead rounds may be difficult to detect without sensitivity adjustment (jacketed bullets are fine), as lead has a very low magnetic field.

[Editor’s note: As long as you remember to adjust your sensitivity settings, you should be fine. I’ve used this type of chrono on subsonic (~950 fps) cast lead bullets with good success.]

Radar Chronograph

The third type of chronograph is a radar chronograph, and you guessed it – this type uses a radar (Continuous Wave Doppler) signal to project downrange and calculate the speed of the projectile as it travels through the radar wave zone.

The benefits of this type of system are that you set it up parallel to your shooting position, so there is no need to go forward of the shooting line. They also don’t touch your rifle, so have no possibility of impacting harmonics, and unlike an on-barrel magnetic chronograph, you set it up once per session and you don’t need to move it in order to test different rifles.

Some radar chronographs also give you the ability to set a tolerance range and any shots outside that range will be indicated by an audible ‘beep’ so you are getting instant feedback without having to monitor the output screen. The downside to this type is that they often struggle to distinguish between different shooters / projectiles as they pass through the radar waves. If you are at a range with people shooting next to you, it’s potentially not going to know whose shot is whose and may give you readings for the guys next to you, also.  Some units have different methods of trying to prevent this, such as microphone triggers / built in software etc.

These units may also struggle to work in some shooting tunnels both due the their need to be set up near the shooter and project forward and also the radar wave “bouncing” off the tunnel walls giving false signals.

Test fire and choosing a chrono

Some recent basic testing we did using a magnetic chronograph and a light chronograph showed 6-7 FPS variation between the two respective readings for the same round, with the light chrono reading faster than the magnetic. With the speeds we were shooting this equates to around a 0.2% variation between the two units which I would suggest is more than accurate enough for most recreational shooters to know what they want to know.

How much you want to spend on a chronograph is up to you, as always there are cheaper and more expensive units out there, and what features you want will also impact price. In general, light chronographs start around $200 NZD for basic models and go to about $500. Magnetic and Radar chronographs start about $400 and go up to about $1000 depending on what functionality you want.

Some of the positives and negatives discussed above may or may not be applicable to you and how you intend to use it. Hence the cheapest light chrono may be fine for your purpose, or you may feel you need to spend $1000 + on a radar unit with all the bells and whistles.  I would suggest if you’re looking for your first chronograph that you will probably use a few times a year to develop loads for hunting, then the cheapest light chronograph will likely tell you everything you need to know.