Bullet selection for hunting this roar

For many young girls and guys around the country, this roar will be their first opportunity to hunt – or at least to hunt some of the more prized species New Zealand has to offer in their prime coats and colours. While a shooter may be proficient with their weapon of choice, this does not automatically make them a good hunter.

Aside from the bushcraft, fitness and stalking involved – not to mention antler-induced-excitement behind the trigger – a serious consideration is the choice of ammunition. Fortunately for those shooting a more common calibre, there is plenty of off-the-shelf ammo that will do the trick. If you don’t intend to shoot much aside from sighting in and hunting, then buying ammo makes much more sense than reloading.

Bullet choice in New Zealand

Some common hunting calibres in New Zealand include .308, .303, .223, 6.5×55, 7mm-08, .243, .270, .260 and .30-06. To a limited extent the old Russian military calibres see some use (7.62×39 on goats or yearlings at close range or 7.62x54R if you’re running around with a sporterised Mosin-Nagant). And .300 BLK is becoming quite popular for goat culling or in short-range (but fancy) bush guns.

If you’re buying ammo for more common calibres like .308 or 7mm-08, your store owner’s recommendation will likely be good enough. Remington Core-LOKT and Winchester Power-Point are popular choices, and Hornady Whitetail does very well in most modern bolt actions too. However, for reloaders who have been chasing accuracy, bullet choice can change the game completely.
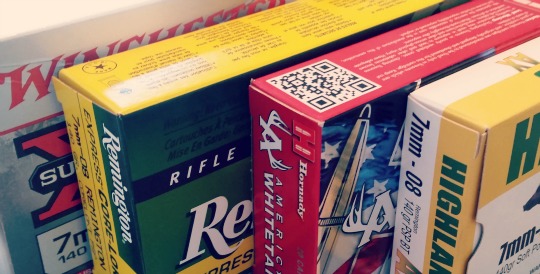
Some of the more common 7mm-08 hunting choices.

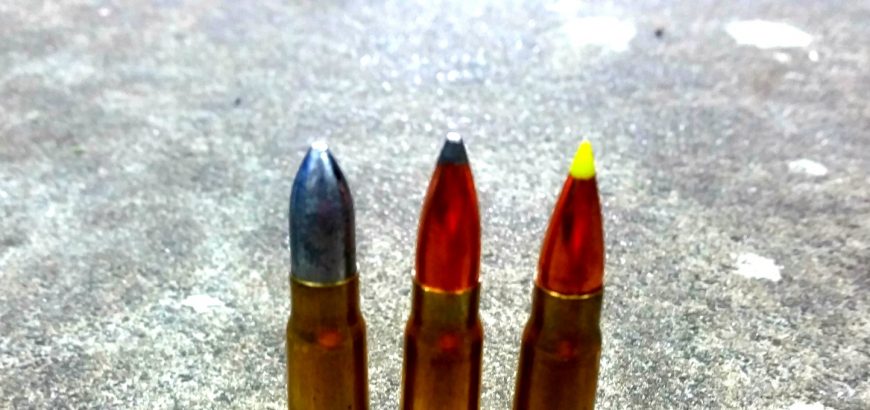
For example, with my 6.5×55 a 142 gr SMK or 140 gr AMAX does a beautiful group at 100 yards. In fact, my new favourite is Norma-Sierra 144 gr – it’s a factory load, but I can’t seem to beat it with the projectiles I have on hand. However, all of these loads have hit-and-miss performance on game. The AMAX less so, but certainly the SMKs are not meant for hunting. They have erratic terminal performance, sometimes yawing and producing massive wounds, sometimes producing pinhole wounds that can lead to inhumane kills and extended tracking of wounded animals.

But isn’t the Sierra Match King a hollow point? Yes it is, however the HP in this projectile is not designed for expansion on game. This hollow section in the bullet is to keep weight to the rear of the bullet, stabilizing it in flight and making it a more accurate round.
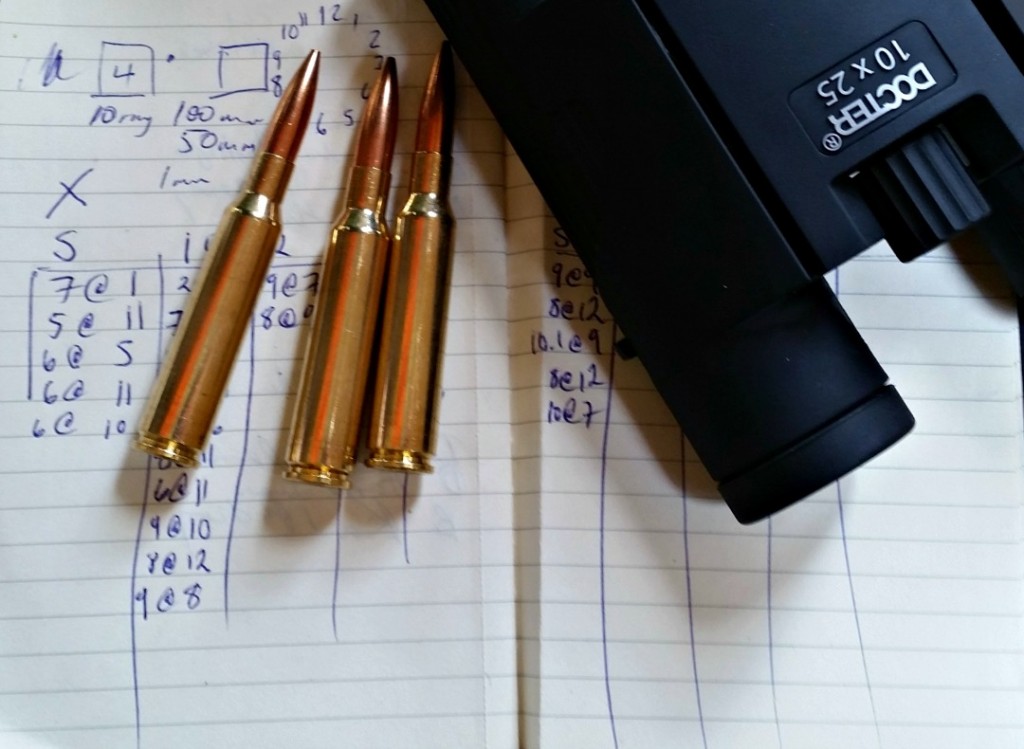
The SMK looks great on paper but does not produce consistent wounds.

Factors like this need to be considered carefully, especially in calibres with higher sectional density, which can lead to deep penetration, but poor expansion if bullet choice is incorrect. This can be prominent in the 6mm and 7mm calibres.

If you’re about to start working up your hunting load for this year’s roar and do some quick sighting in, there are a few ways you can narrow down your bullet selection. You could start by checking out the forums or facebook pages and seeing what others with your rifle/calibre have been using. Or you could start by doing some research on sites like Nathan Foster’s Terminal Ballistics, or checking out the projectile manufacturer’s website. If you are the type to learn better by doing rather than reading, try a sampler pack from Gunworks to get a few different projectiles through your rifle and find its sweet spot.
Rifle stock bedding and finishing: Part 2

In the first part of this blog series, I looked at the rifle stock I’ve chosen for this project – Boyds Prairie Hunter – as well as the bedding compound I’ll be using – Matchgrade Bedding Compound. In this piece, I’ll go over the initial fitting of the stock, and the bedding process.

Prepping the stock

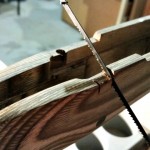
A hacksaw blade gives nice, crisp edges.

Whether you choose to bed your stock or not (you should choose to 99% of the time), your stock may need some prep work. The Prairie Hunter is quite a classic shape, with a nice cheek swell and elegant lines forward of the action. Supplied with sling swivels and a nice butt pad already in place, there’s not much you need to do to get this stock looking great.

Because of my model of rifle, I had to remove material to provide the clearance for the bolt handle. For this reason, my stock was provided unfinished (uncoated). Fortunately, with the bent M38 handle, there wasn’t much to take out. I simply used a hacksaw blade to achieve the angle and depth of of relief needed, and removed the material between the two cuts with a small file, and then some sandpaper. By doing the two cuts on the outside, the relief is quite crisp and even.

Next I had to deal to the plastic nose cap. There are several options you can go for here, ranging from the synthetic (cheapest), through to rosewood and others. Of course, for a more simple appearance and cheaper project, you may choose to exclude this option.

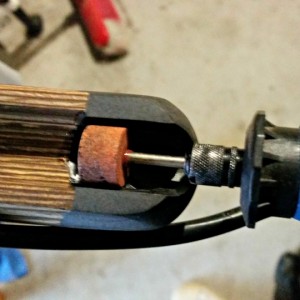
A dremmel makes quick work of evening out the nosecap.

The nose cap and the pistol grip cap where both ground to fit, however, the barrel channel of the nose cap needed some relieving to ensure the barrel is free floating. These caps are obviously produced to allow for common barrel dimensions without having excess clearance, which would look terrible and accumulate dust and grime in the field. So, in this sense, having to clear this out for your particular barrel shape is actually a benefit, as you can ensure you have a free floating barrel, with a minimum of clearance to keep your barrel channel free of any foreign debris. Of course, you’ll want to make sure it matches up nicely with the lines of your stock.

Aside from that, my Boyds stock was good to go. However, as I’m bedding this rifle as well, I chose to leave the final coating of the stock for after the bedding process. This way, any spilled bedding compound or other marks can be easily removed when I do the final sanding before oiling the stock.

Glass bedding the action

The term ‘glass bedding’ comes from the fibreglass-like products that were used in the past to mate barrelled actions to their new homes. Material choice has improved in leaps and bounds, however there are a few prominent bedding systems that seem to have really got it right.

There are a couple that you can find on Brownell’s (if your in the states), or Gun City, Reloaders, Serious Shooters, etc., in New Zealand. However, far and away my most preferred bedding compound is Nathan Foster’s Matchgrade product. It’s easy to use and provides a solid and stable platform on which to achieve repeatable and accurate results with your rifle.

The first time I used this product it came with printed directions, which I have stashed in my drawer somewhere. The second time it came with a basic info sheet and instructions to find the directions online in a PDF. To be honest, I think this is great. It saves on paper and keeps the cost of the product from increasing, but also, it’s so much easier to use your phone to view instructions.

When using your phone or laptop you can use ‘Ctrl + F’ to find exactly what you’re looking for.

In the thick of it

I won’t waste my time repeating Nathan’s instructions, which you can find here, but there are certainly some points to note.

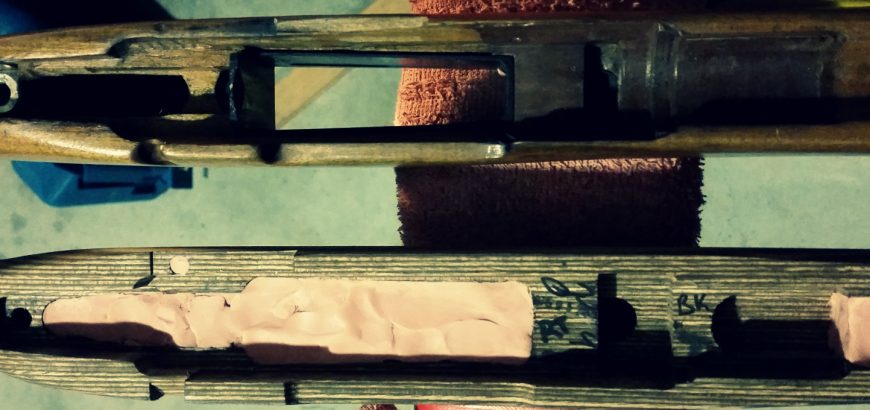
Bedding a rifle is pretty much a one-time job. Undoing a crappy bedding job is an immense amount of work, and the cured product will harden like steel to whatever surface it is on. For this reason, you need to have your barrelled action and the stock completely prepared beforehand.

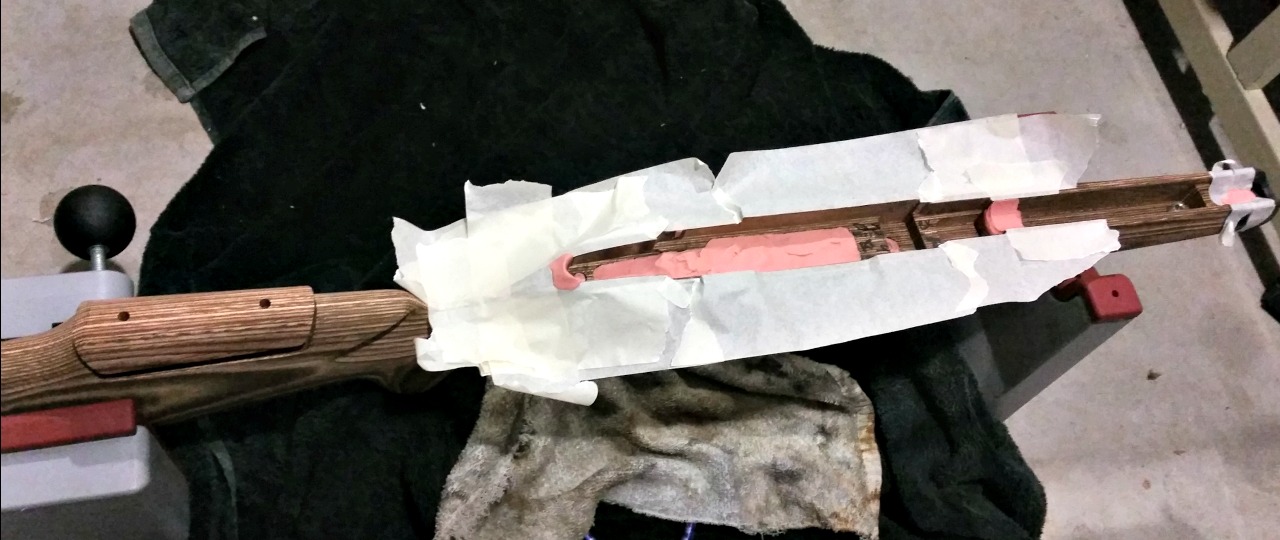
The Prairie Hunter stock ready to receive a full-length bedding job. You may wish to wrap your stock in plastic to protect its finish.

The stock will need to be dammed up, so the compound doesn’t run through the action screw holes, the mag well or down the barrel channel. The action needs to be protected with masking tape and graphite to ensure it doesn’t end up permanently glued into the stock. You also need to ensure that the bead of bedding compound around the action doesn’t creep over the tang or into the ejection port – trapping the action.

Once you've started pouring, there's pretty much no going back.
Once you’ve started pouring, there’s pretty much no going back.

You also need to make sure your working space is completely ready for all stages. You need to be able to keep the compound at a reasonable temperature (no problem in this summer heat) for it to cure properly. However, in winter, this can mean heaters, hot water bottles or any number of weird contraptions. I tend to make a tent of sorts over my workplace once complete (it’s hard to shift the rifle to a different area once you have poured the compound), and use a small heater to warm it up.

Now’s the hard part – you need to be patient and wait for it to cure. In the next part of this series we’ll look at getting the rifle out of its mortice, and how to finish the stock up to a beautiful satin sheen.

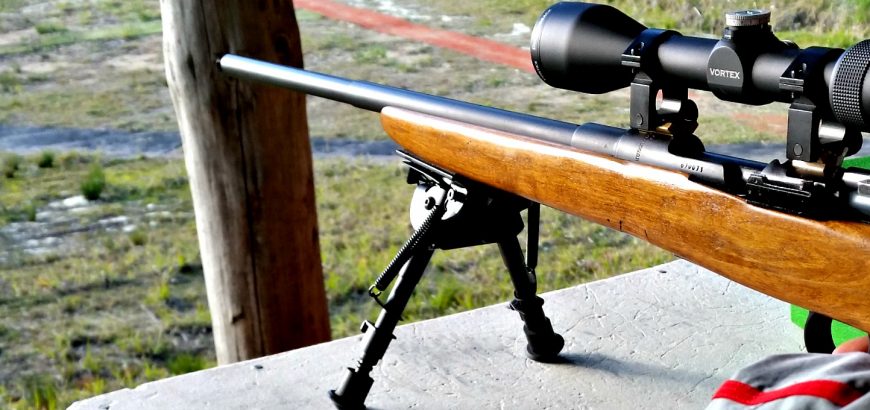
Shooting a sporterised Husky M38 at Deerstalkers Auckland range.

Reasons why I (sometimes) prefer my car to my guns

Like most Kiwi blokes, I have a tendency to tinker in the garage. My two favourite interests at this time in my life are my assorted collection of long arms and my 1980 Triumph TR7 DHC. Both of which I work on just about whenever I get the chance.

I love my guns, but sometimes this little convertible steals the show.

However, being a mere mortal, I can’t dedicate myself to both equally and often have to choose how I spend my time (or dollars). Fortunately for me, my wife enjoys shooting and riding in the convertible, so I don’t have to work too hard on that front.

As much as it pains me to admit it, I do sometimes prefer my car to my guns. And here’s why:

My car always has something to work on

God bless British Leyland, but they didn’t make the most reliable/simple/functional vehicles. While I may finish a project rifle or find the perfect cast projectile load, I may never finish working on the ol’ Triumph.

Great resource for anyone looking to cast lead projectiles for the venerable 7.62×39 – especially for the SKS.http://castboolits.gunloads.com/showthread.php?13453-Practical-Dope-on-the-7-62X39

Posted by The Gun Rack on Tuesday, 9 February 2016


My mates

Most of my shooting friends would know a little bit about cars, or have some sort of mechanical tendency. At the very least, they all have driver’s licenses and vehicles. We have plenty to talk about and share.

Give these to a mechanic and you might get a blank stare in return.

Most of my car enthusiast friends know very little about firearms, don’t have licenses and couldn’t begin to relate to the joy a cloverleaf group or the rush of a clean, ethical kill.

Also, they’d wear out my car knowledge in 20 mins if we tried to have an exhaustive conversation about anything.

Car stuff is easier to buy

It’s right there in the header. Anyone can buy me some bit or bob for my car. Easy Christmas presents. Not everyone can buy me ammunition or import semi-auto rifle parts.

Having said that, there are easy gifts for shooters.

But, in terms of ease of purchasing… There are two car part stores in a 5 min radius of my house. There are also at least half-a-dozen mechanics, a VTNZ and several hardware stores that carry useful automotive stuff.

There is one gun store in that radius. It also happens to be the only camping and outdoor store as well.w

Testing

If I modify my rifle, I have to wait for a weekend or time off work to head down to a range. For rimfire, it’s not so bad – 5 mins away is the Howick Rifle Range, where I shoot with HSSRC. However, for centrefire rifles, I have to travel at least 45 mins.

To test any modification to the car, I can drive down the street. I can even test drive it to the shooting range! And no one will complain if I turn the engine over on the weekend. Test firing a rifle would be a slightly different story.

If I had a range like this in my back yard, I may divide my time slightly differently.

To add insult to injury, if I forget anything at home for my range trip, or if the modification turns out to be unsuccessful or needs reworking, I have to drive all the way home to fix it and wait another week to test it again!

To be honest, I love both hobbies equally. They’re as expensive as each other and both give me a chance to clear my head and work on something with my hands. Both hobbies result in great stories of hit and miss, and allow plenty of opportunity to geek out in stores and online.

Push feed vs controlled feed bolt action rifles

Whenever there is more than one option, shooters around the world will have vastly differing opinions for and against each. The same could be said for push vs controlled feed bolt action rifles. However, after over a hundred years of having both on the scene, it seems a sort of stalemate has been reached.

So, what's the big deal?
So, what’s the big deal?

People still have their preferences, but realistically, there are much more important factors to consider when choosing a bolt action rifle, and the feed/eject mechanism is almost ancillary to other concerns. That being said, there are differences.

The double feed

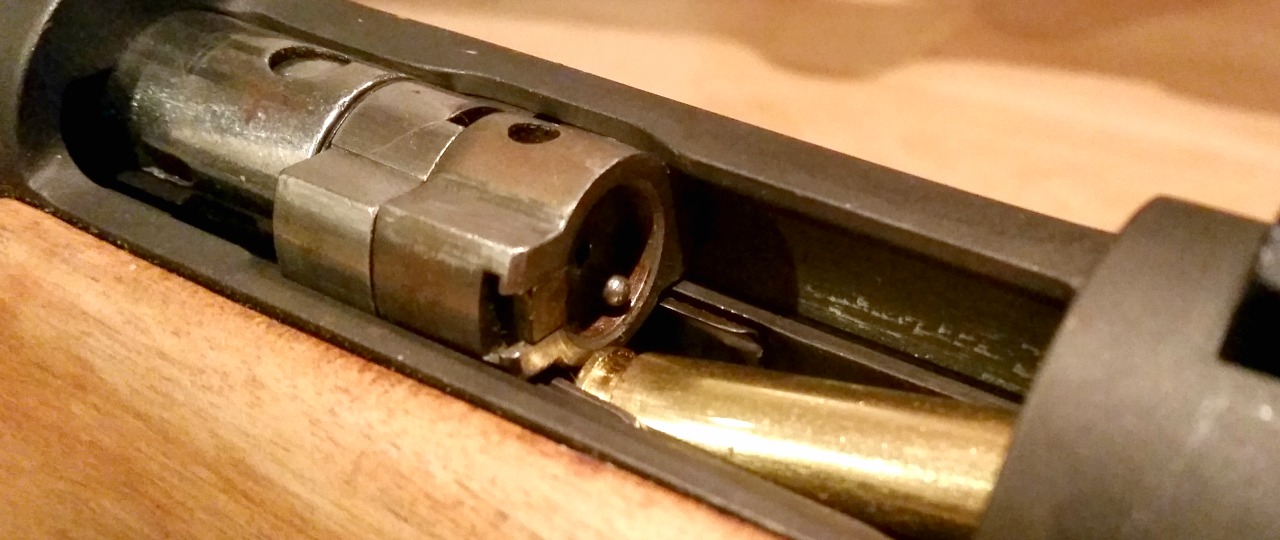
A push feed action is exactly what it sounds like. The round is pushed by the base of the bolt into the chamber. Once the bolt is fully closed the extractor claw will engage the rim of the cartridge, so that the ejector plunger can push it out when it’s clear of the chamber again (once the bolt is pulled rearwards).

The oft-quoted push action double feed can occur if you do not fully close the bolt upon chambering a round. This means the round will not eject as the extractor claw has not engaged the cartridge. If you move the bolt forward again, you’ll feed a second round into the base of the first.

The bolt in this .243 Stevens literally pushes the round without grabbing onto the rim until the action is fully closed.

This situation is very unlikely to occur, except through clear operator error. We all like to think we’re beyond such simple mistakes, but stress can cause us to do funny things. When might you be this stressed? Hunting dangerous game, or perhaps in fast-paced action matches like the Precision Rifle Series. However, most competitors use modern push feed actions without any issues. Big game hunters on the other hand, are probably the biggest proponents of the Mauser-style controlled-round feed.

Making life easier

The main reason for the proliferation of push feed rifles is that they are cheaper and easier to manufacture. Having said that, some very expensive, reliable and accurate rifles use push feed actions.

There’s one thing that just makes like easier with a controlled-round feed. You don’t have to push the bolt fully closed, or completely work the action, to pick up and eject a round. And no, this isn’t the same point above worded in a different way.

This Mauser action with its large claw extractor grips the round upon picking it up out of the magazine.

If you spend a lot of time on the range drilling small holes into paper, you’ll come across plenty of situations where you have to clear your rifle so someone can go forward. This may be for a change of targets, a ceasefire in a match or  some other situation where rifles need to be made safe.

If you have a box magazine, no issues either way. However, if you have a blind magazine, emptying a full mag with a push feed action can be annoying and time consuming. A good example of this is the Mossberg 100 ATR which I recently reviewed. A nice, slick bolt action, but you can’t pull the magazine out or drop a floorplate if you want to quickly empty your rifle.

With the Mauser-style actions built by CZ, Winchester (some model 70s), Ruger, Kimber and others, you can simply move the bolt a fraction of the way forward and pull it back again to solidly pick up and eject a round. I do also find that the bolts are generally less sloppy in the action, as the long extractor acts as another guide to keep the bolt going forward and not sideways.

These sound like silly points to favour one rifle over another, and they are. Although it’s a feature I really like, it wouldn’t influence which rifle I bought if I was choosing between two (unless they were otherwise identical, which isn’t going to happen).

If you want to dig a bit more into the subject, there’s plenty on the web, including this well-illustrated article at Lucky Gunner.

New year = New rifle

Well it’s been a great break, with some awesome weather to get outdoors around the country. One thing that’s true every year is that people make goals to join the gym or eat better, especially after the Christmas splurge. It usually takes the form of “New year = New you” or #newyearsresolution #fit2016 #caloriebattle if you’re particularly young and annoying.

There are some parallels for shooters. Not all of us are lucky enough to have a Christmas budget that literally allows for a new rifle, so we’ll have to make do with the weary barrels, actions and stocks that we already have. Just like the once-a-year gym bunnies, this means squeezing maximum performance out of what can be old and tired equipment.

One of the best ways to do this is to ensure good cleaning habits. By maintaining your rifle or shotgun properly, you’ll extend barrel life, ward off rust and stay accurate for longer. Here are a few cleaning tips for a better 2016.

Strip down semi-autos

While you might clean the barrel and even the chamber and action of your AR or AK after every range trip, stripping it down and giving it a birthday a few times a year can lead to improved reliability.

A surprising amount of gunk builds up in gas tubes, magazines, under selectors and safeties and even in the nooks and crannies of stocks.

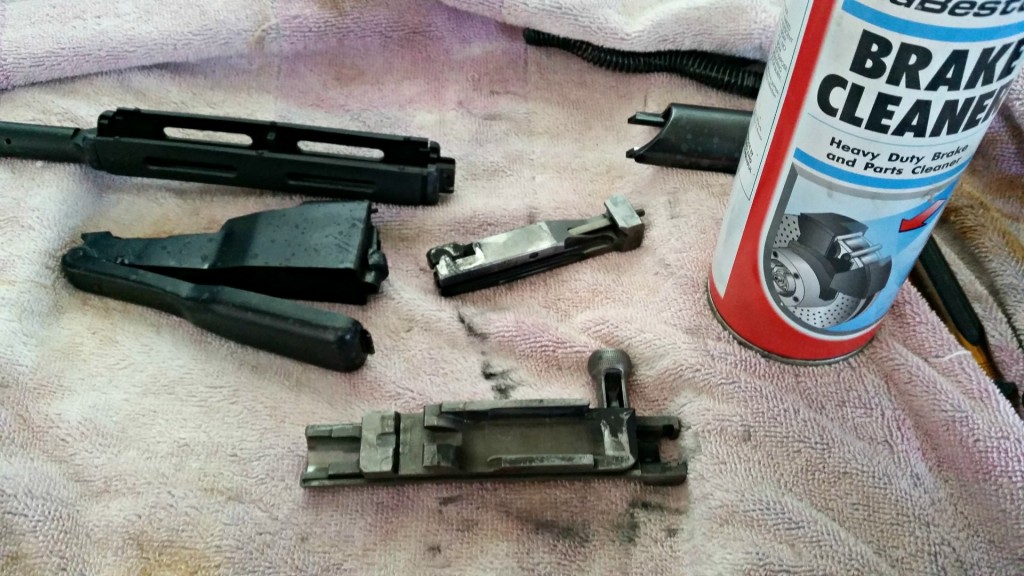
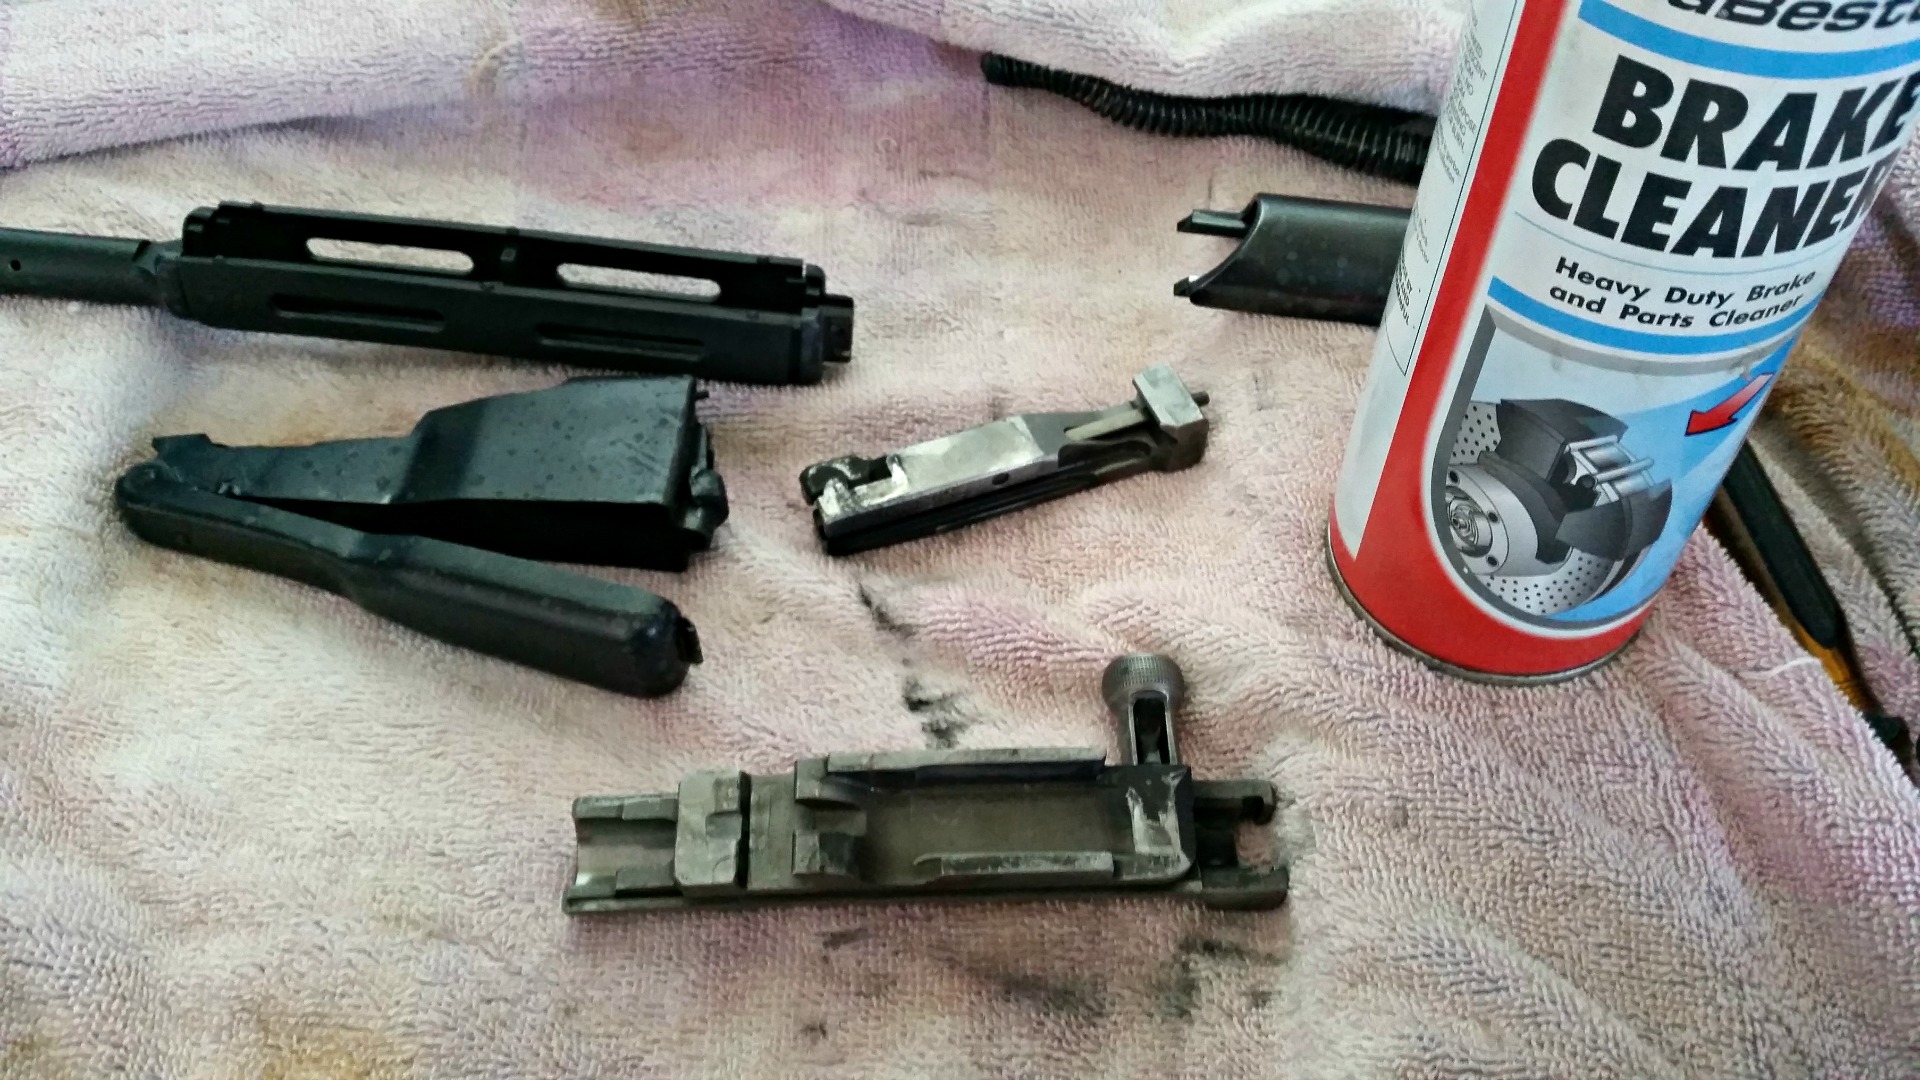
Once you’ve broken down your rifle into its various components, you might cringe at the amount of expensive gun-cleaning product you’re going to have to use to get it ship-shape. My personal recommendation is to use less-expensive cleaners to do the grunt worker. Cleaner-degreasers work well. My favourites are those that are citrus based. Otherwise, a good move is a parts cleaner, such as automotive brake cleaner. Whatever you do use, make sure it’s safe on the materials it will come in contact with. Otherwise, your cheap fix may become very expensive.

Parts cleaners can make for better-functioning weapons.

Use a bore cleaner and a copper remover

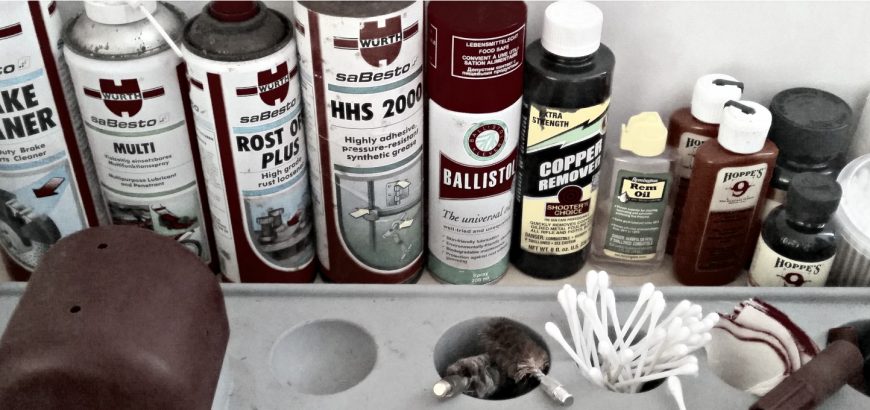
If you’re not too particular about your cleaning, you may not realise that these are in fact two different things. A bore cleaner is great for getting out powder and debris, while a copper remover helps get rid of fouling that can destroy accuracy.

A good cleaning routine makes use of both. I also like to run a wet patch of bore cleaner through my regularly used guns before storing them, and running a dry patch through before shooting them. You’ll be surprised out how much dirt it will lift. I would not recommend doing the same with a copper remover – this shouldn’t stay in your bore for more than 10 mins (depending on the strength of the product).


Industrial and gun care products work side by side.

For guns like my Lee Enfield .303, which doesn’t get used as often, the final patch I run through is wet with lubricating oil. It can be a proper gun lubricating oil, or a safe industrial equivalent. Lubricating oil has a high viscosity and clings to metal. This oil won’t drip down into the action, but will stay in the barrel, keeping the lands and grooves free of rust.

Buy a one-piece cleaning rod

Cheap cleaning kits are all good for getting started, and pull-throughs are great for a quick clean in the field. However, if you’re serious about breathing new life into an old rifle, a one-piece rod should be on your shopping list.

Cleaning more often or more vigorously means more wear and tear on your cleaning apparatus. Aluminium and bronze-alloy rods ten to become weak around the threaded joins, and will eventually snap – especially if you use a larger patch for a more thorough clean and have to push quite hard.

A stainless steel rod with a freely rotating handle is a good bet – even better if it has a plastic coating to prevent damage to your breech or muzzle from ‘enthusiastic cleaning’. A multi-calibre stainless steel rod of solid construction can be had for about the same price as a cleaning kit with a multi-part, aluminium rod for a single calibre.

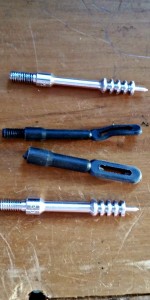
Plastic jags are a good temporary measure, but I wouldn't rely on them.
Plastic jags are a good temporary measure, but I wouldn’t rely on them.

Spend some money on jags

Cleaning jags may seem like a waste of money if you’re relying on the plastic ones that come with cleaning rods or kits, but they do make all the difference. Not only can you buy metal jags specifically designed to remove copper fouling for your specific calibre, but they’re also much less likely to snap or bend under force.

Use a guide for your cleaning rod

Rod/bore guides do several things to help you out, and cost very little. For between $30 and $100 you’ll get a decent guide with adapters that can be used across several/most calibres.

The benefits of a bore guide are as follows:

  • Keep solvents off your stock finish
  • Keep debris and solvents out of your action and mag well
  • Guiding the rod into the bore eliminates unwanted wear on the chamber
  • The guide keeps the rod straight, helping reduce stress on the rod, which could cause it to bend or snap

If you are serious about getting more use out of your rifle between cleans or a more accuracy for your time behind the cleaning rod, you may have to spend a small amount of money on the right tools for the job. In the end you’ll find that setting up your cleaning bench effectively is well worth it. Here’s to a 2016 full of shooting (and just enough cleaning)!

Choosing a scope for rimfire plinking

Choosing a scope for your rifle comes down to many competing factors. There’s quality, availability, price, and often competing recommendations from friends, magazines or internet forums. One often overlooked variable is fit-for-purpose. IS the scope you’re looking at ideal for the type of shooting you want to do?

A 6-24×56 with Milrad reticle is great, but not necessary for scrub hunting in New Zealand. Equally inappropriate would be a 3-9×40 with duplex reticle on an F-Class rifle. While either situation could be made to work, neither would produce outstanding results.

I’ll be doing a series of articles on fit-for-purpose scopes, to help with choosing a piece of glass for your next project.

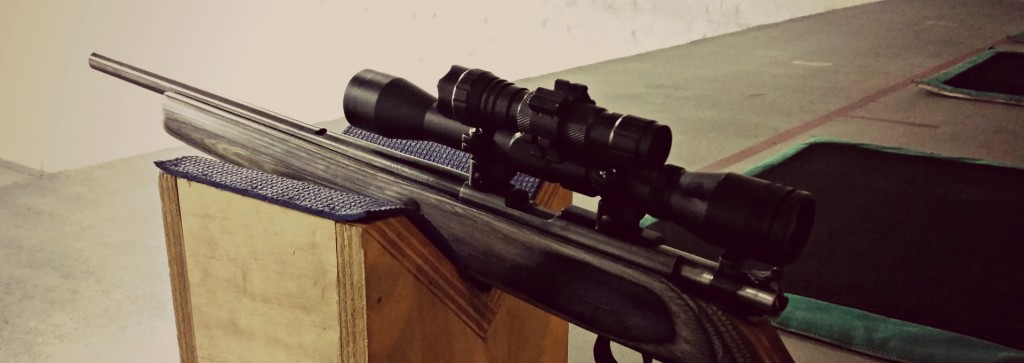
4x32 with torch
This simple 4×32 with attached torch is great for possum hunting and can be used for plinking as well. Not so great for target shooting.

Rimfire plinking

Shooting tin cans or pieces of paper on your own land, or just at the range for fun, does not require an expensive or elaborate scope setup. Often this kind of plinking is done open-sighted, but for those with failing eye-sight or those who just like to practice with optics, a low-magnification scope such as the Classic Rimfire range from Weaver would do the job well.

Rimfire scopes are often not made to stand up the recoil of centrefire rifles, so if you plan on swapping scopes between rifles, you should probably look at a low-magnification centrefire rifle.

If your budget is seriously lacking, you can look at the Kilwell Huntsman or Nikko Stirling Mountmaster, both offered by Serious Shooters and various others. A 3-9×40 with duplex reticle, it’s all you need to get started. These are often the types of scopes included with package deals. You should eventually upgrade to something a bit higher spec if you intend hunting with it.

In the same vain, don’t buy cheap scopes off Trademe, unless you are looking for something for airsoft or paintball. I’ve checked these out and while a few are acceptable, many are sloppily built and have magnification ranges vastly different from what is stated, as well as adjustments that are inaccurate. These can do the job if you are buying your first .22, but do not attempt to hunt with these. Low-quality scopes can lead to unethical kills.