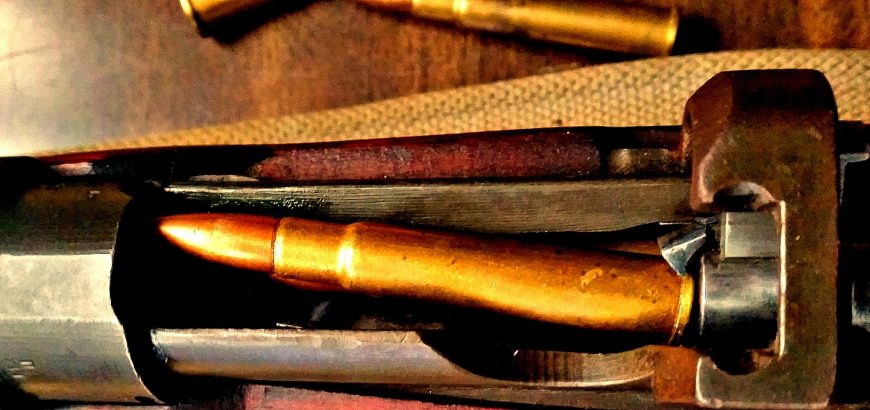
No.1 Mk iii extracting Mk 7 round.

303 SMLE bolt stiff on extraction

Getting my own .303 was a dream come true. It’s a cartridge and rifle with a storied history and a pretty good performance, even by modern standards. What I was particularly looking forward to was the “buttery smooth” action I’ve heard so much about. But mine wasn’t. After removing a good deal of rust and gunk from this historic weapon, I headed down to the local service rifle club to have a shoot. The results were less than spectacular.

I didn’t have much ammo on me at the time, and was primarily going to shoot my SKS and M38, but I did want to put at least half a mag through my brand new (to me) No. 1 Mk iii SMLE. The rifle printed high and to the right, but still in a very tight group with the surplus CAC Mk 7 ammo I had on hand. The elevation was due to shooting at 100 yards with the 200 yard (minimum) setting, so I was fine with that, and it appeared the front sights were off a bit to the right. Not a major.
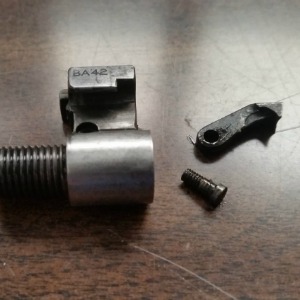
.303 bolt face, extractor claw and screw.

But getting those empty rounds out was difficult. I couldn’t stay in a shooting position and had to use two hands. My thoughts were it needed some cleaning after a long period of disuse. When I got home some quick research on the internet turned up a few that thought it could be due to fouling, so off I went to the garage to get some cleaning done.

One month later with a box of brand new Prvi Partizan .303 I went down to Taupo NZDA range to get the long guns out. After enjoying drilling tight groups with my Husky, it was a bit of a let down to pick up the Enfield and experience the same issues as before. I hadn’t changed the sights, but compensating worked fine. But still, every round was a real hard task to extract. My wife had a few shots and enjoyed the rifle, but didn’t enjoy the experience because of the tough-to-open bolt. I was crestfallen all the way back to Auckland, thinking I had managed to buy a dud surplus rifle.

What the issue actually was

So this time I took to cleaning with fervour. I disassembled the extractor and bolt face, gave everything a thorough degreasing and a light coat of Ballistol. Determined to not have the same issue again, I gave all of the bearing surfaces a generous application of oil and attempted to chamber a round. No problem. Extraction? Problem.

What?
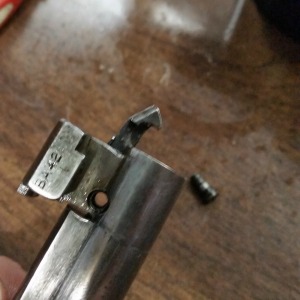
Bolt face with extraction claw slightly pulled out.

This was beyond frustrating. I then took a closer look at the extractor claw and saw that it had become quite sharp after (many) years of use. So I undid the extractor screw, pulled the extractor claw out a bit (not all the way – that V-spring is a pain), and gave it a very light rounding off with a fine file. Extraction seemed to improve.

After three more delicate treatments like this, the bolt is now working like a charm. Now I’m actually looking forward to having a shoot with it again!

P.S. If you’ve got the same problem and want to try this fix, remember that you could damage your rifle – which as we all know can have serious consequences. Take it to a professional gunsmith if necessary.

Also, do not try chambering and extracting live rounds unless you are at a range, pointed in a safe direction. At all other times use a dummy round that you have made yourself, or buy a cheap practice round – they’re about $20 for two.
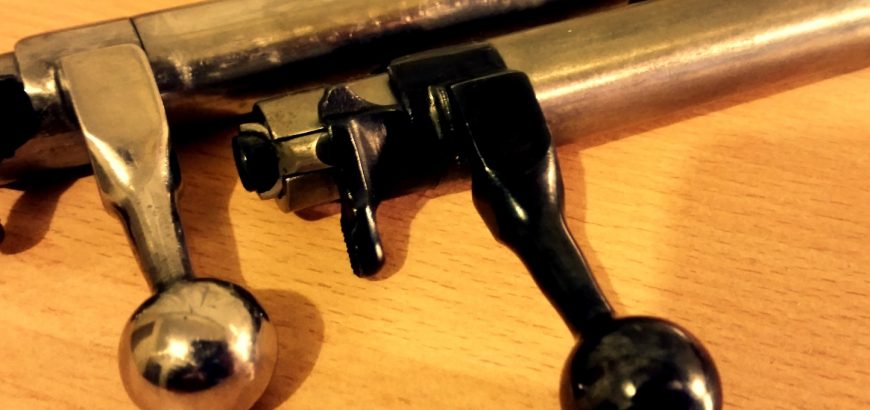
 

JW-15 bolt with and without factory bluing.

Removing bluing from your rifle

Bluing does a couple things for a rifle. It provides some level of protection against the elements, and it helps achieve a classic styling that other coating systems can’t achieve. However, there are some situations where you might want to remove the bluing from your rifle, including polishing your steel to a high shine, or preparing your rifle for another type of coating.

You can strip the factory bluing off your rifle with a very rudimentary list of kitchen/garage supplies. Here’s a look at this simple process:

1. Completely disassemble and clean firearm

Every metal part that you are going to be removing bluing from needs to be detached from the firearm. For my last project I removed the bluing from the floor metal, trigger and bolt handle. Even if you are doing your entire rifle, it still needs to be taken down. And I shouldn’t need to say this, but make sure the thing is unloaded before you do anything.

Once you have all of your bits and pieces ready, do a thorough degreasing with brake cleaner, degreaser, dish soap and water or something similar.

2. Time to get cooking

So, there are blue removal products out there made by many fine manufacturers. You could even try sandblasting your parts if you have the equipment. However, the method I’m going to focus on is cheap, reliable and effective – and probably better for the environment too. Instead of using harsh chemicals, you can simply use a couple bucks worth of vinegar.

Most people say to just leave the parts in vinegar for 30 minutes, check to see if the bluing has been removed, rinse and repeat until done. What I like to do is to heat the vinegar in the microwave (with no metal parts in it) until almost boiling. Try not to breathe it in as you move the dish to the garage, as it’s acrid and will set you off coughing. Nasty stuff.

Drop your parts in the hot vinegar and watch as the bluing literally bubbles off of the metal in spectacular fashion. It will only take a few minutes before you notice changes in the colour of your metal. When the metal looks clear, pull it out so you don’t start it oxidising again.

If you’re doing a barreled action you probably won’t have a big enough container to completely cover it in vinegar. What you can try is wrapping it in paper towels soaked with vinegar. This may be a little slower and could require a bit of extra cleanup to get it just right.

3. Attack the metal

So now you have some bare steel completely free of bluing and rust. Make sure to thoroughly clean and degrease again, removing all traces of bluing, vinegar and anything else that shouldn’t be there. Now it’s time to pull out the ultra-fine sandpaper and steel wool, and remove all of the factory imperfections and slight bluing residue that you can spot.

It’s your call from here. Some people like to coat their firearms with ceramic or paint-on applications, while others like to try more exotic metal finishes. I’m a big fan of matte colours on rifles – usually black. For firearms that spend 99 per cent of their time on the range and seldom see adverse weather or bush conditions, you can afford to go for looks over protection.

My JW-15 which is only used at an indoor smallbore range, has had the bluing removed from the bolt handle, trigger and floor metal as mentioned above, and was polished thoroughly with autosol. I do have to make sure the humidity level in my safe is under control and that the metal surfaces are oiled when not in use for long periods, but realistically I find that the same applies to my factory blued firearms. I’ve got to admit though, that shiny metal is pretty sexy!

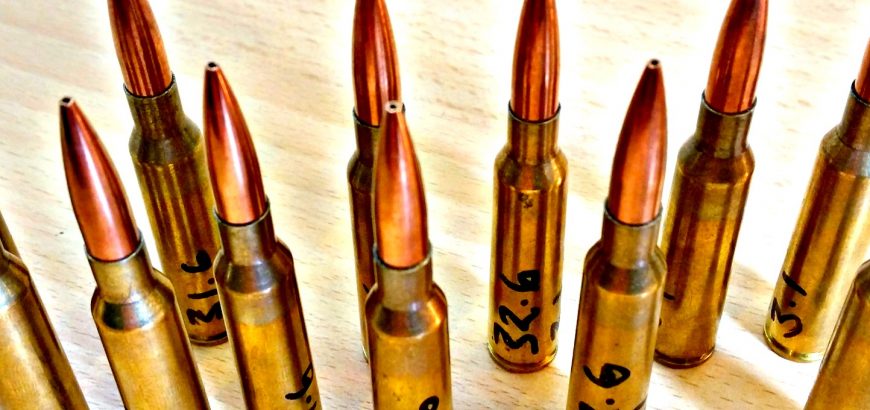
Hand loaded 6.5x55 rounds. Featuring PPU brass and 142gr Sierra Matchkingds.

Check your reloading data. Then check again.

Reloaders are a unique bunch. They represent the line that divides casual shooters and members of the shooting community. Anyone that does any great volume of shooting will reload. So will people interested in achieving the ultimate in accuracy for their particular firearm. Reloading is a unique skill that takes a while to learn, and there are lessons for those who are new to the game. The first one is – check your data.

Check your data before you purchase your components

If you’ve just bought your first reloading kit, dies, shell holders, etc, etc, you want to cracking into producing some highly accurate, super cheap rounds. Hold on. Before you run to your local gun store to buy the cheapest (or most expensive) projectile for your rifle, do some research.

The internet is a vast resource for reloaders. There are plenty of forums that are overflowing with useful data and personal reloading recipes. You’ll also find that most manufacturers will have some load data on their website, or will provide you some by email. This is an authoritative source of information that you can trust.

So, start your search with the forums. Find out what people are using in your particular type of firearm. Certain models, barrels and magazines will have preferences for different weights, seating depths and powders. Once you’ve got a general feel for what would suit your purposes (cheap as chips for plinking, best round for accuracy, great wounding for hunting, etc.), narrow it down to one bullet to start with.

If you’d like some good info on what kind of round is good for your rifle, check out the Knowledge Base at Nathan Foster’s Terminal Ballistics research website.

Check your data when you buy your components

Another great resource is your local gun shop owner or gunsmith. On my last trip the gun store I learned something about conflicting data that I had. I went in to purchase reloading components for my Husqvarna M38 Swedish Mauser. I was armed with reloading data from Sierra (I was purchasing 142 gr Sierra HPBT Matchkings) and data from the powder manufacturer. However, I wasn’t sure on the figures as the powder manufacturer stated a starting load close to the maximum load recommended by Sierra. They also had different seating depths/COALs.

6.5x55 with a 32.6 gr charge and a 3.100" (78.75 mm) COAL.
6.5×55 with a 32.6 gr charge and a 3.100″ (78.75 mm) COAL.

My thought was that the powder manufacturer was trying to sell more powder at the expense of my brass and barrel, but in chatting to one of the sales guys at the local store, we quickly figured out that the powder manufacturer’s specifications were dangerously high for my rifle. The reason being, Sierra’s load was built up for a rifle of similar vintage to mine (the test rifle was Swedish Mauser M96), while the powder manufacturer’s data was figured off a brand new action with a custom built barrel. This made more sense as I realised the 0.050″ difference was to allow for the long throat of the Swede, while modern actions would be a bit tighter.

Whether these rifles were actually used to test these loads or it was done entirely withing a ballistics calculator and other software is unknown to me. Regardless, the same data for the same calibre and projectile came out completely different from two very authoritative sources. So, remember when reloading to always get as much information as possible at every step of the process.

And of course, reloading and shooting hand-loaded rounds comes with risk. Start at minimum loads and work your way up until optimum performance is achieved or pressure signs start to show. If your bolt is stiff on extraction or primers come out flattened or cratered, dial back on the powder a bit.

Corrosive ammo in SKS/AK47

The SKS will outlive us all. There’s no question about it, Simonov created a carbine that will stand the test of time. Unfortunately – it just didn’t stand the test of the Soviet military. Well, not for long anyway, as its Kalashnikov cousin – the AK47 – soon took over. While its history is long and interesting, this post is concerned with the modern day application of the SKS with military surplus ammunition.

As much as the Soviets may have swiftly moved on to bigger and better (and more automatic) things, there are military forces all over the world that have made good use of the robust and reliable SKS. It’s been produced by Eastern Bloc countries and a host of Asian nations to the tune of around 15 million rifles, and has featured in many major armed conflicts. The rugged and forgiving construction of the rifle, ease of maintenance and affordability and abundance of ammunition means it will be around for a while longer with insurgent, rebel and militia factions all over the world. It’s also these three factors that keep it popular among sporting users such as hunters, plinkers and those prepping for the zombie apocalypse.

Benefits of milsurp ammo for the modern shooter

$$$ Military surplus ammunition is cheap and plentiful. If you live in the USA where importers bring in entire containers of disused Soviet arms to sell on to a willing public. Otherwise, it’s about as cheap as the cheapest commercial stuff.

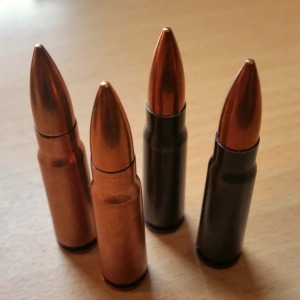
Hungarian 7.62x39 from 1961 (copper wash) and 1971 (lacquer)
Hungarian 7.62×39 from 1961 (copper wash) and 1971 (lacquer)

Long shelf life If you’re storing ammo for “one day” the long shelf life of milsurp ammo probably gets you all excited. I’ve put some Hungarian ammo through my SKS that was head-stamped with 1961 and 1971 dates of manufacture. It went bang.

Steel casings This is a plus or minus, depending on how you look at it. If you’re after some cheap and cheerful time at the range, steel casings keep the cost of your ammo down (whether commercial or milsurp ammo) and also mean you don’t have to scour the range looking for your brass (which the SKS happily ejects in every direction known to man). Of course you’re a good range user who cleans up after themselves anyway, right?

Drawbacks of milsurp ammo for the modern shooter

It’s dirty But then again, if you’re looking at surplus ammunition, chances are the only other stuff you feed your SKS or AK is the cheapest factory fare, which is not much better.

It’s corrosive Well, no need to freak out about that one – we all know that military ammo in 7.62×39 is corrosive. So is 7.62x54R and a lot of 303 British too. Anything that’s been around as long as your father is probably corrosive.

However, all is not lost for the milsurp shooter on a budget. The chrome-lined bore of your rifle protects your barrel from nasty corrosive primer detritus. But the action, gas tube and magazine should still receive a thorough birthday after shooting corrosive ammo.

It’s FMJ Full metal jacket ammo is fine on the range, but it’s no good for hunting. It won’t create enough of a wound channel to quickly and humanely dispatch your game. Species commonly hunted with this round include small deer, goats, wild sheep and pigs. You don’t want an angry boar charging you down because you’ve put a pin hole through its lung. For those that keep spam cans of milsurp ammo next to their crate of SKS rifles ready to arm the family when the rebellion starts, FMJ isn’t your go-to either for the same reasons.

It’s tracer or steel core Tracer is sure fun to shoot, but the novelty wears off after you’ve emptied one or two mags. It’s also very hard to shoot because most ranges (quite reasonably) don’t want you to set their butts on fire. Same goes for forests or other hunting areas – not a good idea. Steel core again, is shunned by many ranges and also causes over-penetration on game and targets. If you’re buying milsurp ammo, try and avoid these two types of ammunition.

Conclusion

For hunting, plinking or “target shooting” with an SKS or AK-style rifle, milsurp ammo doesn’t offer many benefits that make the extra hassle worthwhile. I still have some lying around and will definitely let rip on a range trip if it’s just taking up room in my safe, but I wouldn’t go out to buy milsurp ammo specifically. If you look around and do some digging on the interwebs, chances are you can pick up some cheap commercially produced ammo for the same price as ex-military stuff. While it won’t be any more accurate or clean, it won’t get you in trouble at the range or rust out the gas tube on your rifle.

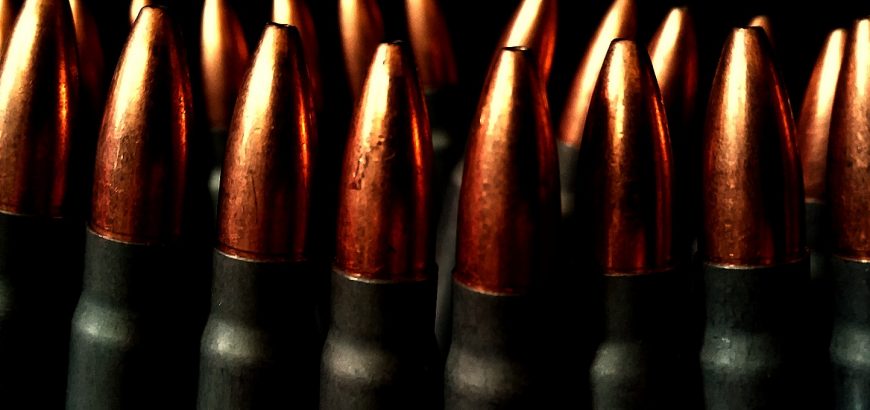
7.62x39 on stripper clips, ready for use in an AK47, NHM90 or SK
7.62×39 on stripper clips, ready for use in an AK47, NHM90 or SKS.