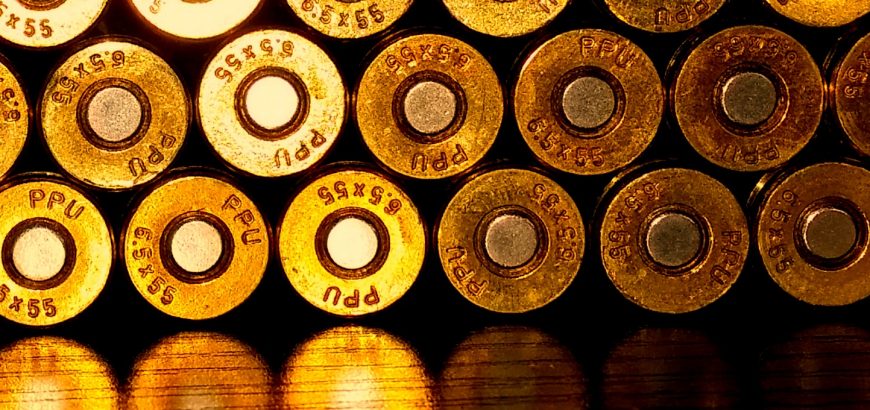
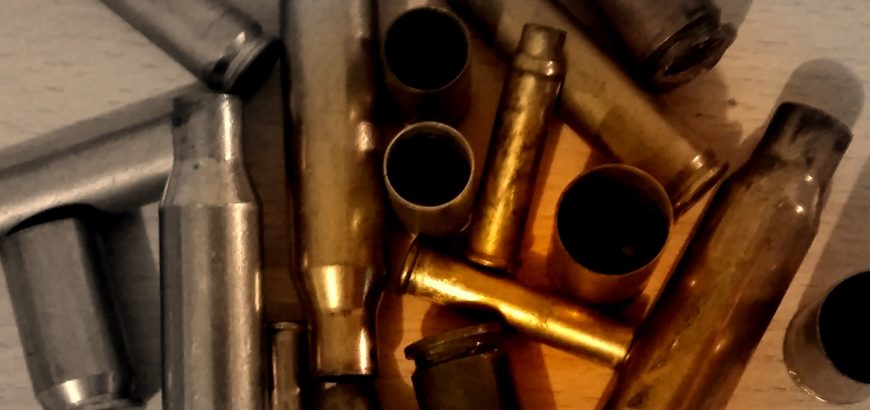
Assorted brass picked up from different ranges.

Range brass – any good for reloading?

Picking up brass from the range is seen by some to be scavenging, and by others to be a useful service to all range users. But at the end of the day, should you be putting range brass through your rifles?

When you sling a couple hundred rounds down range, chances are you won’t be able to recover all of your brass, especially if you’re shooting a semi-auto rifle. After a shoot we all (hopefully) like to clean up our casings, even if they’re not reloadable. We also pick up our targets and other rubbish because we like to keep the range in good condition for all users – and we like to find it that way too.

However, while you’re cleaning up and finding (most) of your brass, you come along some shell casings left by other range users. Do you take them? Sure, why not? Picking these up leaves the range cleaner than you found it and probably makes up for some of the brass that you’ve lost. You could recycle it, beef up your collection of weird and wonderful casings, or you could even reload it. But should you?

Reloading casings of unknown origin

When you’re reloading to achieve optimum accuracy, the answer is: No. As mentioned in a previous article, hand loads designed for match performance eliminate as many variables as possible. When you pick up random brass you have no idea how many times it’s been fired, whether it was a factory round or reloaded and what kind of pressures it’s been subjected to.

All of this has a large bearing on tempering and forming of the metal, which ultimately won’t be consistent with any of your own carefully prepared cases. If you’re controlling your shooting and keep brass sorted as unfired, once-fired, twice-fired and so on, why would you introduce a complete unknown into the mix?

Although, we all like to let loose and destroy things from time to time. Not every trip to the range is about absolute accuracy. Sometimes you just want to put big holes in things. Other times you could be introducing your friends to shooting. These are occasions that don’t warrant using your pet loads and favourite materials. In my opinion, range brass is perfect for this.

Preparing range brass

When it comes to using unknown brass you’ve got to be more careful than usual – but saving your good brass makes this extra effort worthwhile. I don’t think tumbling is a necessary step in reloading, but when it comes to cases picked up off the range, I think it’s a great idea.

Running your new found cases through a tumbler will remove any unknown dirt or residue that may be lurking around. You should also make sure you clean the primer pocket, trim the case to length and debur/chamfer the inside and outside of the case mouth if necessary.

Remember that these cases may have been fired 6 or 7 times before you ever got your grubby mitts on them, so they could only have one or two shots left in them. But again, remember that you’re saving your good stuff for competition days and hunting trips – when accuracy is really important.

In the meantime, keep your range tidy and your ammo box stocked by cleaning up after yourself and your fellow range users. Just don’t take someone’s brass if they haven’t left yet – chances are they want that when they’re done!
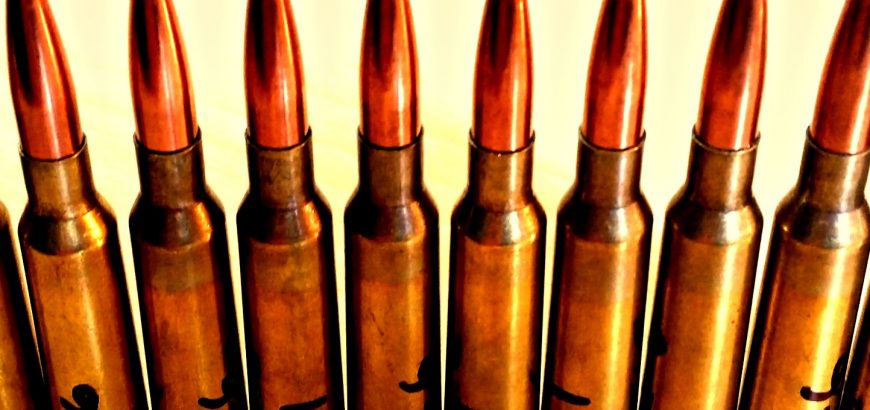
Match quality rounds reloaded for half the price of factory ammo.

How to save money on reloading

Reloading not only allows us to create accurate rounds tailored to specific rifles, but also helps to keep down the cost of shooting. Components can be costly in New Zealand, especially powder which accrues charges for dangerous-goods handling.

The cost of reloading of in New Zealand can be high compared to buying components in the States, and unfortunately a lot of this does come down to those handling charges. Whether it’s the shipping, handling and import charges on bullets and brass or the explosives handling fees on powders and primers, there’s always something that makes it more costly to assemble your own ammunition at this end of the world.

Fortunately there are a couple ways to reduce the cost of hand loading your own ammo. Here are two that I recommend.

1. Shopping around

There are numerous gun stores in Auckland and the rest of New Zealand that sell reloading components. There may only be a few major ones, but there are also plenty of local shops that stock what you need.

In order to find the most cost-effective way to produce match-accuracy rounds I put together a spread sheet comparing the cost of the primers, brass, powder and projectiles at around eight different stores. By comparing prices around the country I managed to shave off more than 50 cents a round. That’s $50 per hundred rounds. Not bad.

When shopping around, don’t forget to account for courier fees. For example, when purchasing some Sierra projectiles I found that the cheapest store in the country was around $10 cheaper than my nearest gun store. Given the $4.50 courier charge and the time it would have taken to reach me, I opted to go the slightly more expensive route.

2. Economise where possible…

…without sacrificing quality. In some areas you may wish to spend a tiny bit more. For example, Federal Large Rifle Match primers cost me less than a dollar more per 100 than less consistent primers. That’s an area where I don’t mind spending a tiny bit more.

When it comes to economising, not everyone can afford to buy vast quantities of powder at a time. However, you can increase your powder economy by 10 per cent very easily.

ADI Powders are manufactured in Australia, and as a lot of shooters know, many Hodgon powders are produced at the ADI plant. In fact, ADI provides a handy sheet that lets you find the Hodgon equivalents of their powders. There is also info for other manufacturers as well.

The reason this is such a bonus for New Zealand reloaders is that not only can you support a company that is kind of local (across the ditch is better than across the world), but if you buy their 500 gram containers, you’ll be getting 10 per cent more than an American manufactured equivalent 1lb which is 454 grams. Usually at the same price too.

There are always ways to make your reloading cheaper, hope these two help!


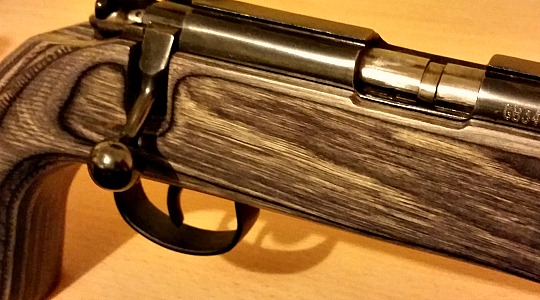
Pro Varmint for JW-15 stock in Pepper Laminate.

Product review: Boyds Pro Varmint gun stock for JW-15

Boyds gun stocks have long been a way for shooters to improve their favourite rifles. Whether it’s replacing a boring factory stock, modifying a sporterised milsurp rifle or finding a better fit for your shooting, there’s usually an option from Boyds that will fit the bill. For one of my rimfire project rifles it was a combination of improving the fit to my body, as well as increasing the aesthetic appeal.

When I first started working on JW-15s Boyds didn’t have anything available for them. Neither did anyone else. This is what got me into building my own stocks, which I’ve done a couple of. However, since then the good guys at Boyds have increased their range (as they always seem to be doing) and the JW-15 now has 5 different designs available.

Some of the designs are the same ones that much more expensive rimfire rifles come in, such as Savage’s Mark II BSEV and BTVS. Of course, the amount of money you could spend customising a JW-15 is probably about the same cost as buying a much better rifle – but where’s the fun in that?

While the Barracuda and SS Evolution are popular rimfire gun stocks that you can see on most ranges, strapped to a Ruger 10-22, the design I like most for the relatively long barrel on my JW-15 is the Pro Varmint, which seems to be the same stock the Savage Mark II TR sports. However, the black textured paint isn’t my cup of tea, so I opted to pay an extra US$15 to go for the Pepper Laminate instead. Visually, the stock is outstanding and I love the look.

Features of the Pro Varmint stock

Standard features include a sling stud under the base of the butt and two studs towards the front of the fore-end, one of these obviously for mounting attachments such as a bipod.

The stock is much heavier and more solid than the synthetic (i.e. plastic) stock the JW-15S comes in and makes it feel less like a toy and more like a real rifle. It’s also better suited to the average New Zealander’s length of pull.

The inletting is good and is done to Boyds’ house action. Obviously there is variation in rifles, probably more so in Norinco’s case, so yours may require some extra finishing. I found I had to relieve a couple millimetres of material where the recoil lug sits, which was not a big deal at all.

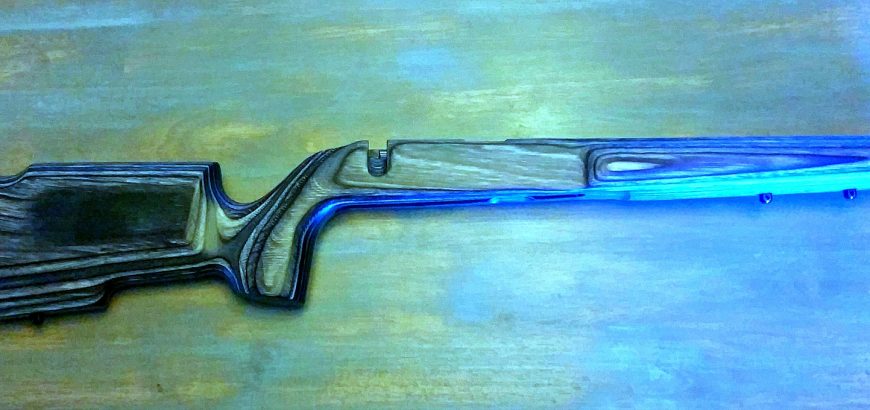
Boyds Pro Varmint stock for JW-15, showing inletting.
Precise inletting and a deep barrel channel on the Pro Varmint.

The barrel channel is extra deep, decreasing weight and ensuring a free floating barrel. You may need to do some fine sanding to make sure your barrel is free-floating, but mine was fine. The fore end also has a nice swell, so it fits perfectly in your hand.

There are also plenty of optional extras, including different finishes, varying lengths-of-pull, custom recoil pads and even laser engraving or chequering.

Downsides to the Pro Varmint stock

There aren’t many, but there are some. Because of the variations in rifle manufacture, you could find slight fitting and finishing is needed in order to get a solid fit for your action. Keep in mind that Norinco weapons have been banned from the states for a long time, so the action they have is probably very old. However, as I mentioned above, there was not much needed to get mine fitted snugly.

What I will probably do (and what I would recommend to anyone going for high accuracy) is bedding the rifle with Terminal Ballistics bedding compound or something similar. I’ve bedded two actions with Nathan Foster’s compund, and loved the result.

When shipping to NZ, Boyds has an order limit of US$100 (before postage). This is because of legal complications with US Customs. Unfortunately, it limits your ability to go for optional extras as some stocks are $99 already. The Pro Varmint was $75, and I changed to the Pepper Laminate for $15. Options like the adjustable comb height ($60) are just out of your reach with the $100 limit.

I can’t remember the cost of postage, but it’s still worthwhile when you consider how much Boyds stocks cost to buy over here. What you could do is buy it when you’re on a trip to the States or ask family/friends over there to buy it for you and send it over. Don’t try NZ Post’s YouShop, as they won’t ship rifle parts. You’ll end up paying for return postage to the supplier. Also, they charge by volumetric weight, which can end up costing a lot more than you expect.

I did have one minor issue with my rifle stock, and that was a tiny chip near the tang. It’s not a deal-breaker, and certainly not worth the effort/cost involved in sending it back for a replacement.

The final verdict

I’m extremely happy with my Boyds stock. As I mentioned before, I’m getting another one soon for a different rifle, so that should say a lot. Although there are minor detractors, these can be addressed fairly easily.

I would definitely recommend finding an alternative method of postage so that you can get all of the great features that your heart desires, and I would also advise that you bed your new stock.


The JW-15 sits snugly in the Pro Varmint.
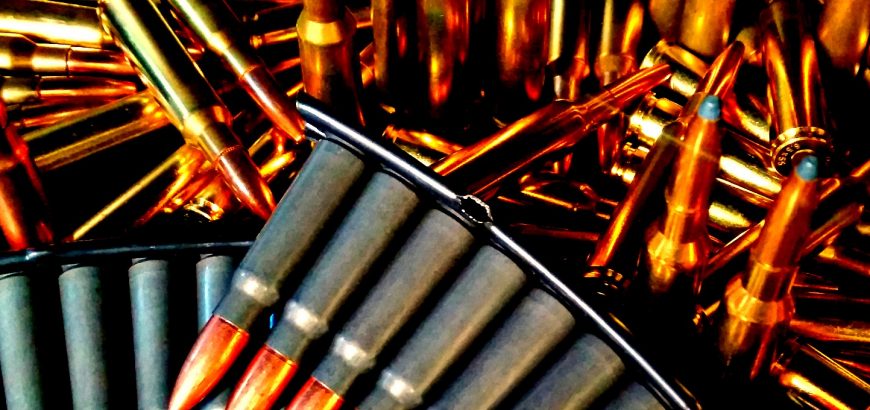
Various live rounds.

Bringing ammunition into NZ

Over the Christmas break I was fortunate enough to be able to go to the USA with my wife to visit family and friends. Of course the States is a Mecca for gun owners, and I did a fair bit of shooting while I was there. I also managed to bring back some ammunition and other shooting equipment from my trip. I thought I’d provide the details of bringing ammo back from the USA to NZ, as information was sparse when I was looking into the process.

Inform your carrier

I’m putting this here because it’s the first thing you should do. Give your travel agent or the airline plenty of notice (aim for 2 weeks minimum) that you will be carrying ammunition and/or firearms in your checked luggage on the way back. You don’t want them to reject your luggage when you’re coming back home, leading to a massive waste of money.

The only real restriction in how much ammo you can bring back is what the airline says. For me, flying Air NZ, it was 5 kg per person. Between my wife and I, we brought back just shy of 10 kg of live rounds. They stipulate “sporting rounds”. I guess that means don’t bring mortar shells in or something, as every military calibre I’m aware of has sporting applications.

They also stipulated it should be in its original packaging. No problem there.

Funnily enough, after declaring to the carrier that I would be bringing ammo (and possibly a firearm) back into NZ, I underwent a “random” search when leaving Auckland for San Francisco. Just a quick swap to see if I was covered in explosives or anything – no big deal. I’m assured it was random. I think not – but who cares?

Purchasing your ammo

When you’re buying ammunition online, a lot of companies won’t sell to you if you have a USEever A delivery address and a NZ billing address. You may need to get family over there to purchase for you ahead of time (so it’s delivered by the time you get there), or you’ll have to go into a gun store.

As an aside, not being a US resident makes it very hard to obtain a firearm. There are also wait periods in a lot of states from the time of purchase to the time you can take possession of the weapon. If you’re wanting to get a rifle over there, a lot of planning is needed. You also need to make sure it’s on the approved list provided by the NZ Police, and there is an import permit involved as well. However, back to the ammo…

Leaving the country with ammunition

My experience was flying out of California (San Francisco) in the States, depending where you go, there could be a vast difference. I had no problem leaving the country with ammo. Nothing to report, my carrier already knew and no hold ups here.

Arriving in New Zealand

There is no import permit required for sporting ammunition. Some people will tell you differently, but there really isn’t. I spoke to arms officers, the police, airport police, Air NZ and airport staff before even leaving for the USA. Not everyone says the same thing, but according to the arms officer, police and my experience, no import permit is needed for live rounds. Heck, customs didn’t even check my firearms licence.

When going through customs I technically had nothing to declare. I didn’t think the ammo needed declaring, and I had nothing else that would get in the way of a completely legal reentry. However, I declared the ammunition anyway.

I did this just to avoid any hassle. i didn’t want to be pulled up or anything, so I volunteered the information. The customs officer searching our bags said they had no problem with ammunition, and they don’t even care how much (again, just the airline limit), but it’s firearms parts they’re concerned with.

I also brought in a scope (my wife’s Christmas present from me) and some reloading gear (my Christmas present from my wife’s grandmother) with no issues at all. Customs did mention the reloading gear, but I guess their concern was whether or not it was used or had any foreign matter in it.

They had more of an issue with the hair product in my wife’s bag than any of the firearms paraphernalia that we brought in.

I hope this clears it all up – it’s actually very easy! Any questions? Post a comment below.

PPU brass and Federal Large Rifle Match primers.

Accuracy in reloading

Just how important is accuracy in reloading? Well, it depends how accurate you want your rounds to be. The key to achieving consistently good rounds is removing every source of variance possible – you are going for repeatability. In other words, to get your bullets in the same hole every time, you need to make sure that all  the variables that go into making them are as controlled as possible.

Match vs. Plinking ammo

If you’re reloading ammo to burn at the range, you can afford to take a “set and forget” approach to your reloading. Once you have your powder trickler set to the right volume, you should be getting fairly consistent charges. You’ll also only need to measure your COAL a few times to ensure that the rest will be coming out the same. This is good enough for general ammo production, and will be as good or better than factory ammo at a third of the cost (depending on your components, etc.).

However, for match ammunition or for working up a load for a new rifle, a lot more precision is required. I tend to weigh every charge on a scale before seating the projectile. Every round is exact. If it’s not, I pour another charge and start again. Because the powder trickler goes off volume and the scale goes off weight, some standard deviation is to be expected.

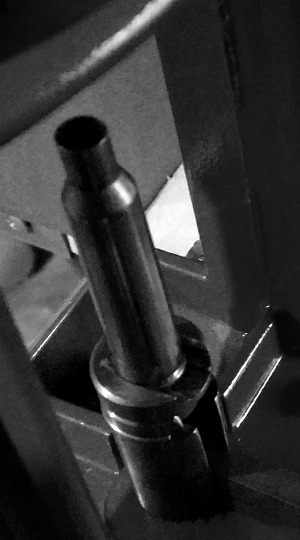
Resized case in shellholder.
Match performance is the result of repeatable procedures.

I also measure the COAL of every single round. Not because my settings have changed, but because slight variations in even the most expensive bullets do happen. Those that aren’t exactly the same get pulled or used for target practice. Why be so pedantic? Because we’re eliminating every possible variation to make sure our ammo production is as uniform as possible from round to round.

I know of people that do this to the extreme. The weigh every bullet they use. They have a log for every casing, rejecting ones that produce inferior accuracy due to differences in metal hardening or other aspects that are beyond the average reloader’s comprehension. This is for the accuracy fanatics. And more power to them, but I enjoy a fine level of accuracy for the amount of effort I put in. It’s each to his/her own. If I had to be as pedantic about my reloading, I probably wouldn’t enjoy the actual shooting as much. But everyone is different, and for some of the shooting fraternity, ultimate accuracy is the ultimate goal.

A proper work space

Whether you’re reloading for 3-gun, varminting or 1000 yard shots, one thing’s always necessary; a properly prepared working area. A space that is free from clutter, mess and distraction is essential.

Before I learnt this lesson, I’ll admit I knocked over a few cases full of powder and so on. Everything should have its place in a reloading station. A good example of how much your work area affects your ammunition production is a mistake I made a few days ago…

Working up a load I was preparing six rounds at 1-grain intervals to take to the range. With six different charges, that’s a total of only 36 rounds, but there’s a lot of finicky business around getting the charge weights right every time. About half way through I move my scale from one bench to another to make room for something. Once settled on the other bench, the charge come up at a different weight.

Now this wouldn’t be a problem if I was using a digital scale, I would be able to hit TARE and know I was working with a clean slate. However, with my mechanical scale, things aren’t quite so simple. The difference in weight readings was because my bench was on a lean… Something had got under one of the legs and was causing the weight on one side of the scale to dip down. The difference was about 1.2 grains. Yup, I just painstakingly produced about 18 rounds that were completely useless because I had no idea what the actual charge was.

Not the worst set back in the world, but a good lesson to learn – always prepare your space thoroughly before starting your reloading procedures.

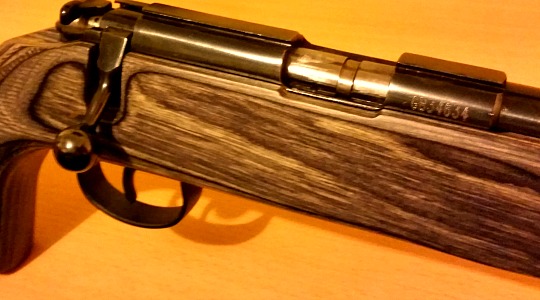
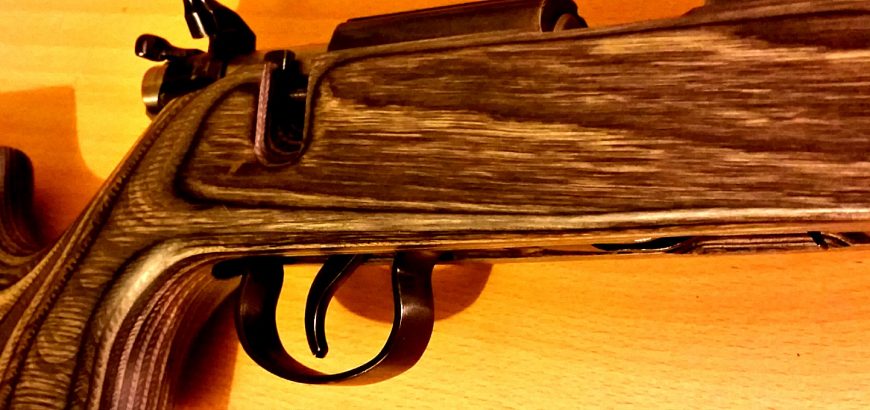
JW-15 with adjusted trigger in Boyds varmint stock.

JW-15 trigger improvement

There are many that will say that the Norinco JW-15 is an excellent tool. An implement meant to be thrown on the quad bike or back seat, and touted around the farm for practical purposes. I agree with those people 100 per cent, but I also think that with a little bit of elbow grease, this humble Brno-clone can be a decent shooter. One of the first things you can improve is the trigger.

Simplicity is…

The trigger on the JW-15 is not pretentious at all. It can be gritty with excessive over-travel (a symptom of the Mauser-style trigger not absent in the Brno), but the ones I’ve tried all break like a glass rod at weights that are not excessive for average shooting.

With such a blank canvas, there is plenty of room for improvement with this trigger.

Trigger weight spring

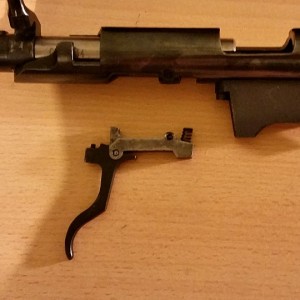
The JW-15 trigger unattached from the rifle.
The trigger mechanism in the JW-15 is uncomplicated to say the least.

This is an easy one. I simply cut off a few coils to lighten my spring. Beware though, that if you cut off too much, the trigger won’t spring back into place after you’ve pulled it – which makes it pretty useless.

If you are not so bold or would like to return your firearm to original spec one day, replacing this spring with a lighter/shorter one will do the trick. I know of some people who have used springs from ballpoint pens. I’ve not found a pen spring that would do the job, but you might.

Polish

A lot of the machining on the JW-15 requires some work with a file, sandpaper and grinding paste to get to an acceptable level. The trigger is no exception.

Just about every part of the trigger could do with at least a polish. If it’s brand new, you’ve got a lot of grease to remove before you get to this point.

Sear adjustment – it’s your call

Adjusting the sear is a risky move. It can take a perfectly safe firearm and make it a loose cannon. There are three ways to adjust the sear on the JW-15, and none should be attempted without a serious level of confidence or skill. The last thing you want is a rifle that will go off when you bump it.

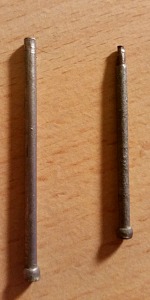
Makeshift punches.
If you don’t have a punch set handy, you can readily make your own with some nails and a grinder.

The first way is to adjust the grub screw behind the trigger. This will move the trigger to the rear and lower the sear in relation to the firing pin – i.e. less of the sear is engaging the firing pin. This means less effort is required to break that engagement, dropping the pin and firing the chambered round.

This method is reversible, and with thorough testing of the trigger mechanism is the safest way of adjusting the sear. I like to check this by ramming the bolt home as hard and fast as possible. If the firing pin drops while you are cocking it, there is not enough positive sear engagement – with enough force, you made the firing pin go right over the sear and hit what would be a live round. Obviously you test this with a dummy round.

The second way is to (lightly) polish the sear surface and/or sear ledge. This means taking away the grittiness of the finish, not changing the shape. This is an irreversible step, and too much polish will leave you with a rifle that won’t cock or that will fire every time you try and close the bolt. In other words, a useless, dangerous gun.

The third, and most dangerous (and pretty stupid) way, is to lightly round off the tip of the sear. What this does is remove the “harshness” from the trigger pull, making it soft and easy. Don’t mistake this for a lighter trigger pull – there is a difference.

The issue here is that the sear is angled sharply like that so that it holds the sear ledge till the very last millisecond, providing a clean and safe break. When one of these surfaces is rounded, the other can easily break the hold when the rifle is bumped or dropped. I don’t know anyone who would recommend trying to change the shape of the sear or sear ledge – at least not for the DIY operator.

The lightest trigger in town

I find the best combination for a light trigger on these rifles that is safe and pleasant to use involves taking a few coils off the spring, polishing the individual trigger components and adjusting the grub screw to lower the sear as much as possible without creating an unsafe action.

Remember, as always, that whatever you do with your firearm is up to you. Everything here is for informational purposes only, and if you’re uncomfortable, unskilled or lacking in confidence, you should either take your rifle to a qualified gunsmith or leave the thing alone.

JW-15 with modified trigger and Boyds laminate stock.
With a bit of TLC the JW-15 is a joy to shoot.