The old .303 has been a staple of the Kiwi bush for decades, and will most likely continue to be around for decades to come. Usually the pristine, fully wooded specimens are locked away in gunsafes and taken out for service rifle shoots, and even old sporters get treated with a degree of respect, reflecting their heritage from the culling days.
However, some sporters are the perfect base for a project that’s a little bit fun – a little bit different. So, looking out for the perfect beginning of a bush rifle project, an easy scope mounting scenario was high on the list for me.
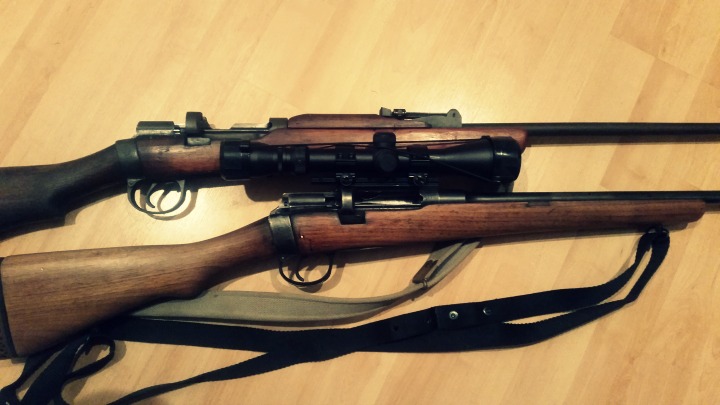
Comparing two SMLEs, one with original fixed sights and one with a scope mounted and iron sights removed.
Most of the older rifles with scope mounts have rails that bridge the gap between the front of the action and the stripper-clip/bolt guide. I think I’ve only seen one with weaver-style rings jimmied into place, and one with a scout-type mount that fit over the rear sight – similar to what you see on some Mosin Nagant scout projects.
Anyway, these older rails – they all tend to lack any Weaver or Picatinny type cross sections – the slots where the recoil stop sits. If you try and fit modern rings to one of these older rifles, you’ll find that after a few shots, the rings will start to slide back or loosen.
So, this means if you buy a rifle with one of these old rails you have a couple choices.
Find some old rings
You could try and find some old style rings that lack a cross-bar. These are similar to the dovetail rings you get for rimfire rifles and for modern Tika rifles. The difference is the width of the ring bases, so you may not be able to find a modern type that will fit your older rifle – especially if the angle of the lips doesn’t mate up with the angle of the rail.
With the ATI scope mount, a longer allen key will be very helpful for the rear grub screws.
So, you may have to try and find some old school rings. However there are two downfalls to this approach. Firstly, older rings were phased out for a reason. The cross bar on picatinny and Weaver style scope rings means the rings cannot slide back on the rail under recoil.
The second downfall is that you will be getting an unknown quantity. They will probably be for 1″ tubes only, and you won’t know whether they’re good quality, well-aligned, etc.
Remove the rail and replace
There are a few modern rail types that you can fit to your .303. There are ones that you drill and tap into the side of the action – I’m not a big fan, but others like them. They’re quite similar to the kind of aftermarket rails you’d use on an AK, Mosin or SKS – basically actions that aren’t designed for scope rails.
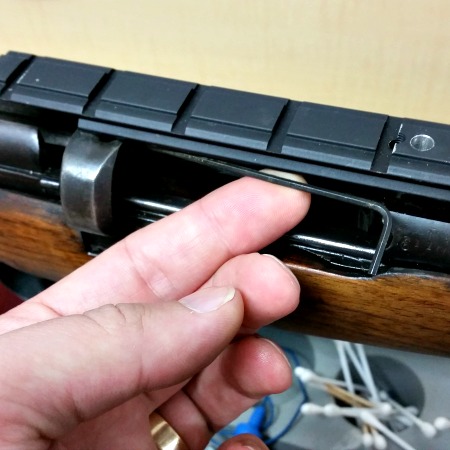
The grub screws in the rear of the ATI scope mount use tension to keep the rail in place.
Because the rear ring of the action is quite different to modern actions, your standard MOA rails probably won’t be much help. However, ATI produces a mount that uses one screw into the front ring of the action and a couple grub screws against the rear ring of the action. While these two rear screws are not drilled and tapped into the action, the force they apply seems to be strong enough to keep the rail in place under recoil.
I’ve been using one on a project .303 for a while now, and have had no complaints.
With any aftermarket scope mounts on an SMLE, you’re going to have a pretty high scope. So, you’ll probably need to look at an aftermarket stock or some sort of cheek riser to allow easy and repeatable eye relief. More on that in another article soon, as this project continues to evolve.
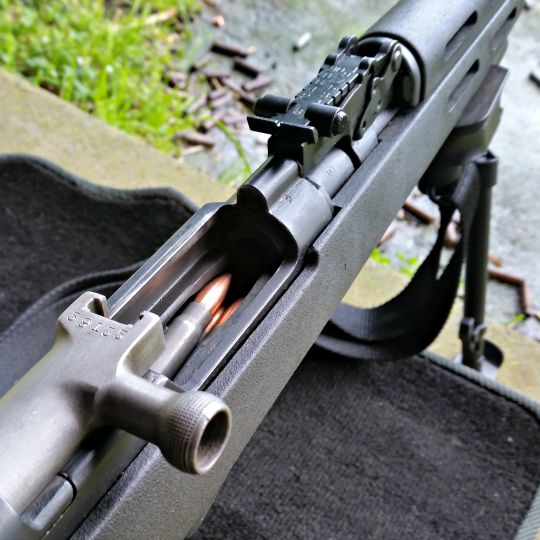
The MI4 or M1A is a mainstay in most military rifle collections, alongside its predecessor the M1 Garand. The M1A even sees frequent use in Heavy Metal classes of 3 Gun competition. The Norinco M305 is a damn good copy of the Springfield M1A (and the newer ones are even better). They’re also 4 or 5 times cheaper than their American cousins.
However, Chinese guns often come dripping in cosmoline, requiring a proper birthday before heading to the range. Even parkerized magazines in sealed bags will be dipped in cosmo to keep rust at bay. If you’ve bought a rifle that’s been stored in an armory for a while, you’ll notice that cosmo and parkerized finishes interact and create a greenish-grey finish. Anyway, I digress…
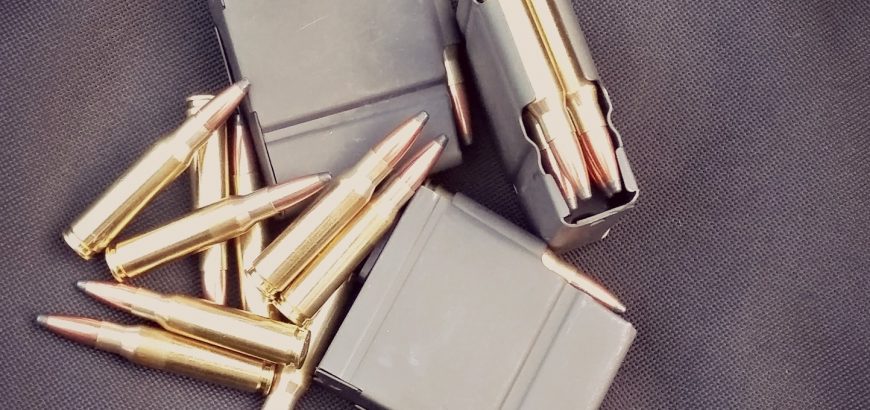
If you’ve bought one of these Chinese knock-offs, chances are you’ve got a magazine or two full of cosmoline. This will mean stiff functioning and potential jams when they get dirty as well, leading to failure to feed situations. Disassembling one of these mags is easy to do, and highly recommended for cleaning purposes.
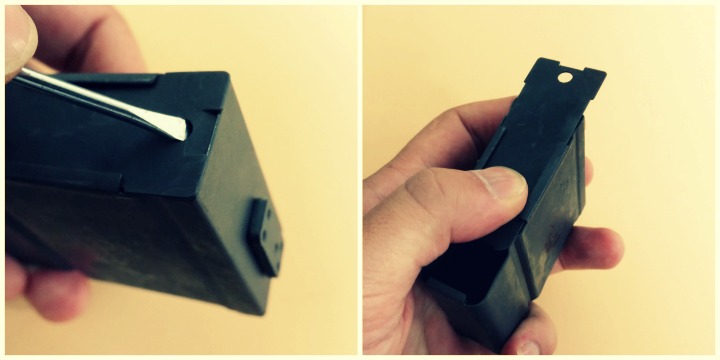
Step 1 – Remove the floor of the magazine
Unlike older magazines like the Lee Enfield’s 10-rounder, where the spring and follower come out of the top of the mag with some wiggling and creative angles, the M305 magazine has a floor plate that can be removed.
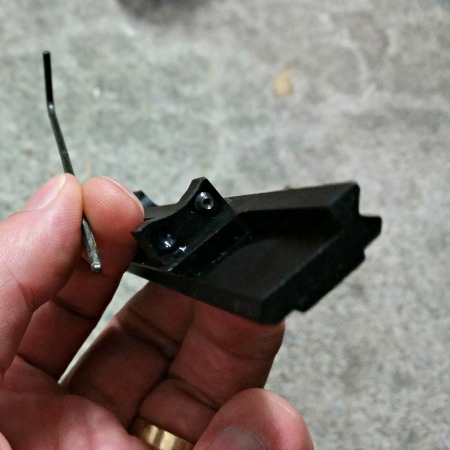
A screwdriver or something similar can be used to pry the locking tab up. Once this is over the magazine wall, you can slide the floor of the magazine forward.
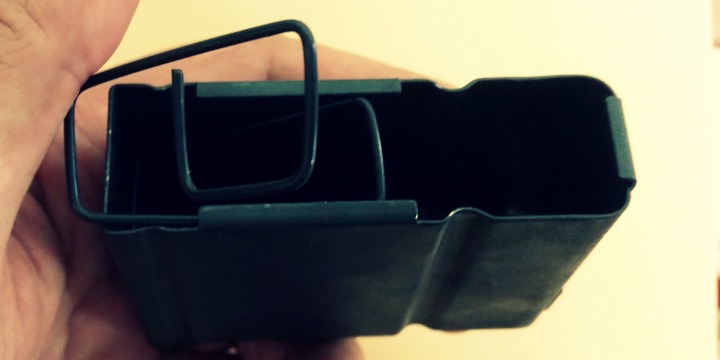
Step 2 – Take it apart
Unlike rimfire magazines, there are no small springs or buttons that leap out at you when you open the magazine up. Once the bottom is removed, you’ll probably find the square spring is pressed against the tabs that were keeping the floor in place.
It’s quite easy to remove the spring by lifting a coil at a time, and then giving the follower a bit of a wiggle to get it out. Take care not to cut yourself, as these mags don’t have the best finish in the world.
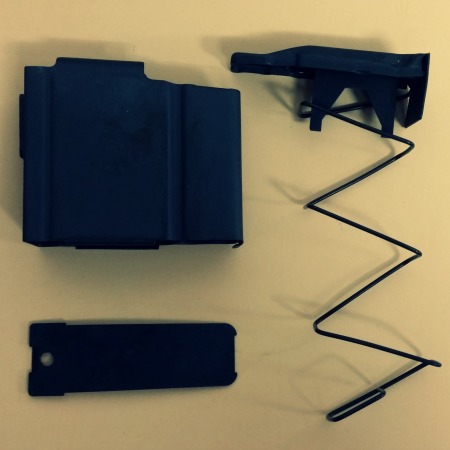
The spring shouldn’t jump out at you and there are no small parts to lose.With so few parts, it’s easy to keep track of everything and clean it. Make sure to watch out for sharp edges.
Step 3 – Degrease everything!
Norinco is nothing if not liberal in their application of cosmoline. The preservative gunk is everywhere. Make sure you get your cleaner/degreaser inside and outside the magazine, and over all of the parts you have removed. I personally prefer a degreaser in an aerosol can to make sure I get everywhere. Most of the time I use Wurth’s Industrial Cleaner, which is a citrus-based aerosol, and highly effective.
Give the magazine a good wipe, inside and out, with a clean rag. Again, make sure to watch out for sharp edges – maybe even debur them if necessary.
Step 4 – Oil and reassemble
A bit of lubrication of the spring/follower is not a bad idea. Not enough to get dirt and debris stuck in there, but enough to relieve some of the friction as the follower contacts the walls of the magazine.
With this particular magazine I used some aerosol Ballistol. However, a few drops of Remoil or Hoppes Lubricating Oil would do the trick too.
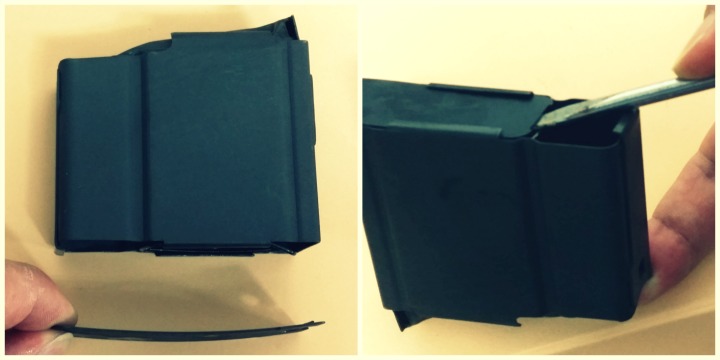
After you’ve applied some lubricant to the inside of the magazine and put the follower and spring back in, it’s time to close up the floor.
The curved floor metal means you’ll need your screwdriver again to lift it into place. Seal the deal by tapping it closed with a rubber mallet or tap it on your bench.
Sometimes you find a winning combination. Something that just works for you. This has been my experience with the Prairie Hunter rifle stock from Boyds, combined with my 1943 Husqvarna Mauser – a dream come true. What makes this such an epic combination? There are several factors that combine to make this gun incredibly shootable, but for now, let’s look at the fancy piece of wood it’s sitting in.
The looks
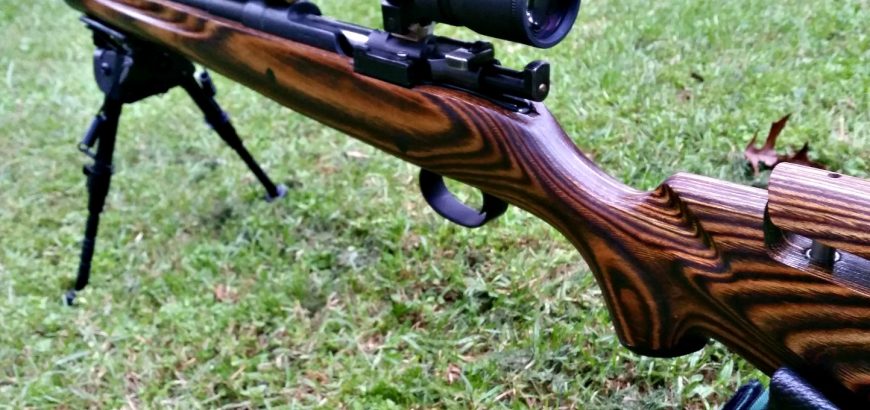
The old Mauser looks perfectly at home on the range in its Prairie Hunter stock.
The Prairie Hunter is a good looking stock, no doubt about it. The first time this rifle was on the range in its new configuration, an old time shooter said “such a pretty stock for such an old rifle!” And he wasn’t the only one. Laminates are known for being hardy, heavy and beautiful in an age of synthetic rifle stocks.
In the looks department, this stock was certainly helped along. Boyds provided this specimen with a nice, thick Limbsaver recoil pad and synthetic caps for the nose and grip. What adds to both the functionality and visual appeal of the rifle, is an adjustable cheek piece. The adjustments are made from the top, with an allen wrench, which means no adjustment knobs on the side of the rifle.
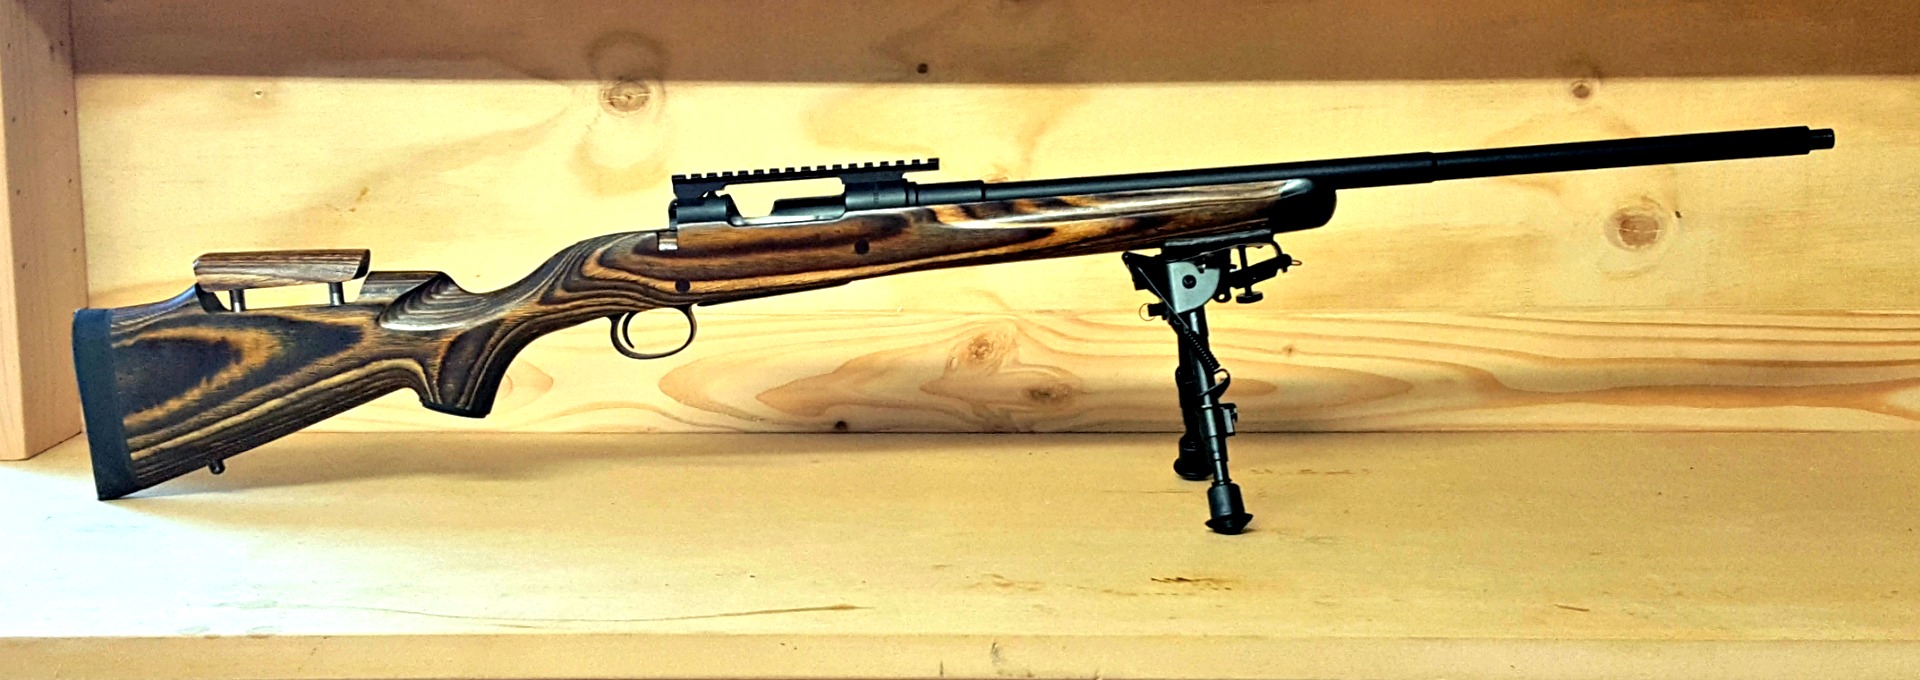
Full profile picture of the Boyds Prairie Hunter stock with adjustable cheek rest. This picture is here especially for Zach.
Final fitting needed
Boyds does advise that their stocks are made to their house actions (imagine how many actions they have!), so final fitting may be needed for your rifle. For this particular project, I received my stock in ‘unfinished’ condition. This means a final sanding and some polyurethane are needed. The reason for this, is that old Mausers come with several different bolt configurations, depending on the life they’ve had. This means that the channel that the bolt handle fits into should be determined by the end user, depending on their particular model. With a bit of work to do, Boyds doesn’t send you a finished stock, that you will then have to cut into and sand down anyway. Makes sense.
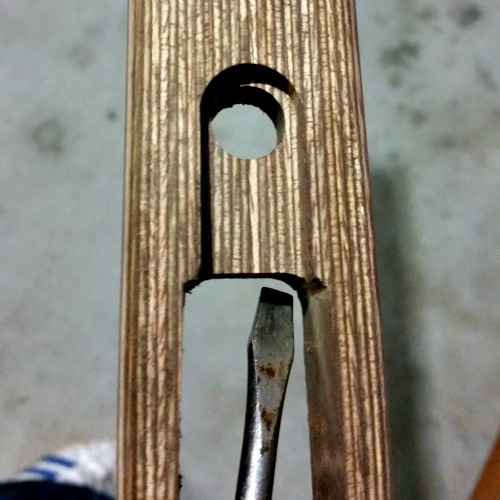
Some relieving of material was needed at the front of the mag well.
The bolt handle notching was easily done, and is covered in my series of articles on bedding and finishing stocks. With this particular stock, I found that the floor metal was a couple millimetres further back than I needed it to be. All I needed to do was to relieve some material from the front end of the mag well to get the metal sitting where it should, and mating up to the action.
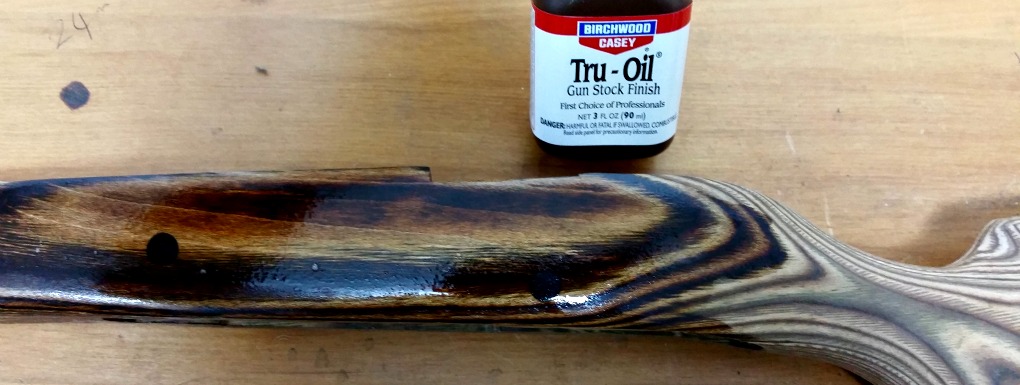
I chose to bed my action, which was a bit more work still, and instead of polyurethane, I opted for a hand-rubbed finish, using Birchwood Casey Tru-Oil and Stock Sheen and Conditioner. The oil even gave a nice gloss to the plastic bits on the stock as well. Learn my lesson without doing the hard yards though, tape off the recoil pad if it’s rubbery. The oil will make this super sticky, and you will get all sorts of fluff on your butt pad for a while. You will eventually be able to rub it all off.
The Tru-Oil immediately brings out the character in the laminate.
Performance
Oh what a joy. I couldn’t be happier.
And that’s not sarcasm!
The 6.5×55 is not known to have heavy recoil, but if you have a shortened barrel and sporterised stock, you feel every bit of it. Having purchased this rifle second-hand with the intention of restoring it, I was happy enough with the home-made sporter stock, but it was certainly made for a shorter person, and the lightweight nature of it didn’t do much to tame the kick of the old service round.
The extra weight associated with the laminate stock meant all sorts of recoil-reduction. I would definitely recommend going for this or a walnut stock over most of the synthetic options out there. The normal-person-sized length of pull also helped, along with the 1″ recoil pad. Don’t get me wrong, the stock isn’t overly heavy either. With a hollowed out barrel channel for free-floating and weight reduction, the balance and weight is nice. Most of the heft is around and behind the action – where you need it most.
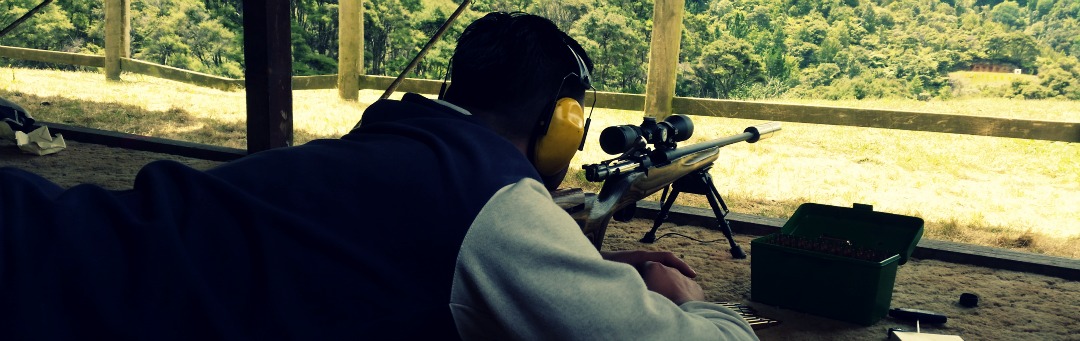
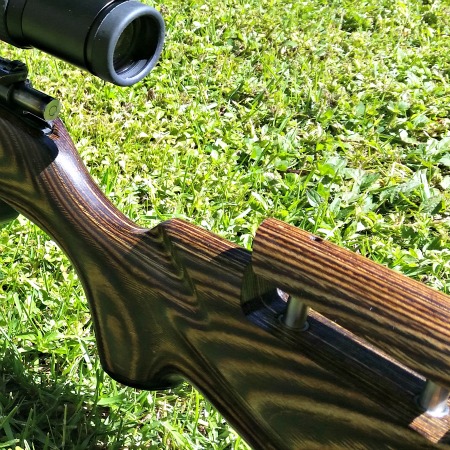
Tall scope mounts are no problem with the adjustable cheek rest.
Combining this with my MAE 6-30 ST suppressor, recoil concerns are now a thing of the past. So much so, that I can shoot off the bipod with my off-hand under the grip as a stabiliser, instead of holding down the fore end to stop myself getting a scope in the face, as I had to do with the synthetic-stocked Mossberg ATR a month or so ago.
Shooting with this configuration and my wife’s Vortex 4-12X Diamondback with BDC reticle, my wife and I were hitting 9’s and 10’s at the 300 metre Swiss Club shoot a couple weeks ago – even a 10.1! And this is with factory loads (Norma-Sierra 144gr).
Adjustable cheek rest
One of the major selling points of the configuration I now have is the adjustable cheek piece on the Boyds stock, and I would highly recommend this option on the next stock you buy. Below are a few of the reasons I love this feature:
easily adjust for different users and eye-relief
raise your line-of-sight for scopes that are mounted high due to large optic bells, iron sights or bolt handle clearance
quickly lower the cheek piece when needed for cleaning rod access
ensure proper cheek-weld to maintain repeatable, accurate shot placement
Overall impressions
There is a lot to be said for keeping old military rifles in their original condition. However, if you’ve bought yourself a bit of a project, or inherited a less-than-perfect specimen, a great place to start with your customisation efforts is a replacement stock from Boyds.
You can get a stock that is more suited to varminting, target-shooting or tactical-style precision matches than the military wood. These old stocks were made to be shot with full winter clothing, and to be light as well. As such, they transfer a lot of recoil to a normal-size shooter. You can also help your sweet Swede look as good as it shoots. With a nice-looking stock, like the one I have in a Nutmeg finish, you won’t feel out of place next to the Howas and Tikkas on the range.
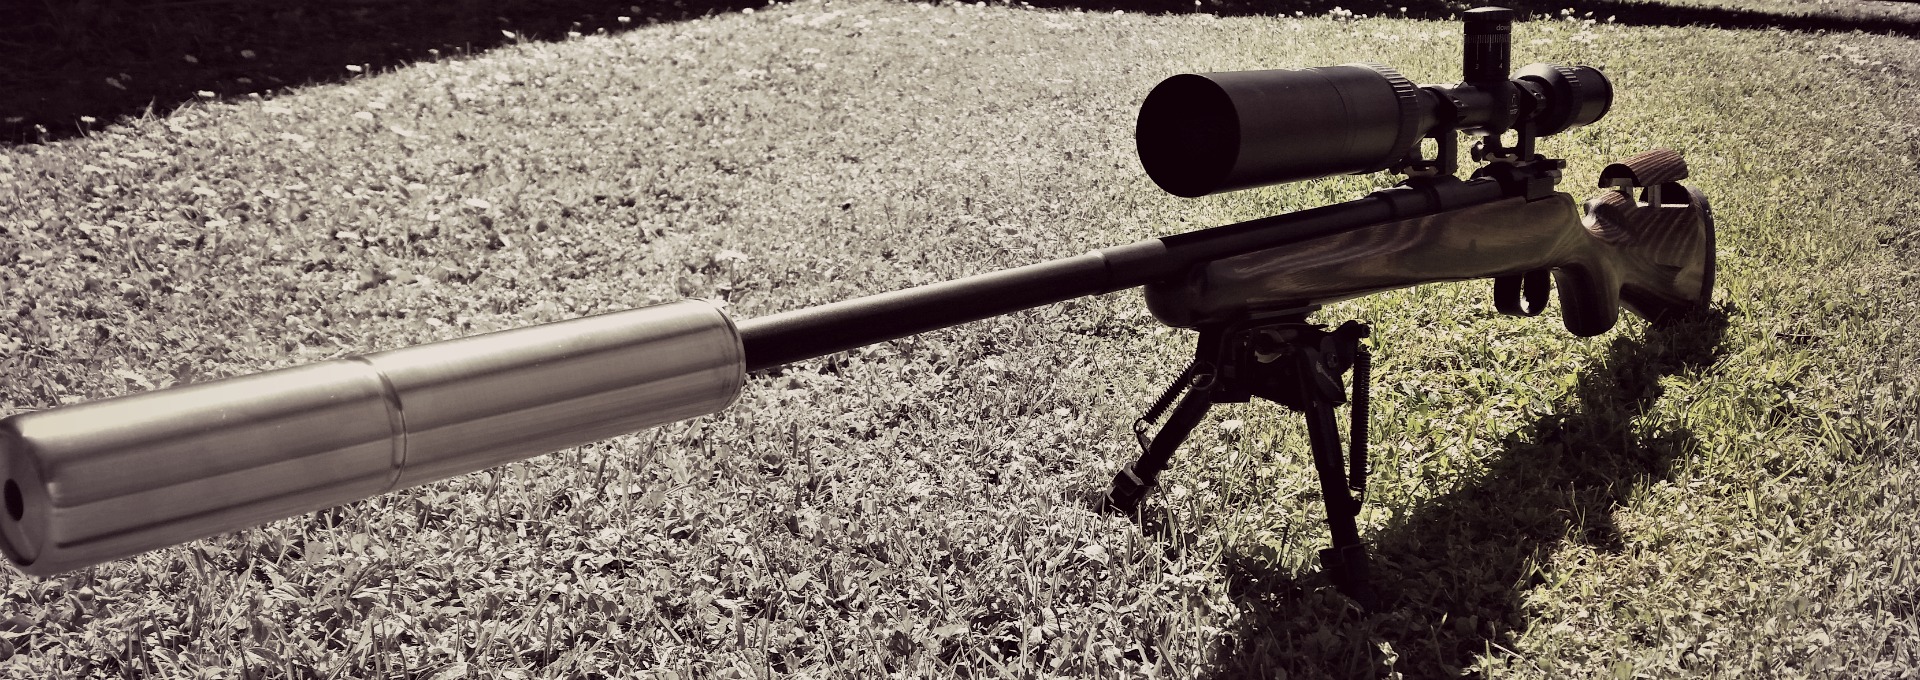
The Boyds stock completes the set up, along with an MAE suppressor and BOLD Trigger unit.
Bear in mind, when you order a stock from Boyds and you are not in the States, you have to keep your order under $100 to avoid costly permits which make the process impossible. If you or someone you know is making a trip to the USA, take advantage. Or get friends and family over there to help you out. Worst case scenario, you can still get an amazing stock, but you may have to forego some of the bells and whistles.
Modern rifles with their out-of-the-box accuracy guarantees usually come with adjustable triggers, but if yours didn’t, help is on the way. Whether it’s an old military surplus rifle that you’re modifying or a modern hunter that needs a little bit of work, installing a new trigger is easy and worthwhile.
A stiff trigger pull can be the difference between a bullseye and the 9 ring, or the difference between a clean kill and a long walk through the bush chasing a wounded animal. If you want to see the difference a good trigger can make, one of the best examples you could have would be to try a 10/22 with a match trigger, and then shoot one with the standard trigger. After shooting with a lightened trigger for so long, I thought the safety was on when I tried to pull the standard trigger.
The tools you’ll need
There’s not much to this job really. Most stock triggers are removed by driving out the pin that holds the unit in place. This pin also acts as the fulcrum for the trigger set and reset. To drive this out, you’ll need a hammer and punch – or a filed down nail if you don’t have a punch to hand.
Depending on the trigger unit, you may need a small spanner or wrench to adjust lock nuts, and probably some allen keys or screwdrivers to adjust pull and sear engagement. Depending on your rifle, you’ll probably need a large flat head screwdriver to undo your action screws.
The tools needed for this job are pretty simple and should all be in your tool box already.
The trigger of choice
Of course all of this is moot if you don’t have a trigger to install. There are a few options out there, depending on your breed of rifle. Ruger 10/22s, AR15s and Rem 700s have a multitude of aftermarket bang switches, however if you’re improving an older rifle you may have to do some digging to find the trigger you need.
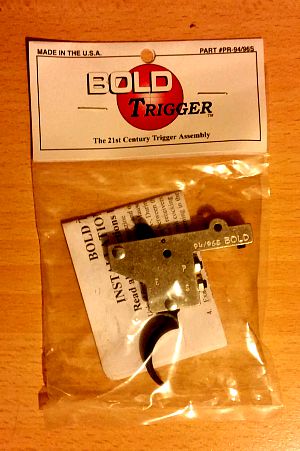
Nice new trigger thanks to Boyds Gunstocks.
My most recent trigger install is a BOLD Trigger from Boyds for my Husqvarna M38. As I’ve mentioned before, I don’t like using a safety – an empty rifle is the best type of safety – so I went for the version without the side safety. However, if you do like to use your safety in addition to safe gun handling practices, the side safety is much more convenient than the toggle on the back of the bolt on the old Swedes.
The 94/96 trigger fits the M38 perfectly. Boyds also stocks triggers for the 98-family Mausers, as well as a Mosin Nagant trigger. Other hardware obtainable from the gun stock manufacturer include trigger guards and floor metal, as well as sling swivel studs and action screws.
Extra inletting
Depending on your trigger, action and stock, there could be some extra in letting to do. Thankfully with the Boyds stock this rifle is destined for, there is ample space for the trigger. However, before I get round to bedding and finishing that stock, I’ll be taking out a bit of material from the current stock to allow the larger trigger unit to fit.
For this job you may want to use a mill. However, hand tools or a dremel will do just fine.
The easy part
The easy part is the install itself. For most triggers, all you’ll need to do is punch out the retaining pin, put the new trigger in the old one’s place, and insert the pin again. That’s almost all there is to it.
With the BOLD Trigger, there’s a grub screw forward of the pin which, when tightened, keeps the unit in place. The mechanism is quite different from the original trigger, so you won’t need the old spring or any of that. If there is any issue with fit (as there can be with the many variations of these beloved milsurp rifles), the instructions that come with your trigger should tell you where you need to add or remove material.
Adjusting the pull and sear engagement
This is where your new trigger comes into its own. It will have its usual factory setting – 3 pounds for the single-stage BOLD Triggers – and an adjustable range. The range on my new trigger is 2-4 pounds, and the sear engagement can be altered too.
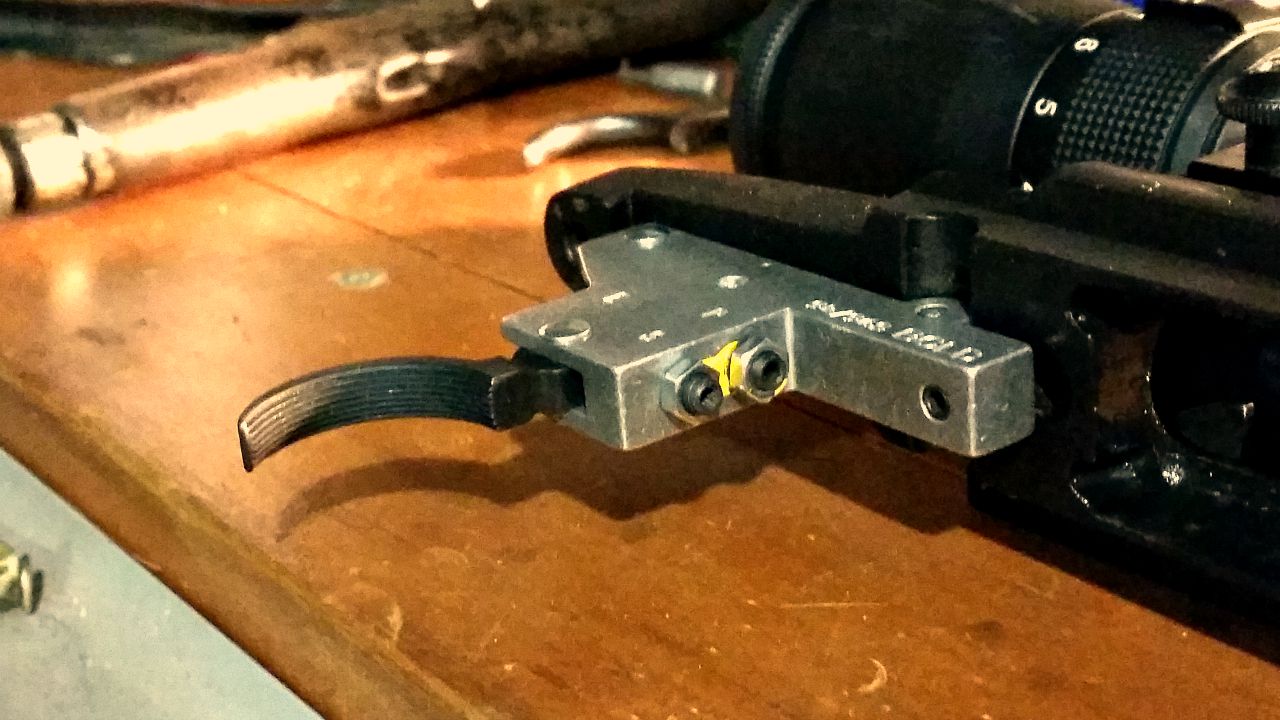
On my model, this is done by loosening the locking nuts and adjusting the grub screws with an allen key. In the photo below, you can see I’ve started on this in the photo below, as the factory seal yellow paint has been broken.
The yellow factory seal on the adjustment screws is broken.
I’ve adjusted my trigger to the lightest it will go. This rifle will be a range-only queen, so the heavier pull you’d want on a hunting rifle is not necessary. When adjusting sear engagement, work the bolt rapidly to make sure it won’t fire on closing – too little sear engagement and you could end up with an unsafe rifle.
Once the trigger pull is where you want it – I shouldn’t have to say this, but obviously you’re testing this on an empty chamber or dummy round – it’s time to tighten up the locking nuts. Your particular trigger may have different instructions or mechanisms, so make sure you follow the included install directions.
Of course, the number one concern when modifying a rifle is safety when operating, as well as during the install process. If you’re unsure of how to properly install or set your trigger, your local gunsmith should be able to help you out for a very reasonable fee, as the the work involved is not onerous.
I’ve never had good luck with a shoot at Waiuku. I’ve been to the range twice before and both times been hit torrential rain and gales, making shooting uncomfortable, if not impossible. Well, third time was the charm as I attended the Waiuku service rifle shoot this Saturday past.
Firstly, let me say that Waiuku has great facilities that enable a wide range of shooters to enjoy themselves. It’s also one of those rare clubs where pistol, rifle and shotgun are all welcome. However, I’ll leave a review of the range for another post. For clarity’s sake, this isn’t the same Waiuku range were ASRA does their winter shooting (The Farm).
On to the shoot itself. Well, it’s a 45 round shoot which I was hoping to do with my .303, until I realised that morning that I only had 20 rounds in the safe. With an abundance of 7.62×39, it turned out that the trusty SKS would get a work out this morning.
Service rifle shoot
If you’re into your military surplus rifles, going along to a service rifle shoot should definitely be top of your list of things to do. With everything from WWI Lee Enfields, through to Mausers and AK47s and AR15s, every major armed conflict in recent history was represented.
The shoot was run in two details and as previously mentioned, was 45 rounds. This consisted of a Trinity and Action M match and a 10 round sniper shoot.
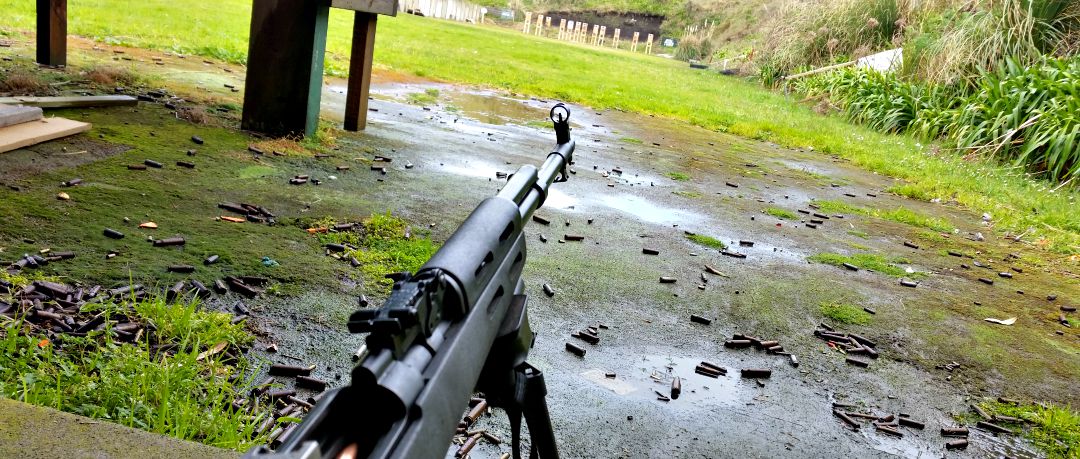
The Soviet weaponry and rusted casings are reminiscent of the Nicholas Cage movie Lord of War.
The trinity shoot is 5 rounds each in the standing, kneeling and prone positions. With no sighters or spotting scopes, you’ve got to know you’re rifle well. The SKS performed well, but was shooting low – which was more me than the rifle, as my wife was shooting too high with the same gun. One thing I may consider doing in the near future is replacing the front sight post with a skinnier one that doesn’t blot out the entire target. Those rifles that were scoped were limited to a magnification of 4x.
After those fifteen rounds, targets were checked, which is when a few of us actually got to see where our rounds were going. For myself, another shooter with an unsighted SKS and another with a new suppressor on his AR, the results were less than stellar.
The next ten rounds allowed us to compensate where we needed to, but the faster pace and movement involved in the Action M shoot means you can’t spend too much time trying to compensate, especially with open sights at 100 metres.
An Action M is usually shot in 60 seconds (at least it was when I last shot one at the Auckland Service Rifle Assn), and consists of 2 rounds prone, 2 rounds standing, one kneeling – reload another 5 round mag or clip – one kneeling, 2 standing and 2 prone. It’s 75 seconds for bolt actions, which is okay if you have a removable box magazine or stripper clips. However, when I shot this last with a Swedish Mauser and no stripper clips, it was certainly challenging. The rules for different types of matches are made by the NZ Service Rifle Association.
In light of the range of rifles and abilities present on the day, and the generally non-competitive nature of the shoot, no strict timing was done, although everyone went as quickly as they could.
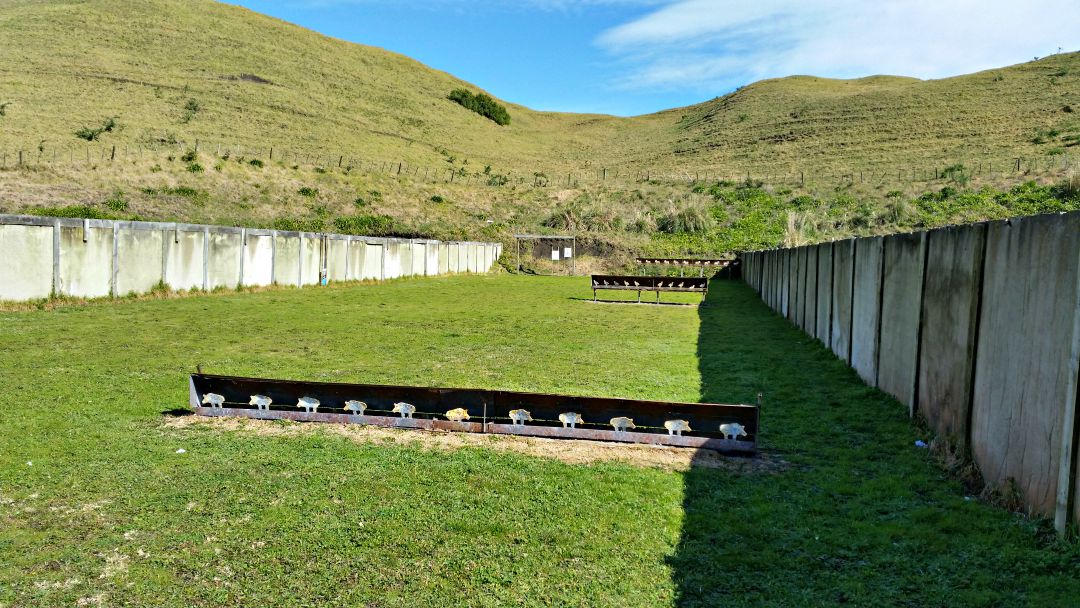
The sniper shoot allowed for rests or bi-pods. Handy hint; your car’s floor carpeting can be used if you forget your shooting mat.
The last ten rounds was a sniper shoot which allowed shooting aids, such as rests, bi-pods and spotting scopes – this is where many people were able to turn the tables – despite the smaller targets. Having someone spotting for you is also very helpful when you’re on iron sights.
Although I didn’t place highly, I did enjoy the day and seeing all the old relics shooting (and their rifles too). About a third of the shooters were from HSSRC, so there were some friendly faces, and a few us enjoyed shooting some silhouettes with the rimfires on range 2 afterwards. All-in-all, for $20 and the cost of ammo, a good day was had all round.
Finishing the day off with some silhouettes at 25, 50, 75 and 100 metres was good fun.
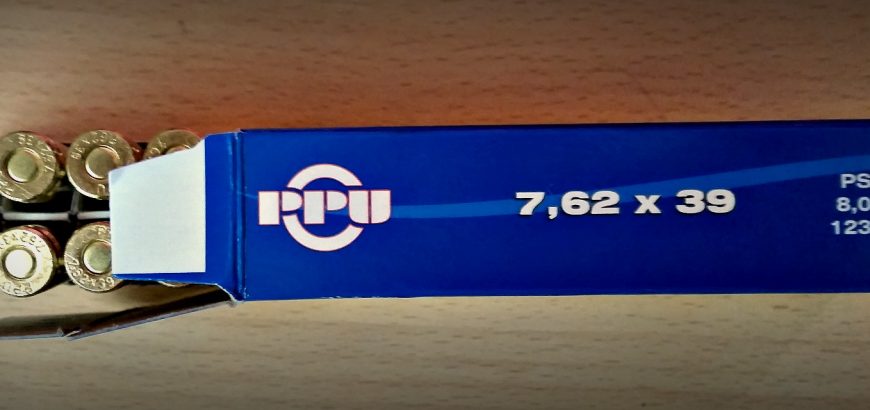
Prvi Partizan ammo has been on the market for years – decades even – but has only just started to make an impact in New Zealand. Or so you thought. Abbreviated to PPU, Prvi Partizan as we know it today has been around since the 1940s, although the company traces its roots back to the late 1920s and has had a few different names as wars and politics have shaped Europe.
My Serbian friend tells me it’s pronounced “pr-ah-vi”, not “privvy” as most people sound it out. It translates roughly to “first partisan” and gets its name from the long and thing rifles produced for partisan forces by the factory in earlier years.
War – what is it good for?
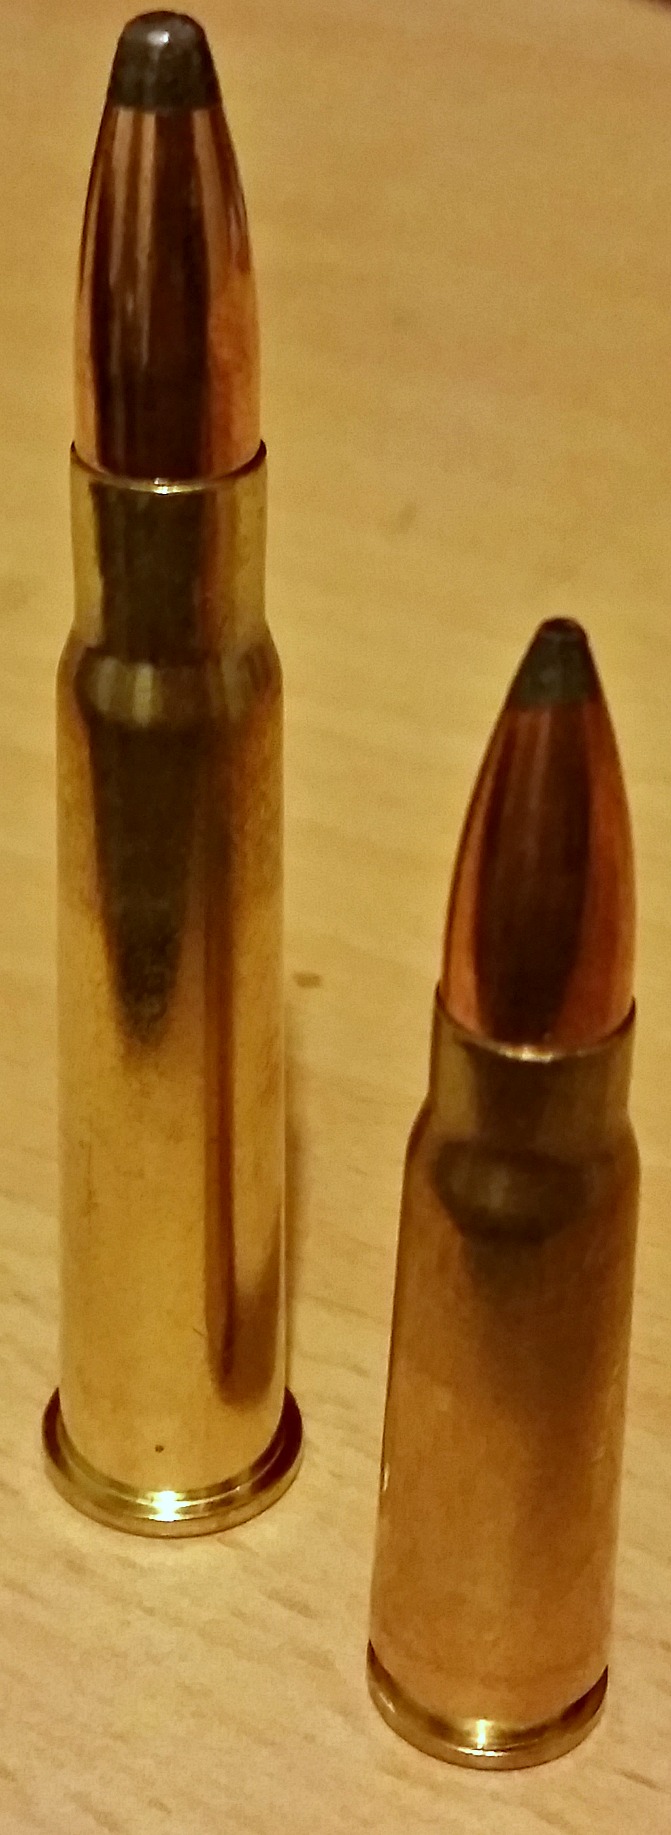
Well, most of the sporting arms and ammunition we enjoy today share their history with their military counterparts. A tonne of the most popular hunting and sporting cartridges today are military cartridges from the past 100 years or more, including:
7.62×51 NATO (.308)
5.56×45 NATO (.223)
.300 AAC Blackout
7.62×39
7.62x54R
6.5×55
7.5×55
7.92×57 Mauser
30-06
.303
.338 LM
.50 BMG
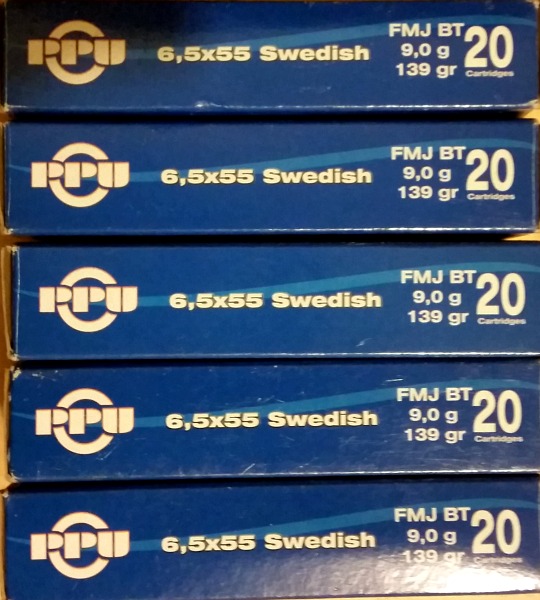
The price of PPU makes it hard not to stock up.
Not to mention the endless array of pistol ammunition too. Of course the search for bigger, better and boom-ier things has led to a surge in development in the cartridge market today, much of which is driven by shooters who demand a high level of accuracy. Ammunition that used to only be available to wildcatters for varminting or bench rest shooting is now common place in the USA and is making its way over to New Zealand as well. Rimfire is also growing in leaps and bounds with the .17 WSM making waves in the shooting community.
But what about those stalwarts of scrub hunting and cheap and cheerful plinking? The cut down .303 bush guns and the semi-auto fun-makers in 7.62×39? Well, PPU is your knight in shining armour. For those that love shooting their military calibre rifles without breaking the bank, the ammunition produced by Prvi Partizan is worth your consideration.
On the plus side
While you might think Prvi hasn’t been in the New Zealand market for a while, it actually has. If you’ve shot Highland ammo, you’ve shot PPU. It’s the brand they’ve been using down here. In terms of military cartridges, Highland hasn’t been the cheapest, but it’s a step up from the dirty steel-cased stuff from Russia. It’s certainly better than putting corrosive ammo through your firearms, especially if you’re not that thorough with your cleaning.
Annealing marks on .303 and 7.62×39 PPU factory rounds.
Prvi Partizan ammunition is brass cased and generally considered to be good brass for reloading. Many Swedish Mauser fans rate the 6.5×55 PPU brass behind Norma and Lapua, but ahead of the American-made stuff. In terms of how soft or long-lasting it is, I can’t personally say. I’m on my second round of firing with this lot of brass and haven’t seen anything untoward yet, but we have a ways to go before anything should be cropping up. When I do get my brass into the higher firing counts I’ll post again to let you know, but considering I have over 140 cases for 6.5×55 alone, I doubt that will be any time too soon.
Considering how good the brass is, it’s certainly worth the price. This is especially the case with calibres like the .303 where you might only have a few options, all of which are more expensive. Not only do you get an acceptable level of accuracy out of it, but you have (I’m guessing) between 6 and 10 more reloads out of them – if not more.
What is the cost? I’ve seen the blue boxes cropping up in a few stores around the country and they’ve ranged in price from $31 to $36 for big rounds like the .303 and 6.5×55. The 7.62×39, which I’ve bought for a reloading experiment, runs at around $30, but if you go to the right Hunting & Fishing, you can pick it up for $25. Most stores will give you a bulk discount if you buy a few packets anyway.
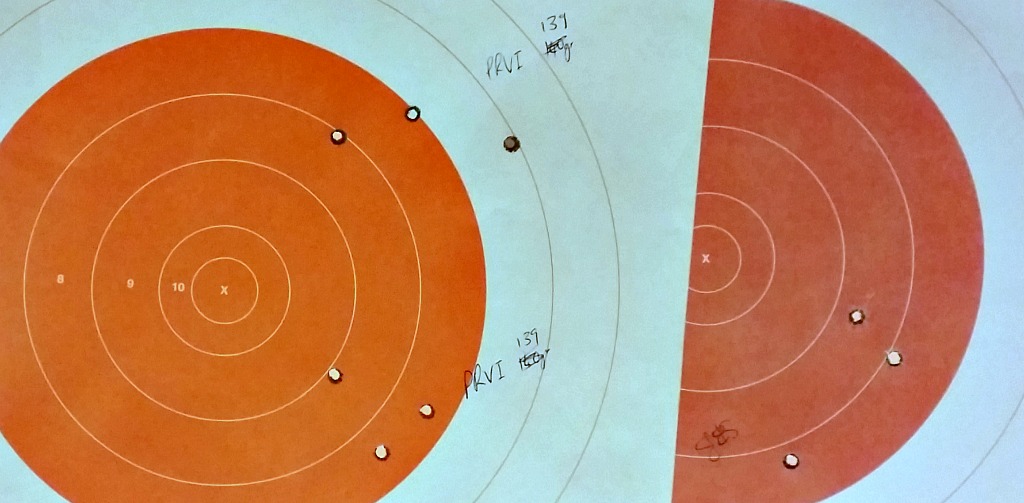
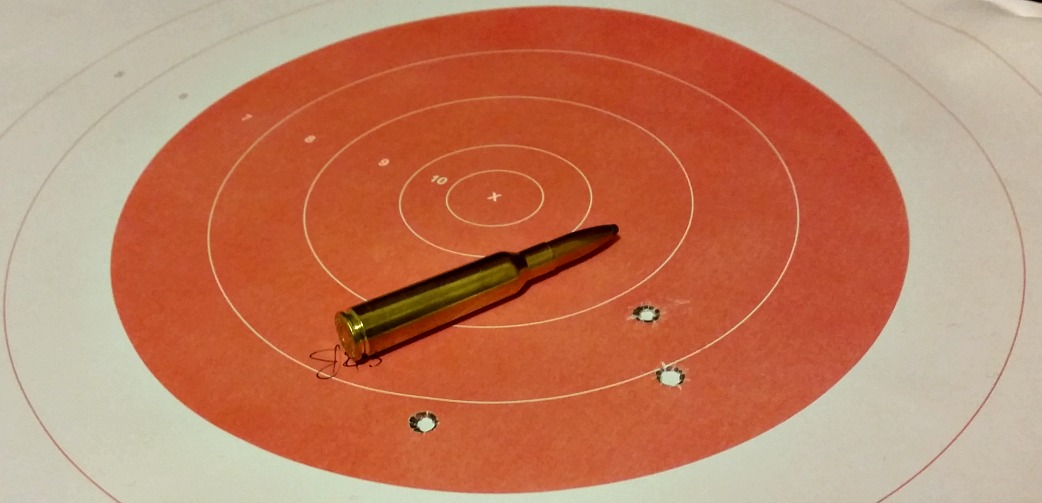
How accurate is it? Well, how long is a piece of string? How accurate a particular round is will be determined by many contributing factors, not least of which are shooter skill and the particular firearm in question. The picture below shows PPU 139gr FMJ 6.5×55 three shot test groups, one is about 1.5 MOA and the other is 2.6 MOA. These are shot from my cut-down 20.5″ barrelled Husky M38. The other target, for comparison, is another reasonably priced brand, Sellier & Bellot 140gr SP, at 2.4 MOA.
PPU 139 gr FMJ and S&B 140 gr SP
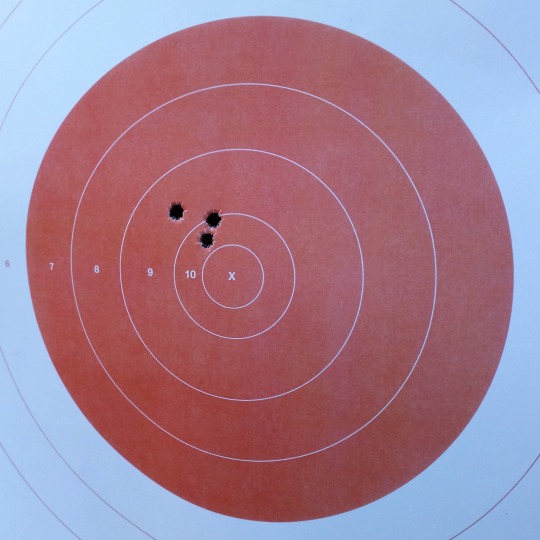
This is not bad, considering many are happy to get 3 or 4 MOA groups with milsurp rifles and cheap ammo. However, you don’t get many people bragging about S&B brass for reloading. The picture below shows the S&B group with an unfired round for reference. Bearing in mind that the orange circle is about the size of a kill zone on a deer, this is very reasonable accuracy. If these groups were zeroed in, every shot would be a clean kill.
S&B 2.4 MOA group with unfired 6.5×55 round for comparison.
The negatives with PPU
Well, no one on the range is going to look at your ammo tin on the range and think your other car is a Porsche. But, if you don’t mind that, there’s not much to gripe about with Prvi Partizan. So far I have only shot .303, 7.62×39 and 6.5×55 in PPU and each has performed better than I would expect budget ammo to. I also find it to be quite clean, generally speaking.
However, if you’re wanting superb accuracy without hand loading your own ammo, this may not be the ammo for you. I would suggest trying it – your rifle may love it – but you may be better off paying one and a half or two times the price to get match-grade ammo.
0.64 MOA group shot off a bi-pod with PPU brass, Federal Match primers, 142 gr SMK HPBT projectiles and 34.7 grains of AR 2208.
There may also be variations in weight of brass and even wall thickness or hardness. This is pure, untested speculation. The only reason I say this could be possible is that the low price indicates that the machinery that produces this brass may not be as thoroughly regulated or maintained as those operated by Hornady or Lapua. The staff may not be as well compensated. But who knows?
What you may wish to do is individually weigh up the clean and empty brass out of a box or two, and see what the variation is between cases. Some spread is to be expected, but too much could have an effect on reloading. You could also see how much water each case holds to determine case-wall thickness and internal capacity. Anyway, I’ve been managing to get smaller than 1 MOA groups out of this brass, so I’m not complaining.
Overall, I think it is well worth the purchase. The accuracy is good enough for hunting ammo if you get the soft point variety, and there’s certainly a place for it in the safe if you just want plinking ammunition or a source of cheap brass.